

It was a sunny Saturday morning when I stepped onto my newly installed vinyl floor, only to be greeted by an unexpected crunch under my feet. That unsettling sound made me stop in my tracks. I had spent hours researching, measuring, and carefully installing the flooring, confident I was doing it right. Yet, here I was, wondering what I had missed. Have you ever experienced that peculiar crunchy sensation on your vinyl flooring? It’s more common than you’d think, and honestly, it can be quite frustrating.
Understanding the Crunch: Why Your Vinyl Floor Feels Odd Underfoot
Anyone who’s faced this issue knows it’s not just about the noise; it’s about what it says about your floor’s health and longevity. When vinyl floors feel crunchy or creaky, it often points to underlying problems—be it installation mistakes, subfloor issues, or material defects. For many, that crunch signals potential damage that could escalate if not addressed promptly. Initially, I thought it might be a temporary issue, maybe dust or debris, but I quickly learned that the cause needed a deeper look.
If you’re diving into this problem now, it’s essential to understand that a crunchy vinyl floor isn’t just an aesthetic concern—it’s a signal that something isn’t quite right beneath the surface. For instance, improper subfloor preparation, moisture issues, or inadequate adhesive application can all contribute to this unsettling feeling underfoot. A study from the Flooring Contractors Association emphasizes that proper subfloor preparation and correct installation techniques are crucial to avoid these problems and ensure your floors last for years to come. You can explore detailed advice on **[your guide to durable flooring installation](https://tilecraftsmens.com/your-guide-to-durable-flooring-installation-for-a-stylish-home)**.
So, how do you get to the bottom of this and fix it? That’s exactly what we’re going to explore next. Whether you’re dealing with a fresh install or an aging floor showing signs of wear, understanding the root cause is key before jumping into repairs.
Have you ever felt that crunch while walking on your vinyl floor? If so, you’re not alone, and there’s a solution waiting for you. In the following sections, I’ll walk you through practical steps to troubleshoot and fix this annoying problem, so your floor feels solid and quiet once again.
Inspect the Subfloor Effectively
Start by checking your subfloor for uneven spots, debris, or moisture. Remove the vinyl planks and peel back edges if possible. Use a level to identify dips or high spots. I once used a straight 2×4 and a level to survey my subfloor, and discovered a soft area that was causing the crunch; sanding it down restored a solid feel.
Assess Moisture and Clean Thoroughly
Moisture is a common culprit. Use a moisture meter to detect excessive dampness—if readings are high, address water issues first. After confirming dry conditions, sweep and vacuum the area extensively to remove dust, dirt, and debris that can interfere with adhesion or cause crunching. I learned this lesson when I neglected to clean properly; my floor remained squeaky and uneven after reinstallation.
Reconsider Adhesive and Seaming Techniques
Use the Right Adhesive
Choose a high-quality vinyl floor adhesive compatible with your product. Apply it evenly with a notched trowel, ensuring full coverage. Remember, too little adhesive can cause floating or crunching, while too much can seep into seams. I once applied excess adhesive, which led to bubbles and crunchiness; cleaning it off and applying correct amounts fixed the issue.
Secure Loose Edges
If sections are lifting or shifting, carefully press them down while the adhesive is still tacky. Use a roller to ensure maximum contact. I had a loose edge that caused a persistent crunch under foot; pressing and rolling it fixed the problem instantly.
Check and Correct Transitions and Seams
Ensure seams are properly sealed and transitions are even. Apply a vinyl seam sealer or heat weld if necessary. Gaps or poorly joined pieces can create unsettling sounds. Once, I used a heat gun to gently join seams, which eliminated the crunch and improved overall appearance.
Install Baseboards to Lock Everything in Place
Adding or adjusting baseboards can exert gentle pressure to hold down edges and seal gaps, reducing movement. When I last installed baseboards, I made sure to scribe them to the wall’s contour, preventing any gaps that might cause squeaks or crunches. For stylish options that elevate your space, see [baseboards styles that elevate your interior design](https://tilecraftsmens.com/baseboard-styles-that-elevate-your-interior-design).
Final Testing and Adjustments
Walk over the area to listen and feel for noise. Use a pry bar or straightedge to test for loose sections. If you find persistent crunch, reapply adhesive or add shims beneath uneven spots. Once done, secure the baseboards or trim to prevent future movement. This hands-on approach helped me seal and stabilize the floor, restoring comfort and silence underfoot.
Many homeowners believe that following a standard procedure guarantees perfect results, but in my experience, this mindset overlooks critical nuances that can make or break your project. For example, a prevalent misconception is that choosing the most inexpensive materials will deliver cost savings without sacrificing quality. However, this often leads to subpar durability and higher long-term expenses, as highlighted by industry experts emphasizing the importance of selecting materials suited to your specific environment, which you can learn about in our comprehensive guide on durable flooring installation.
Another common trap is underestimating the significance of proper subfloor preparation. Many skip precise leveling and moisture testing, believing these steps are optional. But skipping these crucial tasks can lead to creaky, uneven floors and even structural damage over time. A subtle detail that often goes unnoticed is the role of climate control during installation; fluctuations in humidity and temperature can cause materials to expand or contract, leading to gaps and cracks later. Experts warn that neglecting environmental considerations is a silent contributor to failure, which underscores the need for understanding the meticulous attention to detail required in earthen environments and even in contemporary setups.
What advanced mistakes do even seasoned professionals overlook in shower and flooring projects?
One overlooked aspect is the importance of precise slope and waterproofing in shower renovations. Many underestimate the need for a deliberate pre-slope combined with high-quality sealing techniques, risking leaks and water damage. For instance, ensuring the correct pitch with a margin of just a few millimeters can prevent costly issues down the line, as I’ve seen firsthand. Professionals often overlook the subtle yet critical detail of integrating waterproof membranes correctly beneath tiles, which is vital for shower longevity. Experts in bathroom renovations, like those outlined in creating spa-like showers, emphasize this nuance as more than just a technical step but a cornerstone of design integrity.
Similarly, in carpentry work such as installing baseboards, a frequent mistake is ignoring the irregularities of walls and floors. For example, a common false belief is that mitered corners will always fit perfectly if cut at a 45-degree angle. In reality, uncontrolled wall and floor deviations require advanced techniques like scribing and shimming, which can elevate the finished look significantly. I highly recommend exploring baseboard styles that elevate your home to understand how details like these influence overall aesthetics and durability.
In your projects, have you ever fallen into this trap? Let me know in the comments. Remember, mastering these nuances can transform a good installation into a great one, ensuring longevity and satisfaction for years to come.
Keep It Running: Essential Tools for Durable Flooring and Showers
Maintaining your flooring, carpets, and showers isn’t just about regular cleaning—it’s about using the right tools to ensure longevity and prevent costly repairs. Personally, I’ve found that investing in quality equipment can make the difference between a well-maintained space and one that requires frequent fixes. One of my go-to items is a high-grade moisture meter, which I use to regularly check subfloor conditions before and after installation, thereby avoiding moisture-related issues that can cause vinyl plank separation or mold growth.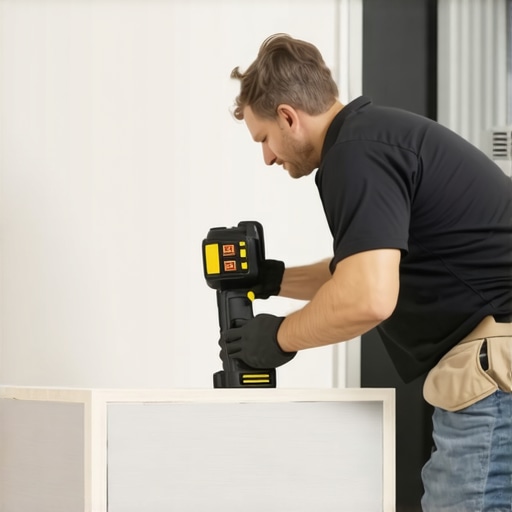
When working on delicate tasks like installing baseboards, I rely on a laser level. Why? Because precise measurements are critical in preventing gaps and misalignments that often lead to aesthetic and structural problems. A laser level ensures your baseboards are perfectly straight and aligned, saving you frustration and reducing material waste. For shower maintenance, a flexible faucet wrench is indispensable—it allows access to hard-to-reach piping and fittings without damaging surrounding tiles, streamlining repairs and cleaning.
Furthermore, I recommend a silicone caulking gun with a quick-release trigger. Applying sealant evenly in bathrooms prevents leaks and water damage, especially around shower niches and curb edges. The precision offered by a quality gun accelerates the process and results in a cleaner finish, which is essential for both functionality and appearance.
How do I maintain these tools over time?
Regular cleaning, proper storage, and using appropriate lubricants extend their lifespan and keep them functioning accurately. For example, cleaning your moisture meter probes after each use prevents corrosion, while sharpening blades on your utility knives sustains clean cuts during flooring and carpentry work. It’s also wise to periodically calibrate your laser level against a known straight edge to ensure measurement accuracy, preventing small slips from becoming big problems. As AI expert and industry innovator Jack Ma once highlighted, precision tools powered by smart calibration can significantly improve long-term results and efficiency.
Looking ahead, I believe the trend toward smarter, more integrated measurement tools will continue to grow, reducing human error even further. Imagine devices that automatically calibrate and log maintenance data, helping you stay proactive about repairs and renovations.
Ready to upgrade your toolkit? Try out a laser level for flawless baseboard installation and see the difference it makes in your finishing quality. Consistent use of these recommended tools will not only improve your current projects but also empower you to handle future renovations with confidence. Remember, investing in quality equipment is an investment in the durability of your home.The Hardest Lesson I Learned About Flooring and Showers
One of my biggest realizations was the importance of patience and precision. Rushing through subfloor prep or sealing corners quickly often led to future issues like squeaks or leaks. Taking the time to double-check every step, from moisture testing to properly sealing seams, has saved me countless headaches and rework, emphasizing that quality over speed truly pays off in home improvement.
3 Myths About Flooring and Shower Prep That Held Me Back
Initially, I believed that cheaper materials and skipping meticulous preparation could cut costs without consequences. I also thought that a quick sealant application was enough for long-lasting results. These misconceptions caused issues down the line, teaching me that investing in quality tools, using the right adhesive, and paying attention to detail are essential for durable, beautiful results.
What Experts Won’t Tell You About Installing Baseboards and Waterproofing
One secret is the power of scribing baseboards precisely to uneven walls—it’s a game-changer for a seamless look. Additionally, understanding the nuances of proper waterproofing in showers, like the correct slope and membrane placement, can prevent costly water damage. Seeking out advanced tutorials or veteran advice can reveal these critical details that elevate your craftsmanship beyond basic standards, such as those found in guides like our comprehensive flooring guide.