

It was 11:30 PM on a Tuesday, and I was staring at a frustrating 1/8-inch gap in my brand-new luxury vinyl plank floor. I had worked my way across three-quarters of the living room, feeling like an absolute pro, until I hit what I now call the ‘Island of Despair.’ That is the spot where you cannot get a metal pull bar in because there is a heavy built-in cabinet or a weird architectural corner in the way. I tried to kick the plank into place with my sneakers, and then I tried swearing at it. Neither worked. My wife found me sitting on the floor, surrounded by off-cuts and sawdust, looking like I had just lost a heavy-weight boxing match with a piece of plastic. I was desperate and ready to rip the whole thing up, but that was when I remembered a tip from an old-school installer: the scrap-block trick. If you are struggling with [fixing gaps in luxury vinyl without pulling up the whole floor](https://tilecraftsmens.com/fixing-gaps-in-luxury-vinyl-without-pulling-up-the-whole-floor), this is the ‘aha!’ moment you have been waiting for.
Stop Fighting Your Flooring and Use This Simple Trick
The biggest lie we tell ourselves during a [flooring installation](https://tilecraftsmens.com/flooring-installation-mistakes-to-avoid-for-a-seamless-look) is that more force always equals a better fit. In my early days, I made the classic rookie move: I used a standard claw hammer directly on the edge of an LVP plank because I thought I could just ‘nudge’ it into place. Spoiler alert: I absolutely shredded the delicate click-lock mechanism. It is a common [tapping block mistake that breaks vinyl tongues](https://tilecraftsmens.com/the-tapping-block-mistake-that-breaks-vinyl-tongues), and it turned a thirty-dollar plank into expensive trash in about two seconds. The scrap-block trick is different. It involves taking a small piece of your leftover flooring, locking it into the ‘tongue’ of the stubborn plank, and tapping that scrap instead of the actual floor. This distributes the pressure and keeps your seams pristine while giving you the leverage you need in tight spots. I have found that pairing this with the [rubber mallet hack for locking stubborn vinyl planks](https://tilecraftsmens.com/the-rubber-mallet-hack-for-locking-stubborn-vinyl-planks) makes the whole process feel like a breeze rather than a workout. Have you ever been stuck with a gap you just could not seem to close no matter how hard you pulled?
Does a piece of trash really work better than expensive tools?
It sounds a bit crazy to suggest that a literal piece of waste-bin scrap is more effective than a specialized pull bar, but the physics do not lie. While a pull bar is great near walls, it is useless in the middle of a large room or near a kitchen island. According to the National Wood Flooring Association (NWFA), vinyl plank popularity has surged by over 20% in recent years largely due to its DIY-friendliness, yet they emphasize that improper joint engagement is the leading cause of floor failure. By using a scrap block, you ensure the joint is fully seated without the risk of ‘peaking’ or buckling later on. It is part of a [guide to durable flooring installation for a stylish home](https://tilecraftsmens.com/your-guide-to-durable-flooring-installation-for-a-stylish-home) that focuses on finesse over brute strength. Before you spend forty dollars on a heavy-duty tool you might only use once, give this scrap-block method a try; your wallet and your subfloor will thank you.
Avoid the Hammer and Save Your Seams
The most important thing to remember is that LVP is not like a nail-down hardwood. It is a precision-engineered system. Think of the click-lock mechanism as a high-stakes jigsaw puzzle. If you hit it too hard, you break the puzzle piece. I learned this the hard way while working on a small powder room where I thought a few ‘gentle’ hits with a heavy hammer would solve a alignment issue. Instead, I mushroomed the edge of the plank, making it impossible for the next piece to lock in. To execute the scrap-block trick properly, you need a piece of waste flooring at least six inches long. Ensure the ‘tongue’ side of your scrap is clean and free of debris. Slide it into the groove of the plank you are trying to move. It should click into place just like a regular row. By doing this, you are creating a temporary handle that protects the floor you actually want to keep. This is a critical part of a step-by-step flooring installation from planning to perfect finish because it prevents the micro-fractures that lead to floor failure six months later.
Lock the Scrap Block for Maximum Leverage
Once your scrap is clicked into the target plank, you have a sacrificial surface. Now, instead of hitting the floor, you hit the scrap. I prefer using the dead blow hammer secret for flat floor seams because a dead blow doesn’t bounce. It delivers all its energy directly into the move. I remember a kitchen remodel where I was working around a custom island. I tried to use a pull bar, but there was only an inch of space between the cabinet base and the floor edge. I ended up making a custom ‘hook’ block from a 6-inch scrap piece. It felt like I was performing surgery with a block of plastic, but when that plank finally clicked home, the sound was more satisfying than a winning lottery ticket. 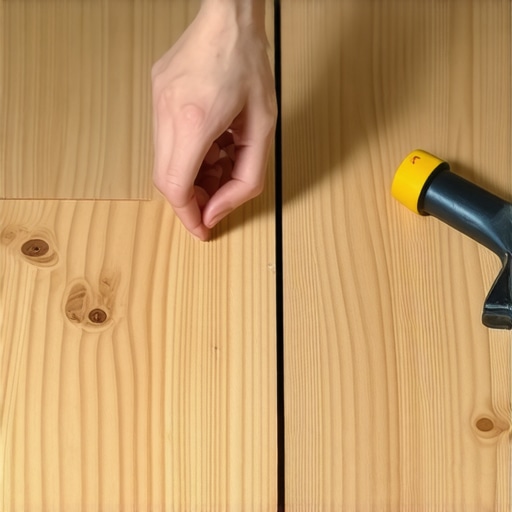
Reach for the Suction Cup When Space Runs Out
Sometimes, even a scrap block won’t fit if you are stuck against a heavy appliance or a built-in shelf. In these tight quarters, you have to change your physics from ‘pushing’ to ‘pulling’ from the top. This is where you should employ the suction cup hack for adjusting gapped laminate planks. By sticking a heavy-duty glass suction cup to the surface of the LVP, you can use the handle to yank the plank toward the gap without ever touching the edges. It’s a lifesaver when you realize a gap opened up three rows back and you don’t want to disassemble half the room. It works by using the friction of the wear layer rather than the strength of the locking joint.
Clear the Path at Every Doorway
Gaps often happen at doorways because the plank gets hung up on the door casing. If the plank can’t slide freely under the trim, it will never lock tight. Before you start hammering, make sure you have used the undercut saw secret for professional doorway transitions. If the casing is sitting even a hair too low, it acts like a brake on your flooring. I once spent forty-five minutes trying to close a gap under a closet door only to realize a tiny sliver of old carpet padding was jammed under the wood trim. Once that was cleared, the scrap-block trick closed the gap with a single, light tap. If you find the plank still won’t budge, double-check your perimeter and ensure you haven’t accidentally pinned the floor against a wall elsewhere, as this tension can travel across several rows and cause stubborn gaps.Fixing a gap is incredibly satisfying, but the real secret to a floor that lasts twenty years isn’t just about closing seams—it’s about understanding what is happening underneath the surface. Most DIYers think if a subfloor is flat, they are good to go. I used to believe that too, until I saw a perfectly flat vinyl floor start to buckle because I skipped [the concrete moisture test that saves your vinyl floor](https://tilecraftsmens.com/the-concrete-moisture-test-that-saves-your-vinyl-floor). Moisture vapor is an invisible floor-killer. According to the World Floor Covering Association (WFCA), over 70% of flooring failures are attributed to site conditions and subfloor moisture issues rather than product defects. If you aren’t testing your slab, you aren’t installing a floor; you are just setting a timer on a future disaster. This level of detail is what separates a weekend project from a [step-by-step flooring installation from planning to perfect finish](https://tilecraftsmens.com/step-by-step-flooring-installation-from-planning-to-perfect-finish).
Stop Killing Your Carpets with the Wrong Tool
There is a common myth in the carpet world that ‘more power equals a tighter stretch.’ Many people grab a knee kicker and go to town, thinking they are doing a great job. In reality, relying solely on a kicker is [the knee kicker mistake that ruins new carpet](https://tilecraftsmens.com/the-knee-kicker-mistake-that-ruins-new-carpet) by overstretching the primary backing without engaging the secondary one. Professional [carpet install secrets for achieving flawless results](https://tilecraftsmens.com/carpet-install-secrets-achieving-flawless-results-every-time) always involve a power stretcher. If you only use a kicker, your carpet will likely develop ripples within two years because the tension isn’t uniform. It is a nuanced difference that saves you from having to restretch the whole house down the road.
Why does your expensive shower still leak at the floor?
You can buy the most beautiful marble in the world, but if the foundation is flawed, it is just a ticking time bomb. One of the most advanced mistakes I see is focusing on the tile’s surface rather than the drain assembly. This is exactly [why most DIY shower waterproofing fails at the drain](https://tilecraftsmens.com/why-most-diy-shower-waterproofing-fails-at-the-drain). People often forget to perform a 24-hour flood test before a single tile is laid. They assume the ‘kit’ they bought is foolproof. Real expertise involves understanding how the weep holes in a drain function; if you clog those with mortar, the water trapped under your tile has nowhere to go but into your joists. 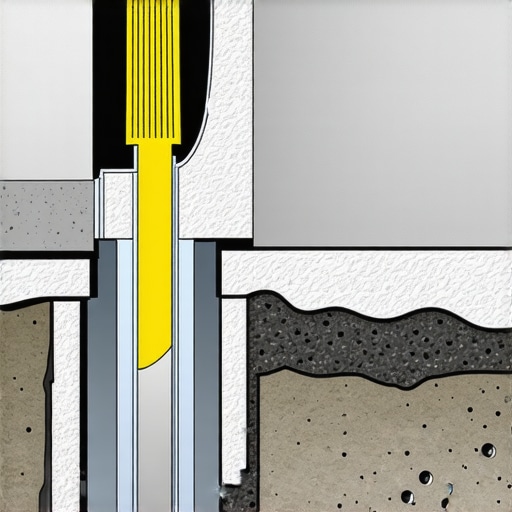
The Baseboard Trap Most Pros Hide
When you finally get to the finishing touches, it is easy to get lazy. Many people think they should nail their trim directly into the bottom plate of the wall and call it a day. However, [why you should never nail baseboards into the bottom plate only](https://tilecraftsmens.com/why-you-should-never-nail-baseboards-into-the-bottom-plate-only) becomes clear when the seasons change and the wood expands. Nailing only at the bottom allows the top of the trim to pull away from the wall, creating unsightly gaps. Instead, you need to hit the studs at an angle. If you are working with uneven walls, I highly recommend [the shimming secret for making MDF baseboards look custom](https://tilecraftsmens.com/the-shimming-secret-for-making-mdf-baseboards-look-custom). It is these tiny adjustments—the ones nobody sees once the paint is dry—that define a high-end renovation. Have you ever fallen into this trap or discovered a ‘hidden’ mistake halfway through a project? Let me know in the comments.But the work doesn’t stop once the last nail is driven. If you want that ‘just finished’ look to last more than a single season, you need to transition from an installer mindset to a maintenance mindset. I used to think my hands were the most important tools I owned, but after a decade of callouses, I’ve realized it’s actually the specialized gear that saves my joints and my sanity. For instance, the scribing tool every DIYer needs for tight baseboards isn’t just for show; it’s the difference between a gap-filled mess and a professional transition. I also never step onto a job site without the moisture meter test every flooring pro uses. It tells me exactly when a slab is ready or when I’m headed for a disaster. 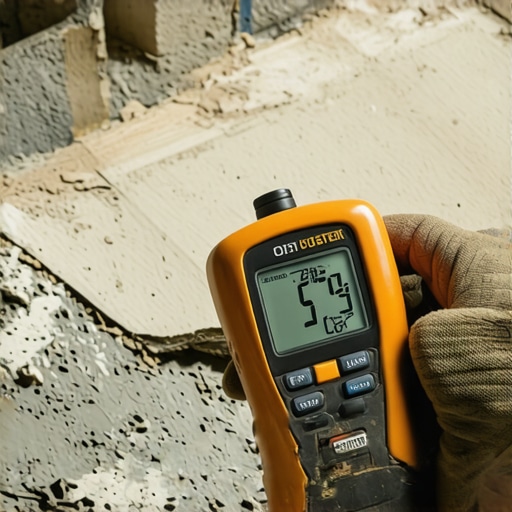
The One Tool I Refuse to Work Without
If you asked me ten years ago, I’d say a hammer and a prayer were enough. Today, my oscillating multi-tool is my best friend. It allows for surgical precision when you need to cut door jambs or trim back a piece of baseboard that’s just a hair too long. This level of precision is how you achieve carpet install secrets for achieving flawless results when transitioning between different materials. Precision tools aren’t just about speed; they are about reducing the margin for human error that leads to ‘fixing it later.’
How do I maintain my home’s new look for years?
The biggest mistake homeowners make is using the wrong cleaners. If you want to avoid shower repairs when to fix vs replace for longevity, you have to be careful with acidic cleaners that eat away at your grout. I always recommend learning how to deep clean sanded grout without scuffing tile to keep your bathroom looking like a spa. Similarly, if you have carpet, you need to watch for early signs of tension loss. Knowing why your carpet is wrinkling two years after install can help you address the issue before it becomes a permanent trip hazard. According to the Tile Council of North America (TCNA) Handbook, achieving 95% mortar contact is critical for tiles in wet environments to prevent moisture-related discoloration and structural failure. Use the perimeter tension trick for wrinkle-free carpets to ensure your soft surfaces stay as flat as the day they were stretched.
Expect More Intelligence from Your Floors Soon
Looking ahead, I see flooring becoming much ‘smarter.’ We are already seeing luxury vinyl planks with integrated acoustic layers and even moisture-sensing underlayments that can alert your phone if a leak starts under your kitchen cabinets. Sustainability is also driving the market toward more recycled composites that don’t sacrifice durability for eco-friendliness. If you are feeling overwhelmed by all these technical details, don’t hesitate to reach out via our contact-us page. My best advice? Go buy a professional-grade moisture meter today—it’s the single best insurance policy for your home’s future.
The Most Expensive Lessons My Subfloor Ever Taught Me
Reflecting on a decade of dust and debris, I have realized that the most successful projects are not the ones that go perfectly—they are the ones where the installer knew exactly how to pivot. One major lightbulb moment was learning that patience beats pressure every single time. In the past, I would grab a bigger hammer if a plank would not seat, but that is a fast track to broken locking systems. Now I know that 90% of the time, a stubborn joint is caused by a microscopic piece of grit in the groove or a slight misalignment four rows back. Another hard-learned truth: never ignore the subfloor. I once tried to ‘float’ over minor dips, only to realize why your click-lock flooring is making a snapping sound—it is the friction of the joint straining over those very hollows. Finally, always respect the expansion gap. It might look unfinished before the trim is on, but that space is the only thing keeping your floor from buckling when summer humidity hits.
The Gear I Actually Keep in My Truck
You do not need every tool in the aisle, but you do need the ones that actually solve problems. For any serious step-by-step flooring installation from planning to perfect finish, I recommend an oscillating multi-tool for precision door jamb cuts. I also never start a wood project without a professional moisture meter; it is the only way to avoid seeing why your new hardwood floor is starting to cup in the center weeks later. For bathroom renovations, I have moved away from heavy cement boards in favor of high-density waterproof foam boards. They are easier to handle and offer superior protection when combined with the liquid membrane rule for zero leak shower niches. These tools are my personal insurance policy against callbacks and failures.
#IMAGE_PLACEHOLDER_E#
Build a Home That Stands the Test of Time
Taking on these projects can feel daunting at first, but there is an incredible sense of empowerment that comes from mastering your own space. Whether you are finally achieving carpet install secrets for achieving flawless results or giving your living room a much-needed baseboards makeover, the attention to detail you provide today is what creates a lasting legacy. Do not be intimidated by the learning curve—every pro was once a beginner staring at a gap they did not know how to close. Grab your tools, trust the physics, and focus on one row at a time. Have you ever discovered a hidden gap or a weird subfloor surprise weeks after finishing a project? Let me know how you handled it in the comments below.