

I stood there, sweat dripping off my nose and onto my dusty boots, looking at a miter joint that looked more like a canyon than a corner. I had measured twice. I had cut exactly at 45 degrees. Yet, there it was—a massive gap at the front that made my brand-new trim look like a total amateur job. I could feel that hot, prickly frustration building in my chest; you know the feeling, when you realize you’ve just turned a perfectly good piece of wood into scrap. It was my first big renovation, and I realized a hard truth: your house is lying to you. No wall is ever truly square. If you’ve been struggling with choosing the right baseboard style, you already know how much of an investment this is for your home’s aesthetic. Today, I’m showing you the 45-degree trick that changed everything for me, turning those yawning gaps into tight, professional seams that stay shut for years. [image_placeholder_1]
Stop Relying on Caulk to Fix Your Bad Miters
Let’s be honest with each other. We’ve all been tempted to just “caulk and walk.” I spent years thinking I could just fill a gaping 1/8-inch hole with white goop and a prayer, assuming no one would notice once the paint dried. But guess what? Houses breathe. Materials expand and contract. And before you know it, you’re looking at cracking caulk and ugly, dark lines in your corners. The real secret isn’t in the filler; it’s in how you manipulate the saw to account for the fact that your drywall corners are almost always wider than 90 degrees due to corner bead and mud buildup. One of the biggest mistakes I made early on was trusting my miter saw’s factory presets without testing the actual angle of the wall. I just assumed the manufacturer knew better than my own eyes. According to the construction experts at The Journal of Light Construction, the buildup of drywall compound at outside corners can push your trim out by as much as two degrees, rendering a perfect 45-degree cut useless. This is why you need the back bevel secret to get that crisp, tight fit that looks like it was done by a master carpenter.
Is this tiny adjustment really worth the extra effort?
You might be thinking, “Do I really need to mess with half-degrees and shims just for a bit of floor trim?” The answer is a resounding yes if you want your baseboard makeover to actually look high-end and not like a weekend accident. When you combine the right angle with the cardboard shim hack, you aren’t just being “picky”—you’re ensuring that the joint stays closed even as the seasons change and the humidity fluctuates. I remember one guest bedroom I did where I ignored this, and by the time the furnace kicked on in November, every single outside corner had opened up like a blossoming flower. It was humiliating when my father-in-law pointed it out. We are going to solve that today by mastering a technique that compensates for those “fat” corners. Have you ever spent hours on a single room only to have the very last corner ruin the whole look? Tell me I’m not the only one who has considered moving a massive potted plant just to hide a bad joint! Let’s get into the nitty-gritty and save your sanity.
Ditch the Factory 45 and Grab a Scrap Piece
I remember a drafty living room in a 1920s bungalow I was flipping. I had just finished a step-by-step flooring installation that looked like a million bucks, but the moment I tried to wrap the outside corner with trim, the house fought back. A standard 45-degree cut left a gap so wide I could have parked a bike in it. My mistake was trusting the saw’s detents. Now, before I ever commit a 12-foot piece of expensive molding to the blade, I use two six-inch “test scraps.” I hold them against the wall and see how they meet. If the tips touch but the bottom of the miter stays open, you’re dealing with a “fat” corner.
Lean Into the Back Bevel for a Tight Face
This is where the back bevel secret comes into play. Most people just change the miter angle (left to right), but the pro move is to tilt the actual blade (the bevel) about one or two degrees away from the face of the wood. Think of it like a puzzle piece that is slightly smaller on the back than the front. This ensures that the very front edge of the trim—the part you actually see—makes contact first.
Shim Your Way to a Professional Seam
Even with a perfect angle, drywall compound often builds up at the bottom of the wall, pushing the baseboard out of plumb. If your miter is still opening at the top, you need the cardboard shim hack. Take a small strip of the baseboard’s packaging or a business card and slip it behind the trim about two inches away from the corner. This tiny bit of leverage pivots the miter shut. It’s the difference between a “good enough” job and baseboard styles that elevate your interior design to custom-home levels.
Stop the Splintering Before it Starts
There is nothing worse than making a perfect calculation only to have the saw blade chew up the finished edge of your trim. I always use the painters tape trick for a clean finish. Wrap the area where the blade will exit the wood in tight blue tape; it supports the wood fibers and prevents those jagged “fuzzies” that ruin a joint. This attention to detail prevents the common flooring installation mistakes that scream “DIY disaster.”
Master the Return Miter for a Finished End
When a baseboard just stops at a door casing or a wall end, don’t leave the “meat” of the wood exposed. You need to use the 45-degree trick for clean returns. I used to just cut them flat and paint the end, but it always looked unfinished. By cutting a tiny 45-degree “cap” from a scrap piece and gluing it to the end of your run, you wrap the profile around the corner. It creates a continuous, high-end look that hides the raw inner core of the material. This is especially crucial when working with MDF, which absorbs paint differently than the finished face.
The Gap is Your Best Friend Not Your Enemy
One of the biggest debates in home renovation is the order of operations. Most DIYers think you have to wait until the flooring is down to touch the trim, but that’s often the hardest way to get a clean finish. In my experience, if you are doing carpet, you should actually install the baseboards first. I leave about a 3/8-inch gap between the bottom of the trim and the subfloor. Why? Because it allows for a “tuck.” When the installers use the kicker move for tucking carpet into tight corners, they can hide the cut edge of the carpet perfectly under the baseboard. If the baseboard is sitting flush on top, you’re left trying to jam a thick pile against a flat surface, which usually results in a messy bulge or visible staples. It’s these small, professional choices that separate a basic renovation from a high-end custom home.
Should you really install baseboards before the carpet arrives?
The answer depends on the height of your carpet pile, but for most residential grades, the “floating” baseboard method is superior. However, the biggest “oops” factor I see—and one I’m guilty of from my early days—is why you should never nail baseboards into the bottom plate only. Most people just fire nails into the bottom inch of the trim where the framing plate is located. But houses are dynamic; they breathe and shift. If you only nail the bottom, the top of your trim will eventually lean away from the wall, creating a dark, unsightly shadow line as the floor settles. You must hit the vertical studs higher up to maintain a permanent, tight fit. This is especially true when attempting carpet install secrets that rely on perimeter tension to stay flat. If the trim isn’t anchored to the studs, the tension of the carpet can actually pull the baseboard off the wall over time.
Even with hard surfaces like LVP or hardwood, the nuances go deeper than just the miter. Professionals never skip the moisture meter test every flooring pro uses because they know that the house’s relative humidity will dictate how much that “perfect” joint will move. According to the National Wood Flooring Association (NWFA), failing to account for environmental acclimation can cause even the tightest miters to buckle or gap within six months because the wood hasn’t reached its equilibrium moisture content. People often assume that “waterproof” flooring like vinyl doesn’t need this, but the subfloor beneath it certainly does. I once saw a gorgeous oak floor cup so badly it actually lifted the baseboards off the wall because the installer ignored the expansion gap and the moisture levels in the crawlspace. Another common trap is forgetting that “floating” floors really do float. If you pin a floating floor down by nailing your baseboards too tightly against the planks, you’re essentially locking the floor in place. When the temperature changes, the floor has nowhere to go, leading to peaking or buckling at the seams. Have you ever fallen into this trap where your “finished” project looked worse a year later? Let me know in the comments. It’s all about the prep and the physics of the materials, not just the skill with a saw. Taking the extra time to verify your subfloor and wall structure ensures your flooring installation mistakes are left in the past and that your home remains a sanctuary rather than a source of stress.
After the dust settles and you have finally finished admiring those tight corners, the real battle begins: long-term maintenance. I used to think a mop and some generic spray were enough, but that is exactly how I ruined my first master bath renovation within just two years. To ensure your hard work lasts, you have to treat different surfaces with specific respect. For example, knowing shower repairs when to fix vs replace for longevity can save you thousands in structural damage down the road. I have learned the hard way that aggressive steam cleaners can actually blow the sealer right out of your grout lines, leading to moisture ingress and tile failure. Instead, I swear by the toothbrush trick for cleaning stubborn shower grout to reach those tiny crevices where pink mold loves to hide without damaging the surrounding surface.
How do I keep my bathroom and floors looking new after year one?
The secret is not just in the cleaning; it is in environmental monitoring. I now keep a small digital hygrometer in my main living area. If the humidity jumps above 55 percent, I know my baseboards might start groaning and shifting. To prevent those inevitable hairline gaps, I stopped using standard painters caulk for everything and switched to a high-performance elastomeric. Learning to stop baseboard hairline cracks with this flexible filler ensures that when the house settles—and it absolutely will—the joints stretch rather than snap. According to the Tile Council of North America (TCNA) Handbook, the use of proper movement joints in tiled areas is the only scientifically backed way to prevent ‘tented’ tiles or cracked grout in large-span floors. If you are dealing with older installations, you must learn how to deep clean sanded grout without scuffing tile to restore that original luster without creating a porous mess.
The Two Specialized Tools That Actually Matter
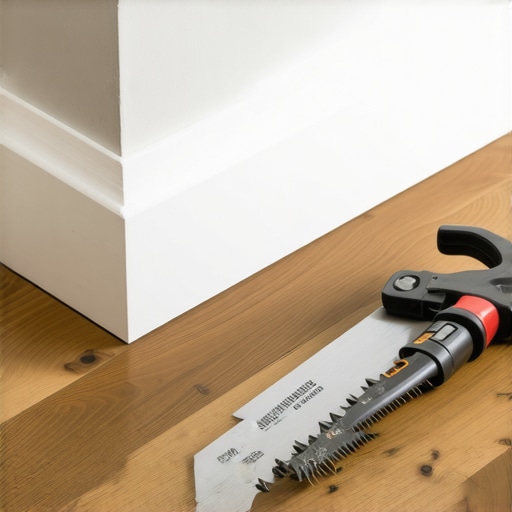
My toolbox used to be cluttered with ‘as seen on TV’ gadgets that promised to make flooring easy. Now, my kit is lean and focused on precision. If you are tackling door transitions, stop trying to notch the wood with a shaky jigsaw. You need to use the undercut saw secret for professional doorway transitions to slide the flooring directly under the jamb for a seamless, factory-finish look. And when those stubborn vinyl planks just will not click into place? Put away the heavy sledgehammer. I always reach for the dead blow hammer secret for flat floor seams. It delivers the necessary driving force without the rebound that often breaks the delicate tongues and grooves of modern flooring.
Looking ahead, I predict a massive shift toward ‘smart’ modular flooring systems. We are already seeing the beginning of baseboards with integrated LED lighting paths and subfloors with moisture-sensing tape that alerts your phone the second a dishwasher leak starts. While we are not quite at a fully automated home yet, the precision we practice today—like mastering the 45-degree trick for clean baseboard return miters—is what builds a home ready for the next decade of technology. My challenge for you this weekend is to upgrade your kit: go buy a high-quality dead blow hammer and a tube of elastomeric filler. These two small investments will immediately elevate your project from ‘DIY’ to ‘Designer’ level.
Hard-Won Secrets From a Dozen Flooring Battles
If I could go back and whisper in my younger self’s ear, I’d tell him that the most important tool isn’t the saw—it’s patience. I used to rush into a step-by-step flooring installation thinking speed was the mark of a pro, but the real masters spend more time checking their walls than cutting wood. I learned that every home has a ‘personality’ that shifts with the seasons. If you don’t account for that movement, your beautiful work will literally tear itself apart. Another ‘lightbulb’ moment for me was realizing that imperfection is inevitable; the goal isn’t to be perfect, it’s to be smart enough to hide the flaws using tricks like back-beveling and shimming.
The Only Tools You Need to Stop Faking It
You don’t need a thousand-dollar setup to get a high-end look, but you do need gear that works. First, stop guessing about humidity; I never start a job without checking the moisture meter test every flooring pro uses to see if the wood is ready for your home environment. Second, for those tricky transitions between rooms, the undercut saw secret for professional doorway transitions is the only way to avoid ugly gaps around jambs. Finally, for the love of your knees and your floors, use the dead blow hammer secret for flat floor seams. It gives you the control you need without damaging the finish of your new trim. [image_placeholder_final]
Building a Home That Lasts Past the Weekend
There is a unique kind of pride that comes from walking into a room and knowing the corners are tight because you took the time to do it right. This isn’t just about trim; it’s about the care you put into the place where you live your life. By mastering the 45-degree trick and refusing to settle for ‘good enough,’ you’re creating a professional finish that will stand the test of time and house-settling. You’ve got the knowledge and the tricks—now go grab your saw and make it happen for your next baseboards makeover. Have you ever had a corner that just refused to close no matter how many times you cut it? Let me know your biggest trim frustration in the comments below!