

The sound was a sharp, heart-sinking crack that echoed through the house at 2 AM. It sounded like a joist snapping, but it was much worse—it was my pride. I walked into the guest room, flipped the switch, and saw a six-inch peak running right down the center of my brand-new laminate floor. I had spent my entire Saturday meticulously fitting every plank tight against the drywall, thinking I was being a master craftsman. I was wrong. I was a disaster. I hadn’t left a single millimeter for the floor to breathe, and the summer humidity had turned my living space into a tectonic plate collision. That’s how I learned about the Penny-Gap rule the hard way, and if you’re currently staring at a stack of boxes wondering where to start, I’m here to save you from my own stupidity. [image_placeholder_1]
My $2,000 Volcano and the Lesson it Taught Me
Laminate flooring is essentially a high-density sponge wrapped in a pretty picture. When the moisture in your home rises, those wood fibers swell. If you’ve jammed those planks tight against the wall, that energy has nowhere to go but up. I spent hours trying to kick that ‘volcano’ back down, but it’s impossible. You have to pull the whole thing apart. I learned that you simply cannot wing your step-by-step flooring installation without respecting the perimeter. It’s one of those classic flooring installation mistakes to avoid that sounds minor until your floor starts acting like a trampoline. Trust me, spending $1.50 on a roll of pennies is a lot cheaper than buying a whole new floor because you refused to leave a small gap.
Does a Tiny Gap Really Matter That Much?
I get the skepticism. You want your floor to look tight and professional, and a gap feels like sloppy work. But even the National Wood Flooring Association (NWFA) notes that wood-based flooring materials can expand by as much as 1/16th of an inch for every foot of width depending on humidity changes. The ‘Penny-Gap’ is my favorite way to keep things consistent because a standard penny is about 1.5mm thick. By stacking three of them at intervals along your wall, you create a perfect 4.5mm gap. This is the ‘Goldilocks’ zone: large enough for the floor to expand during a humid July, but narrow enough that your baseboard trim will still hide the edge completely. If the gap is too wide, you’re stuck with a gap you can see from across the room. If it’s too tight, you’re calling me for advice on how to fix a buckle. Have you ever felt your floor ‘shift’ under your feet after a big rainstorm?
Give Your Floor Room to Breathe
Following expert flooring installation tips for 2025 means understanding that your home is a living, breathing thing. It moves, and your floor needs to move with it. We’re going to walk through the exact process of setting these gaps today, including the tricky spots like door frames. Getting the perimeter right is just as vital as the expansion gap rule for flooring under door jambs. If you skip this, you aren’t just installing a floor; you’re installing a headache. Let’s make sure your hard work stays flat, stable, and beautiful for years to come. I promise, once you see how easy the penny trick is, you’ll never use those overpriced plastic spacers again.
Master the Layout Before You Click a Single Plank
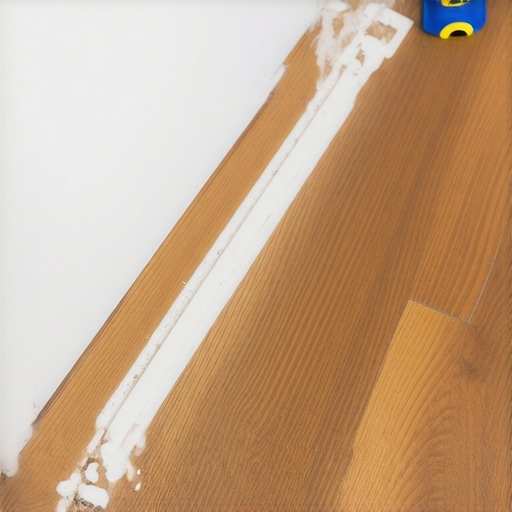
The first row sets the tone for the entire room. If you start crooked, you will be fighting the walls by the time you reach the other side. Think of your first row like the foundation of a house; if it is off by a hair, the roof will not fit. I use a chalk line to snap a perfectly straight reference mark about 1/4 inch away from the starting wall. This ensures that even if the wall is wavy—and trust me, most walls are as straight as a wet noodle—your floor stays true. Since we are aiming for that 4.5mm gap, I stack my three pennies and tape them together into little ‘spacer slugs.’ They stay put much better than those cheap plastic wedges that always seem to slide out when you tap the planks home. I learned this while helping a neighbor fix a hallway; he had used individual spacers that fell into the wall cavity, leading to flooring installation mistakes to avoid that eventually caused his floor to shift an inch to the left.
Protect Your Joints with the Right Tapping Method
Once that first row is pinned by your spacers, you need to lock the next rows in. Avoid the temptation to go full Thor with a hammer. I once cracked three planks in a row because I was using a metal hammer directly on the tongue. It was a mess. Now, I always use a dead blow hammer and a scrap piece of flooring to distribute the force. This is where the tapping block mistake that breaks vinyl tongues usually happens—people hit the block too hard or at the wrong angle. A gentle tap is all it takes to seat the joint without mushrooming the edge. Using the dead blow hammer secret for flat floor seaming ensures the locking mechanism fully engages without distorting the material.
Stop Cutting Around Door Jambs
This is the part where most DIYers lose their minds. You see a complex door frame and think you need to cut the flooring into a jigsaw puzzle piece. Stop. That is a recipe for a 1-inch gap that looks like a crime scene. Instead, use the undercut saw secret for professional doorway transitions. You lay a scrap piece of your flooring upside down against the jamb, rest your saw on top, and slice through the wood casing. 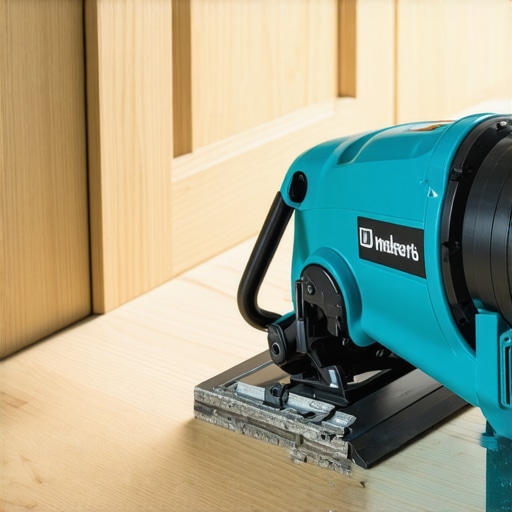
The Hidden Space Under the Trim
By undercutting the jamb, the floor actually slides under the door frame. This gives you the required expansion room while looking like the floor was built into the house. I remember my first ‘pro’ job where I did not do this; I tried to caulk a 1/2-inch gap around a colonial door casing. It looked like I had applied frosting with a firehose. The client was not happy, and I spent the next day ripping it out. Now, I follow the expansion gap rule for flooring under door jambs religiously. It is the difference between a ‘handyman special’ and a high-end finish that looks great even if you choose best carpet types for high traffic areas for the adjoining rooms.
Manage the Transition to Wet Areas
As you move from a bedroom into a hallway or toward an upgrade your bathroom project, you will encounter transition strips. Don’t just eyeball these. If you are moving toward a tile area, you need to ensure your subfloor is rock solid. Sometimes subfloor prep mistakes that make new vinyl planks sound hollow show up right at the doorway because the subfloor dips. If the floor bounces when you step on the transition, the T-molding will eventually snap. I like to use a bit of construction adhesive in the track of the transition strip to keep it from rattling, but never on the flooring itself.
The biggest myth in the DIY world is that ‘floating’ floors are a set-it-and-forget-it solution. Most tutorials tell you that as long as the planks click together, you are golden. But here is the contrarian truth: many people inadvertently ‘anchor’ their floating floors, turning a flexible system into a rigid one that is destined to buckle. If you install your heavy kitchen islands or screw your baseboard styles directly through the flooring into the subfloor, you’ve just killed the expansion potential. I once saw a beautiful oak laminate rip itself apart because the homeowner nailed the transitions into the joists, effectively pinning the floor in place. It’s one of those flooring installation mistakes to avoid that no one talks about until the boards start to separate in the winter.
Floating Floors Need More Freedom Than You Think
When you are finishing the edges, you have to be surgical with your nail gun. You should never nail baseboards into the bottom plate only through the floor. Instead, aim higher into the wall studs so the baseboard sits just a hair above the flooring, allowing it to slide back and forth like a piston. This is where the back bevel secret for seamless baseboard corners comes into play; it allows for a tight visual fit without putting physical pressure on the planks. Have you ever fallen into the trap of pinning your floor down? Let me know in the comments; I’ve seen some creative ‘fixes’ that usually involve a lot of wood glue and regret.
Why do my brand new planks sound like I’m walking on potato chips?
If you hear a crunching or hollow ‘clack’ every time you walk across the room, you likely ignored why your subfloor needs a 48-hour moisture test first. Moisture trapped under the underlayment creates a pocket of air or, worse, causes the subfloor to swell unevenly. Even the Tile Council of North America (TCNA) emphasizes that substrate flatnesses are the leading cause of installation failure, and the same applies to laminate. If your subfloor has a dip greater than 3/16 of an inch over 10 feet, those planks will flex, eventually leading to the stair-step pattern mistake that weakens vinyl joints and snaps the locking mechanisms. 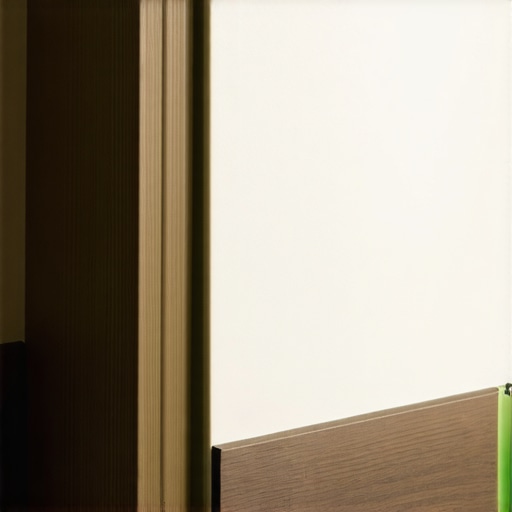
The Shower Drain Trap That Ruins Every Renovation
This expertise doesn’t stop at the bedroom door. If you are planning to upgrade your bathroom, the biggest ‘oops’ factor isn’t the tile choice—it’s the drain. People focus so much on the pretty marble that they ignore why most DIY shower waterproofing fails at the drain. You cannot just slap thin-set over a standard drain and call it a day. You need a bonded flange system to ensure a watertight seal. This is the same level of precision required for a carpet install where using the power stretcher setting for plush pile carpets determines if you’ll have wrinkles in two years. Whether it is a shower pan or a living room floor, the nuance is always in how the material handles movement and moisture.
Stop the Squeak Before It Starts
Keeping your hard work pristine isn’t just about avoiding the first scratch; it’s about the tools you use to maintain that invisible stability. I never step onto a job site without my digital hygrometer. Why? Because atmospheric moisture is the silent killer of laminate. Even if you followed the expansion rules, a sudden spike in humidity can still cause issues if you don’t use the moisture meter test every flooring pro uses to monitor the air and the subfloor before, during, and after installation.
How do I keep my shower from leaking after the first year?
It’s all about the integrity of the secondary drainage and the waterproofing layer. According to the Tile Council of North America (TCNA) and the ANSI A118.10 specification for load-bearing, bonded, waterproof membranes, the system must remain flexible enough to handle house settling without cracking. This is why I swear by the liquid membrane rule for zero leak shower niches. You need to apply that membrane like you’re icing a cake—thick, consistent, and without a single pinhole. If you miss a spot in the corner, gravity will find it, and you’ll be tearing out tile by next Christmas.
The Pro Gear I Never Lend Out
When it comes to baseboards, I see people struggling with gaps every single day. Stop trying to fill a 1/2-inch gap with caulk; it will shrink and look terrible within months. Instead, get your hands on a quality compass. Using the scribing tool every diyer needs for tight baseboards allows you to trace the exact profile of an uneven floor onto your trim. It’s a game-changer for baseboard trends in 2025, where we’re seeing taller, more architectural profiles that show every flaw. If the floor is wavy, your scribe tool is your only friend for a seamless finish.
I predict that within the next five years, we’ll see ‘active’ flooring systems with embedded moisture sensors as standard in luxury builds. These will alert your phone before a minor leak becomes a structural disaster. Until then, you have to be the sensor. If you’ve opted for the best carpet types for high traffic areas in 2025, don’t skimp on the final tension. I always use the power stretcher setting for plush pile carpets to ensure the backing is actually taut. A knee-kicker is great for corners, but only a power stretcher prevents those ugly ripples three years down the line. Take my advice: go buy that scribing tool today and try it on your most difficult corner. It will transform your results from a weekend project to a high-end renovation.
Hard Truths from the Subfloor Trenches
After years of fixing my own messes and helping neighbors out of theirs, a few things have become clear. First, the 48-hour rule is not a ‘suggestion’—it is a physical requirement. I’ve seen people rush a step-by-step flooring installation only to have the boards shrink and leave gaps big enough to lose a remote in later. Second, remember that a floating floor is like a living organism; it needs to move. If you pin it down with heavy cabinets or bad nailing, it will eventually fight back and buckle. Finally, don’t ignore why your subfloor needs a 48-hour moisture test first. Skipping this is the number one reason floors fail within the first year. It’s better to lose two days waiting than to lose thousands in ruined material.
The Gear That Saved My Sanity
You don’t need a warehouse full of tools, but you do need the right ones. I never start a job without a digital hygrometer to check the ambient humidity. For the actual work, I swear by the scribing tool every diyer needs for tight baseboards. It turns a frustrating afternoon of ‘cut and hope’ into a surgical operation where every piece fits the first time. [image_placeholder_final] If you’re tackling soft surfaces, using the power stretcher setting for plush pile carpets is the only way to avoid the dreaded ripples that appear when the seasons shift. I also highly suggest using the painters tape trick for splinter free baseboard cuts to ensure your final trim looks high-end rather than hacked together.
Stop Planning and Start Clicking
There is a unique kind of satisfaction that comes from walking across a floor you laid with your own two hands. It feels more solid, looks sharper, and carries a story of your own hard work. Whether you are following expert flooring installation tips for 2025 or just trying to finish that one stubborn guest room, remember that every mistake is just a lesson for the next row. Take your time, leave your penny gaps, and give your home the foundation it deserves. Your perfect flooring installation is just a few clicks away. Have you ever found a ‘volcano’ in your living room or struggled with a tricky door jamb? Let me know your flooring stories in the comments below!