

I stood there with my utility knife in one hand and a sinking feeling in my chest that no DIYer ever wants to feel. I had measured twice, or so I thought, but as I went to join the two pieces of plush pile in the doorway, I realized I’d made the ultimate rookie error: I cut the seam about half an inch too short. The gap was staring back at me like a missing tooth, mocking my weekend plans. In that moment, I was sure I’d have to scrap the whole roll and admit defeat. But over years of trial and error, I’ve learned that a “short” cut doesn’t have to mean a “short-lived” floor. Whether you are deep into a carpet install or just trying to tidy up a transition, there are ways to bridge that gap without calling in an expensive professional. Today, I am going to walk you through how to stretch, patch, and hide those frustrating gaps so your room looks seamless again. Have you ever faced that “heart-drop” moment when a cut went just a bit too far? [IMAGE_PLACEHOLDER]
Don’t Panic Because Your Mistake is More Common Than You Think
When I first started messing around with flooring, I thought every cut had to be laser-accurate. I once made the classic knee kicker mistake that ruins new carpet by trying to force a short piece to reach a wall, only to end up with a structural tear that looked even worse. It was a mess. But here is the truth: even the pros occasionally find themselves a fraction of an inch off. The secret isn’t being perfect; it’s knowing how to manipulate the material after the fact. According to the Carpet and Rug Institute (CRI), proper seaming is one of the most critical aspects of installation longevity, yet it is also where most DIY failures happen. If your seam is looking a bit “peaked” or thin, you might need to check why your carpet seam peaks and how to flatten it before you try to close a physical gap. Fixing a short cut is about understanding the tension of the backing and using scrap pieces to your advantage without compromising the subfloor.
Can a patched seam really stay invisible?
This is the big fear, right? You’re worried that even if you “fix” it, you’ll see a line across the floor for the next ten years. I used to think the same thing until I learned the “butterfly” method for blending fibers. If you use the right adhesive and follow the natural grain of the pile, that gap will vanish into the surrounding texture. We aren’t just taping things together; we are surgically re-integrating the carpet. Before we dive into the specific tools, let’s look at how to assess if your carpet has enough “give” to be stretched into place or if we need to bring in a donor strip from the back of a closet.
Can You Stretch Your Way Out of a Bad Cut?
Before you reach for the scrap pile, you need to determine if the carpet has any give left. I remember a humid Tuesday in July when I was installing a thick frieze in a master bedroom and missed my mark by nearly three-quarters of an inch near the doorway. My first instinct was to grab the knee kicker, but that is often a recipe for bruised knees and uneven tension. Instead, I pulled out the big guns. Using the power stretcher setting for plush pile carpets is like using a car jack for your floor; it provides the mechanical advantage to pull that backing tight without shredding the fibers. If you can get the edges to touch by applying firm, consistent pressure from the center of the room toward the seam, you have won. You want to utilize the perimeter tension trick for wrinkle-free carpets to ensure that once you hook the carpet onto the tack strips, it stays put and does not snap back like a rubber band the moment you let go.
Stealing a Donor Strip from the Closet
If the gap is wider than a thumb’s width, stretching will only cause the carpet to thin out or peak later. This is where you perform a carpet graft. You will need a donor strip, ideally from the very back of a walk-in closet or under a radiator where no one will ever look. I once had to steal a two-inch strip from behind a water heater to save a living room install. Use a sharp utility knife to cut a piece that is exactly the width of your gap plus about an eighth of an inch for compression. When you tuck this piece in, it should not just sit there; it should be slightly wedged to ensure the fibers interlock. Use the kicker move for tucking carpet into tight corners to make sure the donor piece sits flush against the subfloor and aligns with the existing grain. #IMAGE_PLACE_HOLDER_B#
Melt the Tape and Blend the Fibers Like a Pro
Now comes the part that scares most DIYers: the heat. You are going to use seaming tape, but the trick is in the melt. If the iron is too hot, you will scorch the backing; too cool, and the bond will fail. I follow the heat iron trick for reactivating old seam tape even on new installs to ensure a deep, molten bond. Place the tape centered under the two pieces. Run your iron slowly over the tape—about two inches every five seconds—and follow immediately behind it with a seam roller or a heavy, flat object. As the adhesive cools, the two pieces of backing become one unified sheet. If you are working with a tricky texture, you might even borrow techniques on how to repair a cigarette burn in Berber carpet to manually weave individual loops back into the glue line. It sounds tedious, but this butterfly blending ensures that the light hits the fibers consistently, hiding the mechanical seam underneath. This phase is the backbone of any step-by-step flooring installation from planning to perfect finish, turning a potential disaster into a professional-grade result without the cost of a full replacement.
I’ve spent a lot of time on my knees fixing so-called professional jobs that failed after just two seasons, and there is one mistake I see more than any other: the obsession with a zero-gap fit. We are taught that gaps are the enemy, but in the world of durable flooring installation, a tiny bit of breathing room is actually your best friend. Most DIYers—and even some hasty contractors—slam their baseboards tight against the flooring or nail them into the subfloor plates without thinking about seasonal movement. This is a massive “oops” because as humidity levels shift, that “perfect” fit turns into a buckling nightmare or a series of flooring installation mistakes that are expensive to undo.
Does My Floor Really Need to ‘Breathe’ This Much?
The answer is a resounding yes. The National Wood Flooring Association (NWFA) notes that wood and even some laminates can expand significantly based on the relative humidity of the room. If you do not leave that “penny gap” or use the expansion gap rule for flooring under door jambs, the material has nowhere to go but up. I once saw a beautiful oak floor “tent” three inches off the subfloor because the installer didn’t account for a summer humidity spike. They thought they were being precise; in reality, they were building a ticking time bomb. According to expert studies, moisture-related failure is the leading cause of post-install litigation in the flooring industry.
Stop Nailing Your Baseboards into the Bottom Plate
One of the biggest traps involves your trim. You might think you are being sturdy by driving long finish nails straight down, but you should never nail baseboards into the bottom plate only. When the house settles or the floor shifts, those nails will either pull the board out of alignment or cause the wood to split. Instead, I always use the shimming secret for making MDF baseboards look custom to ensure the trim sits perfectly without putting undue pressure on the floor itself. It is about creating a system where the floor can slide independently of the walls. 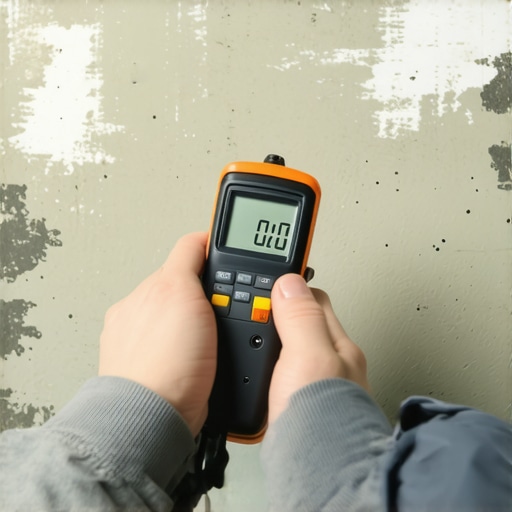
The Invisible Moisture Trap That Destroys New Floors
Let’s talk about the “expert” myth that you can skip the prep if the floor looks level. If you are not using the moisture meter test every flooring pro uses, you are basically gambling with your mortgage. Even a dry-looking concrete slab can wick enough moisture to ruin a new vinyl or carpet install from the bottom up. Have you ever fallen into this trap where you thought ‘good enough’ was actually enough? Let me know in the comments. I have learned the hard way that the hidden nuances—the things you do not see immediately—matter far more than the final coat of paint or the weave of the fibers. By accounting for these invisible forces, you ensure your work looks just as good in five years as it does the day you finish.
I have spent years building up a tool chest that actually saves me time, rather than just taking up space in the garage. If you want to move past the ‘beginner’ phase, you have to stop trying to eyeball your cuts. For instance, I used to struggle with gaps between my trim and the wall until I started using the scribing tool every DIYer needs for tight baseboards. This isn’t just about making things look pretty; it is about structural integrity. When your baseboards fit the contour of your home perfectly, they are less likely to pull away or rattle. I always pair my scribe work with the back bevel secret for seamless baseboard corners, which allows for a tighter fit on the visible edge even if the wall behind it is a mess. It is the difference between a project that looks ‘DIY’ and one that looks like a high-end contractor was there for a week.
How do I maintain my flooring and trim over the long haul?
Maintenance is where the real work begins after the tools are packed away. I see so many people spend thousands on a durable flooring installation only to ruin it with the wrong cleaning chemicals or by ignoring small issues. If you notice your trim starting to pull away, do not just reach for any old tube of sealant. You need to understand why your baseboard caulk is cracking and the flex fill fix that actually moves with your house. For showers, I swear by the toothbrush trick for cleaning stubborn shower grout to prevent mold from ever getting a foothold. According to the Tile Council of North America (TCNA) Handbook, maintaining the integrity of grout joints is the single most important factor in preventing subsurface water damage. Neglecting this leads to shower repairs when to fix vs replace for longevity, and believe me, you want to fix it while it is still a small issue.
The 2025 Shift Toward High-Precision Modular Systems
As we look at baseboard trends in 2025 fresh styles for every room, I predict we are going to see a massive move toward modular, pre-finished systems that allow for even easier maintenance. We are already seeing this in the flooring world with expert flooring installation tips for 2025 focusing on ‘floating’ systems that can be repaired plank by plank rather than tearing up a whole room. This shift toward modularity means your precision during the initial setup—like using the dry fit rule for no mistake shower drain alignment—is more important than ever. If the ‘bones’ of your install are right, the future-proofing is built-in. I highly recommend you try the ‘scribe-and-bevel’ method on your next small hallway project; once you see that hair-thin joint, you will never go back to standard miters. It is about taking pride in the hidden details that make the whole room sing.
Three Flooring Myths That Almost Ruined My Home
Over the years, I’ve realized that the biggest barrier to a professional-looking home isn’t a lack of talent—it’s believing these three common myths. First, I used to think a visible seam meant I failed. In reality, the goal is often ‘mechanical unity’ rather than literal invisibility; a strong bond matters more than a disappearing act. Second, I believed that more glue always meant a stronger bond. In truth, too much adhesive actually causes the backing to stiffen and creates a ridge that catches the light. Finally, I thought I could skip the ‘boring’ prep work. But using the moisture meter test every flooring pro uses taught me that what happens under the carpet is twice as important as the pile on top.
- Precision is a lie: Wood and fibers are living materials that move. Aim for controlled expansion, not a rigid, suffocating lock.
- Tools aren’t just for pros: Using the scribing tool every DIYer needs for tight baseboards turned my ‘shabby’ corners into sharp architectural features.
- Mistakes are just pivots: A short cut is just an opportunity to practice a donor patch, which is a skill every master installer needs.
The Toolkit That Turns Amateurs into Experts
If you’re tired of ‘hacking’ it, you need a few non-negotiables in your kit. I never start a project without a high-quality scribe tool and a reliable moisture meter. I also highly recommend looking at the Carpet and Rug Institute (CRI) standards as your ‘bible’ for tensioning rules. For those finishing touches, knowing the back bevel secret for seamless baseboard corners will save you from using a gallon of caulk to hide gaps. These tools don’t just make the work look better; they give you the confidence to tackle bigger rooms without the heart-drop moment when something goes slightly off-plan.
Step Into Your Next Home Improvement Win
Flooring is more than just something you walk on; it’s the foundation of your home’s character. Whether you are perfecting a carpet install or refreshing your trim, remember that every expert was once a beginner staring at a short cut with a sinking feeling in their chest. The difference is just a few more hours of practice and the willingness to try one more ‘save.’ You have the tools, the techniques, and the resilience to turn any flooring mishap into a masterpiece. Don’t let the fear of a small gap stop you from a total baseboards makeover elevate your interior with simple updates. Have you ever had a ‘heart-drop’ moment where a cut went just a half-inch too short? How did you fix it? Let me know in the comments below!