

The first time I saw a “carpet tumbleweed” roll across my hallway just three days after my big renovation, I nearly called the installer to demand my money back. I had spent weeks researching how to choose the right carpet for a cozy living space, and here I was, watching my investment evaporate into lint. It looked like my vacuum was eating the floor alive. But after twenty years in the home improvement game, I have learned that this “snowing” effect is actually a perfectly normal—albeit annoying—part of the process. If you have just finished a carpet install and feel like you are living in a dryer vent, take a deep breath. We are going to fix your floor anxiety today by breaking down the science of shedding and setting a realistic timeline for when your vacuum can finally take a break.
Stop Panicking About the Fuzz on Your Floor
I made a massive mistake with my very first high-end install. I thought the shedding was a defect, so I took a stiff-bristled brush and tried to “groom” the loose fibers out manually. Big mistake. I ended up fraying the yarn and creating a fuzzy mess that never quite looked right again. This is exactly why you need to know carpet install secrets before you touch a single fiber. Shedding is mostly a byproduct of how the carpet is manufactured, specifically with “staple fibers.” These are shorter lengths of yarn spun together, and the ones that are not quite tucked in during the tufting process simply want to escape.
Is my expensive rug actually falling apart?
It is the number one fear: “Did I buy a lemon?” According to the Carpet and Rug Institute, shedding is a natural characteristic of many pile fabrics and does not affect the ultimate life or quality of the carpet. Think of it like a new haircut; you are just getting rid of the loose ends. While it is tempting to think you have fallen victim to flooring installation mistakes, rest assured that those fibers were never part of the structural integrity of your floor. They are just the “extras” that did not make the cut. Have you ever opened your vacuum canister and felt like you have just sucked up half a sweater? It is a bit jarring, is it not? Drop a comment and tell me if your new floor is currently winning the battle against your vacuum.
How Long This Living Room Snowstorm Actually Lasts
Most people expect it to stop in a week, but the reality is a bit more patient. Depending on the traffic and the fiber type, you might see this for several months. If you have been looking for the best carpet types for high traffic areas in 2025, you might find that those denser weaves shed differently than a loose shag. The key is consistent, gentle maintenance. Do not be like me and try to “force” the shedding to stop. It is a marathon, not a sprint. We will dive into the specific vacuuming schedules and the “thumb test” in the next section to see if your shedding is normal or if there is a real problem underfoot.
The Thumb Test Tells the Truth
I remember a job in a massive suburban living room where the owner was convinced her floor was literally melting because of the sheer volume of fuzz. I walked over, knelt down, and performed what we call the ‘thumb test.’ It is the fastest way to differentiate between normal staple fiber shedding and a genuine manufacturing defect. To do this, grab a small tuft of the loose fiber between your thumb and forefinger and pull gently. If the fiber comes away easily without resistance, it is just an ‘extra’ from the tufting process. However, if you feel a distinct ‘pop’ or see a long, looped strand pulling out of the backing, you are dealing with a structural failure. 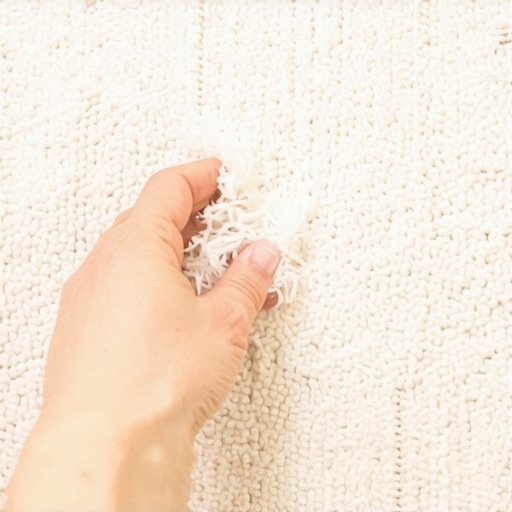
Gentle Suction Wins the Shedding War
You have to treat a fresh carpet install like a high-end wool suit, not a pair of rugged work jeans. For the first few months, your vacuum needs to be your best friend, but you must use it correctly. Aim for three times a week. The goal is to lift those loose fibers before they get ground back into the pile, which leads to permanent matting. But here is the secret: set your vacuum to the highest pile setting and disable the beater bar if possible. Aggressive agitation is the enemy of a new floor; it is like using a wire brush on a silk shirt. You want the suction to do the heavy lifting, not the friction of the bristles.
Check Your Beater Bar Height
If you cannot turn off your beater bar, adjust the height so the bristles barely skim the surface. I once saw a homeowner ruin a beautiful frieze carpet in six weeks because they had the vacuum set to ‘bare floor’ mode. They thought they were being extra thorough, but they were actually shredding the yarn. If you are working with best carpet types for high traffic areas in 2025, they are often engineered to hide soil, but that dense weave also traps loose fibers more effectively. You might need to make two slow passes rather than one fast one to really clear the deck.
Spotting When a Seam is Actually the Culprit
I have had clients call me back frantic about ‘extreme shedding’ in the middle of the room, only for me to find it was a localized issue. If the ‘fuzz’ is only appearing in a perfectly straight line, you are not looking at shedding—you are looking at a seam problem. This often happens if the carpet seam tape is showing through or if the installer used a dull blade. Unlike the random tumbleweeds of a staple fiber rug, seam shedding means the yarn is unraveling where it was cut. If you notice this, stop vacuuming that area immediately and check if your carpet seam peaks. That requires a professional re-stretch or a seam sealer application, not more vacuuming.
Wait for the Ninety Day Mark
Flooring is a game of patience. Most carpets will finish their ‘molting’ phase after about 15 to 20 thorough vacuuming sessions. Think of it as the ‘break-in’ period for a new pair of leather boots. If you have followed a proper step-by-step flooring installation plan, the integrity of the floor is solid. But if you are still filling vacuum canisters to the brim after 90 days of consistent care, that is when you need to pull out your warranty paperwork. By then, the loose ‘manufacturing dust’ should be long gone, leaving only the durable, locked-in fibers behind.After the shedding stops, many homeowners assume the hard part is over. But there is a hidden nuance to a step-by-step flooring installation that most DIYers—and even some local handymen—completely ignore. Everyone says that “tight is right” when it comes to carpet, but in my experience, over-tensioning with the wrong tools is exactly why your carpet is wrinkling two years after install.
Stop Relying on the Knee Kicker Alone
The biggest myth in the industry is that a knee kicker is sufficient for a full-room install. It is not. A knee kicker is for positioning and small tucks; a power stretcher is for the actual installation. The Carpet and Rug Institute (CRI) standards 104 and 105 are very clear: power stretching is a mandatory requirement for any professional carpet installation to prevent premature wear and ripples. If your installer shows up with only a small tool bag and no long-handled poles, send them home. You are paying for a floor that lasts a decade, not one that looks like a calm sea after the first summer humidity spike. I have seen beautiful, expensive weaves ruined by the knee kicker mistake that ruins new carpet because the internal backing was literally torn by improper, localized force. 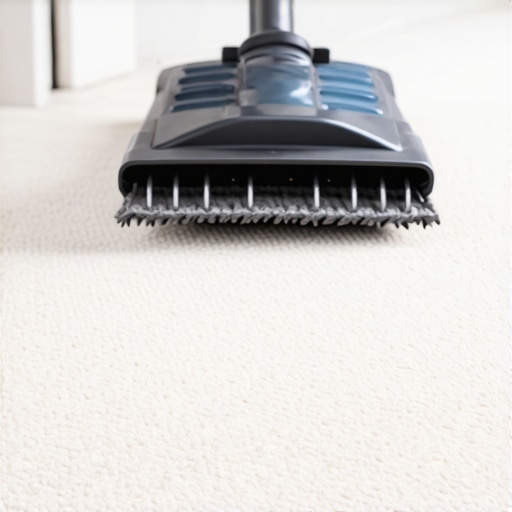
Why Your Baseboard Nails Are Actually Missing the Mark
While we are talking about the edges of the room, let us look at the “trap” of the bottom plate. Most people think nailing straight into the wall at the bottom is the safest bet for securing trim. However, knowing why you should never nail baseboards into the bottom plate only is a game-changer for long-term finish quality. When the house shifts—and it will—those nails can pull or cause the wood to split, leading to unsightly gaps. Instead, aim for the wall studs at a slight downward angle to create a mechanical lock. And for the love of aesthetics, use the back bevel secret for seamless baseboard corners to ensure those joints stay tight even if your drywall is not perfectly square.
Could your subfloor be the reason your carpet still feels ‘dusty’?
This is a question I get from frustrated clients who have been vacuuming for six months and still see a fine white residue. Sometimes, what you are seeing isn’t fiber—it is pulverized latex. This happens when the subfloor hasn’t been properly vetted for moisture or pH levels. If you didn’t perform the moisture meter test every flooring pro uses, rising vapor can break down the carpet’s secondary backing into a fine white powder. It looks like standard shedding, but it is actually the floor disintegrating from the bottom up. It is the ultimate “oops” factor that turns a routine renovation into a major structural repair.
Nuances of the Wet Zone
We cannot talk about floor integrity without mentioning the bathroom. Just like carpet needs the right tension, a shower needs the right foundation. I often see homeowners obsess over the tile patterns but ignore the mud bed secret for rock-solid shower floors. Without a proper slope and a solid mortar base, your expensive tile will eventually crack under the pressure of daily use. Have you ever fallen into the trap of thinking “good enough” was enough for your subfloor or your carpet tension? Let me know in the comments—let us troubleshoot your flooring nightmares together.I used to think my eye was good enough to freehand a baseboard cut, but I was wrong every single time. It wasn’t until I picked up a dedicated scribing tool that my joints stopped looking like a ‘before’ picture. If you want that high-end look, the scribing tool every diyer needs for tight baseboards is the only way to hug a wall that isn’t perfectly plumb. I personally use a brass-locking compass because plastic versions flex too much when you’re under pressure. This tool allows you to translate the weird dips in your drywall directly onto your trim, ensuring you never have to over-rely on caulk to hide gaps. When you are dealing with modern baseboard trends in 2025, which often favor flatter profiles, this precision becomes the difference between a DIY job and a pro-level finish.
How do I maintain my flooring and shower systems over time?
Maintenance isn’t just about cleaning; it’s about monitoring the mechanical health of the installation. For your carpets, that means checking the perimeter every six months for ‘slack.’ If you can lift the carpet with a light tug near the wall, it’s losing tension. I recommend keeping a log of when you last checked the power stretcher setting for plush pile carpets to ensure the backing hasn’t relaxed too far. In the shower, maintenance means looking for the first sign of a failing seal. If your grout looks ‘wet’ for hours after a shower, your sealer has likely reached the end of its life. Moving from a basic bathroom to creating a spa-like shower experience requires you to be proactive with a soft-bristle brush—never use steel wool, which can leave microscopic metal shards that rust inside your grout lines. 
Why Your Waterproofing Strategy Needs a Modern Liquid Upgrade
If you are still relying solely on a PVC liner tucked into a drain, you are essentially gambling with your subfloor. The industry is moving rapidly toward integrated systems where the waterproofing is applied directly under the tile. Following the liquid membrane rule for zero leak shower niches is non-negotiable for my projects now. According to the TCNA Handbook for Ceramic, Glass, and Stone Tile Installation, which is the gold standard for pros, liquid-applied membranes provide a continuous, seamless barrier that eliminates the structural weak spots found at corner folds of traditional sheet membranes. I predict that by 2027, we won’t even see traditional ‘buried’ pan liners on professional sites; everything will be a bonded, topical system that keeps the entire assembly dry.
Smart Tools for High Traffic Longevity
When I am maintaining the best carpet types for high traffic areas in 2025, I swear by a vacuum with a bypass motor and HEPA filtration. This prevents the manufacturing dust and broken staple fibers from being exhausted back into your room or clogging the motor. It is a heavier investment than a big-box store vacuum, but it protects the density of the weave. I want you to try this: next time you are at the hardware store, grab a scrap piece of luxury vinyl or a carpet sample and a small bottle of liquid waterproofing. Test how the materials bond and flex. Understanding the ‘feel’ of your materials is the first step toward a floor that lasts thirty years instead of three. Don’t just follow the box—test your tools before they touch your home.
Mistakes That Taught Me Everything About Flooring
After decades of getting my hands dirty, I have realized that the best floors aren’t just about the materials—they are about the respect you show the process. One of the biggest shifts in my career was moving away from the ‘good enough’ mindset. For instance, I used to think I could skip the deep dive into carpet install secrets and just wing it, but my first wrinkled living room proved me wrong. Now, I never start a job without a clear plan. Another lightbulb moment was realizing that patience is a tool just like a hammer; if you don’t wait for your step-by-step flooring installation to cure or settle correctly, you are just building on sand. Lastly, never underestimate the power of the right tool for the specific job. Using a knee kicker when you need a power stretcher is like using a spoon to dig a foundation—it might eventually work, but you will regret the results. Focusing on these carpet install secrets has saved me more headaches than I can count.
What I Keep in My Professional Tool Bag
If you are serious about achieving a pro-level finish, you need to look beyond the basic hammer and nails. For baseboards, I never leave home without a high-quality brass compass; it is the scribing tool every diyer needs for tight baseboards to ensure a gap-free fit against wonky walls. For shower projects, I have completely transitioned to using liquid waterproofing over traditional liners because the liquid membrane rule for zero leak shower niches is the only way to guarantee a moisture-proof seal. I also highly recommend picking up a copy of the TCNA Handbook; it is the industry bible for tile and stone. Finally, for those finishing touches on a carpet job, a reliable heat seam iron is non-negotiable for creating invisible transitions. These tools don’t just make the work easier; they ensure that when you are creating a spa-like shower experience, it stays beautiful for decades.
Believe in the Power of Your Own Two Hands
Stepping back and looking at a perfectly installed floor or a seamless baseboard run is one of the most rewarding feelings in home improvement. It turns a house into a sanctuary. Don’t be intimidated by the technical details or the temporary fuzz of a new carpet install; embrace the learning curve. Every pro was once a beginner who decided to try one more time. You have the ability to transform your space into something extraordinary. What is the one flooring hurdle you are facing right now that keeps you up at night? Let me know in the comments below!