

The sun is a carpet’s harshest critic. I remember sitting in my first ‘pro’ install—a gorgeous, south-facing sunroom—with my morning coffee. Under the dim shop lights the night before, that floor looked like a continuous field of plush velvet. But as soon as the clock hit 10:00 AM and the sunlight hit the floor at that low, punishing angle, my heart sank. A jagged, dark line slashed right through the center of the room. It looked like a scar. I’d followed the basic rules, or so I thought, but the light revealed every tiny sin I’d committed with the seam iron. It was a humbling moment that taught me that a ‘good’ seam isn’t just about sticking two pieces of fabric together; it’s about mastering the way light interacts with fiber and heat. [IMAGE_PLACEHOLDER]
The Daylight Test Always Wins
Most homeowners don’t realize that a seam can look invisible at night but look like a speed bump by noon. If you are struggling with a ‘peak’ or a visible tape line, you’re not alone. I’ve spent years figuring out carpet install secrets to avoid these heartbreaks. Whether you are dealing with a DIY gone wrong or a contractor who cut corners, we are going to look at why those seams are betraying you. I’ll never forget the time I used too much heat on a low-pile olefin. I thought I was getting a great bond, but I actually melted the backing slightly, creating a permanent ‘shiny’ line that no amount of grooming could fix. It’s one of those flooring installation mistakes that haunts you. Today, I’m going to show you how to spot the five biggest offenders before they ruin your living room’s aesthetic.
Is a 100% invisible seam even possible?
That’s the fear, isn’t it? That no matter what you do, you’ll always see the joint. According to the Carpet and Rug Institute (CRI), while no seam is technically ‘invisible,’ a professionally executed one should not be ‘apparent’ from a standing position under normal lighting. But ‘normal’ lighting doesn’t include the high-contrast glare of a sliding glass door. We’re aiming for the highest standard possible. If your carpet seam tape is showing through the face fibers, or if you’ve noticed why your carpet seam peaks every time the sun hits it, you know exactly the frustration I’m talking about. Have you ever stood in your doorway, looked at your new floor, and felt that immediate ‘uh-oh’ in your gut? Drop a comment or reach out—I’d love to hear if you’re battling the ‘sunlight scar’ right now.
Stop the Peak Before it Starts
One of the most common issues that the morning sun loves to highlight is ‘peaking.’ This happens when the tension of the carpet pulls the seam upward, creating a literal ridge. If you don’t use a power stretcher correctly, the internal forces of the carpet will fight against the seam tape. It’s like a tug-of-war where the floor loses.
Get the Edge Right or Fail Early
A perfect seam starts long before the iron even gets plugged in. If your edges aren’t crisp, no amount of glue will save you. I always use a row cutter to find the ‘valley’ between the tufts. If you try to freehand a cut with a utility knife, you’re basically gambling with your living room’s aesthetics. I remember a job in a high-end rental where I rushed the cut on a tight loop pile. Because I didn’t follow the row perfectly, the fibers on one side were slightly longer, creating a ‘shadow’ that made the seam look like a canyon. Now, I always perform a dry fit rule even for carpets to ensure the backing matches up perfectly before the tape touches the floor. This precision is what prevents the dreaded ‘fray’ later on.
Why Your Iron Temperature is a Liar
Most people think ‘the hotter, the better’ when it comes to seam tape. That’s a recipe for a shiny, melted mess. You want the adhesive to be molten, but never boiling. If you see smoke, you’re likely ruining the integrity of the carpet fibers. I keep my iron on a medium setting and move it slowly—about one foot every 60 seconds. If you’re dealing with a repair, sometimes the heat iron trick for reactivating old-seam tape is your only hope, but for new installs, it’s all about that consistent, steady glide. 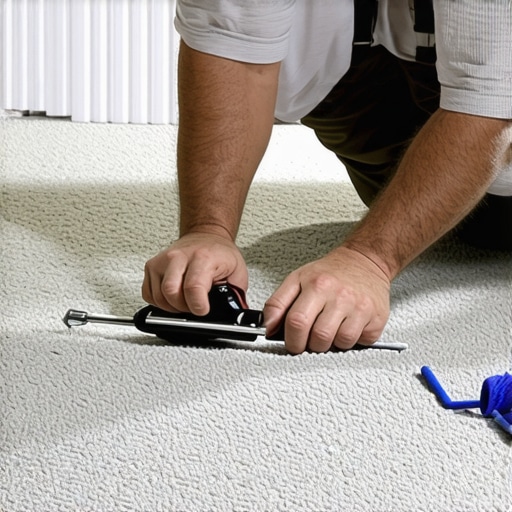
The Heavy Block Move
Once the iron passes, the work isn’t done. The adhesive is still hot and pliable. If you don’t compress it immediately, the carpet backing can lift, creating those annoying peaks. I use a professional seam weight—or in a pinch, a smooth piece of scrap wood—to hold the seam flat while it cools. This is one of those carpet install secrets that separates pros from amateurs. I once forgot my weights on a job and tried to use a stack of heavy books; the uneven pressure actually forced the glue into the face fibers, ruining the texture. Lesson learned: use a dedicated, flat weight to keep the joint flush.
Stretch Away the Peaks
After the seam is stone-cold, it’s time for the power stretcher. Many DIYers rely on a knee kicker, but that’s often the knee kicker mistake that ruins carpet tension. A power stretcher pulls the carpet toward the walls, taking the internal pressure off the seam itself. Think of it like a drumhead; if the tension is even across the whole room, the seam stays flat. If you only stretch from one side or use a kicker, you’re literally pulling the seam apart. For deeper carpets, make sure you adjust the power stretcher setting for plush pile carpets so the teeth don’t shred the yarn while you work.
Check the Subfloor One Last Time
Before the final tuck against the perfect baseboards, I always run my hand over the seam area. If I feel a bump, it might not be the carpet at all. It could be a staple or a bit of debris caught in the glue. This is why step-by-step flooring installation always includes an obsessive subfloor cleaning. I’ve seen beautiful seams ruined by a single stray nail underneath that only became visible once the carpet was tight.Let’s dig deeper into a practice that even some seasoned pros get wrong: the skipped sealer. There’s a pervasive myth that if you use high-quality seam tape, you don’t need a separate liquid sealer. In my experience, skipping this step is the single biggest reason for premature floor failure. Without sealing the edges, the primary and secondary backings are prone to delamination. I’ve seen countless flooring installation mistakes to avoid for a seamless look that started with a ‘dry’ edge. Over time, as people walk or vacuum, those edges fray and the seam starts to ‘open up,’ even if the tape underneath is holding strong.
The Sealing Myth That Costs You Thousands
Many installers believe that the heat from the iron is enough to melt the adhesive into the fibers and seal them. This is simply not true for most modern synthetic backings. According to the CRI 105 Residential Installation Standard, all seams must be sealed with an approved seam sealer to prevent yarn loss and delamination. If you’re working with best carpet types for high traffic areas in 2025, this is non-negotiable. A high-traffic hallway will tear an unsealed seam apart in six months. 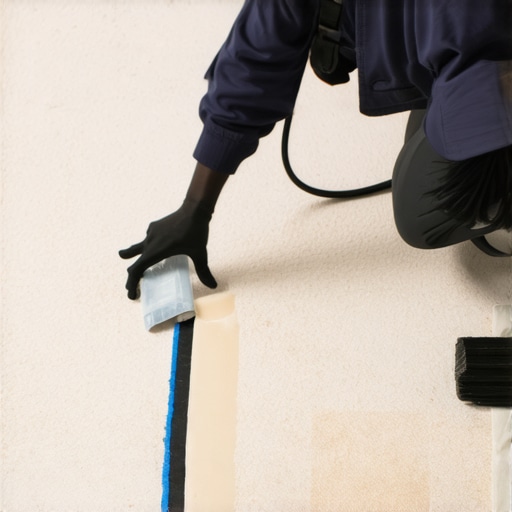
Why do some backings refuse to bond?
This is the advanced question I get from DIYers who ‘did everything right’ but still have a gap. Often, it’s a compatibility issue between the tape’s adhesive and the carpet’s backing material. For example, some polypropylene backings require a specific temperature range to ‘accept’ the glue. If you are struggling with how to fix a carpet seam that was cut too short, you already know the stress of trying to make pieces fit that just don’t want to.
Don’t Over-Groom Your Way into a Permanent Scar
Here is a contrarian view: I actually tell people to stop brushing the seam so much during installation. Everyone says to ‘blend the fibers,’ but if you over-manipulate the yarn while the glue is still warm, you risk pulling the pile into the adhesive. This creates a ‘valley’ that will never come out. Instead, rely on the row-by-row tactic for seaming patterned carpets to ensure the fibers are naturally aligned before they ever touch the iron.
The Tension Trap That Ruins Everything
One massive ‘oops’ factor is failing to balance the room’s tension. You need the perimeter tension trick for wrinkle-free carpets, but if you apply full power-stretcher pressure directly against a fresh seam, you’re asking for a blowout. You have to let the seam ‘set’ for at least 30 minutes. I’ve seen pros rush this and end up wondering why your carpet is wrinkling two years after install. It’s usually because the seam was compromised by premature stretching. Have you ever fallen into this trap of rushing the stretch? Let me know in the comments below.
Invest in a Stretcher That Actually Works
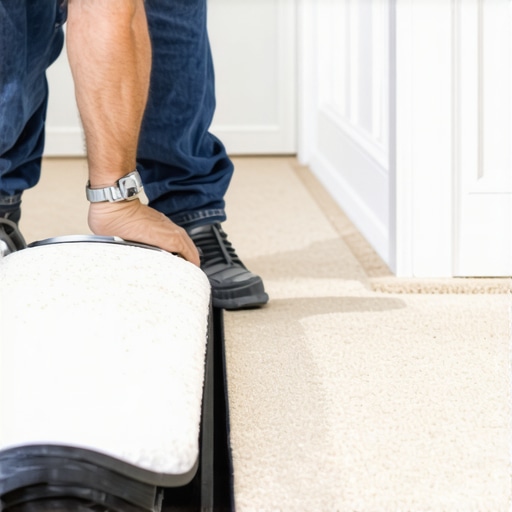
If you’re still relying solely on a knee kicker for anything larger than a closet, you’re essentially planning for failure. I personally use the Crain 800 Power Stretcher because the head articulation allows me to get into corners that cheaper models just can’t reach. It’s not just about the muscle; it’s about the leverage. When you are dialling in the power stretcher setting for plush pile carpets, you’re protecting the structural integrity of the backing. I’ve seen cheap tools literally rip the secondary backing off a high-end Shaw carpet. That’s an expensive mistake you don’t want to explain to a client. Beyond the stretcher, your iron maintenance is critical. I use a specific Teflon-coated iron shield to prevent any adhesive buildup from dragging across the next seam. If you don’t clean your iron after every single job, you’re basically dragging old, burnt glue into your new projects, which is one of those carpet install secrets the old-timers rarely share until you’ve already messed up a floor.
Don’t Let the Shedding Freak You Out
I get frantic calls all the time from homeowners who just spent five grand on a new install, only to find their vacuum bag full of fibers after the first week. Relax. If you’ve chosen the best carpet types for high traffic areas in 2025, especially staple-fiber products, some initial shedding is totally normal. It’s called ‘blooming.’ Knowing why your new carpet is shedding so much and when it will stop can save you a lot of anxiety. Usually, after three or four good vacuum cycles with a high-quality upright, the loose factory fibers will clear out. While you’re at it, keep an eye on your edges. A common oversight is neglecting the transition between the floor and your trim. A quick baseboards makeover can hide minor tucking imperfections and provide that crisp, high-end finish that makes the whole room pop. I always recommend learning how to choose the perfect baseboards for your home’s style before you even lay the first tack strip, as the height of the baseboard dictates how much ‘tuck’ space you really have.
How do I maintain professional tension over time?
The secret to a floor that doesn’t wrinkle in three years is climate control and proper cleaning. According to the ANSI/IICRC S100 Standard for Professional Cleaning of Textile Floor Coverings, maintaining a consistent indoor humidity between 30% and 50% is vital for preventing the latex in the carpet backing from becoming brittle or over-expanding. If you notice a furniture dent, don’t panic. You can often use the iron and towel trick for removing carpet dents to steam the fibers back to life. Looking forward, I predict we will see a massive shift toward fully recyclable, thermoplastic backings that are almost impervious to moisture-related stretching. For now, focus on the fundamentals. My challenge for you: the next time you finish a seam, give it a full 30 minutes to cool completely before you apply even an ounce of stretcher tension. It takes patience, but it’s the difference between a floor that lasts five years and one that lasts twenty.
The Secret to Perfect Tension That Pros Keep Quiet
Looking back at years of installs, the biggest lightbulb moment wasn’t about the heat of the iron, but the silence of the room after the job is done. I’ve learned that a seam is never truly finished until the house has ‘exhaled.’ If you rush to stretch the carpet before the adhesive has completely crystallized at a molecular level, you are essentially pulling a wet scab. I’ve seen countless flooring installation mistakes to avoid for a seamless look that could have been fixed by just waiting twenty more minutes.
Another hard-won insight: your fingers are more reliable than your eyes. I always run my hand against the grain across the joint. If I feel even a microscopic ‘catch,’ I know that sunlight will turn that catch into a shadow later. Mastering these carpet install secrets is what separates a floor that looks okay from one that looks like a single, continuous piece of velvet.
[IMAGE_PLACEHOLDER]
Tools That Save My Reputation on Every Install
I don’t believe in ‘budget’ tools when your reputation is on the line. My van is always stocked with a professional-grade power stretcher—specifically one with an adjustable head to handle different pile heights. Without this, achieving the right perimeter tension trick for wrinkle-free carpets is nearly impossible. I also never start a job without checking the compatibility of my seam tape with the carpet backing; modern synthetics can be finicky.
For the final touch, I always look at the transitions. A beautiful carpet deserves a beautiful frame, which is why I often suggest a baseboards makeover to my clients. Knowing how to choose the perfect baseboards for your home’s style ensures that the ‘tuck’ at the wall is as clean and crisp as the seams in the middle of the room. I trust these tools and methods because they’ve turned my most difficult ‘sunlight scar’ nightmares into glowing referrals.
Your Path to a Seamless Living Space
Mastering the craft of flooring is a journey of patience and precision. Don’t let a visible line today discourage you from the goal of a perfect install tomorrow. By following a disciplined step-by-step flooring installation and respecting the science of heat and tension, you’re not just laying carpet—you’re creating comfort. If you ever feel stuck, remember that even the most seasoned pros are still refining their carpet install secrets with every new project. Have you ever battled a carpet seam that just wouldn’t stay flat no matter what you tried? Let me know in the comments below—I’d love to help you troubleshoot your next project.