

I remember the first time I tackled a master bedroom install on my own. I was twenty-four, fueled by caffeine, and armed with a brand-new knee-kicker that I treated like a magic wand. I slammed my knee into that pad for three solid hours, convinced I was getting the tightest fit in town. Fast forward eighteen months, and that beautiful plush looked like a series of ocean waves rolling toward the ensuite. It was humiliating. I had to tell the homeowner that my so-called professional job was actually a ticking time bomb because I had relied on the wrong tool for the heavy lifting. I thought effort could replace engineering, and my bruised knee was the only thing I had to show for it.
Your Knees Aren’t Built for This Kind of Tension
Most DIYers and, let’s be honest, quite a few hurried pros make the mistake of using the knee-kicker as their primary stretching tool. It feels productive because you can see the carpet move and you certainly feel the physical toll. However, you aren’t actually achieving long-term tension; you’re just using the kicker move for tucking carpet into tight corners rather than truly stretching the backing across the room. If you don’t get this right, you’ll be searching for how to remove carpet dents or fix unsightly ripples far sooner than you should. Back when I started, I thought I could out-work the physics of carpet backing with pure grit. I was wrong. These days, I know that carpet install secrets aren’t about how hard you hit the tool, but which tool you choose to hit. I spent the early part of my career fixing flooring installation mistakes that were entirely preventable.
Is renting a power stretcher really worth the hassle?
It is the difference between a floor that stays flat for twenty years and one that fails in two. Many people fear the power stretcher is ‘overkill’ for a standard bedroom, but the reality is quite the opposite. In fact, according to the Carpet and Rug Institute (CRI) S104 residential installation standard, power stretching is a mandatory requirement to maintain most manufacturer warranties. Without it, you aren’t just risking ripples; you are literally voiding the protection on your investment.
The Plan to Get Your Tension Right the First Time
Today, we are going to break down why you need to put the kicker down the moment your carpet is hooked on the initial tack strip. We are going to dive into the perimeter tension trick for wrinkle-free carpets and finally explain why your carpet is wrinkling years after the install. Have you ever walked into a room and felt like the carpet was ‘floating’ or noticed a small wave forming near the heavy furniture? If so, you’ve seen the knee-kicker mistake in action. Let’s make sure it never happens to you again.
Hook Your First Wall Like a Pro
The process starts by choosing your anchor wall. This is usually the longest wall in the room, and it serves as the foundation for the entire install. You want to use your knee-kicker here, but only to set the initial teeth on the tack strip. I see people trying to stretch the whole room with just a kicker, and it’s like trying to tighten a guitar string with your bare hands; you might get a note, but it will never stay in tune. You need to hook the carpet onto the strip firmly across this first span. If you are handling a complex layout, following a step-by-step flooring installation guide ensures you do not miss these critical early anchors before moving to the heavy machinery.

Set the Teeth and Check Your Grip
Before you apply full pressure, you have to adjust the head of your power stretcher. If the teeth are too shallow, they will just scrape the fibers off the top of your carpet. If they are too deep, you will puncture the padding or even the subfloor. Finding the power stretcher setting for plush pile carpets is an art form. I remember a job in a high-end condo where I set the teeth too deep on a delicate Berber. Every time I pushed the lever, I heard a sickening crunch and realized I was chewing up the wood of the tack strip rather than pulling the carpet backing. I had to reset, dial back the depth, and start over. It was a classic example of how flooring installation mistakes can happen even when you have the right tool but the wrong calibration.
Drive the Tension Toward the Opposite Corner
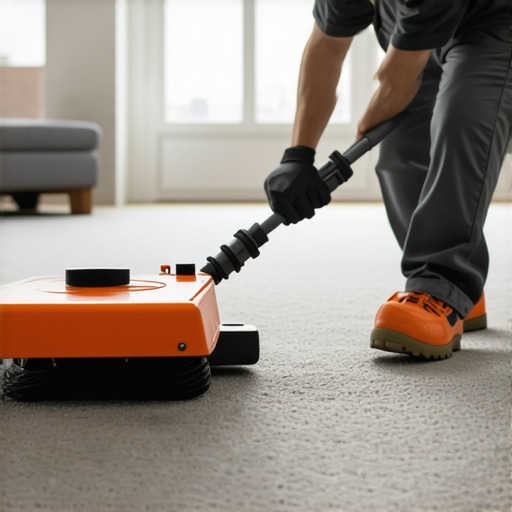
Now comes the actual stretch. You are not just pushing a tool; you are leveraging the entire length of the room. Assemble your extension poles so the foot of the stretcher is braced against the baseboard of the anchor wall. If you have not yet installed baseboard styles that elevate your interior design, use a scrap piece of 2×4 to protect the drywall from the pressure of the foot. Aim the head of the stretcher at about a 15-degree angle toward the far corner. When you lock that handle down, you should see the carpet grow. You will have an extra inch or two of material hanging over the tack strip. This is the perimeter tension trick for wrinkle-free carpets. You are creating a drum-tight surface that can withstand years of humidity and heavy foot traffic without shifting.
Master the Diagonal Sequence
Avoid the temptation to just go straight across the room. You need to work in a specific sequence: anchor the first wall, stretch to the adjacent wall, and then pull toward the far corner. It is a three-point system. If you skip the diagonal pull, you will almost certainly end up with a slack bubble in the middle of the room that eventually turns into a trip hazard. These carpet install secrets are what separate the pros who get referrals from those who get complaints. While you will still use the kicker move for tucking carpet into tight corners at the very end, the power stretcher does ninety percent of the structural work.
People often think that a tighter carpet is always a better carpet. In my early days, I’ve seen guys reef on a power stretcher until the tack strip literally pulls out of the floor. They think they’re being thorough, but in reality, they’re committing one of the most common flooring installation mistakes to avoid for a seamless look. Over-stretching is just as dangerous as under-stretching. When you exceed the manufacturer’s recommended stretch—usually between 1% and 1.5%—you risk delamination, where the primary and secondary backings actually separate. Once that structural bond breaks, your carpet will never lay flat again, and no amount of re-stretching will save a compromised backing. It is a permanent injury to the textile.
The Temperature Trap That Creates Ghost Ripples
There is also the infamous ‘cold carpet’ trap that catches even seasoned pros. I once handled a basement job in the dead of winter. I brought the roll in from my frozen van and started stretching immediately because I was behind schedule. By that evening, as the house heat finally soaked into the fibers, the carpet relaxed and went completely limp. If you don’t allow for a proper 24-hour acclimatization period, you’re basically guessing at the tension. This is one of those carpet install secrets that separates the veterans from the ‘get-it-done-now’ crowd. It isn’t just about the air; it’s about the subfloor. If the room is humid or the slab is damp, the backing reacts differently. This is why your subfloor needs a 48-hour moisture test first even if you aren’t laying down vinyl. Moisture affects the elasticity of the latex used in carpet backings, and ignoring it is a recipe for a callback.
Can you actually destroy a carpet by stretching it too much?
Absolutely. According to the Carpet and Rug Institute (CRI), excessive force can cause ‘structural failure’ of the backing material. This isn’t just about ripples; it’s about the integrity of the weave. If you see the pattern starting to distort or bow significantly, you’ve gone too far. You want a firm, drum-like feel, not a bowstring ready to snap. I also see people forget about the details around the transitions. If you’re moving from a hallway into a bathroom, the best way to transition hardwood to a tiled shower or carpet to tile requires a different level of precision. If the carpet isn’t tucked perfectly using the kicker move for tucking carpet into tight corners, the long-term tension from the power stretcher will eventually pull the edges right out of the transition strip.
Why the Wrong Tack Strip Ruins the Right Stretch
Another nuance is the hardware itself. Using the wrong strip for the wrong floor is a disaster waiting to happen. If you’re on a slab, choosing the right tack strip for concrete subfloors is non-negotiable. Regular wood nails won’t hold under the thousands of pounds of pressure a power stretcher exerts. If that strip moves even a fraction of an inch, your tension is gone. It’s these tiny, invisible details that explain why your carpet is wrinkling two years after install. You might leave the job looking perfect, but the moment the seasons change and the house settles, those shortcuts come back to haunt you. Have you ever fallen into this ‘more tension is better’ trap? Let me know in the comments.
The Scribing Tool That Saved My Reputation
I used to think a tape measure and a prayer were enough to get tight joints on a baseboard install. Then I worked on an 1890s Victorian where not a single wall was plumb and the plaster had more curves than a mountain road. That is when I realized that the scribing tool every diyer needs for tight baseboards is the only way to handle real-world wonky walls. If you are aiming for a serious baseboards makeover, don’t just cut at a flat 45 degrees and hope the caulk hides your sins. You need to map the floor’s actual profile onto the wood. I carry a heavy-duty metal compass with a locking nut in my vest at all times; it is far more reliable than those plastic contour gauges that lose their shape the moment you bump them. By physically tracing the wall’s imperfections onto the back of your trim, you create a custom fit that looks like the wood grew right out of the drywall.
How do I keep my bathroom and floors looking new?
Maintenance is where most people drop the ball. You spend thousands on a durable flooring installation only to let it degrade because of bad cleaning habits or ignored structural shifts. For showers, the biggest enemy isn’t actually the water; it is the lack of flexibility. According to the TCNA (Tile Council of North America) Handbook, specifically Method EJ171, movement joints are absolutely mandatory in every tile installation to prevent tenting, cracking, or catastrophic grout failure. If you ignore these expansion gaps, you’ll be researching shower repairs much sooner than anticipated. For your baseboards, pay close attention to the seasonal humidity shifts. If you notice hairline gaps appearing, take the time to understand why your baseboard caulk is cracking before you just slap more silicone over the old bead. You often need a high-stretch flexible filler that can handle the micro-movements of your home’s framing without pulling away from the wall.
The Future of Intelligent Flooring Systems
In the next few years, I expect we will see a massive shift toward ‘smart’ subfloors and integrated moisture detection. We are already seeing the early stages of sensors that can be embedded during a step-by-step flooring installation, capable of alerting your phone to a slow leak behind a shower niche before you ever see a damp spot. Until that tech becomes the standard, we rely on manual vigilance and the right chemistry. Knowing how to deep clean sanded grout without scuffing tile will extend the aesthetic life of your bathroom by at least a decade. My biggest piece of advice for any homeowner is to stop treating maintenance as a reactive chore. Next time you’re facing a tricky corner or a joint that just won’t close, give the back bevel secret for seamless baseboard corners a shot. It is an advanced technique that takes ten extra seconds at the saw but makes your work look like it was done by a master craftsman. Start building for the next thirty years, not just the next thirty days.
The Costly Truth About Skipping the Power Stretcher
The hardest lesson I ever learned was that speed is the enemy of a lifetime floor. I spent years chasing the clock, thinking that if it looked good at 5:00 PM on Friday, it was a success. But a real carpet install secret is that the floor’s integrity is invisible on day one; it only shows up on day seven hundred. I finally understood that the knee-kicker mistake that ruins new carpet isn’t just a technical error—it’s a mindset of taking shortcuts that eventually catch up to you. Once I started treating every room like it was my own house, my callbacks dropped to zero. Remember that tension is your best friend or your worst enemy; respect the physics of the backing, and the carpet will respect your feet for twenty years.
The Tools That Rescued My Projects and My Back
If you’re serious about taking your work to the next level, there are three items I never leave the truck without. First, a heavy-duty power stretcher with adjustable teeth—rent one if you have to, but do not skip it. Second, the scribing tool every diyer needs for tight baseboards is non-negotiable because walls are never as straight as we want them to be. Finally, I always refer back to a durable flooring installation guide whenever I’m dealing with a new material or a tricky climate. These aren’t just gadgets; they are the bridge between a ‘DIY look’ and a ‘master craftsman finish’ that adds real value to your property.
Building a Floor That Tells a Story of Quality
You have the knowledge now to avoid the ripples, the gaps, and the squeaks that plague most home renovations. Don’t be afraid to take that extra hour to calibrate your tools or test the moisture in the subfloor. When you follow expert flooring installation tips for 2025, you aren’t just laying down material; you’re creating the foundation for your family’s daily life. Go ahead and start that next project with the confidence that you are doing it the right way from the very first tack. Have you ever noticed a ripple in your carpet and wondered if it was the installer’s fault or just the weather? Let me know your flooring stories in the comments below!