

I remember the exact moment I smelled that distinct, acrid scent of singed nylon. I had been working in the guest room when a hot tool slipped, and before I could even blink, there it was: a crisp, black crater right in the middle of the floor. My heart sank. I’ve spent years helping folks with choosing the right carpet for a cozy living space, yet here I was, staring at a self-inflicted disaster. For a second, I thought the only option was to move a heavy piece of furniture over it or shell out hundreds for a professional patch. But then I remembered a trick an old flooring pro taught me decades ago. It’s a method that requires almost no money, just a steady hand and a pair of tweezers.
Your Carpet Isn’t Ruined Just Because of One Little Mistake
Trust me, I know that feeling of dread when you see a burn mark. Whether it’s from a cigarette, a stray coal, or an iron, that little black spot looks like it’s a mile wide. But before you start looking up the best carpet types for high-traffic areas in 2025 to replace the whole room, let’s breathe. We are going to perform a little ‘carpet surgery’ today. The goal is simple: we’re going to remove the dead, charred fibers and transplant healthy ones from a hidden corner of your closet. I made the mistake early on in my DIY journey of trying to just ‘scrub’ the burn away. Bad idea. All that does is fray the surrounding fibers and make the spot bigger. If you’ve ever looked at a carpet install secrets guide, you know that tension and fiber direction are everything. The same applies to a tiny patch. We’re not just throwing glue at a problem; we’re matching the ‘grain’ of the rug to make it disappear.
Can You Really Hide a Burn Without It Looking Like a Patch Job?
This is the question I get most often from skeptical neighbors. If you do it right, the answer is a resounding yes. According to the Institute of Inspection, Cleaning and Restoration Certification (IICRC), most synthetic carpets have a melting point between 450 and 500 degrees Fahrenheit, which is why these burns happen so fast—but because the damage is often localized to the tips of the fibers, it’s surprisingly fixable. Have you ever stared at a spot on your floor and felt like the whole room was ruined? I’ve been there, and I promise you, this tweezers-and-glue strategy is the secret weapon you need. We’re going to take those tweezers and meticulously clear out the damage, then use a tiny dab of adhesive to secure new fibers. It’s about patience, not power. If you’ve ever had to deal with how to repair a cigarette burn in new carpet, you know the stakes are high, but the payoff of a seamless floor is worth the effort. It’s much like the precision needed for the row-by-row tactic for seaming patterned carpets. You have to respect the pattern. When I first tried this, I used way too much glue—it turned into a hard, crunchy lump that felt like a pebble underfoot. I learned the hard way that less is definitely more. Now, let’s get our tools ready and save that rug.
Clear the Char Without Making the Hole Bigger
The first rule of carpet surgery is to stop the spread. You need to grab a pair of sharp nail scissors—the kind with the curved tip works best—and meticulously snip away the blackened, melted plastic. If you pull at the fibers, you risk damaging the primary backing, which is a nightmare to fix. Just like following a step-by-step flooring installation guide, the prep work determines the final look. Think of this part like weeding a garden; you only want to remove what is dead. Keep your cuts shallow. If the burn goes deep into the backing, you aren’t just replacing fibers; you’re filling a structural gap. I once rushed this on a rental property, tried to just ‘brush’ the char out with a wire brush, and ended up with a bald spot three times the size of the original cigarette burn. Take your time and only remove the toasted bits until you see the clean, uncolored base of the carpet tuft.
Where to Harvest the Perfect Donor Fibers
Now that you have a clean ‘crater,’ you need material to fill it. Most people think they need a matching remnant, but you likely have a goldmine of fibers hidden in plain sight. Head to the back corner of your master closet or under the baseboards in a utility room. Using your scissors, gently shave a small handful of fibers from the carpet surface. You aren’t cutting the backing here; you’re just ‘giving the carpet a haircut.’ This ensures the color and dye lot match perfectly, which is the biggest hurdle in how to repair a cigarette burn in new carpet projects. If you take the fibers from different spots, the repair will be less noticeable because you aren’t leaving one single bald patch in the closet. Collect enough to fill the hole plus about twenty percent extra, as some will inevitably be lost during the bonding process.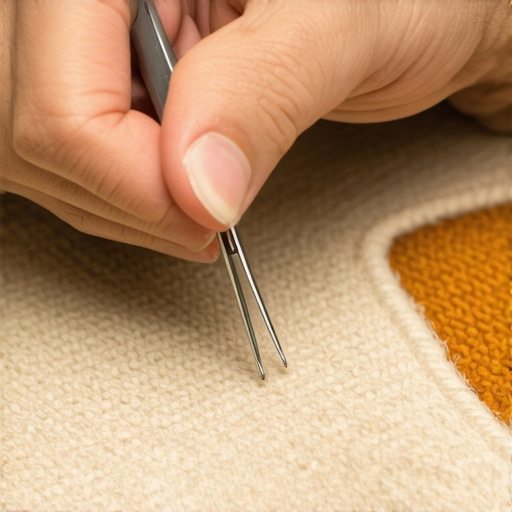
Bond the New Fibers Without Creating a Hard Lump
The most common mistake I see is using too much adhesive. If you saturate the area, it dries into a rock-hard plastic scab that’s painful to walk on. I’ll never forget my first ‘surgical’ repair on a high-pile rug in my hallway. I thought I could just use a massive glob of clear craft glue and call it a day. The next morning, it felt like I was walking on a sharp pebble. I ended up having to cut the whole hardened mess out and start over. That taught me that the secret isn’t more glue; it’s the right placement. You want to use a tiny drop of clear-drying waterproof adhesive or a specialized carpet glue, similar to the stay-put glue strategy for carpet on stairs. Apply the glue to the base of the hole, not the fibers themselves. Use a toothpick to spread a thin layer. Then, using your tweezers, take your donor fibers and press them into the glue, standing them upright to match the surrounding pile.
Blending the Patch for a Seamless Finish
Once the fibers are in place, don’t touch them for at least an hour. Once the glue is tacky but not fully set, take a wide-tooth comb or your fingertips and very gently ‘massage’ the area. You want the new fibers to mingle with the old ones. This is a lot like carpet install secrets for small-scale fixes; it’s all about hiding the transition point. If the new fibers are standing too tall, give them a micro-trim to level them with the rest of the floor. This prevents the repair from catching the light differently, which is often why your carpet seam peaks and how to flatten it becomes a visible issue in larger installs. Finally, place a heavy book over the spot for 24 hours to ensure the bond is permanent and the height is uniform.While we’re talking about precision, I have to debunk a huge myth I see in almost every DIY forum: the idea that a knee kicker is all you need for a full room install. Everyone says, ‘I got it tight with the kicker,’ but in my experience, that’s exactly why your carpet is wrinkling two years after install. A knee kicker is designed for positioning and small-scale adjustments, not for providing the structural tension a large room requires. According to the Carpet and Rug Institute’s (CRI) 105 standard for residential carpet installation, the use of a power stretcher is mandatory to prevent ripples and premature wear. If you skip it, you aren’t actually stretching the carpet; you’re just shifting the slack until it eventually bunches up near your baseboards makeover. This leads to the ‘Oops’ factor that ruins more floors than actual spills: the luxury padding trap. I’ve seen homeowners spend a fortune on the best carpet types for high-traffic areas in 2025 only to pair them with a 1/2-inch, ultra-soft foam pad. It feels like walking on a cloud for a week, but it creates too much ‘vertical travel’ for the carpet backing. That constant up-and-down movement eventually snaps the latex bonds in the backing, causing delamination. It’s one of those flooring installation mistakes to avoid that many don’t realize until the warranty is already voided. 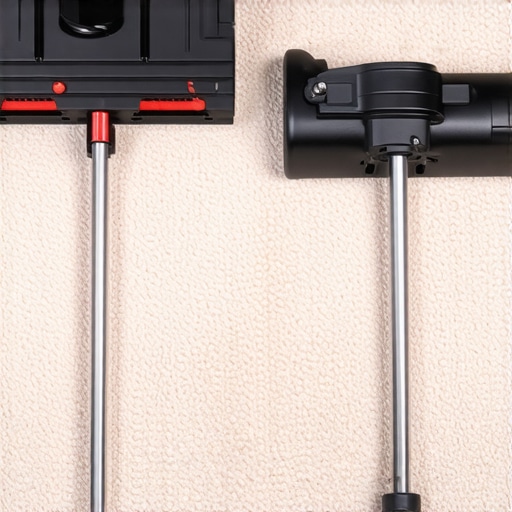
Wait, Is My New Carpet Actually Shedding Too Much?
If you’ve just finished an install or a large-scale repair and see ‘fuzz’ everywhere, don’t panic. This is often a result of staple fibers—short bits of yarn that didn’t quite make it into the primary backing during manufacturing. You can learn more about why your new carpet is shedding so much and when it will stop, but generally, it’s a temporary nuisance, not a defect. However, if the shedding happens in localized patches after a repair, you might have been too aggressive with your trimming or used the wrong blade. It’s about finding the balance between a clean finish and preserving the structural integrity of the tufts. Another nuance involves the transition to other surfaces; for instance, understanding the best way to transition hardwood to a tiled shower requires the same level of height-matching logic we used for our carpet patch. Have you ever fallen into this trap or accidentally over-stretched a seam during a DIY project? Let me know in the comments.I’ve spent way too much money on rookie mistakes to not mention my favorite piece of gear. If you are doing any kind of hard surface, you need a moisture meter. I’m not talking about the cheap ones that just beep; I mean a pinless unit that gives you real data. I remember a project where I ignored the slab’s humidity, and three months later, the vinyl plank floor was buckling at the windows. It was a $2,000 lesson. Now, the moisture meter test every flooring pro uses is my first step, every single time. It’s about insurance. Whether you are following a guide to durable flooring installation or just doing a quick patch, knowing what’s happening under the surface is the only way to avoid a total redo. 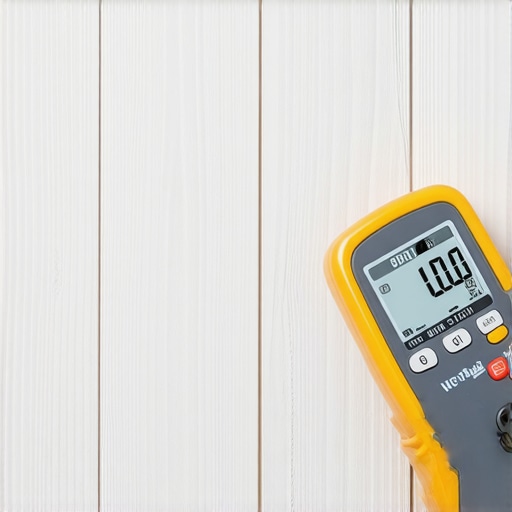
Stop doorway gaps before they happen
I also never tackle a transition without my undercut saw. If you’ve ever struggled to get a plank to sit flush under a door frame, you know the frustration. Using the undercut saw secret for professional doorway transitions is what separates a DIY job from a master install. It prevents those ugly gaps that you’d otherwise have to hide with a pile of caulk. I’ve found that using the painters tape trick for splinter-free baseboard cuts alongside a sharp blade makes the finish work on baseboard styles that elevate your interior design look like it was done by a custom millwork shop. It is that extra ten percent of effort that stops people in their tracks when they walk into the room.
How can I make my flooring and trim last for the long haul?
Maintenance isn’t just about vacuuming. It’s about the ‘seal and flex’ strategy. For showers, the Tile Council of North America (TCNA) Handbook specifies that movement joints (caulk, not grout) are required at all changes in plane and where tile meets a different material. If you ignore this, you’ll see cracks within a year. Use the toothbrush trick for cleaning stubborn shower grout to keep things pristine, but don’t forget the baseboards. I’ve seen beautiful homes ruined by baseboard caulk cracking. The fix is always a high-stretch, flexible filler. If you’re worried about future issues, keep an eye on shower repairs: when to fix vs replace. Looking ahead, I suspect we are going to see a massive shift toward smart flooring. We’re already seeing under-floor sensors that can detect a leak from a dishwasher before it reaches your ice maker leak recovery point. In five years, your baseboards might even have integrated LED pathways that sync with your phone. But for now, the best tech you have is a steady hand and the right materials. Go ahead and grab a tube of high-flex caulk this weekend and hit those gaps in your bathroom—it’s the smallest change that makes the biggest difference.
What I Learned the Hard Way About Invisible Carpet Repairs
After years of fixing these little disasters, I’ve realized that a truly ‘invisible’ repair is 90% about light and 10% about glue. If you don’t match the natural nap of the carpet, the patch will always look dark from one angle and light from another. I always tell my friends to look at the ‘flow’ of the fibers before even touching the adhesive. It’s the same logic used in carpet install secrets for hiding seams—you have to break up the artificial line created by the repair.
Another big lightbulb moment for me was realizing that ‘shaving’ the donor fibers from the closet needs to be a distributed effort. If you take too much from one square inch, you’re just moving the bald spot to another room. Spread your harvest out across the very back of the closet where nobody looks. Also, remember that synthetic fibers melt into hard beads, while wool chars like wood. This changes how you snip; for synthetics, you’re often cutting away a hard plastic lump that requires extra care to avoid damaging the backing.
The Tiny Toolkit That Saves Me Hundreds on Flooring Fixes
I don’t go into any flooring job without a specific set of gear that has earned my trust through sheer reliability. First is a pair of curved-tip nail scissors; their shape allows you to get flush with the backing without gouging it. For anything moisture-related, the moisture meter test every flooring pro uses is non-negotiable to avoid future buckling or mold issues behind your trim.
If you’re moving beyond small repairs to a full room, please don’t rely on a knee kicker alone; it’s the fastest way to get wrinkles in a year or two. And for your finishes, keep an eye on baseboard trends in 2025 to ensure your trim matches the quality of your restored floor. I personally swear by a specialized high-flex filler for those tricky gaps between the trim and the wall—it prevents that annoying hairline cracking that ruins a clean look.
Stop Worrying About the Damage and Start Your Restoration
It is incredibly empowering to take a ‘ruined’ floor and make it look brand new with nothing but a few scraps and some patience. You don’t always need to call in a professional for how to repair a cigarette burn in new carpet when you have the right technique and a steady hand. Most home improvement projects feel daunting until you take that first snip, but your home is a work in progress, and every small fix is a win. If you’re looking to tackle the bathroom next, don’t miss this ultimate shower renovation guide for your next big project. Have you ever tried to ‘shave’ your carpet for a repair, or did you accidentally create a bigger bald spot like I did? Let me know in the comments below!