

I’ll never forget the sound. It was a dull, sliding thwack followed by my own undignified scramble to grab the handrail. My “perfectly” installed carpet had shifted a full two inches on the third tread down. I wasn’t hurt, but my pride was bruised, and I realized that my reliance on traditional methods was a gamble I was losing. If you’ve ever felt that sickening “give” under your heel while carrying a laundry basket, you know exactly what I’m talking about. We often think that a few tack strips and some staples are enough to fight gravity and the constant friction of foot traffic, but stairs are a different beast entirely. It was that specific failure that led me to develop a method I now swear by: the ‘Stay-Put’ glue strategy.
The Safety Gap You’re Probably Ignoring
Stairs are high-velocity zones. Every time you step down, you’re applying a massive amount of forward and downward force that standard carpet install secrets sometimes overlook. It’s not just about aesthetics; it’s about making sure your home doesn’t have a built-in booby trap for your family. According to the American Journal of Emergency Medicine, more than one million people are treated in emergency departments for stair-related injuries each year. Many of those involve loose or poorly secured floor coverings. When I first started out, I made a massive mistake: I thought if I just used a heavier hand with the staples, the carpet would stay. Instead, I ended up with a staircase that looked like it had been through a staple-gun war, and the carpet still puckered after six months. I eventually realized that you can’t just pin the carpet down; you have to bond it to the structure.
Will this glue make it impossible to replace the carpet later?
This is the first thing everyone asks me. Nobody wants to be chiseling dried adhesive off their beautiful oak treads for three days straight when they want a style change. But here’s the reality: the ‘Stay-Put’ strategy isn’t about drenching your stairs in epoxy. It’s about a strategic, surgical application of pressure-sensitive adhesive that holds firm under lateral force but releases when you’re ready for a change. It’s the middle ground between a loose rug and a permanent weld. We’re going to combine this with a proper power tuck move to create a finish that looks like a professional did it—because, by the time we’re done, you’ll have the same results.
Why Mechanical Fasteners Alone Fail on Stairs
If you’ve spent any time looking at high-traffic carpet types, you know they are built to be tough and rigid. But that toughness makes them heavy and less prone to conforming to the sharp angles of a stair nosing. When you use a knee-kicker, it’s easy to accidentally ruin your carpet’s tension if you aren’t careful, especially on those tricky turns. Tack strips are great for flat rooms, but on a tread, the carpet is constantly being pulled away from the riser. My glue-assist method uses a thin bead of specialized adhesive along the crotch of the stair and the nose to ensure that even if the humidity changes or the kids decide to run a marathon up and down the steps, that fabric stays put. Have you ever felt your carpet “creep” toward the edge of a step? It’s a common frustration, and I want to hear your experience with it before we dive into the step-by-step fix. Let’s look at the specific tools you’ll need to finally win the war against loose stair treads.
The Precision of the Pressure-Sensitive Bond
You aren’t just slapping some glue on wood and hoping for the best. To win the war against shifting treads, you need a pressure-sensitive adhesive (PSA). Think of PSA as the high-stakes version of a sticky note; it stays tacky forever, allowing the carpet to grab hold of the wood without becoming a permanent, brittle mess. When you begin your step-by-step flooring installation, the goal is to create a friction-lock. Unlike standard wood glues that dry hard and eventually crack under the vibration of footsteps, a specialized carpet adhesive absorbs that energy. It’s like the difference between a rigid glass pane and a rubber gasket. You want that gasket-like flexibility to handle the weight of a grown adult pivoting on the ball of their foot at the edge of a step. 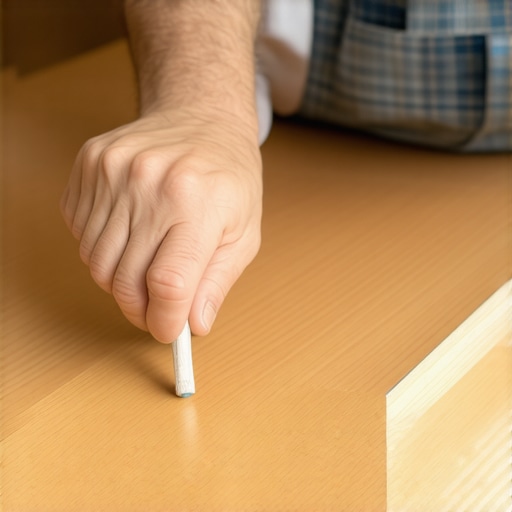
A Messy Lesson in Choosing the Wrong Adhesive
I learned this the hard way about eight years ago. I ran out of my usual PSA and decided, in a moment of sheer laziness, to use a construction adhesive I had sitting in the truck. It seemed strong—it held the subfloor down, right? Six months later, the homeowner called me back. Every time they stepped on the fourth tread, it sounded like they were walking on a bag of potato chips. The glue had dried into a hard, crystalline ridge that the carpet backing was rubbing against. It was a loud, crunchy failure. I had to rip up the whole flight, scrape the treads bare, and start over. That’s why I tell everyone: use the right chemicals or don’t use them at all. This is one of those flooring installation mistakes to avoid for a seamless look and a quiet home.
Execute the Perfect Stay-Put Application
Before the first drop of glue touches the tread, you must prep the surface. Dust is the ultimate bond-killer. If you leave sawdust from your baseboard corner cuts on the stairs, the glue will stick to the dust, not the wood. I always vacuum twice and wipe down with a damp tack cloth. Once the surface is pristine, apply a thin, 1/8-inch bead of adhesive exactly two inches back from the stair nose and another bead directly in the ‘crotch’—the 90-degree angle where the tread meets the riser. These are the two zones where the carpet experiences the most ‘creep.’
Secure the Crotch and the Nose
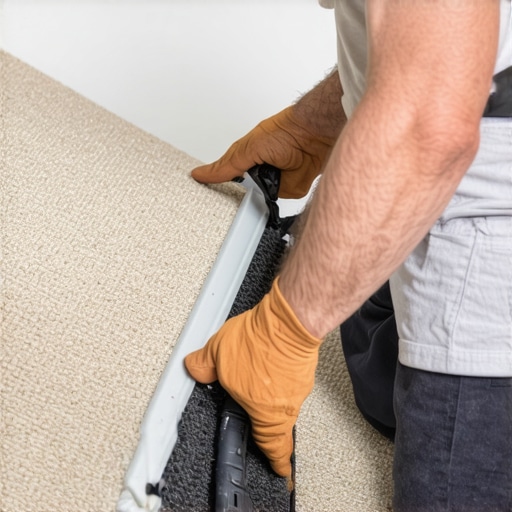
Wait for the adhesive to flash off. It should go from a milky white to a clear, translucent state. If you press the carpet into wet glue, it might soak through the primary backing and ruin the pile. Once it’s tacky, bring your carpet down. This is where you avoid the common knee-kicker mistake that ruins new carpet by using your hands to firmly mold the material over the nose first. You want that adhesive to grab the ‘face’ of the nose to prevent that rounded edge from ever sliding forward. After the nose is set, you can focus on mastering the power tuck move to drive the carpet into the junction. By combining the mechanical hold of the tack strip with the lateral stability of the glue, you’re creating a multi-layered defense system that most carpet install secrets guides simply don’t mention because it takes an extra ten minutes. Those ten minutes are what keep your carpet from wrinkling two years down the road.
Everyone tells you that tack strips are the backbone of a solid installation. In my experience, relying solely on them is a recipe for a callback. While they are essential for horizontal tension, they do nothing to combat the vertical ‘lifting’ that happens when someone’s weight hits the tread at an angle. I’ve seen countless DIYers—and even some pros—load up the stair crotch with three times the necessary amount of staples, thinking they are adding security. In reality, they are just perforating the latex backing of the carpet, which is exactly why your new carpet is shedding so much. Instead of structural integrity, they’ve created a perforated line that will eventually tear under heavy use.
Why More Staples Usually Means More Problems
The ‘Oops’ factor here is subtle: the more you staple, the more you compress the pile, creating permanent ‘dimples’ that act as dirt traps. These spots wear out faster because they can’t be reached by a vacuum’s beater bar. According to the Carpet and Rug Institute (CRI 105) standards, proper installation requires consistent tension across the entire width of the piece, not localized ‘pinning.’ When you over-staple, you create uneven tension zones that lead to those annoying ripples. If you find yourself in this situation, you might need to learn how to fix a bubbling carpet before the wrinkles become permanent folds. Have you ever fallen into this trap of thinking ‘one more staple’ would solve a loose fit? Let me know in the comments.
Can you skip the glue when working with patterned or commercial grades?
I get this question from guys who are used to the ‘stretch-in’ method for bedrooms. On stairs, patterned carpets are a nightmare because any slight shift in the tread makes the pattern look crooked. This is where the row-by-row tactic for seaming patterned carpets becomes your best friend. Without a glue assist, the natural stretch of the fabric will eventually pull the pattern out of alignment. If you’re working on concrete, don’t just grab standard strips; you must be choosing the right tack strip for concrete subfloors to avoid the pins popping out entirely under the stress of foot traffic.
The Critical Connection Between Carpet and Baseboards
The mistake that separates an amateur from a pro happens at the very end: the transition to the trim. Most people focus so much on the stairs that they neglect how the carpet meets the baseboards. I’ve seen people try to hide a bad cut by nailing the trim tighter against the floor, but you should never nail baseboards into the bottom plate only, as this doesn’t allow for the natural expansion of the subfloor and can actually pinch the carpet, causing it to pull away from the wall. This is a classic example of flooring installation mistakes to avoid if you want a finish that stays flush for years. By understanding these high-level nuances—the chemistry of the bond, the physics of tension, and the geometry of the trim—you aren’t just laying carpet; you’re engineering a staircase that will outlast the house itself.
The professional’s toolkit is where the real magic happens, and if you’re still relying on that $40 knee-kicker for a full flight of stairs or a living room, you’re setting yourself up for a workout that yields mediocre results. I personally never step onto a job site without my senior power stretcher. While a kicker is fine for a quick ‘power tuck’ in a corner, the power stretcher is what ensures your floor doesn’t look like a topographical map of the Andes in eighteen months. When you dial in the right power stretcher setting for plush pile carpets, you’re applying thousands of pounds of tension that human muscle simply can’t replicate. This is the difference between a carpet that lasts fifteen years and one that needs a professional bubbling fix by the second Christmas. 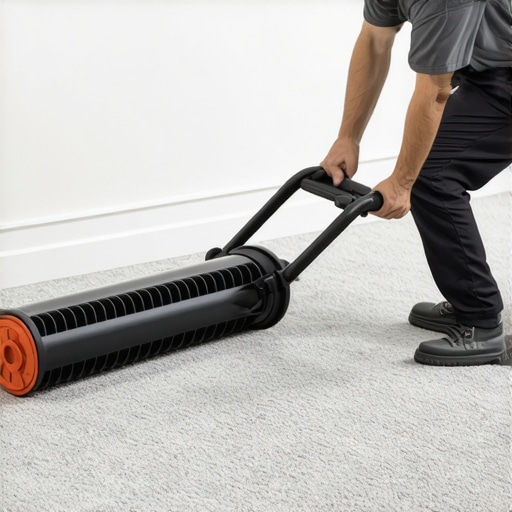
How do I maintain my new flooring and trim over the long haul?
Maintenance is the part of the personal flooring journey that most people skip because it isn’t as ‘Instagrammable’ as the final reveal. But if you want your best carpet types for high-traffic areas to actually survive 2025, you need a rigid schedule. According to the IICRC S100 Standard for Professional Cleaning of Textile Floor Coverings, you should be deep cleaning via hot water extraction every 12 to 18 months, even if the surface looks pristine. For the edges where the carpet meets the wood, I use a modified version of the toothbrush trick for cleaning stubborn areas—it’s not just for shower grout; it’s the only way to get the fine dust out of the crevice between your carpet and your baseboard makeover without damaging the paint. If you notice the pile starting to lean or ‘crush’ in certain spots, a quick pass with a carpet rake can redistribute the fibers and prevent that permanent ‘pathway’ look that kills resale value.
Moving Toward a Future of Integrated Flooring Tech
Looking at the horizon, I see a massive shift toward ‘smart’ subfloors and integrated moisture sensors. We are rapidly moving away from the days of guessing if a concrete slab is truly dry enough for a glue-down application. I already use a pinless moisture meter on every single step-by-step flooring installation, but soon, these sensors will be embedded directly into the underlayment. The major trend for 2025 is ‘hybrid’ resilience—carpets that have the waterproof backing of luxury vinyl. This makes the carpet install secrets we discuss today even more vital because these rigid-backed materials are much less forgiving of poor tension or improper layout. Try this right now: Go to your stairs and try to pinch the carpet in the center of a tread. If you can grab more than a half-inch of loose fabric between your fingers, your tension is failing. Grab a power stretcher and reset the perimeter before the backing stretches beyond the point of no return.
The Real Reason Your First Stair Job Might Fail
I’ve spent two decades on my knees stretching fabric, and the biggest lesson isn’t about the tool—it’s about the patience. Most beginners rush the ‘flash-off’ time for the adhesive. They see the glue is down and want to kick the carpet into place immediately. If you don’t wait for that PSA to turn clear, you’re essentially lubricating the carpet rather than bonding it. Another lightbulb moment for me was realizing that carpet install secrets aren’t just about the floor itself, but how you treat the subfloor. A tiny bit of moisture can ruin the best glue bond in the world, which is why I never skip the moisture meter test every flooring pro uses before opening a single bucket of adhesive. Finally, remember that the stair nose is the highest-impact area in your entire house; treating it with the same tension as a flat bedroom floor is a recipe for a trip hazard.
The Gear That Keeps My Back From Screaming
If you’re serious about doing this more than once, you need a kit that protects your body and your reputation. I swear by a Senior Power Stretcher with an adjustable head; it’s the only way to get true perimeter tension without destroying your knees. For the fine details, a pro-grade tucking tool (not just a screwdriver!) is essential for getting that crisp look where the tread meets the riser. I also recommend keeping a dedicated tack cloth in your pocket to ensure every inch of wood is dust-free before applying your PSA. These aren’t just ‘extra’ items; they are the foundation of a step-by-step flooring installation that looks like a million bucks. If you’re transitioning from stairs to other rooms, don’t forget to check your baseboards makeover options to ensure the trim matches the high quality of your new carpet work.
#IMAGE_PLACEHOLDER_E#
Your Path to a Staircase That Does Not Squeak or Slide
Taking on a staircase is an act of bravery in the DIY world. It’s the most technical part of a flooring project, but once you master the ‘Stay-Put’ glue strategy and the power tuck, you’ve reached the top tier of home renovation skills. You aren’t just covering wood; you’re creating a safe, quiet, and beautiful transition between the levels of your home. Don’t be afraid to pull a piece back up if the tension isn’t perfect—the PSA is forgiving enough to allow for a second chance. With the right tools and a bit of ‘insider’ chemistry, your carpet install will stand the test of time, children, and pets. Have you ever felt that frustrating ‘creep’ on your own stairs, or are you planning your first installation this weekend? Let me know in the comments below!