

I’ll never forget the sound. It was a Tuesday afternoon, and I was standing in a client’s brand-new walk-in shower when I heard it: a sharp *pop* followed by the clatter of ceramic hitting a fiberglass floor. My heart sank. I’d spent a week meticulously laying those tiles, but there it was—a large porcelain plank lying face down, its backside as clean as the day it left the factory. I had committed the ultimate rookie sin. I used a 1/4-inch notch trowel for a heavy tile because I thought it would be easier to manage the “ooze.” I was wrong, and that one “trowel-size” mistake turned my pride and joy into a costly repair job. Today, I’m going to make sure you never have to hear that sound in your own bathroom.
The Day I Realized My Trowel Was Ticking a Time Bomb
When you’re knee-deep in a shower renovation guide, it’s easy to focus on the pretty patterns and the grout colors. But the real magic—or the real nightmare—happens in the thinset. If you don’t get the right coverage, you’re essentially just balancing heavy rocks on your wall and hoping gravity stays on your side. That’s why learning how to avoid hollow spots under your new tile is the most important lesson any DIYer or pro can learn. Early on, I figured a notch is a notch. I didn’t realize that the depth of those grooves dictates whether your tile is actually “gripped” or just “touching” the wall. The Tile Council of North America (TCNA) specifies that for wet areas like showers, you need a minimum of 95% thinset coverage to prevent water from pooling behind the tile and causing bond failure. If you use a trowel that’s too small, you might only hit 50% coverage, and that’s a recipe for disaster. This is especially true if you aren’t using the back-buttering secret for large format shower tiles, which adds that extra layer of security.
Can a Little Bit of Thinset Really Hold Up a Heavy Tile?
I get the skepticism. You look at a 1/2-inch notch and think it looks messy and excessive. But here is the reality: as the thinset cures, it shrinks slightly. If those ridges aren’t tall enough to collapse and merge into a solid bed, you end up with air pockets. These air pockets are where mold grows and where tiles begin to shift. I’ve had to perform shower repairs on projects where the homeowner used a tiny V-notch trowel for heavy stone, and let me tell you, it wasn’t a pretty sight. So, have you ever pulled a tile back and noticed it barely had any “mud” on it? It’s a frustrating moment, but catching it early saves you from a total collapse later. We’re going to dive into the exact math of notch sizes and why “bigger” is almost always “better” for your shower’s life span.
How to Pick a Trowel That Actually Works
When you are standing in the aisle of a home improvement store, the wall of trowels looks like a collection of medieval torture devices. But for a shower, the choice is binary: either you get 95% coverage, or you risk a leak. For most large-format tiles—anything over 12×12 inches—you should be reaching for at least a 1/2-inch by 1/2-inch square notch trowel. Anything smaller is essentially just painting the wall with mud. If you are working with smaller subway tiles, a 1/4-inch by 3/8-inch notch might suffice, but when in doubt, go bigger. This is the foundation of a step-by-step flooring installation from planning to perfect finish, and it applies just as strictly to your walls as it does to your floors.
Mix Your Thinset Like You Are Making a Sandwich
Before you even touch the trowel to the wall, your thinset needs to be right. It should have the consistency of creamy peanut butter—stiff enough to hold a ridge but wet enough to stick to the tile. If it is too runny, the ridges will collapse under the weight of the tile before you even set it. If it is too dry, it won’t ‘wet out’ the back of the tile. I learned this the hard way during a bathroom remodel in 2018. I tried to use a batch that had been sitting for forty-five minutes; it looked fine, but it had started to ‘skin over.’ I pressed a tile in, and it felt solid, but when I pulled it back ten minutes later, the thinset was as dry as bone.
Ditch the Swirls for Straight Ridges
This is where most DIYers fail. We have all seen the photos of beautiful, swirly patterns in the thinset. They look artistic, but they are a death sentence for your shower. When you trowel in swirls, you trap air pockets. When you press the tile down, that air has nowhere to go, creating hollow spots. 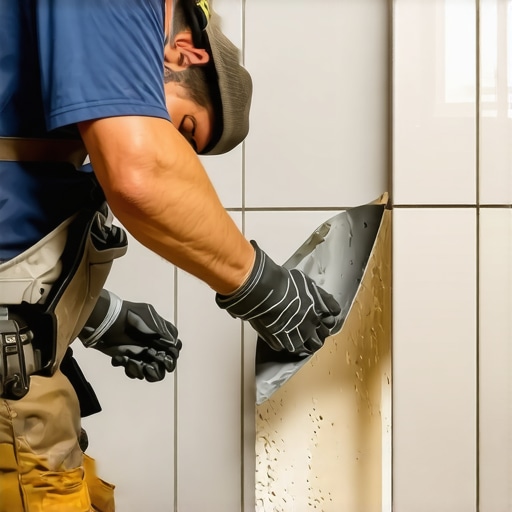 Instead, you must trowel in straight, parallel lines. This allows the air to escape through the channels as you collapse the ridges. When I first switched from swirls to straight lines, I was shocked at how much easier the tiles were to level. Using the back-butter secret for non-slip shower wall tiles in conjunction with straight ridges ensures that there is a chemical and mechanical bond that gravity simply cannot break.
Why You Must Butter the Back of Every Tile
Think of back-buttering as the ‘primer’ for your tile. You take the flat side of the trowel and scrape a thin layer of thinset onto the entire back surface of the tile. You aren’t trying to add thickness; you are filling the microscopic pores of the ceramic or porcelain. Without this, your tile is just sitting on top of the ridges like a person lying on a bed of nails. With it, the thinset on the wall and the thinset on the tile fuse together into a single, monolithic slab. This is especially critical for a the mud bed secret for rock-solid shower floors where the weight and water pressure are at their peak.
The Collapse Test Saves Your Renovation
Every five or six tiles, you need to perform a ‘pull test.’ Pull a tile back off the wall and look at the back. Are the ridges completely flattened? Is the back of the tile 100% covered in wet thinset? If you see any of the original tile surface or if the ridges are still standing, you are failing the coverage test. You either need a larger notch trowel or more pressure when setting the tile. This simple check is how you how to avoid hollow spots under your new tile and avoid the dreaded ‘popping’ sound of a failed bond months down the line. It’s a small price to pay for a shower that lasts decades instead of days.
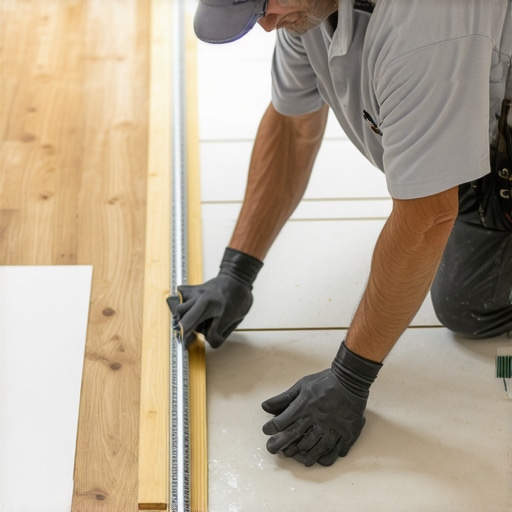
You might have the perfect trowel and 100% thinset coverage, but if the foundation beneath your feet is wavy, all that work is just a countdown to a crack. I see it all the time: homeowners spend thousands on premium porcelain or luxury vinyl, only to have the seams separate six months later because they focused on “level” instead of “flat.” There is a massive difference. A floor can be sloped at a three-degree angle—making it technically un-level—and still be perfectly suitable for tile as long as it is flat. However, a level floor with a 1/4-inch dip across six feet? That is a disaster waiting to happen. The Tile Council of North America (TCNA) and the National Wood Flooring Association (NWFA) both specify that subfloors must be flat within 1/8 of an inch over a 10-foot radius. If you ignore this, you are essentially asking your tile to bend, and we all know how that ends. To avoid this, I always recommend using the string line test for perfectly level subfloors to find those hidden valleys before the thinset even touches the floor.
Stop Obsessing Over the Bubble and Start Looking for the Belly
One of the most common mistakes I see involves the “oops” factor of over-correcting with thinset. People think they can just add an extra half-inch of mud to fill a low spot. Do not do this. Thinset is a bond, not a filler. When it cures, thick pockets of thinset shrink at different rates than thin ones, creating internal tension that eventually shears the bond. This is why 4 subfloor prep mistakes that make new vinyl planks sound hollow usually start with failing to use a self-leveling underlayment. If your subfloor isn’t within that 1/8-inch tolerance, you aren’t ready to tile. Period. This principle extends to carpet too; if you are trying to hide a dip with extra padding, you are just creating a trip hazard and a spot where the backing will eventually delaminate.
Why Does My Perfectly Flat Floor Still Feel Bouncy?
Even if you have mastered the flatness, there is a nuance most people miss: joist deflection. You can have a floor as flat as a pool table, but if your floor joists are undersized for the weight of a new tile shower, the floor will bounce every time you step. This vertical movement is the silent killer of grout. Before you start an upgrade-your-bathroom-the-ultimate-shower-renovation-guide, jump in the center of the room. If the china in the kitchen cabinets rattles, you need to stiffen the subfloor with an uncoupling membrane or additional plywood layers. Speaking of movement, another common trap is the tapping block mistake that breaks vinyl tongues. When installing click-lock floors, most DIYers hit the block too hard, micro-fracturing the joint. It looks fine on day one, but after three months of walking on it, that joint will open up into a gap you could lose a credit card in.
The Advanced Secret to Carpet Longevity
If you are pivoting from tile to textiles, the myth is that a knee-kicker is all you need. In reality, a knee-kicker is only for positioning; it is not for stretching. Every professional installation requires a power stretcher to achieve the proper tension. Without it, your carpet will develop those ugly ripples within two years because the latex backing relaxes. Understanding the power stretcher setting for plush pile carpets is the difference between a carpet that lasts fifteen years and one that needs replacing in five. Whether you are dealing with baseboards or basins, the secret is always in the prep work you can’t see once the job is finished. Have you ever fallen into this trap where you thought the subfloor was “good enough” only to regret it later? Let me know in the comments.
If I could go back to the start of my career and give myself one tool, it wouldn’t be a fancy wet saw or a high-end nailer; it would be a professional-grade moisture meter. For years, I relied on ‘feel’ and ‘looking dry,’ but that is a fool’s errand. According to the ANSI A108.02 standard, subfloor moisture content must be within a specific percentage of your finish material—typically within 2% to 4% for wood-to-subfloor comparisons—to avoid a total bond failure. Using the moisture meter test every flooring pro uses has saved me from dozens of potential disasters where a concrete slab was still ‘breathing’ moisture. As we look toward the next few years, I predict we will see smart sensors embedded directly into uncoupling membranes that alert your smartphone if a leak starts behind the tile long before you ever see a stain on the ceiling.  When it comes to those finishing touches that separate a pro job from a weekend attempt, the devil is in the scribing. I spent way too many years trying to ‘caulk the gap’ on wavy walls or uneven floors, only to have the joint fail within months. Now, I use the scribing tool every diyery needs for tight baseboards to ensure the wood actually follows the contour of the floor. It is the difference between a high-end craftsman finish and a generic builder-grade look.
How do I maintain my shower grout so it stays white forever?
This is the most common question I get at every single job wrap-up. The reality is that grout is essentially a hard sponge unless you are using high-end epoxy. Over time, skin cells, minerals, and soap scum build up in the pores, providing a feast for bacteria. If you notice your floor changing color, it’s usually why your shower grout is turning pink or orange—which is caused by an airborne bacterium called Serratia marcescens. To stop this cycle, I recommend a yearly application of a high-quality penetrating sealer. If you want to go the extra mile during the build, the liquid membrane rule for zero leak shower niches also prevents moisture from dwelling inside the wall cavity where mold loves to hide. Without proper sealing and moisture management, you will eventually be left wondering why your baseboard caulk is cracking and the flex fill fix will be your only recourse to stop the aesthetics from crumbling. If you are about to start your next project, do yourself a favor: grab a scrap piece of tile and run a ‘pull test’ on your very first row. Seeing that 95% thinset coverage with your own eyes will give you a level of confidence that no tutorial can provide.
Hard-Won Truths That Saved My Sanity on the Job Site
Looking back at years of renovation work, I’ve realized that the difference between a pro and an amateur isn’t just speed—it’s the willingness to slow down when everyone else is rushing. First, I learned that “good enough” is the precursor to a leak. If you see a tiny gap in your waterproofing, do not assume the grout will hide it; it won’t. Second, always trust the chemistry over your clock. If the thinset bag says it needs ten minutes to slake, give it the full ten minutes. Rushing that chemical reaction is why I had to redo my first three shower floors early in my career. Finally, I’ve come to realize that lighting is your best friend and your worst enemy. Always check your work with a raking light against the floor to spot those high spots before the adhesive sets. This helps you avoid flooring installation mistakes to avoid for a seamless look and ensures the finish is truly professional.
The Non-Negotiable Gear I Never Start Without
If you are serious about getting results that look like a magazine spread, you need the right partners in your toolbox. I personally swear by a high-quality moisture meter like the ones mentioned in the moisture meter test every flooring pro uses; it has saved me from installing wood over wet concrete more times than I can count. For those tackling carpet, skip the rental house kickers and invest in a professional power stretcher to ensure carpet install secrets achieving flawless results every time are not just myths. For your trim work, a dedicated scribing tool is a game changer for matching baseboards to wonky floors. And if you ever get stuck, the TCNA Handbook is the “Bible” of the industry—it is where I go when a project layout gets complicated.
Build Something That Stands the Test of Time
At the end of the day, a successful shower renovation guide is only as good as the hands that follow it. There is a specific kind of pride that comes from walking across a floor you laid yourself, knowing there is not a single hollow spot or squeak beneath you. Don’t let the technical details intimidate you. Take it one row of tile, one strip of carpet, and one miter cut at a time. If you run into trouble, such as how to fix baseboard gaps without replacing the trim, just remember that every pro started exactly where you are right now. Go build something you are proud of. Which part of the installation process has given you the most trouble in the past? Let me know in the comments below.