

I remember standing in the center of my first major living room renovation, proud as a peacock, until the 3 PM sun slanted through the large bay window. That’s when it hit me. A jagged, ugly line sliced right through the middle of the plush beige nylon. It looked less like a professional job and more like a poorly stitched wound on a Frankenstein experiment. I’d spent hours reading up on [carpet install secrets](https://tilecraftsmens.com/carpet-install-secrets-achieving-flawless-results-every-time), but I’d completely botched the most visible part of the room. It was a gut punch. If you’ve ever felt that sinking feeling when you see a seam that just won’t lay flat, you are definitely not alone. We’ve all been there, staring at a floor that looks amateur for all the wrong reasons. Today, I’m going to show you how to bury that seam for good. We’re moving past the basics and diving into the techniques that the pros use to make two pieces of carpet look like one continuous sheet of luxury. We are going to solve the shadow issues, the peaking, and the fraying once and for all.
Stop Staring at That Ugly Line in Your Living Room
When I first started out, I thought more glue meant a better hold. Boy, was I wrong. Over-applying adhesive is one of those classic [flooring installation mistakes to avoid](https://tilecraftsmens.com/flooring-installation-mistakes-to-avoid-for-a-seamless-look) because it creates a hard ridge that catches the light like a beacon. The secret isn’t just in the tape; it’s in the surgical preparation of the edges. You have to treat those edges like they’re part of a bespoke suit. If you’ve ever wondered [why your carpet seam peaks](https://tilecraftsmens.com/why-your-carpet-seam-peaks-and-how-to-flatten-it) and how to flatten it out, it usually comes down to how much you struggled with the tension during the initial stretch. I once cut a piece just a quarter-inch too short and tried to ‘muscle’ it into place with a kicker. Spoiler alert: it looked terrible. Have you ever finished a room only to realize the seam was the first thing your eyes landed on? It’s incredibly frustrating!
Can You Actually Make a Seam Invisible?
This is the big question every homeowner asks when they see a gap. The truth is, while a seam is technically always there, it can be made invisible to the naked eye with the right approach. Even the pros at the Carpet and Rug Institute admit in their CRI 104/105 standards that while 100% invisibility isn’t always possible, a properly executed seam must be ‘unobtrusive’ and structurally sound. To get there, you need to master [the heat iron trick for reactivating old seam tape](https://tilecraftsmens.com/the-heat-iron-trick-for-reactivating-old-seam-tape) or, better yet, getting the temperature perfect the first time. We aren’t just slapping tape down; we’re marrying the fibers. If the ‘nap’ of your carpet isn’t running the same way on both sides, you’ve already lost the battle. It’s like trying to brush hair in two different directions—the light will always reveal the break. I’ve learned that checking the pile direction three times before the first cut is the only way to avoid the [5 carpet seaming errors that show up in bright daylight](https://tilecraftsmens.com/5-carpet-seaming-errors-that-show-up-in-bright-daylight) later on.To get that invisible look, you have to stop thinking about the carpet as a rug and start thinking about it as a grid of fibers. Most DIYers just slice through the back with a utility knife, but that’s how you end up with those 5 carpet seaming errors that show up in bright daylight. Instead, you need to use the row-by-row tactic for seaming patterned carpets, even if the carpet isn’t obviously patterned. You part the fibers with a screwdriver or a knitting needle first, finding the ‘valley’ between the rows. Then, you cut only the backing. This keeps the long fibers intact so they can fold over the seam like a natural curtain. I remember my third job—a massive master bedroom. I was rushing and decided to freehand the cut. I ended up cutting right through a row of tufts. When I joined the pieces, it looked like the carpet had a receding hairline. It was a $400 mistake. Since then, I treat every cut like a surgery.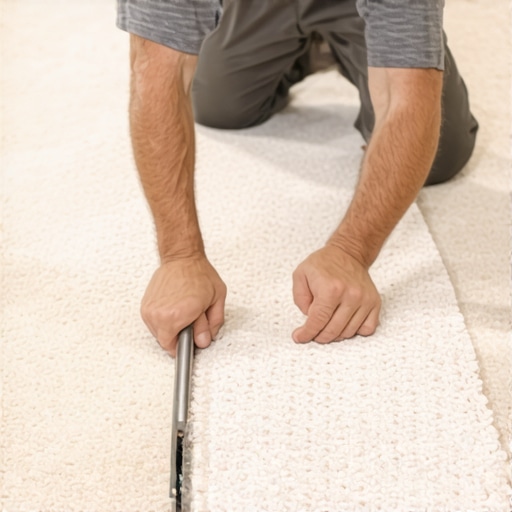
Heat Your Seam Tape Until It Just Starts to Sizzle
Once your edges are crisp, it’s time for the heat. You aren’t just melting glue; you are creating a chemical bond. If you leave the iron in one spot for too long, you risk melting the nylon fibers on top. On the flip side, if the glue isn’t hot enough, the seam will split the first time someone drags a chair across it. You want the iron set to about 3 or 4, and you move it slowly—about one inch every few seconds. If you’re working with a repair on an older floor, you might need the heat iron trick for reactivating old seam tape to get things moving again without adding extra bulk to the joint.
Keep the Iron Moving to Avoid Fiber Melt
The key is consistency. Think of the iron like a slow-moving boat on a calm lake; if you stop, you leave a wake of damage. I always keep a scrap piece of carpet nearby to test the iron temperature before I touch the main floor. It saves you from that panicked smell of burning plastic.
Apply Pressure While the Glue is Still Molten
The biggest mistake I see is people letting the seam sit without pressure. Think of it like wood glue; you wouldn’t just press two boards together and walk away. You need to use a seam tractor to knit those fibers together while the adhesive is still tacky. If you notice a ridge forming, that’s when you need to know why your carpet seam peaks and how to counteract the tension. I usually follow the iron with the dead blow hammer secret for flat floor seams—not to hit it hard, but to use its weight to press the backing firmly into the cooling adhesive.
Work in Small Sections for Total Control
Don’t try to run a 12-foot seam in one go. Work in 3-foot increments. Pull the iron forward, press the edges together with your fingers—be careful, that glue is hot!—and then roll the tractor over the joint. This ensures the carpet install secrets achieving flawless results every time stay secrets because no one will ever find the join. If you’re transitioning near a wall, don’t forget that you might need to keep the knee-kicker mistake that ruins carpet tension fresh in your mind so you don’t pull the seam apart while stretching the rest of the room.Most DIY guides make it look like the knee kicker is the star of the show. You see the pros slamming their knees into that pad and think, ‘That’s how I’ll get it tight.’ But here is the contrarian truth: if you rely solely on a kicker, you are setting yourself up for failure. In fact, the Carpet and Rug Institute (CRI) 105 standard explicitly states that power stretching is mandatory for most residential carpet installations to prevent ripples and maintain seam integrity. The kicker is for fine-tuning and positioning; the power stretcher provides the uniform tension that actually stabilizes the room. If you skip the big tools, you’ll likely find yourself wondering why your carpet is wrinkling two years after install when the fibers finally lose their initial factory stiffness. One massive ‘oops’ I see all the time is what I call ‘perimeter neglect.’ People focus so much on the center of the room that they forget the edges. They tuck the carpet behind the baseboard styles that elevate your interior design and assume the tack strip will do all the work. It won’t. If the tension isn’t equalized across the entire floor, the carpet will eventually ‘relax’ into the areas of least resistance, usually right at your most visible seam. This is often the knee-kicker mistake that ruins carpet tension because it creates localized tightness that isn’t sustainable. #IMAGE_PLACE_HOLDER_C#
Is Your Subfloor Secretly Sabotaging Your Seam?
We often blame the carpet or the tape, but the floor underneath is frequently the culprit. A slight dip in the subfloor can cause a seam to ‘sink,’ making one side appear higher even if the pile is trimmed perfectly. Professional installers often use the string line test for perfectly level subfloors before a single tack strip goes down. If you’re working on concrete, ensure you are choosing the right tack strip for concrete subfloors to avoid the strip popping loose under the high tension required for a professional finish. I’ve learned the hard way that a ‘good enough’ stretch is just a delayed repair job. Have you ever fallen into this trap of thinking a knee kicker was enough, only to see ripples months later? Let me know in the comments.I used to think my kit was complete with a basic kicker and a utility knife, but the moment I stepped onto a job site with a professional-grade Crain power stretcher, everything changed. If you want to move beyond the DIY look, you have to invest in—or at least rent—the right gear. The power stretcher isn’t just about making the carpet tight; it’s about structural stability. When you use the stretcher correctly, you are pre-loading the backing so it won’t expand when the humidity hits 80 percent in July. This is the cornerstone of carpet install secrets achieving flawless results every time. I personally swear by the star-wheel seam roller because it doesn’t just press the carpet; it actually knits the fibers together over the seam tape. It’s that final touch that turns two pieces of fabric into a monolithic floor.
Stop Relying on Cheap Tools for High-End Results
Many people ask me if they can skip the expensive rollers and just use their feet. The answer is a hard no. You need consistent, mechanical pressure to drive the carpet backing into the hot adhesive. If you’re dealing with a particularly stubborn area, I often combine the roller with the dead blow hammer secret for flat floor seams. The non-marring head allows you to set the seam without damaging the delicate pile. This level of detail is what separates a floor that lasts twenty years from one that needs a repair in twenty months. According to the Shaw Residential Carpet Installation Manual, failing to properly acclimate your materials for at least 24 hours in the room where they will be installed can lead to seam failure regardless of how good your tools are. 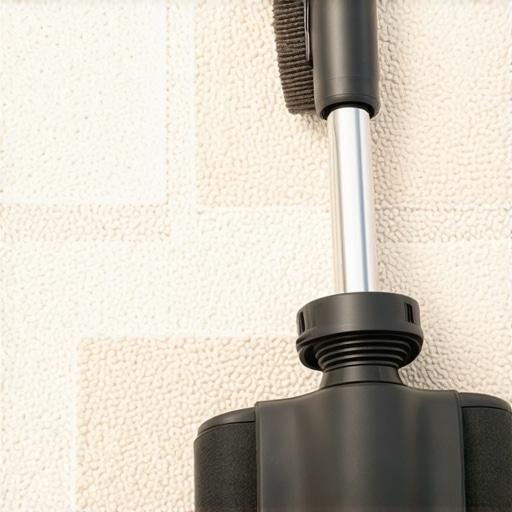
How do I keep my carpet seams invisible for years?
Maintenance is where most homeowners drop the ball. Once that seam is set and the step-by-step flooring installation from planning to perfect finish is complete, your job has just begun. You need to avoid using high-suction vacuum cleaners directly over the seam for at least the first 72 hours to let the adhesive fully cure. Long-term, you should be checking for any signs of lifting. If you notice a small area becoming prominent, you might need to use the iron and towel trick for removing carpet dents and localized pressure to reset the fibers. Also, keep an eye out for external factors; if you see ripples forming away from the seam, you need to address them immediately before they put tension on your joint, otherwise you’ll be searching for why your carpet is wrinkling two years after install and facing a much bigger headache.
What the 2025 flooring market means for your DIY projects
Looking ahead, I see a massive shift toward modularity and sustainable backings. We are moving toward a world where ‘lock-and-go’ carpet tiles will have the same plush feel as broadloom but with none of the seaming nightmares we’ve discussed. Expect to see more transform your flooring top trends in installation for 2025 focusing on pressure-sensitive adhesives that allow for easy individual piece replacement. This will change the game for high-traffic areas where stains are inevitable. My advice? Start practicing your precision cutting now, because even with modular systems, the perimeter fit is what defines a professional look. I challenge you to try the ‘double-glue’ method on your next small repair—apply a thin bead of seam sealer to both edges before heat-taping. It’s a bit messier, but the bond is virtually unbreakable.I’ve spent thousands of hours on my knees, and if there’s one thing I’ve learned, it’s that the floor never lies. You can’t hide a rush job under the furniture forever. To truly master this craft, you have to embrace the details that happen before the iron even touches the tape.
Hard Lessons I Learned While Crawling on the Floor
After years of trial and error, I’ve realized that the ‘perfect’ seam is actually a combination of patience and lighting. One of the biggest takeaways from my journey is the 10-minute cooling rule. I used to be impatient and wonder why your carpet seam peaks, only to realize I was pulling the joint apart while the adhesive was still molten. Another ‘lightbulb moment’ was realizing that row-finding is a meditation, not a race. If you snag even one tuft while cutting, the light will catch that ‘bald spot’ forever. Precision in these carpet install secrets isn’t about speed; it’s about the meticulous preparation of the backing. Finally, I always check my work with a flashlight held low to the floor. If a seam looks good under a focused spotlight, it will be absolutely invisible in the morning sun, helping you avoid the 5 carpet seaming errors that show up in bright daylight.
Tools I Trust More Than My Own Luck
You don’t need a massive warehouse of gear, but you do need these specific essentials to move from a DIY look to a step-by-step flooring installation that lasts decades. First, the Star-Wheel Seam Roller is non-negotiable; unlike a flat roller, the stars actually knit the fibers into the backing. Second, always use a Crain Power Stretcher. Renting this tool is the best investment you can make to avoid the knee-kicker mistake that ruins carpet tension and causes ripples later. Lastly, I recommend the Orcon Seam Tape—it has a consistent melt point that takes the guesswork out of the heat iron process. #IMAGE_PLACEHOLDER_E#
Stop Dreaming and Start Your First Seam Today
Installation is as much an art as it is a science. While it’s easy to feel overwhelmed by the technicalities, remember that every professional started with a messy first room and a jagged line. By focusing on uniform tension and proper heat management, you are already ahead of most weekend warriors. Your home deserves that high-end, continuous look, and you now have the knowledge to make it happen. Go ahead and start your next carpet install with confidence, knowing you’ve got the inside track on how the experts achieve perfection. What’s the biggest hurdle you’ve faced with a carpet seam, or are you still nervous about making that first cut? Let me know in the comments below!