

I was standing in the middle of my living room, the late afternoon sun streaming through the windows, feeling like a DIY champion. I’d just finished a grueling two-day install. But as the light hit the floor at just the right angle, my stomach did a somersault. There, scattered across my pristine white oak planks like tiny, hardened landmines, were droplets of dried urethane adhesive. I tried picking at one with my fingernail—nothing. I tried a damp rag—it just laughed at me. That moment of panic is something every installer, from the weekend warrior to the seasoned pro, knows all too well.
Stop the Panic and Put Down the Chemicals
When you see those shiny spots, the first instinct is to grab a bottle of Goo Gone or some heavy-duty solvent. Please, for the sake of your top coat, do not do it. Early in my career, I made a catastrophic flooring installation mistake by using a harsh chemical on a pre-finished floor. Within minutes, the glue was gone, but so was the beautiful satin sheen, leaving behind a dull, hazy ghost of a footprint that I could never fix. That’s why I swear by the scraper-blade method now. It is a surgical approach that relies on physics rather than chemistry. If you’ve followed the glue assist trick for wide plank hardwood floors, you know that some squeeze-out is almost inevitable. The goal today is to show you how to flick those spots away without leaving a single scratch on your new investment.
Is a Metal Blade Actually Safe for My Expensive Wood?
It sounds counterintuitive, right? Taking a sharp piece of steel to a floor you just paid thousands for feels like performing open-heart surgery with a butter knife. But here is the reality: modern urethane adhesives are designed to be incredibly strong, often boasting a tensile strength of over 300 psi according to industry standards discussed by organizations like the National Wood Flooring Association. This means once they cure, they aren’t “sticky”—they are plastic. A razor-sharp scraper blade, held at the exact right angle, doesn’t cut the wood; it breaks the bond between the plastic glue and the smooth finish.
Master the Art of the Surgical Flick
The scraper-blade fix isn’t about brute force; it is about finesse. I’ve seen people try to sand the glue off or use a dull putty knife, which only leads to more heartache and surface marring. If you’ve been through the struggle of step-by-step flooring installation, you know the finish line is so close you can taste it. Don’t trip now. Have you ever found yourself staring at a “perfect” floor only to realize you left a trail of adhesive crumbs behind? Tell me your horror stories—I’ve probably lived through them too. We are going to ensure you’re removing glue, not finish, by prepping your tools correctly.
Prep Your Scraper for Surgical Precision
To get started, you need a high-carbon steel scraper. But here is the secret: a fresh-out-of-the-package blade can actually be your worst enemy. It often has a microscopic burr that can gouge the wood. I remember a job in a Victorian-style library where I skipped the tuning phase. I took a fresh blade to a stubborn glue spot and, instead of a clean flick, I carved a two-inch canyon into the grain. It took me three hours of wood filler and grain-painting to hide that flooring installation mistake. Now, I always burnish the edge by lightly rubbing it against a piece of hardened steel or the back of a chisel to smooth out those factory imperfections.
Treat the Blade Like a Fine Instrument
Think of your scraper like a chef treats their favorite knife. You wouldn’t hack at a delicate fish, and you shouldn’t hack at your floor. This is especially true if you followed the moisture meter test every flooring pro uses and know your planks are perfectly acclimated; the last thing you want is a physical defect in an otherwise perfect board. Keep the blade clean. A tiny bit of dried glue already on the blade will act like a pivot point, causing the blade to skip and potentially scratch the surrounding finish. 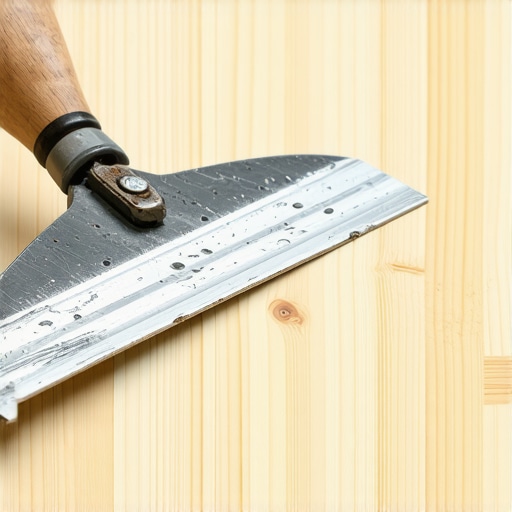
Execute the Perfect Flick to Save Your Finish
The movement is all in the wrist. You aren’t pushing the blade across the floor like you’re shoveling snow. Instead, you are placing the corner of the blade right at the base of the glue landmine. Much like using the dead blow hammer secret for flat floor seams, it is about controlled energy directed at a specific point. You want to apply just enough downward pressure to keep the blade on the surface, then a quick, sharp flick forward. If the glue is properly cured, it should pop off with a satisfying ping sound, leaving no residue behind.
Hold Your Ground at the Thirty Degree Mark
The angle is the most critical variable in this equation. If you hold the blade too high, closer to 90 degrees, you are scraping the finish off. If you hold it too flat, you will just slide right over the top of the glue. I have found that a 30-degree angle is the sweet spot. It is steep enough to catch the edge of the glue but shallow enough to skip over the factory top-coat without biting in. This precision is what separates an amateur step-by-step flooring installation from a professional-grade result. I always test my angle on a scrap piece of flooring from the same box first. If it leaves a dull mark on the scrap, my angle is too high or my blade has a burr. Once you find that rhythm, you can clear an entire room of spots in minutes, turning a potential disaster into a minor cleanup task.But even the cleanest glue-flicking technique won’t save a project if the structural foundation of the install is flawed. Let’s dig deeper into the mechanics of why things fall apart even when they look good on the surface. Most homeowners think that if a carpet looks flat on day one, the job was a success. I’m here to tell you that is a dangerous assumption. One of the biggest myths in the industry is that a knee kicker is sufficient for a proper carpet install. If you rely solely on that tool, you are almost guaranteed to see ripples within twenty-four months. In my years of fixing botched jobs, I’ve realized that the knee kicker mistake that ruins new carpet is the most common reason for callbacks. The knee kicker is a positioning tool, not a stretching tool. Professional standards, specifically the CRI 105 Residential Carpet Installation Standard, mandate the use of a power stretcher for every installation. Without that mechanical leverage, you aren’t actually stretching the backing; you’re just shifting the surface tension.
How Much Tension Does Your Carpet Actually Need?
To achieve the industry-required 1% to 1.5% stretch, you need the reach and power of a dedicated stretcher that braces against the opposite wall. If you skip this, why your carpet is wrinkling two years after install becomes a question of ‘when,’ not ‘if.’ Have you ever fallen into this trap and had to move all your furniture back out for a costly re-stretch? Let me know in the comments. 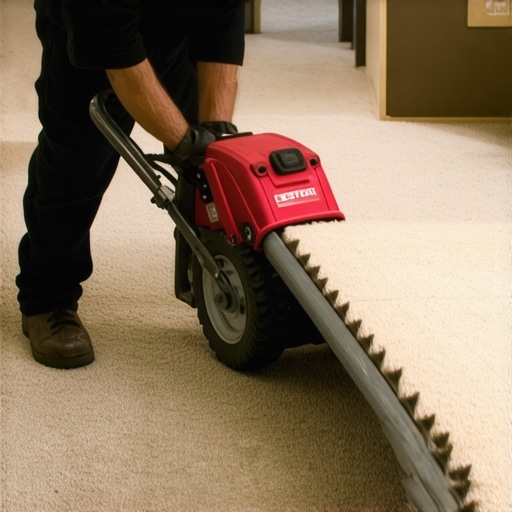 Moving into the bathroom, the mistakes get even more expensive because they are hidden. A common contrarian view I hold is that ‘waterproofing’ is often done in the wrong order. Most DIYers lay their shower liner directly on the flat subfloor, believing the tile and grout do the heavy lifting. This is a massive mistake. According to the Tile Council of North America (TCNA), a ‘pre-slope’ is required under the liner so that any water that reaches it actually migrates toward the weep holes. If you miss this, why most DIY shower waterproofing fails at the drain becomes painfully obvious as the stagnant water rots your framing from the inside out. I always recommend using the mud bed secret for rock-solid shower floors to ensure that geometry is working for you, not against you. Don’t let the ‘oops’ factor of a flat liner turn your luxury renovation into a moldy nightmare. Following carpet install secrets for achieving flawless results and shower prep rules might take an extra day, but it saves a decade of regret. Real expertise is knowing that the most important work is the work you will never see once the floor is finished.
Level Up Your Result with the Scribing Compass
If there is one tool that separates the ‘good enough’ DIYer from the master craftsman, it is a high-quality scribing compass. When you are fitting baseboards against a stone fireplace or an old plaster wall that is as wavy as the Atlantic, you cannot rely on straight cuts. I remember struggling with gaps for years until I started using the scribing tool every diyer needs for tight baseboards. It allows you to trace the exact profile of the wall onto your trim. According to the USDA Forest Products Laboratory in their ‘Wood Handbook,’ wood is an anisotropic material, meaning it expands and contracts differently in various directions. This constant movement is why your fit must be perfect from the start; a tight scribe accounts for the wall’s imperfections so that when the house breathes, the gaps don’t become eyesores. If you have been frustrated by messy corners, learning the back bevel secret for seamless baseboard corners will change your life. 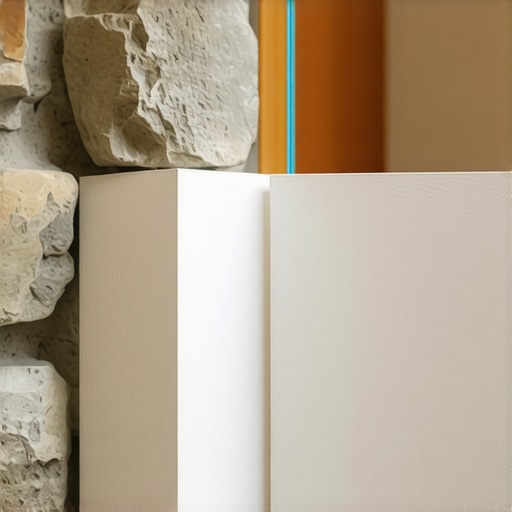
How do I maintain my flooring investment over time?
Long-term maintenance is where most people drop the ball. You have spent weeks on a step-by-step flooring installation, but the wrong cleaning routine can ruin it in months. Stop using steam mops on hardwood or laminate—period. The high-pressure vapor forces moisture into the joints, which leads to swelling and delamination. Instead, stick to a pH-neutral cleaner and a barely damp microfiber pad. For those with carpet, the maintenance story is all about the vacuum. If you have chosen the best carpet types for high traffic areas in 2025, you need a vacuum with adjustable brush roll height. Too low, and you’ll shred the fibers; too high, and you leave the abrasive grit at the base of the pile that acts like sandpaper on the backing.
Stiffen the Foundation Before You Scale Up
If you are planning to move from a small bedroom to a large open-concept living area, you need to address the ‘bounce.’ A floor that feels solid in a 10×10 room might feel like a trampoline in a 20×20 space. I always tell people to check their subfloor deflection first. Understanding why your floor is bouncing and how to stiffen the joists is essential before laying down heavy tile or high-end hardwood. We are seeing a major shift toward ‘smart floors’ in the coming years. I predict that by 2030, we will be installing integrated sensors under the underlayment that can detect a slow leak from a dishwasher or a spike in subfloor moisture before it ever reaches the surface. This trend is already starting to emerge in high-end commercial builds, as seen in the top trends in installation for 2025. For now, your best defense is a solid mechanical install. My challenge to you: on your next room, don’t just cut your baseboards at 45 degrees. Try the scribing method on one difficult corner. Once you see that hair-thin joint, you will never go back to ‘caulk and walk’ methods again. Ensure you are also following the expansion gap rule for flooring under door jambs to give that wood room to move.
Lessons My Worst Callbacks Taught Me
Over the years, I’ve realized that even the most beautiful flooring installation can fail if you ignore the subtle science behind the materials. Here are a few lightbulb moments that changed how I approach every project:
- Respect the invisible layers: Most failures happen where you can’t see, like the moisture barrier or the subfloor prep. Don’t hide a problem; fix it before the top layer goes down.
- Patience is as vital as a saw: Rushing the acclimation process or the adhesive cure time is the fastest way to double your workload later when gaps or buckles appear.
- Physics always wins over force: Whether you are removing cured adhesive or fitting baseboards, finesse and the right blade angle always beat brute strength and frustration.
The Gear That Never Leaves My Truck
If you want to move beyond basic DIY results, you need a toolkit that accounts for professional standards. I never step onto a job site without a high-quality power stretcher; it is one of the most important carpet install secrets for achieving flawless results. For trim work, a precision scribing compass is my secret weapon for making how to choose the perfect baseboards for your home’s style look like a custom architectural feature. I also swear by a reliable digital moisture meter to ensure every plank is ready for its new environment. #IMAGE_PLACEHOLDER_E#
Build Something That Outlasts the Trends
There is a deep satisfaction in finishing a room and knowing the foundation is as solid as the surface. By applying expert flooring installation tips for 2025 and focusing on the small details—like the expansion gap or the pre-slope in a shower—you ensure your hard work stands the test of time. Whether you are creating a spa-like shower experience tips and tricks or laying down wide-plank oak, let your craftsmanship be your legacy. Have you ever encountered a flooring mistake that looked perfect on day one but failed later? Tell me your story in the comments below!