

I remember standing in my brand-new master shower, feeling that first satisfying spray of hot water, when I heard it: a distinct, hollow clack right under my heel. My heart sank. I knew exactly what that sound meant. Within two months, the grout around that single tile began to crumble, and soon enough, the tile was literally rocking like a loose tooth. It is a gut-punch when your hard work starts coming apart under your feet. I realized then that I had fallen victim to the most common amateur mistake in the book. I was so focused on the aesthetics of the stone that I completely neglected the foundation. Today, I am going to show you how to ensure your tiles stay stuck for a lifetime by mastering the art of thinset coverage. We are going to dive into the nitty-gritty of why tiles fail and how you can avoid the same trowel size mistake that ruins your shower tile bond.
Stop Your Shower Floor from Sounding Like a Tap Dance
When I first started out, I honestly thought that as long as there was ‘enough’ mud under the tile, I was golden. I used the ‘spot bond’ method—just five little dabs of thinset on the corners and the center. It seemed faster, and the tile looked level. But a few years later, those tiles were popping up like toasted bread. The reality is that air pockets are the enemy of a wet environment. If you do not have a solid bed of mortar, water finds its way into those voids, and the constant pressure of your weight eventually snaps the bond. You need to learn how to avoid hollow spots under your new tile if you want your bathroom to survive daily use. This is especially true for showers where the temperature fluctuates rapidly. According to the Tile Council of North America (TCNA) Handbook, wet areas like showers require a minimum of 95% mortar contact to prevent moisture from pooling and tiles from shifting.
Does 95% coverage feel like an impossible goal?
It sounds like a lot of work, and you might be wondering if you can just get away with ‘good enough.’ I used to think so, but ‘good enough’ is what leads to expensive repairs three years down the road. It is about more than just the amount of thinset; it is about the technique. You have to comb your ridges in straight lines, not swirls, and you must back-butter every single piece of tile. Combining this with the mud bed secret for rock solid shower floors creates a monolithic structure that simply will not budge. Have you ever stepped on a tile and felt that terrifying little wiggle? Let me know in the comments if you have dealt with a ‘floater’ before, because I have definitely been there. Now, let’s get into the actual physics of how to spread that mortar so it stays put forever.
Get the Ridges Straight to Avoid the Trap of Air Pockets
I used to think of thinset like cake frosting—just slap it on and smooth it out. That was a recipe for disaster. When you spread your mortar, you must comb the ridges in straight, parallel lines. Think of these ridges like the tracks of a train; they need to be uniform and headed in the same direction. If you swirl the trowel, you are essentially building little circular walls that trap air inside once the tile is pressed down. Those trapped air pockets are exactly how to avoid hollow spots under your new tile becomes your primary mission. In a shower, where water is a constant presence, these voids act like tiny reservoirs for moisture. I once spent three days ripping up a guest bath because the previous installer swirled his thinset, and the resulting mold growth underneath the tiles was enough to make your stomach turn.
Hold Your Trowel at a Consistent 45 Degrees
It sounds like a small detail, but the angle of your trowel determines the height of your ridges. If you vary the angle from 30 degrees to 60 degrees as you move across the floor, you create high and low spots. You want to maintain a steady 45-degree angle to ensure every ridge is exactly the same height. This consistency is the secret sauce for a flat, lippage-free surface. If you are struggling with a bumpy substrate, remember that step-by-step flooring installation from planning to perfect finish starts with a flat subfloor, not trying to fix it with extra mud. 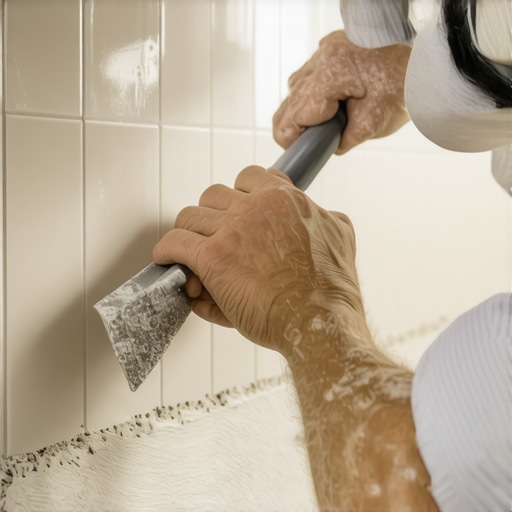
Back-Butter Your Way to a Lifetime Bond
I cannot stress this enough: you must back-butter your tiles. This means taking the flat side of your trowel and scraping a thin, ‘skim’ coat of mortar onto the back of the tile before you set it. It is like putting glue on both sides of a project. This ensures that the mortar ridges on the floor actually fuse to the tile. In 2018, I was rushing a job and skipped back-buttering on a 12×24 porcelain piece. Six months later, the homeowner called because the tile was clicking. When I pulled it up, the back of the tile was bone dry—the mortar ridges on the floor had skinned over and never actually stuck to the porcelain. Avoid this trowel size mistake that ruins your shower tile bond by ensuring you have a wet, sticky surface on both the floor and the tile.
The Slide and Click Method to Collapse the Ridges
Once you place the tile onto those straight ridges, do not just press down. You need to move the tile perpendicular to the ridges about 1/8 of an inch and then slide it back into place. This mechanical movement collapses the peaks of the ridges into the valleys, creating a solid, 100% coverage bed of mortar. If you are worried about your lines staying straight during this process, using the hidden spacers for perfectly even shower grout lines will keep everything aligned while you apply the necessary pressure. You should periodically pull a tile back up to inspect the back; if you see the ridges still standing, you are not pressing hard enough or your mortar is too dry. This simple ‘peek-a-boo’ check has saved me from countless potential failures over the years.
It is easy to get obsessed with the tile itself, but most homeowners—and even some self-proclaimed pros—forget that a house is a living, breathing thing. Once that tile is set, the next phase usually involves the trim and the transitions. I see the same mistake repeated constantly: the obsession with a ‘perfectly snug’ fit. While it looks great on day one, a floor that has zero room to move is a floor that is destined to fail. You have to respect the expansion gap rule for flooring under door jambs. If you pin the floor down tight with your trim or baseboards, you are essentially building a ticking time bomb that will buckle the moment the humidity spikes.
And speaking of trim, here is a contrarian truth: your caulk gun is not a substitute for a skilled miter saw. Many people rely far too heavily on flexible fillers, but if your joints are not tight mechanically, the house’s seasonal shifts will eventually rip that caulk apart. One of the biggest ‘oops’ moments I witness is when installers nail their trim blindly. You need to understand why you should never nail baseboards into the bottom plate only. If you are not hitting the wall studs, the baseboard will eventually pull away from the wall, leaving you with a massive gap to fill later. To get those corners looking like a single piece of wood, I always rely on the back-bevel secret for seamless baseboard corners. It is a tiny adjustment that makes a world of difference.
Why do those expensive mitered corners always seem to shrink?
It usually comes down to the moisture content of the material. According to the National Wood Flooring Association (NWFA), wood trim and flooring should ideally be acclimated to the specific environment for at least 3 to 5 days before installation. If you take trim directly from a humid garage and nail it into an air-conditioned room, those miters will open up before the paint is even dry. This is why I never start a job without performing the moisture meter test every flooring pro uses. It is the only way to be 100% certain that the wood has stabilized. 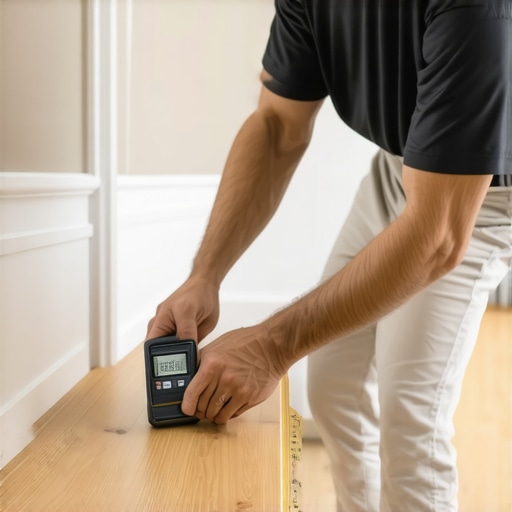
Even in the world of carpet, where things seem ‘softer’ and more forgiving, nuances matter. The most common myth is that a knee kicker is sufficient for a ‘tight’ install. In reality, relying solely on a kicker is the knee kicker mistake that ruins carpet tension. You need a power stretcher to truly tension the backing across the entire room. If you skip this, I can guarantee you will be dealing with unsightly ripples and ‘waves’ within two years. I have spent more time than I care to admit stretching out carpets that were ‘installed’ by guys who only owned a kicker. It is a frustrating and avoidable expense. I have learned these lessons the hard way—usually by having to go back and fix a job on my own dime. Have you ever fallen into the trap of thinking ‘good enough’ was sufficient, only to have it backfire six months later? Let me know in the comments below if you have dealt with shrinking miters or buckling floors.
Besides the big stuff like miter saws and wet saws, there are three ‘smaller’ tools that separate the hacks from the pros. First, an oscillating multi-tool. I use it for the under cut move for fitting flooring perfectly under door casings because it gives you that clean, factory-finish look without the headache of trying to slide planks under a jagged gap. Second, a high-quality green-beam laser level. If you are working on shower renovation ideas modern designs for a luxury feel, you simply cannot rely on a standard bubble level to keep your horizontal lines consistent across four different walls. And third, a dedicated pinless moisture meter. I have seen too many $10,000 hardwood floors fail because the installer didn’t run the moisture meter test every flooring pro uses on the subfloor first. According to the IICRC S100 standard for professional carpet cleaning and restoration, improper initial tensioning and moisture management can void your material warranty before the first year is even up, which is why choosing the right tools for the job is just step one.
How do I maintain my new floors so they last 20 years?
The work does not stop once the last piece of trim is nailed into place. For showers, your worst enemy is ‘wicking.’ Even if your tile is waterproof, your grout is often a literal sponge. I always tell my clients to wait the full 72 hours for the grout to cure before applying a high-grade penetrating sealer. If you miss this, you will be looking up how to match old grout color when repairing a shower floor much sooner than you would like. For carpet, forget the store-bought foaming sprays that leave a sticky residue. You need to follow carpet install secrets achieving flawless results every time by ensuring you are vacuuming with a high-efficiency particulate air (HEPA) filter to keep abrasive grit from grinding down the base of the fibers. If you see a seam starting to peak or lift, do not wait for it to rip; use the heat iron trick for reactivating old seam tape to bond it back down before the edges begin to fray. 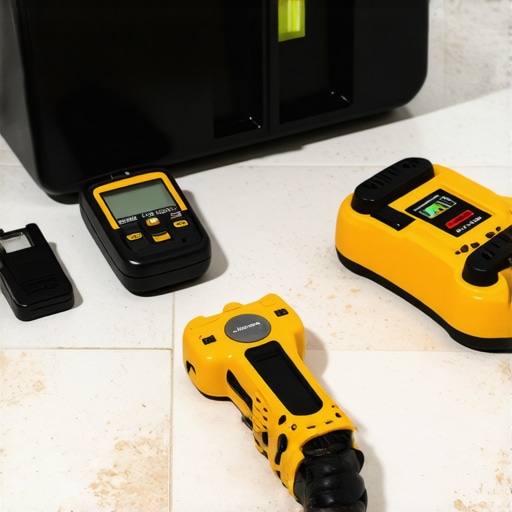 Looking ahead to the future of our industry, we are seeing a massive shift toward mineral-core composites and ‘smart’ subfloors. These are not your grandma’s vinyl planks; they are designed to withstand massive temperature swings without the expansion issues we have struggled with for decades. We are moving toward a ‘zero-maintenance’ reality, but even the best tech requires a human touch for the final aesthetic. If you really want that ‘pro’ look on your current project, try the blue tape secret for professional shower silicone lines every time. It is a tiny extra step that makes your caulking look like a machine did it. Grab a roll of delicate-surface blue tape and give it a shot on your next backsplash or tub surround—I promise you will never go back to freehanding it again.
Realities from the Job Site That No Manual Mentions
After years in the trade, I have realized that the best results come from the small details people rarely discuss. First, your subfloor is 90% of the battle; if it is not flat, your finish will never look right. I always recommend reviewing flooring installation mistakes to avoid for a seamless look before you even open a box of material. Second, never assume a wall is square—they never are. Always measure from the center of the room to ensure your cuts on the edges are balanced and visually appealing. Finally, remember that patience is a tool just as much as a hammer. Rushing the curing time for mortar or the acclimation period for wood is a guaranteed way to see failures within the first year. These are the nuances that separate a DIY look from a true professional result.
The Toolkit That Never Leaves My Truck
To get that high-end finish, you need more than just the basics. I rely heavily on a few specific items to ensure every job is perfect. For those tricky transitions, I always follow a step-by-step flooring installation from planning to perfect finish, which keeps my workflow organized and prevents backtracking. My must-haves include a high-quality oscillating tool for precision undercuts, a sturdy tapping block to avoid the stair step pattern mistake that weakens vinyl joints, and a laser level that projects 360 degrees for perfect tile alignment. These tools take the guesswork out of the equation and allow you to focus on the artistry of the install rather than fighting the materials.
Your Path to a Flawless Finish Starts Now
There is an incredible sense of pride that comes from walking across a floor you laid yourself, knowing every tile is solid and every miter is tight. Whether you are following baseboard trends in 2025 fresh styles for every room or sticking with a classic hardwood look, the principles of prep and patience remain the same. Do not be afraid to take your time and do it right the first time. If you find yourself intimidated by the final caulking phase, remember to use the blue tape secret for professional shower silicone lines every time to get that crisp, clean look that defines expert work. Your home is your sanctuary, and the effort you put into these details today will pay off for decades to come. Have you ever encountered a subfloor issue that completely changed your project plans? Let me know your stories in the comments below!