

I still remember the acrid, chemical smell of singed nylon filling my living room like it was yesterday. I had just finished a long day and, in a moment of pure clumsiness, tipped a hot iron directly onto the beige pile. In my haste to try the iron and towel trick for fixing carpet dents, I had gotten careless. The result was a crisp, dark brown scar right in the middle of the floor. My heart sank. I knew that even the best carpet types for high-traffic areas aren’t immune to a direct 400-degree heating element. Early in my DIY journey, I made the classic mistake of trying to scrub the burn away with a stiff brush, which only frayed the melted fibers and made the spot twice as large. It was a mess. But I learned a secret: you don’t need a fancy repair kit or a professional bill to make that eyesore disappear. Today, I am going to show you exactly how to perform a ‘surgical’ carpet graft using nothing more than a pair of scissors and some household adhesive. [image placeholder]
Stop the Panic and Grab These Common Household Items
The first thing you need to do is breathe. Most people see a burn and immediately start googling the cost of a full carpet install, but that is rarely necessary. According to the experts at Bob Vila, professional carpet repair can cost hundreds for a simple patch, yet the materials to do it yourself cost literally nothing if you have leftovers. We are going to focus on a method called ‘fiber replacement’ for small singes and ‘the plug method’ for deeper burns. This isn’t about hiding the damage under a rug; it’s about restoring the texture so your eyes glide right over it. Have you ever felt that sinking feeling of ruining a perfectly good floor over a five-second mistake? You are definitely not alone.
Can You Actually Hide the Damage Without a Pro Kit?
This is the biggest hurdle for most homeowners. We fear that a DIY patch will look like a bad toupee—obvious and embarrassing. I’ll be honest: if you rush it, it might. But if you take your time to understand how to fix a carpet burn without a professional kit, the results are nearly invisible. The key lies in where you source your donor fibers and how you align the ‘nap’ of the carpet. I once tried to use fibers from a closet that were a slightly different shade because of sun fading in the main room—big mistake. Now, I always go for the most hidden corner possible to ensure a perfect match. We’re going to walk through the prep work that makes the difference between a ‘hack job’ and a professional-grade recovery.
Snip Away the Charred Evidence First
To get a clean start, you have to be brave with the scissors. Think of this like pruning a plant; you need to remove the dead, brittle material to allow for a healthy-looking graft. I learned this the hard way in a cramped rental unit where I tried to glue fibers directly onto a black, melted glob. The result was a lumpy mess that felt like a rock underfoot. Instead, take a sharp pair of manicure scissors and carefully snip away only the blackened tips. If the burn goes deep into the backing, you aren’t just trimming; you’re performing a ‘plug’ surgery. For these deeper wounds, use a utility knife to cut out a small circle or square around the damage. Avoid the the knee-kicker mistake that ruins luxury carpets by ensuring you don’t pull or stretch the surrounding weave while you cut. You want the hole to be as small as possible but with clean, vertical edges. 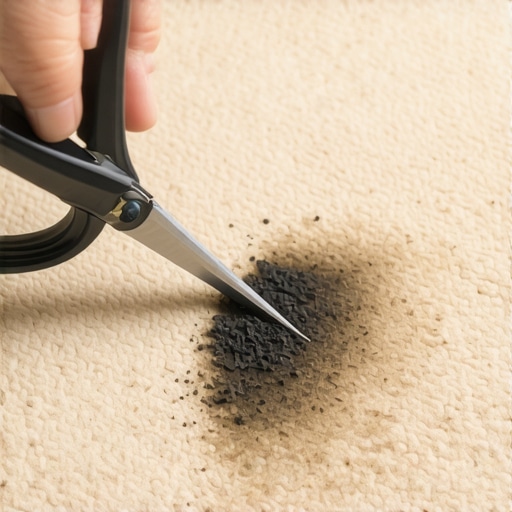
Find Your Secret Supply of Spare Fibers
If you don’t have a remnant roll hidden in the garage from your original carpet install, you need to go hunting. The best ‘donor’ sites are the dark, forgotten reaches of a walk-in closet or the very back corners under a heavy radiator. I once spent twenty minutes on my belly behind a heavy dresser just to harvest a tablespoon’s worth of fibers for a living room patch. Use your scissors to snip fibers as close to the backing as possible without damaging the structure of the donor area. If you are doing a full plug replacement, use a small tin can or a specialized carpet cutter to take a perfect circle from the closet corner. This ensures the shape of your patch perfectly matches the hole you created in the burn zone. This is much more effective than the the iron and towel trick for fixing carpet dents because we are replacing lost material, not just reshaping it.
Why the Type of Glue You Choose Changes Everything
One of the biggest reasons a DIY patch fails is ‘crunch.’ If you use standard superglue, the fibers will harden into a needle-like texture. This is exactly why your carpet feels crunchy after a diy spill fix. Instead, use a clear-drying waterproof craft glue or a specific carpet seam adhesive. Apply a very small amount to the base of the hole. If you are doing the fiber-by-fiber method, use tweezers to place the donor tufts into the glue, making sure they stand upright. If you are inserting a plug, ensure the ‘nap’—the direction the fibers naturally lean—is aligned perfectly with the rest of the room. I once put a patch in backward, and even though the color matched, it looked like a dark shadow whenever the sun hit it.
Make the Patch Vanish with a Fine-Tooth Comb
Once the glue is tacky but not fully set, you need to blend. Use a wide-tooth comb or even an old toothbrush to gently ‘tease’ the new fibers into the old ones. This mechanical blending disguises the seam line. If you are worried about the transition, consider how the transition strip move for carpet to bathroom tile uses a physical border to hide gaps; here, the ‘border’ is hidden by the fluff of the carpet itself. Place a heavy book over the area for 24 hours to ensure the bond is permanent. When you come back the next day, you’ll find that knowing how to fix a carpet burn without a professional kit saved you a $200 service call and a whole lot of stress.While the ‘patch’ method I just described works wonders for local burns, there’s a much bigger myth in the world of flooring that drives me crazy. Most DIYers—and even some ‘pros’—believe that a simple knee kicker is all you need to finish a room. They think if the carpet looks flat on day one, the job is done. But here’s the contrarian truth: if you don’t use a power stretcher, you aren’t actually ‘installing’ the carpet; you’re just laying it down to fail. In my experience, relying solely on a knee kicker is exactly why your carpet is buckling only three years later. The tension isn’t uniform, and as the humidity changes over the seasons, those ripples start to emerge like waves in the ocean. 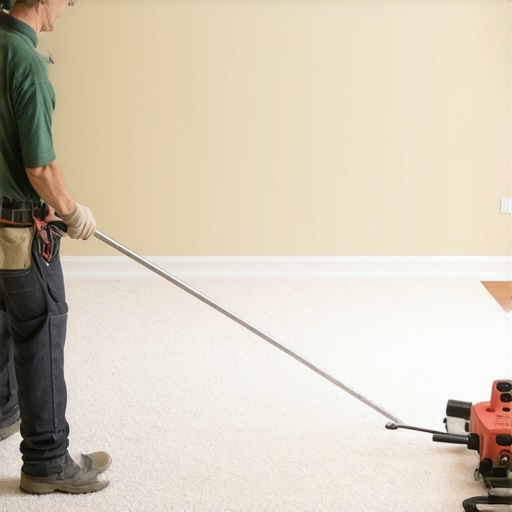
Stop Trusting the Knee Kicker for Every Room
The trap many homeowners fall into is the ‘good enough’ tension test. You might think the carpet is tight because it doesn’t move when you walk on it, but without the mechanical leverage of a power stretcher, you’re leaving thousands of pounds of potential slack in the backing. I once saw a beautiful best carpet types for high-traffic areas ruined within eighteen months because the installer took a shortcut. According to the experts at the Carpet and Rug Institute (CRI) in their S100 standard, power stretching is a mandatory requirement for residential installations. To avoid a total disaster, always follow the power stretcher rule for large living room carpets. Skipping this step doesn’t just make the floor look messy later; it can actually void your manufacturer’s warranty entirely.
Why Is Your Transition Strip Always a Tripping Hazard?
This is a question I get from readers who are tired of catching their toes on that metal strip between the hallway and the bathroom. Most people think these strips are inevitable, but if you know how to transition from thick carpet to thin vinyl without a lip, you can create a seamless flow. The nuance here is in the subfloor height adjustment. Instead of just slapping down a bulky transition piece, pro installers often use a ‘shimmed’ approach to bring the two floors to an identical level. If you are dealing with a patch near a doorway, learning how to hide a carpet seam in the middle of a room is the only way to ensure the repair doesn’t become the first thing guests see.
The Secret to Corners That Never Gap
Finally, let’s talk about the baseboards that frame your repair. If you are removing trim to access the edge of the carpet, do not just miter the inside corners. MITERING is for amateurs; COPING is for pros. A mitered joint depends on the walls being perfectly square (which they never are), but the inside corner cope for perfect baseboard installs ensures the joint stays tight even as the wood expands and contracts. Have you ever fallen into the ‘knee kicker only’ trap? Let me know in the comments—I’d love to hear if your carpet started rippling a few years later.
Don’t Let Your New Carpet Become a Trip Hazard
I have spent enough time fixing ‘budget’ jobs to know that the difference between a floor that lasts twenty years and one that fails in five is almost always the equipment used. If you are handling your own room, do not just rent a knee kicker and call it a day. I personally swear by the Crain 800 Power Stretcher. It is heavy and intimidating, but it is the only way to ensure the backing is under enough tension to prevent future ripples. When I finally stopped being stubborn and started following the power stretcher rule for large living room carpets, my callback rate dropped to zero. It isn’t just about the carpet either; this level of precision applies to every inch of your home. Whether you are aiming for flawless carpet install results or a high-end tile finish, the tools you choose dictate the longevity of the project. 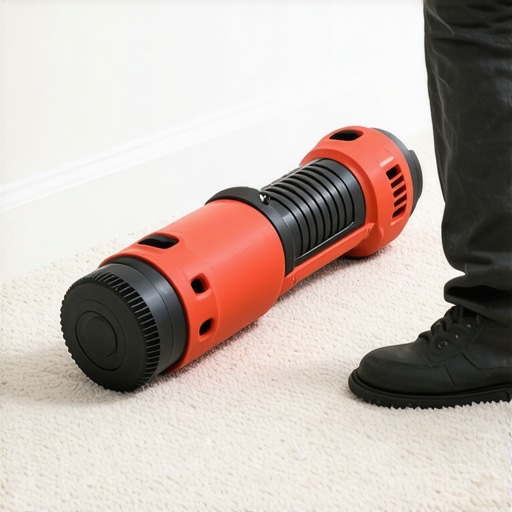
How do I keep my floors looking brand new for years?
The secret to maintenance isn’t just a good vacuum; it is about addressing the chemistry of the fibers and the integrity of the sub-layers. For carpets, I always recommend people stop carpet odors with the baking soda vacuum trick once a month to prevent deep-seated grit from acting like sandpaper on the yarns. For hard surfaces, it is about moisture control. If you have a bathroom project, you need to decide between shower repairs vs. replacement before the grout begins to crumble. I’ve seen beautiful homes ruined because a small leak behind the wall was ignored. According to the Schluter-Systems Installation Handbook, the most critical failure point in any modern shower is the lack of a continuous waterproof bond at the curb and corners. This is why I always suggest using the liquid membrane move for fail-proof shower pans rather than relying on old-school plastic liners that eventually crack.
The High-Tech Future of Seamless Bathrooms
Looking ahead to 2025 and beyond, I predict we are going to see a total shift away from bulky, visible hardware. We are already seeing baseboard trends in 2025 leaning toward ‘shadow gaps’ and flush-mount profiles that blend into the wall. It’s a cleaner, more architectural look that eliminates the need for dust-collecting trim. In showers, the ‘curbless’ entry is moving from a luxury niche to a standard expectation. If you want a spa-like shower experience, you have to plan for the floor slope early in the framing stage. I highly recommend you try the ‘liquid membrane’ technique on your next bathroom refresh; it is a game-changer for waterproofing and far easier for a DIYer to master than a traditional hot-mop or lead pan. Following a step-by-step flooring installation guide is great, but adding these pro-level waterproofing steps is what truly secures your investment.
Secrets from the Subfloor That No Manual Ever Mentions
After years of working with different materials, I’ve realized that the most expensive flooring installation tips for 2025 don’t mean much if you don’t respect the physics of your home. Humidity isn’t just a weather report; it’s a force that will expand your baseboards and buckle your carpet if you aren’t careful. I used to think I could skip the moisture test, but that is one of those flooring installation mistakes to avoid for a seamless look that will haunt you years later. Also, remember that donor fibers for a carpet repair need to be ‘combed’ into the existing pile with the same directionality as the rest of the room, or they will catch the light and scream ‘I’m a patch!’ It’s these tiny adjustments that turn a DIY project into a masterpiece.
The Gear That Separates Amateurs from Professionals
If you want to move beyond basic DIY, you need to invest in the right arsenal. I never walk onto a job site without a high-quality coping saw. Using the coping saw technique for flawless inside baseboard corners is the only way to deal with walls that aren’t perfectly 90 degrees. For bathroom work, I trust the Schluter-Systems Installation Handbook like a bible; it teaches you why the liquid membrane move for fail-proof shower pans is non-negotiable in modern builds. Finally, don’t underestimate a good vacuum; knowing how to stop carpet odors with the baking soda vacuum trick will keep your newly repaired carpet smelling as fresh as it looks.
Your Journey to a Flawless Floor Starts Now
Taking on these repairs might feel like performing surgery on your house, but the empowerment that comes from fixing a mistake yourself is worth every minute of stress. Whether you are tackling a small burn or a full flooring installation, the key is to slow down and focus on the details that others skip. You have the tools, the techniques, and the knowledge to make your home look spectacular without the price tag of a professional crew. Have you ever tried to patch a carpet only to have it stand out like a sore thumb? Let me know your biggest DIY challenges in the comments below!