

I still remember the afternoon I decided I was strong enough to stretch a 20-foot living room carpet using nothing but a knee kicker and sheer willpower. By 3 PM, my kneecaps felt like they’d been through a meat grinder, and the carpet had more ripples than a bag of potato chips. It was a classic rookie move. I thought the heavy-duty tools were just for the pros who wanted to overcharge, but the reality is much simpler: physics doesn’t care about your ego. If you’re working with a space larger than a walk-in closet, you need more than just a little leg power to get that professional, drum-tight finish. Today, we are going to fix those unsightly bumps for good. I’m going to walk you through the non-negotiable rule of the power stretcher—specifically why you can’t skip it for large rooms if you want your flooring to last. We’ll cover how to avoid the knee kicker mistake that ruins carpet tension and why your large living room requires a completely different approach than a small bedroom.
Why Your Knee Kicker is Failing You in Big Spaces
The problem with a knee kicker in a massive living room isn’t the tool itself; it’s the lack of reach. When you’re dealing with a large expanse, you’re only moving the carpet a few inches near the wall. The rest of that heavy backing is just sitting there, waiting to bunch up the moment you move the sofa. I learned this the hard way when I had to redo a whole floor because I ignored the carpet install secrets that veteran pros swear by. You see, a power stretcher uses a long pole to push against the opposite wall, creating a level of tension that a human leg simply cannot replicate. According to the Carpet and Rug Institute (CRI), power stretching is actually mandatory for most residential installations to maintain manufacturer warranties. If you don’t use one, you’re not just risking wrinkles; you’re likely voiding your investment. This is especially true if you’ve spent time picking out the best carpet types for high traffic areas, as these denser materials are even harder to pull tight by hand.
Is a rented power stretcher actually worth the hassle?
You might be thinking, “Do I really need to lug a giant metal case from the rental shop just for one room?” I get it. It’s heavy, it looks intimidating, and it costs a few extra bucks. But consider the alternative: in six months, you’ll be tripping over a “carpet bubble” while carrying a tray of drinks. I once saw a beautiful cozy living space ruined because the homeowner thought they could save fifty dollars on a rental. The result? A permanent crease that no amount of steam could fix. Trust me, the “hassle” of the right tool is nothing compared to the nightmare of moving all your furniture out a second time to fix a botched job. Have you ever looked at a ripple in your carpet and tried to just “smoosh” it down with your foot, only for it to pop back up somewhere else?Before you even touch the power stretcher, you have to ensure your foundation is rock solid. I learned the hard way in a client’s basement that if your tack strips aren’t anchored for the specific subfloor, the tension from the stretcher will just pull the strips right off the ground. When dealing with slabs, choosing the right tack strip for concrete subfloors is the difference between a job that takes two hours and a job that takes two days because you’re re-gluing wood. Also, if you are doing a full room, you probably need to clear the way. Use the pry bar secret for removing baseboards without damaging the drywall so you can get the carpet right up against the framing without fighting the trim.
Get the Power Stretcher Poles Level and Locked
Think of the power stretcher as a long-range hydraulic jack for your floor. You are not just kicking it; you are using the mechanical advantage of the opposite wall to force the carpet backing to expand. Start by assembling enough poles to reach from one wall to the other. The base of the stretcher, which pros call the tail, needs to push against a solid surface—usually a 2×4 scrap or a piece of the baseboard you have not removed yet—to distribute the pressure. If you push directly against the drywall, you will just punch a hole in it, which I did during my very first solo job in an apartment complex. It was an expensive lesson in physics.
Set the Teeth for a Deep Bite
The head of the stretcher has adjustable teeth. If they are too shallow, they will just shred the fibers. If they are too deep, they will snag the padding. I once over-tightened the teeth on a high-pile Berber and ended up pulling a run right through the center of the room. You want the teeth to grab the primary backing, not just the surface fuzz. This is part of the carpet install secrets that differentiate a DIY look from a pro finish. Once the teeth are set, push down on the handle until you feel that satisfying resistance. It should feel like you are stretching a giant, heavy-duty rubber band.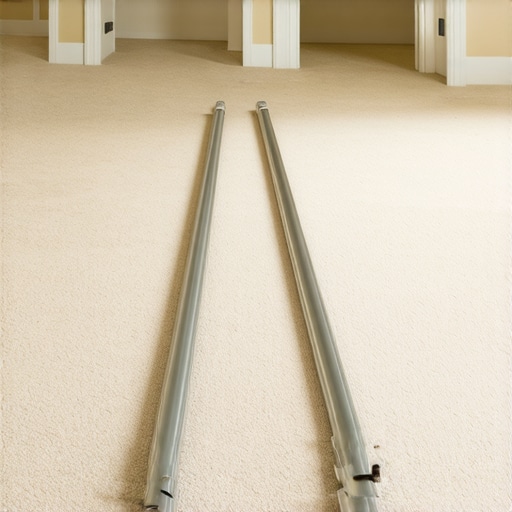
Follow the Star Pattern for a Tight Finish
Don’t just stretch randomly. You need to work from one corner out, almost like tightening the lug nuts on a car wheel. Start by securing one short wall with your knee kicker, then use the power stretcher to pull the carpet toward the opposite wall. You are aiming for about a 1% to 1.5% stretch. In a 20-foot room, that is about 3 inches of movement. If you do not hit that mark, the carpet will eventually relax and those annoying bubbles will return within the first year. Using the perimeter tension trick for wrinkle-free carpets involves pulling at a slight angle toward the corners to ensure no diagonal ripples form as you move down the wall.
Lock it Down with the Final Tuck
Once the power stretcher has done the heavy lifting, you will have a few inches of excess carpet hanging over the tack strips. This is where your knee kicker finally earns its keep for the fine-tuning. Use the kicker move for tucking carpet into tight corners and over the pins. You want to bump the carpet onto the pins so they bite hard into the backing. If you are following a step-by-step flooring installation guide, this is the moment where the room starts to look polished. Trim the excess with a wall trimmer, but leave just enough—about an eighth of an inch—to tuck into the gulley between the tack strip and the wall for a seamless transition.I’ve heard it a thousand times: “I want the thickest pad you’ve got so it feels like walking on a cloud.” Here’s the contrarian truth that most big-box retailers won’t tell you: overkill on padding is a fast track to a failed installation. If the cushion is too soft or too thick—usually anything over 7/16 of an inch for most residential cuts—it creates a trampoline effect. Every time you step, the carpet backing flexes excessively, eventually pulling itself right off the tack strips. If you’ve ever wondered why your carpet pad feels crunchy under your feet, it’s often because the cells in a low-quality, over-thick pad are collapsing under that localized stress. For the best carpet types for high traffic areas, a denser, thinner pad is the secret to a drum-tight finish that lasts a decade rather than a season. 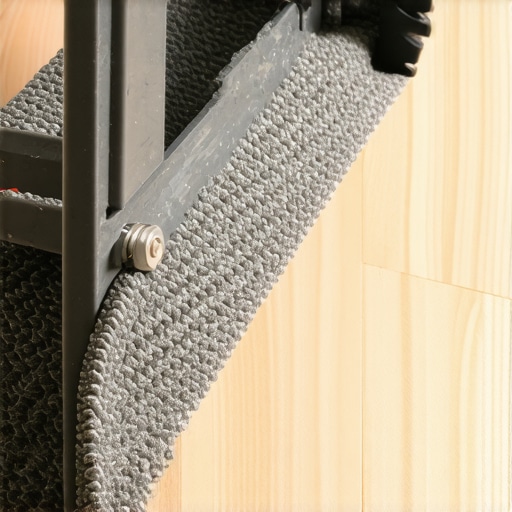
The Temperature Trap Most DIYers Ignore
One of the biggest flooring installation mistakes to avoid for a seamless look is rushing the stretch on a cold carpet. Professional standards, specifically the CRI 104/105 Installation Standards, emphasize that carpet must acclimate to a room’s temperature (between 65°F and 95°F) for at least 24 hours before you even think about using a power stretcher. If the backing is cold, it’s stiff. You’ll fight it with the stretcher, think you’ve got it tight, and then—as the room warms up—the fibers relax and the ripples reappear. I once saw a gorgeous living room develop a massive swell in the center because the installer hauled the roll off a freezing truck and kicked it in immediately. It’s a classic rookie move that proves expert flooring installation tips for 2025 are as much about biology and physics as they are about tools.
Does the direction of the carpet pile actually matter for tension?
Absolutely. This is the “hidden nuance” that separates the pros from the amateurs. If you don’t account for the nap, you might find that your seams look like scars or that the room feels “off” depending on where you stand. Understanding why your carpet looks different colors from different angles is vital because stretching *against* the grain requires significantly more force than stretching with it. If you apply equal pressure in both directions without checking the pile sweep, you’ll end up with uneven tension that pulls your seams apart during the first heavy vacuuming.
Avoiding the Double-Stretch Disaster
Here is a trap to watch out for: the “over-stretch.” While I’ve emphasized the need for power, you can actually go too far and rip the primary backing or distort the pattern. This is particularly dangerous when you’re following a step-by-step flooring installation for patterned carpets like Wilton or Axminster. If you pull a geometric pattern out of square, there is no going back—you’ve essentially ruined the aesthetics of the room. Always use a stay-tacking method where you temporarily nail down portions of the carpet to ensure the pattern stays true while the stretcher does the heavy lifting. Have you ever fallen into this trap or noticed ripples appearing just months after an install? Let me know in the comments.Once the tension is set and the room is stretched to its limits, the final hurdle isn’t the heavy lifting—it’s the precision. Most DIY disasters happen in the last six inches of the room. I’ve seen homeowners do a beautiful job stretching only to hack the edges with a dull utility knife, leaving a jagged mess that no amount of tucking can hide. For my own projects, I never touch a standard blade for the final perimeter. I rely on a Crain 191 wall trimmer. This tool is a game-changer because it uses a guide to ride along the wall, ensuring the cut is consistently about an eighth of an inch long. This tiny bit of extra material is the secret to getting a tight, professional tuck into the gulley. If you’re following carpet install secrets from the pros, you know that the edge is where the floor either looks like a million bucks or a weekend mistake. Dealing with the transition to other rooms is just as critical; learning how to transition from thick carpet to thin vinyl without a lip will save your toes from a lifetime of stubbing and keep your subfloor protected from moisture.
The Secret to Perfect Edges Without the Bloodshed
After the edges are trimmed, you have to seal the deal with the baseboards. I’ve found that baseboard trends in 2025 are leaning toward taller, flatter profiles, which can be a nightmare to install if your walls aren’t perfectly straight. This is where the scribing tool every diyer needs comes into play. If your carpet is thick, you might think you can just smash the baseboard down on top of it. Don’t do it. You should set your trim just a hair above the carpet height to allow for future cleaning and to ensure the wood doesn’t wick up any moisture from professional steam cleans. Choosing baseboard styles that elevate your interior design is only half the battle; the real victory is in the installation. 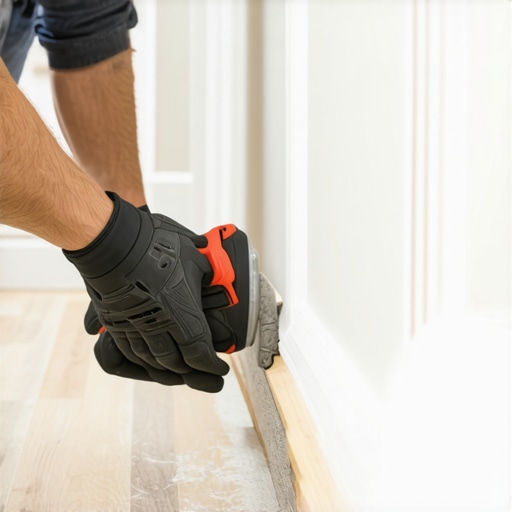
How can I keep my carpet looking new for a decade?
Maintenance is the most ignored part of the process, but it’s the only way to protect your investment. I personally follow the IICRC S100 standard for professional cleaning, which recommends a hot water extraction every 12 to 18 months. Beyond the deep cleans, your best friend is a high-quality vacuum with an adjustable beater bar. If you’ve chosen one of the best carpet types for high traffic areas, you need to lift the pile regularly to prevent the fibers from crushing. If you ever notice a localized ripple—perhaps because you moved a heavy piano—you can often learn how to fix a bubbling carpet without calling a professional using a simple re-stretch technique in just that corner.
Look Into the Future of Eco-Friendly Flooring
The industry is shifting rapidly. By 2030, I predict we will see a move away from traditional tack-and-stretch methods toward sophisticated, adhesive-free magnetic or hook-and-loop backings that allow homeowners to swap out sections of carpet like tiles without needing a power stretcher at all. We are already seeing these innovations in commercial spaces, and the residential market isn’t far behind. For now, though, stick to the basics of high-tension installation. My final piece of advice? Don’t settle for ‘good enough’ when you’re finishing the edges. Spend the extra twenty minutes with your trimmer and your scribe tool. Trust me, your future self—and your home’s resale value—will thank you. Grab a professional wall trimmer for your next project and see the difference a dedicated tool makes on your very first cut.
The Hardest Lessons Learned in the Trenches of Carpet Install
Over the years, I’ve realized that the difference between a “good” job and a “pro” job often comes down to the things you can’t see. First, never underestimate the power of the snap test; once you think you’re done stretching, lift the carpet in the center of the room about an inch and let it go. It should snap back against the pad with a crisp sound. If it floats down slowly, you haven’t used enough tension yet. Second, I’ve learned that the knee kicker mistake that ruins luxury carpets usually happens because people treat the tool like a sledgehammer rather than a precision instrument. Finally, remember that temperature isn’t just a comfort thing—it’s a structural requirement. A cold backing is a stubborn backing.
Gear That Actually Makes the Job Easier
If you want to move beyond the basics, there are a few resources I swear by. The CRI 104/105 Residential Installation Standard is my bible for any dispute or technical question; it’s the gold standard for the industry. For physical tools, I always recommend the Roberts 10-254 Power Stretcher because of its durability and the reach it provides in large rooms. Additionally, if you are looking for carpet install secrets achieving flawless results every time, investing in a high-quality row finder will save you from accidental “runs” when cutting. I also suggest keeping a copy of the transform your flooring top trends in installation for 2025 guide handy to stay ahead of new backing technologies.
#IMAGE_PLACEHOLDER_E#
Your Path to a Wrinkle-Free Home
Installing your own flooring is a rite of passage for any serious DIYer. It transforms the way you feel about your home, turning a simple walking surface into a testament to your hard work. Don’t be intimidated by the power stretcher; respect the physics, take your time with the edges, and you’ll have a floor that stays drum-tight for years. Whether you’re doing a full baseboards makeover or just refreshing one room, the effort is always worth the result. If you run into trouble at the thresholds, knowing how to fix a loose carpet transition that trips everyone will be your final victory lap. Have you ever struggled with a carpet bubble that just wouldn’t stay down no matter how hard you kicked it? Let me know in the comments below!