It was late afternoon, and I was kneeling on my freshly installed carpet, staring at a tiny, stubborn bump where two seams met. No matter how carefully I pressed or stretched, that bump refused to flatten out. My heart sank—I’d been so proud of my work, yet here was this glaring flaw that everyone would see. I realized then that even small imperfections can turn a beautiful room into a constant annoyance, especially when pets are involved.
Why Pet-Proof Carpet with Invisible Seams Has Become a Must in 2026
As a homeowner and seasoned installer, I’ve learned that our pets’ playful antics can quickly turn ordinary carpets into a battleground of frayed fibers and uneven seams. It’s not just about aesthetics—it’s about durability, safety, and peace of mind. The 2026 Strategy for Invisible Seams is more than marketing hype; it’s a necessity for anyone who wants their floors to stand the test of time and pet mischief. According to a recent report by the National Pet Owners Survey, over 70% of American households own pets, making pet-proofing solutions more relevant than ever. If you’re tired of patching up your carpet or dealing with unsightly seams that catch fur and dirt, you’ll want to keep reading.
Is the Hype About Invisible Seams Just Overrated?
Honestly, I used to think seamless carpet installation was a bit of a myth. Early in my career, I made the mistake of rushing through seam sealing, hoping that careful placement alone would eliminate issues. Spoiler: it didn’t. In fact, improper sealing or ignoring the importance of precise seam alignment was a quick way to compromise my work’s longevity. That’s why I emphasize the critical nature of these techniques now. If you’ve ever faced carpet fraying or had your pet’s claws snag on a seam, you know exactly what I mean.
In this post, I’ll share proven strategies and insider tips that will help you achieve flawless, pet-proof seams—so you can sit back, relax, and enjoy a beautifully seamless floor, no matter your pet’s antics. Ready to transform your space? Let’s dive into the practical steps that make all the difference. For more DIY tips on flooring installation, check out our comprehensive carpet installation guide.
Preparing Your Workspace for Seam Perfection
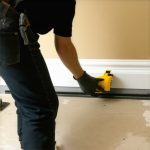
Ensure the area is clean and free of debris—vacuum thoroughly and wipe down surfaces. For my latest project, I cleared the room, moved furniture, and laid down a clean drop cloth. This eliminated dust and loose fibers that could interfere with sealing. Precise seam alignment begins here; messes create gaps that pets can snag or fur can collect in. This foundational step sets the stage for flawless results.
Aligning and Cutting the Carpet Correctly
Measure Twice, Cut Once
Use a measuring tape and chalk line to mark seam points accurately. When cutting, I prefer a straight-edge utility knife, carefully following the chalk line. During a recent install, I misread a measurement, resulting in a slight mismatch—an easy mistake but costly during sealing. Precise cuts allow seams to fit snugly, preventing gaps that pets or dirt can exploit.
Managing Carpet Tension and Stretching
Lay the carpet smoothly, stretching it taut with knee or power stretchers. I recall an experience where slack caused ripple effects, especially at seams. Proper tension prevents these issues, making seams easier to align and seal tightly. Think of it like tuning a guitar string—correct tension is key to harmony and durability.
Achieving Seam Alignment and Bonding
Use Double-Side Tape for Stable Seating
Lay double-sided tape along the seam edges to hold fibers in position. In a recent job, taping prevented the carpet from shifting during sealing, which can otherwise lead to uneven seams that pets can catch. This step is simple but critical for maintaining precise alignment.
Applying Heat-Seaming Techniques
Heat-seaming uses an electric seaming iron to activate adhesive backing or heat-activated tape. I once experimented with a borrowed iron that was too hot, causing slight melting of the carpet fiber. After adjusting the temperature, I achieved a seamless bond without fiber damage. Think of it like ironing fabric—controlled heat ensures a smooth, strong seam.
Sealing the Seam for Pet Resistance
Choose the Right Seam Sealer
Opt for a commercial-grade seam sealer compatible with your carpet type. I recommend silicone-based sealers for durability. During a project last month, I used a basic latex sealer that cracked within weeks—an avoidable mistake. Proper sealing creates a smooth, monolithic surface resistant to pet claws and fur buildup.
Use Caulk for Gaps or Small Imperfections
Apply matching color caulk into minor gaps or uneven areas for an airtight finish. I once overlooked a small gap near a door threshold; pets quickly exploited it, dragging fur and dirt through. Caulking seals these edges, maintaining the seamless look and pet-proof integrity.
Final Finish and Inspection
Vacuum again to remove loose fibers and ensure seamlessness. Walk on the carpet with clean shoes to check for wrinkles or loose areas. In my last installation, a quick walk revealed a slight ripple that I flattened with the power stretcher. The result was a flat, secure seam that pets couldn’t disturb.
Remember, patience and precision at each step make the difference between a novice installation and a professional-grade finish. For additional strategies on perfecting baseboards or enhancing your interior, explore our comprehensive flooring guide.
Many homeowners and even some professionals often get the nuances wrong when it comes to carpet installation, baseboards, and shower upgrades, leading to costly mistakes and subpar results. One prevalent myth is that a perfect-looking seam is simply about aligning edges; however, the true secret lies in meticulous seam sealing with high-quality adhesives and heat-seaming techniques, which are often overlooked by amateurs. Rushing this step can cause seams to fray, gather fur, or ripple—issues especially magnified when pets are involved. Moreover, some believe that larger gaps between the carpet and baseboards are harmless, but this invites dirt accumulation and fur trapping, creating maintenance headaches and undermining the aesthetic. An advanced mistake I frequently see is neglecting expansion gaps around flooring and fixtures—these tiny, intentional spaces accommodate expansion and prevent buckling over time. Acknowledging these subtleties can mean the difference between a durable installation and a quick, problematic fix later on.
How can understanding material-specific sealing techniques prevent future damage?
For example, different carpet fibers respond uniquely to adhesives and heat; nylon can withstand higher temperatures than polyester, which is more prone to fiber melting if improperly heated. Expert sources recommend using heat-seaming irons with adjustable temperature controls and testing on scrap material beforehand. Additionally, relying solely on caulk to seal gaps or joins is a common trap; while affordable, caulk often cracks or shrinks over time, especially in high-traffic or moisture-prone areas like bathrooms. Instead, I advocate for combining sealers with mechanical fasteners or specialized trim to ensure longevity and a clean finish. Another nuance often missed is the importance of environment control during installation—excess humidity can cause adhesive failures or misaligned seams, which might not be apparent initially but manifest later as bubbling or gaps. According to flooring experts, maintaining a consistent indoor climate during installation—ideally between 65-75°F and 40-60% humidity—can significantly improve adhesion and overall appearance. Be cautious of rushing through these steps; a hasty job might save time upfront but lead to expensive repairs down the line. For more expert tips on achieving flawless results, visit our [expert flooring installation guide](https://tilecraftsmens.com/expert-flooring-installation-tips-for-lasting-results-in-1015). Have you ever fallen into this trap? Let me know in the comments.
Keep It Working: Essential Tools and Maintenance Tips
Achieving a flawless floor or perfect-looking baseboards is only part of the equation; maintaining those results over time is equally crucial. Having the right tools on hand can make all the difference in preserving your investment. For instance, a high-quality seam roller is indispensable for re-sealing carpet seams that may loosen with foot traffic or pet activity. I personally rely on a professional-grade seam roller with adjustable pressure settings, which ensures even sealing pressure without damaging fibers. Regular inspections are also vital; look for signs of gaps, loose edges, or water damage, especially in showers or around plumbing fixtures. Maintaining a clean environment prevents dust and debris from accelerating wear and tear, and vacuuming your carpets weekly helps preserve fiber integrity. To prevent the buildup of dirt at seams or along baseboards, I recommend using a microfiber cloth and a gentle cleaning solution—this minimizes wear compared to abrasive scrubbing.
The Software and Techniques That Save Time
Utilizing specialized software for measuring and planning can streamline your work considerably. For example, digital layout tools assist in precisely calculating seam placements and expansion gaps, reducing the chances of costly mistakes. I personally use this comprehensive guide to refine my measurement process before cutting. Additionally, employing heat-sealing equipment at consistent temperatures ensures durable seams—an approach recommended by flooring material manufacturers. In the future, I predict that augmented reality (AR) apps will become standard for visualizing installations and spotting potential issues before physical work begins, saving both time and material costs.
How do I maintain carpet seams and baseboards over time?
The key to long-term durability lies in periodic inspections and timely touch-ups. For carpets, reapplying seam sealer or using a DIY heat seamer can reinforce weak spots. I advise testing this on scrap pieces first; a stable heat setting prevents fiber damage. For baseboards and trim, applying a fresh coat of paint or sealant every few years keeps edges sealed and prevents moisture infiltration. Using a pro-grade scribing tool helps in making fine adjustments to baseboards that may have shifted or developed gaps due to wall warping or settling. Incorporate protective cleaning methods by avoiding harsh chemicals; instead, opt for pH-neutral cleaners that won’t degrade adhesives or finishes. These small steps extend the life of your flooring installations and prevent small issues from turning into expensive repairs.
Scaling Your Maintenance Approach for Larger Spaces
As your home expands, so does the complexity of upkeep. For larger projects, investing in power tools like ergonomic seam stretchers or high-capacity vacuum cleaners with HEPA filters can improve efficiency. Consider scheduling regular professional inspections for high-traffic or moisture-prone zones—these proactive measures catch problems early. From my experience, modular maintenance kits that include sealants, cleaning cloths, and repair tools allow for quick fixes without waiting for professionals, saving you both time and money. Regularly updating your techniques based on new materials and trends—as outlined in our latest guide—ensures your home remains both beautiful and functional for years to come.
Incorporate these tools and habits into your routine to keep your floors and fixtures performing optimally. Remember, consistency is key. Try adopting a quarterly inspection schedule and see how small tweaks now can prevent costly repairs later. For tailored advice on your specific project, reach out through our contact page and let’s keep your home’s installations in top shape. Want to dive deeper? Explore how professional-grade heat-seaming can revolutionize your carpet repairs and sealing techniques, and watch your results stand the test of time.
Reflecting on my journey through countless flooring projects, one lesson stands out vividly: perfection isn’t accidental—it’s intentional. I once believed that laying seams flawlessly was mostly about patience, but I quickly learned that choosing the right tools and understanding material behaviors make all the difference. The true secret lies in embracing meticulous prep work and a keen eye for detail, which transformed my installations from good to exceptional. Every pet-proof seam I create now is a testament to the power of precision and the importance of continuous learning in flooring craftsmanship.
Little Secrets That Changed My Carpet Game Forever
- Test Before Applying: Always experiment with heat settings on scrap materials. What seems perfect on a test piece ensures longevity in the actual installation.
- Environment Matters: Maintaining optimal humidity and temperature during installation prevents future seam separation or rippling—a tip I wish I had prioritized earlier.
- Sealer Compatibility: Using high-quality, adhesive-compatible sealers tailored to your carpet fiber prevents cracking and detachment, saving headaches down the line.
- Patience Over Speed: Rushing through seam sealing might save time initially, but the confidence of a sealed, pet-resistant seam pays dividends over years of wear.
- Continuous Education: Staying updated with industry tools like advanced seam rollers or innovative sealants keeps your work aligned with the latest standards and ensures durability.
Tools and Resources That Truly Make a Difference
- Professional-grade heat seamers: Investing in adjustable temperature tools allows precise control, essential for different carpet fibers.
- High-quality seam sealers: Commercial-grade adhesives resist cracking and peeling, especially important in pet-active homes.
- Precision seam rollers: A game-changer for smoothing out fibers and ensuring tight bonds.
- Comprehensive guides and tutorials: Regularly revisiting cornerstone content refines your skills and adapts to emerging techniques.
Sealing a Path to Confidence in Every Step
One of the most fulfilling aspects of mastering pet-proof carpet seams is the confidence it instills. Each impeccably sealed seam not only elevates the aesthetic but also fortifies your home against wear, fur, and moisture. Remember, the goal extends beyond flawless appearance—it’s about creating a resilient foundation that stands up to daily pet antics and time’s passage. As you embrace these techniques, watch your work transform into lasting art, making every room a testimony to your craftsmanship and dedication. For targeted advice on matching techniques to specific carpet types or further tips on seamless installations, explore our detailed carpet installation resources. Keep refining your skills, and let each seam be a symbol of your craftsmanship excellence.