

There I was, kneeling on a half-finished floor, holding a beautiful piece of primed pine. It was the final corner of a long weekend project. I took aim with my finish nailer, pulled the trigger, and—*POP*. A hairline fracture raced six inches up the grain. I didn’t just break the wood; I broke my spirit. I’d spent all that time researching how to choose the perfect baseboards only to butcher the installation in the final seconds. We have all been there. You want that seamless look, but the wood has other plans. Today, I am sharing the one extra step I used to think was a complete waste of time, but now I refuse to start a room without it: the pre-drilling tactic. Have you ever felt that sinking feeling when a piece of trim you just spent twenty minutes measuring and cutting splits right at the finish line? Let me know in the comments if I am not alone in this frustration.
The Tiny Hole That Saves Your Trim
In my early DIY days, I was convinced that my 18-gauge brad nailer was a magic wand. I thought the thin nails were so small they couldn’t possibly do any damage. I was wrong. I ruined more baseboards makeovers than I care to admit because I was too lazy to reach for my drill. According to technical data from the USDA Forest Products Laboratory, wood is significantly more likely to split when fasteners are placed near the end-grain without a pilot hole because the nail acts as a wedge, forcing the wood fibers apart. By taking ten seconds to drill a pilot hole slightly smaller than your nail, you remove the material instead of just shoving it aside. This is especially critical when you are trying to nail those perfect outside corners where the wood is thinnest and most vulnerable.
Does Pre-Drilling Actually Save Any Real Time?
You might be thinking that swapping tools every thirty seconds will turn a two-hour job into a four-hour marathon. It is a fair concern. But consider this: how long does it take to pull a split board, go back to the saw, recut it, and try again? I once wasted an entire afternoon on a single hallway because I kept splitting the delicate returns. If I had just used a drill from the start, I would have been on the couch with a cold drink two hours earlier. Pre-drilling ensures that when you finally fire that nailer, you are doing it with confidence, not a prayer. It also keeps you from falling into the trap of nailing into the bottom plate only, which can lead to gaps later on. Trust me, your future self will thank you when those corners stay tight for years.
Master the Pre-Drill Before You Fire the Nailer
Think of wood fibers like a tightly packed bundle of drinking straws. When you drive a nail into that bundle, you aren’t making a hole; you are forcing those straws to move out of the way. If there is no room to move—like at the very end of a board—the straws simply burst outward. This is why your trim splits. I remember a humid Tuesday in July when I was finishing a master bedroom. I was using 1/2-inch MDF—which is basically compressed sawdust and glue—and I decided to skip the pilot hole on a tiny 2-inch return piece because I was tired. *CRACK.* The piece didn’t just split; it shattered like a dry biscuit. I spent forty minutes driving back to the store for one stick of trim. That one shortcut cost me my entire evening. When you are knee-deep in a step-by-step flooring installation from planning to perfect finish, the last thing you want is a hardware run because of a ten-second oversight.
Pick a Bit That Actually Fits Your Fastener
The secret is in the sizing. If your drill bit is the same size as your nail, the nail won’t have anything to grab onto. It will just slide into the hole like a loose tooth, providing zero structural integrity. You want a bit that is roughly 75% the diameter of the nail shank. For a standard 18-gauge brad nail, a 1/16-inch drill bit is usually your best friend. Hold the nail behind the bit; you should see the bit covering the ‘body’ of the nail, but the sharp edges of the nail should still peek out from the sides. This ensures the nail can still bite into the wood fibers while the bulk of the displacement pressure is removed.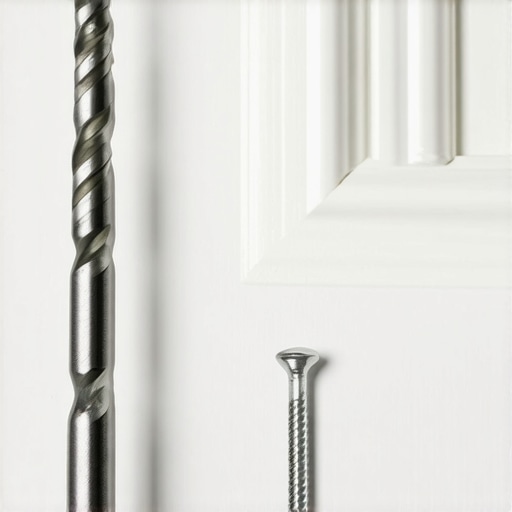
Angle Your Cuts for a Gap-Free Finish
Even with perfect nailing, a bad cut will ruin the aesthetic. Most people cut their miters at a flat 45 degrees, but I’ve found that using the back bevel secret for seamless baseboard corners creates a much tighter fit. By angling the back of the cut slightly more than the front, you ensure the visible faces of the wood touch first, hiding any slight imperfections in the wall’s squareness. This prevents those annoying flooring installation mistakes to avoid for a seamless look that usually require tubes of caulk to fix later. If you find yourself staring at a small opening anyway, don’t panic. You can often use how to fix baseboard gaps without replacing the trim techniques to save the day.
Protect the Ends Where Wood is Weakest
The most dangerous area for any piece of trim is the last two inches of the board. This is where the tension is highest. When you are executing the 45-degree trick for perfect baseboard outside corners, always drill your pilot hole through the mitered face of one board into the meat of the adjoining board. This creates a mechanical bond that resists seasonal expansion and contraction. For those tiny, tricky pieces where a nailer might be too powerful, I often pivot to the pocket hole secret for sturdy baseboard returns. It’s an extra minute of work that guarantees your returns won’t go flying when a vacuum cleaner inevitably bumps into them. Using a bit of wood glue in tandem with your pre-drilled holes acts like a weld, making the joint stronger than the wood itself.Let’s dig deeper into where most people actually lose the battle: the invisible layers. Most DIYers—and even some pros who should know better—operate under the dangerous assumption that tile and grout are waterproof. They aren’t. Grout is a porous cementitious product that eventually lets moisture through. If your secondary drainage system isn’t perfect, that water stays trapped, rotting your studs from the inside out. Have you ever fallen into this trap? Let me know in the comments. In my experience, the biggest ‘oops’ factor is relying on the surface finish rather than the ‘mud’ beneath. According to the Tile Council of North America (TCNA) Handbook, tile in wet areas requires a minimum of 95% mortar contact to prevent water-collecting voids. If you don’t achieve this, you aren’t just risking a loose tile; you are inviting mold to grow in the hollows. This is why the trowel size mistake that ruins your shower tile bond is so catastrophic for long-term durability.
Stop Treating Your Grout Like a Waterproof Barrier
Many homeowners spend thousands on shower renovation ideas modern designs for a luxury feel, but ignore the substrate. If you aren’t using a topical liquid membrane or a solid sheet system, you are essentially letting your subfloor drink every time you shower. I’ve seen beautiful marble floors ruined because the installer skipped the moisture barrier, thinking the ‘sealer’ on the grout was enough. It never is. You need to ensure you understand why most DIY shower waterproofing fails at the drain—usually because the weep holes in the drain assembly get clogged with mortar, preventing trapped water from escaping. #IMAGE_PLACE_HOLDER_C#
Can Your Drain Connection Survive Ten Years of Use?
The nuance of a rock-solid floor isn’t just about the top layer; it’s about the compression strength of what’s underneath. I once walked into a job where the client complained their floor felt ‘squishy’ near the drain. It turns out the installer used a cheap foam base without a proper mortar bed, causing the entire assembly to flex and crack the grout lines. Understanding the mud bed secret for rock-solid shower floors is the difference between a lifetime installation and a five-year failure. When the support fails, the pan begins to flex, which is exactly why your shower pan is sinking and the mortar bed fix becomes your only expensive option. Don’t just follow the instructions on the box; look for the hidden ‘traps’ like seasonal expansion. For example, if you are installing luxury vinyl nearby, you must respect why your vinyl plank floor is buckling at the windows due to thermal expansion, a rule that applies to almost every material in your home. Expert-level installation is 10% what you see and 90% the preparation you’ll never see again.Once you move past the initial panic of installation, you realize that the real work is in the verification. I used to rely on my gut feeling to tell if a concrete slab was dry enough for vinyl, but after one disastrous project where the planks curled like potato chips, I bought a professional pinless moisture meter. It was a game changer. If you want to avoid a total rebuild, you need to lean on the moisture meter test every flooring pro uses before any material touches the ground. According to the National Wood Flooring Association (NWFA), a wood floor is only as stable as its environment, and maintaining a relative humidity between 30% and 50% is non-negotiable for preventing gaps. I carry my Wagner meter everywhere now; it’s the only way to prove to a client—or myself—that the house is actually ready for its new skin.
Stop Relying on the Knee Kicker for Carpet Tension
In the world of textiles, I see the same mistake repeated in almost every DIY bedroom: people think a knee kicker is a stretching tool. It isn’t. It’s a positioning tool. If you want a floor that doesn’t look like a topographical map of the Andes three years from now, you need a power stretcher. I’ve seen so many homeowners fall victim to the knee kicker mistake that ruins new carpet because they didn’t want to rent the right gear. A power stretcher uses leverage to pull the backing tight against the walls, ensuring the perimeter tension trick for wrinkle-free carpets actually holds. It’s the difference between a floor that stays flat and one that develops those annoying ripples that lead to trips and premature wear. 
How do I maintain my shower and floors over the long haul?
Maintenance isn’t about deep cleaning once a year; it’s about micro-interventions. In the bathroom, you have to be vigilant about the junctions. When you see a hairline fracture in the corner of your tile, don’t just ignore it. That is a signal that the house is shifting and your rigid grout is failing. This is how we fixed the grout crack in the shower corner for good: we replaced the grout in the change-of-plane with a color-matched 100% silicone caulk. Silicone flexes while grout snaps. For your baseboards, keep an eye on the floor-to-trim gap. If you notice a separation, it might not be the trim moving, but the floor settling. Knowing shower repairs when to fix vs replace for longevity can save you five figures if you catch a failing seal early enough.
The Shift Toward Smart and Sustainable Surfaces
Looking ahead, the industry is moving away from purely aesthetic choices toward ‘intelligent’ installations. I’m already seeing a surge in transform your flooring top trends in installation for 2025 that include built-in leak sensors under appliances and antimicrobial grouts that actually inhibit mold growth at the molecular level. We are moving toward a time where your floor will tell you if there’s a leak before you even see a spot on the ceiling below. If you want to step up your DIY game today, I challenge you to master one ‘pro’ finish: the next time you seal a shower, use the blue tape secret for professional shower silicone lines every time. It is the single easiest way to make a $500 job look like a $5,000 masterpiece.
Why My Most Expensive Mistakes Always Happened in the Last Ten Percent
Looking back at decades of home projects, I’ve realized that the most costly errors weren’t made during the demolition or the framing; they happened during the final hour of the finish work. We often get so close to the finish line that we start to gamble with our time. I learned the hard way that skipping the moisture meter test every flooring pro uses can turn a beautiful weekend of work into a warped, buckling nightmare three months later. My biggest lightbulb moment was realizing that professional results aren’t about speed; they are about the discipline to stay meticulous even when you’re exhausted. Whether it is deciding on shower repairs when to fix vs replace for longevity or simply taking the time to pre-drill a tiny piece of trim, that final ten percent of effort accounts for ninety percent of the home’s long-term value. Don’t let your ‘almost done’ excitement cloud your ‘done right’ judgment.#IMAGE_PLACEHOLDER_E#
The Tools That Rescued My Sanity and My Subfloors
If I had to narrow down my workshop to just a few essentials that elevated my results from amateur to artisan, I’d start with a high-quality scribing tool. Using the scribing tool every diyert needs for tight baseboards allowed me to fit trim against wonky, century-old walls with zero gaps. For the bathroom, I no longer rely on a steady hand alone; I always use the blue tape secret for professional shower silicone lines every time to get those crisp, surgical edges that prevent mold and leaks. Finally, if you are tackling soft surfaces, stop relying on your knees. I’ve seen how the knee kicker mistake that ruins new carpet tension can lead to ripples and wear; always rent a power stretcher to ensure that the carpet stays taut for its entire lifespan. These tools don’t just make the job easier—they make the results permanent.
Step Into Your Newly Transformed Space With Confidence
The transition from a construction zone to a finished sanctuary is one of the most rewarding feelings a homeowner can experience. By focusing on the hidden details—the pre-drilled holes, the moisture barriers, and the correct tension—you are doing more than just updating a room; you are protecting your biggest investment. As you move forward with your expert flooring installation tips for 2025, remember that every extra minute spent in preparation is an hour saved in future repairs. Your home is a reflection of your patience and your craft, so take that final victory lap with the knowledge that you did it right. Have you ever rushed the final few boards only to regret it later? Share your ‘lesson learned’ in the comments below!