

Picture this: I just finished installing a fancy new shower in my bathroom, feeling pretty proud of my handiwork. But within days, a stubborn smell started wafting up from the drain—this awful, musty odor that no amount of scrubbing could eliminate. Turns out, I’d overlooked a tiny but crucial detail—the dry P-trap—that was causing the entire problem. That moment of realization was a lightbulb for me, and I knew I wasn’t alone in facing this frustrating issue.
Why Drain Odors Feel Like a Home Invader
If you’ve ever battled a lingering drain smell, you know how it can turn your clean home into a less-than-pleasant place. It’s not just an annoyance; persistent odors can indicate underlying plumbing issues that, if ignored, might lead to more significant problems. I’ve learned that most of these odors arise because the water in the P-trap effectively seals off the drain from sewer gases. When that water evaporates—especially in rarely used drains or during dry seasons—the gases sneak back into your home, bringing the smell along for the ride.
Just How Common Is This Problem?
Did you know that according to plumbing experts, dry P-traps are among the most overlooked causes of unpleasant drain odors? It’s surprisingly common, especially in bathrooms or laundry rooms that aren’t used regularly. I made the mistake early on of assuming that any smell would be due to a clog or a more complex issue, only to discover it was simply a matter of water evaporation. Fixing this was easier than I thought, and it made a huge difference in the air quality of my home.
So, whether you’re facing this problem now or want to prevent it before it starts, I’m here to guide you through practical, tried-and-true solutions. We’ll delve into how to identify if your drain has a dry trap and the steps you can take to put an end to those unwelcome odors once and for all.
Ready to reclaim your home’s freshness? Let’s get into the details.
Identify the Dry P-Trap and Restore Water Seal
First, locate the drain that’s emitting the odor. Remove the drain cover and inspect the P-trap—this U-shaped pipe holds water to block sewer gases. If this water has evaporated, gases escape, causing odors. To fix this, pour water directly into the drain until the P-trap fills and seals properly, preventing gases from rising. During my own experience, I found that simply pouring a few liters of water solved the stubborn smell instantly. For extra reassurance, add a bit of vegetable oil to slow evaporation and keep the seal intact longer.
Clean the Drain Thoroughly to Remove Odor Sources
Next, clean the drain and surrounding pipe to eliminate buildup of organic matter that can harbor bacteria and emit foul smells. Use a mixture of baking soda and vinegar—pour baking soda first, then add vinegar, which will fizz and loosen debris. After 15 minutes, flush with hot water. I once tried this method in my bathroom, and it not only freshened the air but also improved drainage. Regular cleaning reduces residue that could contribute to persistent odors.
Check for Hidden Leaks or Ventilation Issues
Odors may also stem from leaks or poor ventilation in the plumbing system. Examine nearby pipes for leaks or corrosion; moisture can promote mold growth and bad smells. Also, ensure vent pipes are clear—blockages prevent sewer gases from venting outside, causing odors to back up into your home. I had a blocked vent that caused a musty smell; clearing it with a plumber’s snake resolved the issue. Installing proper ventilation, especially in rarely used drains, is crucial for ongoing odor control.
Use Odor Neutralizers or Sealants
To keep your drains smelling fresh longer, consider applying a consumer-approved odor sealant inside the trap or drain pipe. These products create a chemical barrier that traps odors. Additionally, employing biological drain cleaners containing enzymes can break down organic matter responsible for bad smells. I once used an enzyme-based cleaner monthly, and it maintained a neutral aroma in my bathroom without resorting to heavy chemical fragrances.
Implement Preventative Maintenance
Prevent dry P-traps by running water periodically in infrequently used drains—pour a cup of water every few weeks. Installing a small amount of mineral oil in the trap can also slow evaporation. Think of this as watering your houseplants to keep them healthy; regular maintenance ensures the plumbing’s natural defenses function smoothly. For a comprehensive upgrade and to make sure your plumbing system is in top shape, exploring modern shower enclosure tips can also boost your bathroom’s freshness and efficiency.When it comes to home improvements like carpet installation, baseboard updates, flooring, or shower renovations, many assume that following standard procedures guarantees success. However, even seasoned DIYers or novice contractors often get tripped up by subtle nuances that can make or break the final result. Let’s explore some of these overlooked details that can save you time, money, and frustration.
What Do Experts Know That You Don’t About Precise Alignment and Material Choice?
Many believe that simply leveling the subfloor or choosing the right color is enough. In reality, advanced practitioners pay close attention to the direction of material installation, moisture barriers, and expansion gaps, which aren’t always obvious at first glance. For example, incorrect flooring direction can lead to buckling or uneven wear over time. According to a study published in the *Journal of Construction Engineering and Management*, improper joinery or misaligned seams are among the most common causes of early material failure, emphasizing the importance of meticulous planning (source: see here).
Keep It Running with Precision Tools
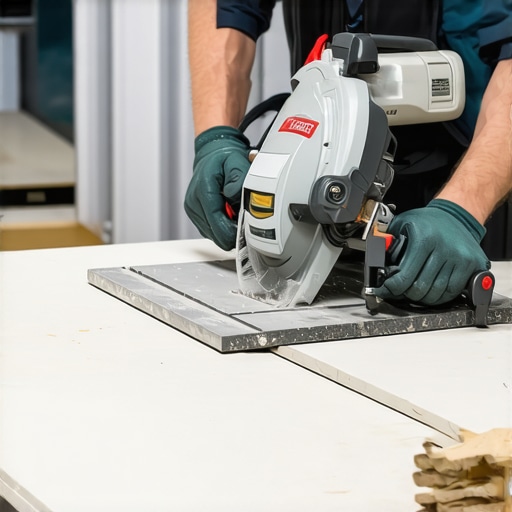
Achieving flawless results in carpet installation, flooring, or shower renovation relies heavily on using the right tools. I personally swear by a high-quality pneumatic sledgehammer for removing old tiles—its controlled power reduces breakage and speeds up demolition, saving me hours. For precise cuts, I rely on a wet tile saw with a diamond blade; it’s essential for clean edges and reducing dust. When installing baseboards, a radial arm saw with a fine-tooth blade ensures perfect miter cuts, especially for complex corners, aligning with my standards for professional finishes. I also use a digital moisture meter from Extech when preparing subfloors (source), to prevent future warping or buckling. These tools might have a steep upfront cost, but their durability and accuracy make long-term maintenance much easier and more predictable.
Investing in the Right Software
For complex projects, I utilize software like SketchUp to visualize layouts and anticipate potential issues before physical work begins. This 3D modeling helps me optimize material use and avoid costly mistakes, especially when dealing with large tiles or intricate shower niches (see tips here). Additionally, apps like Houzz for inspiration and iHandy Level for checking evenness save countless hours of adjustments on-site. Embracing digital tools not only enhances precision but also streamlines communication with clients or team members, keeping everyone on the same page.
Methodical Maintenance for Longevity
Once your installations are complete, regular inspections are key. I recommend a quarterly check for loose baseboards or cracked grout—early detection preserves your work and mitigates expensive repairs. Using a specialized grout cleaner with biological enzymes, like those containing Bacillus subtilis, prevents mold and odor buildup (more on grout maintenance). Additionally, applying a breathable sealant on your shower enclosures annually keeps water from penetrating and causing damage. Consistently maintaining with these methods extends the lifespan of your upgrades significantly.
Scaling Home Improvements Carefully
As your skills develop, scaling projects becomes more feasible. I advise creating a detailed project plan, including a timeline, material list, and budget, before expanding to larger or more complex renovations. This approach minimizes surprises and ensures quality outcomes. For example, when upgrading an entire bathroom, systematically working from demolition to finishing ensures every step remains manageable. Modern trends, like seamless shower enclosures or minimalistic baseboards (trends for 2025), can be incorporated gradually without overwhelming yourself.
What’s the Best Way to Maintain Your Remodel Over Time?
Consistency is crucial. Schedule regular checks, clean surfaces with appropriate products, and promptly address any signs of wear. For instance, I recommend reapplying grout sealant every 1-2 years to prevent stains and moisture ingress. Using quality tools and modern techniques not only preserves your initial work but also simplifies future upgrades. With advancements like automated moisture monitoring systems, monitoring your home’s health will soon become even easier, reducing the guesswork involved in long-term maintenance. Try incorporating a high-grade digital meter into your routine; it’s an investment that pays off by catching issues early before they spiral into costly repairs.
Lessons from the Trenches: What I Wish I Knew About Renovations
- One of the most insightful lessons I learned is how seemingly minor details, like properly sealing baseboards or checking moisture levels, can save you from costly repairs down the line. Overlooking these can turn a smooth project into a lasting headache.
- Patience with preparation often outweighs rushing to see immediate results. Taking the time to measure twice, ensure correct alignment, and use the right tools leads to professional-quality finishes that stand the test of time.
- Understanding the importance of climate and moisture control can’t be overstated. For example, in flooring, ignoring subfloor moisture levels can cause warping months after installation, reminding me to constantly prioritize environmental factors during planning.
- I’ve discovered that continual learning from reputable sources—such as industry guides and experienced professionals—helps avoid common pitfalls and elevates my craftsmanship beyond beginner level.
- Finally, embracing digital tools, like project visualization apps and moisture meters, has made my renovation workflow more predictable and less stressful, transforming the way I approach each new project.
The Tools and Resources That Keep Me on Track
- TileCraftsmen’s Installation Guides: Their detailed instructions on flooring and shower installs are invaluable for understanding nuanced techniques, ensuring consistent results each time.
- Moisture Meters: Devices like the Extech Moisture Meter help me verify subfloor readiness, preventing future buckling or mold issues, which is a game-changer in my process.
- SketchUp Software: Visualizing layouts beforehand allows me to anticipate challenges and plan accurately, saving time and reducing material waste.
- Biological Drain Cleaners: Using enzyme-based cleaners maintains my drains’ odor-free condition without harsh chemicals, making ongoing maintenance effortless.
Your Next Step Toward Renovation Confidence
Every renovation journey is a learning adventure, and paying attention to these insider details transforms a daunting task into a rewarding experience. With the right knowledge and tools, you can achieve results that not only look great but also last for years. Now is the perfect time to take what you’ve learned and start your own successful project—embrace the process, and watch your home transform!
Which renovation tip resonated most with you, and how will you apply it in your next project? Share your thoughts below!