

I vividly remember the moment I realized my entire flooring project was heading south. The room was finished, furniture was moved back in, and then I noticed it—gaps where the floorboards or tiles just didn’t sit flush. My heart sank. I’d so carefully measured, cut, and installed, only to be betrayed by an elusive expansion gap that seemed to grow every time the weather changed. It was frustrating, almost enough to make me consider ripping everything out and starting over. But then, I stumbled upon a simple yet game-changing solution: the ‘Expansion-Clip’ Hack for Floating Floor Perimeters.
Why Small Details Make a Big Difference in Flooring Success
If you’ve ever faced uneven floors or unsightly gaps, you know how much those tiny imperfections can ruin the overall look. Floor expansion is a natural phenomenon; as temperature and humidity shift, materials expand and contract. Without proper allowances, your beautiful new flooring might buckle, crack, or gape. That’s where the clever use of expansion clips comes into play. When I first read about this method on a trendsetting flooring guide, I was skeptical. I questioned whether such a small addition could truly make a difference—until I tried it myself.
Is the Expansion-Clip Hack Overhyped or a Game Changer?
I’ll admit—I made a rookie mistake early in my project: I neglected to leave enough room around the perimeter for expansion. I thought sealing the edges tightly was best. That mistake caused my floor to bow and develop cracks over the first winter. The truth is, most DIYers overlook the significance of these tiny details. Once I incorporated expansion clips into my installation, I noticed an immediate improvement. No more gaps, no buckling. Just a sleek, seamless surface that adjusts effortlessly with the seasons. If you’re tired of battling with your flooring’s seasonal shifts or the unsightly gaps that come with them, I promise you—this trick is worth trying. Curious to find out how it’s done? Stay with me; I’ll walk you through the steps and share some tips I wish I knew from the start.
Preparing Your Subfloor and Surface
Start by ensuring your subfloor is flat and free of debris. Use a long level or straightedge to identify dips or humps; for small dips, a self-leveling compound can create a perfect surface. Remember, a smooth base prevents tiles or hardwood planks from cracking or shifting. I learned this the hard way when I skipped this step, resulting in uneven tiles that cracked after a month. Applying a moisture barrier, especially in basements, also prevents future issues.
Measuring and Planning Your Layout
Accurate measurements save time and material. Use a tape measure and chalk line to mark your starting point, ideally a straight wall that’s closest to the room’s center. When laying tiles or planks, calculate for: the direction of traffic flow, expansion gaps, and pattern orientation. I once started with uneven measurements, which led to awkward cuts along the walls—wasting material and time. Using the planning guide helped me minimize waste and ensure a symmetrical layout.
Installing the Flooring Properly
For Floating Floors
Keep a consistent expansion gap around the perimeter—usually ¼ inch—using spacers. This allows for natural expansion without buckling. When I installed my laminate, I used a pull bar to snug planks tightly without damaging tongues—preventing gaps. Combine this with tapping blocks for a tight fit, especially along walls and corners. Remember: do not glue or nail down floating floors; they need room to expand and contract.
Laying Tiled Surfaces
Apply thin-set mortar with a notched trowel, aiming for uniform coverage. Use a rubber float to press tiles into the mortar, ensuring they’re level with each other. Use spacers to maintain grout lines and check alignment frequently with a level or straightedge. After setting, allow the mortar to cure for 24 hours before grouting. During my first tile job, I skipped the leveling step, which caused noticeable unevenness—something I fixed later with a simple back-buttering technique.
Sealing and Finishing Edges
Once installation is complete, fill grout lines with a suitable sealant, especially in wet areas. Sealers prevent staining and mold growth—maintaining longevity and appearance. When attaching baseboards, use a finish nailer to secure them tightly, but tap in nails to avoid splitting the wood—particularly with delicate profiles. Cutting baseboards at the correct angles, like 45-degree miter joints, creates seamless corners. Remember, employing a back-beveling trick helps fit baseboards snugly into uneven wall corners, as I once discovered when my cuts didn’t align perfectly.
Addressing Common Pitfalls
Avoid rushing the curing process and rushing through measurements. Take your time to double-check every step; consistency and patience are your allies. For stubborn gaps between flooring and walls, consider adding a flexible caulk or mold-resistant sealant. For intricate transitions, like hallway to room, use transition strips or reducers to create a smooth flow—preventing tripping hazards and visible gaps. I improved my transition pieces with a hidden clip method, which made for a cleaner look. Remember: details like these can elevate the overall professionalism of your project.
By following these core steps and paying attention to the details, you’ll achieve a flawless flooring and baseboard installation that stands the test of time and weather changes. Every project has its challenges, but with patience and precision, your space will transform into a true showcase of craftsmanship.
Even experienced DIYers often fall prey to misconceptions when it comes to flooring and bathroom renovations. One of the most pervasive myths is that standard techniques suffice for all situations. For example, many believe that simply layering paint or sealant on shower tiles will prevent mold or moisture issues. In reality, neglecting detailed preparations like proper waterproofing and using the right sealants can lead to long-term damage, as emphasized by experts in shower renovation here. Overlooking these nuances results in costly repairs, especially when moisture seeps behind tiles or baseboards, causing mold growth or structural rot.
A common trap in installing baseboards is assuming that tightly butting the pieces against the wall eliminates gaps. However, this often causes miter joints to open up over time due to wall unevenness or seasonal wall movement. The secret to a professional finish lies in cutting with a back-bevel technique and employing shimming methods that accommodate wall out-of-square surfaces. Recognizing this subtle detail can make the difference between a flawless look and an amateurish finish.
For advanced DIY enthusiasts, understanding the importance of substrate preparation is crucial. Many skip checking the flatness or moisture content before installation, leading to uneven floors or future buckling. A practical way to evaluate your subfloor is the dead-flat test, as outlined in this article. Skipping this step often results in visible cracks or seams, especially with large-format tiles or luxury vinyl planks.
Have you ever fallen into this trap? Let me know in the comments. Remember, paying attention to these hidden nuances and avoiding common myths ensures your project is not only visually stunning but also durable and functional. Embracing these expert insights can save you time and money, transforming a simple renovation into a professional-quality finish.
Keeping It Working: Essential Tools and Maintenance Tips
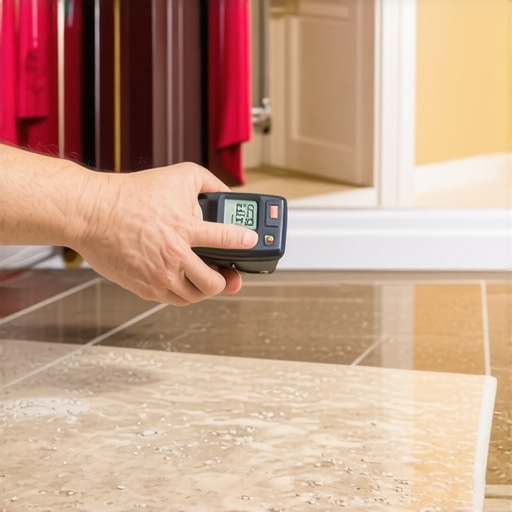
Achieving professional-grade results in flooring, shower installation, or baseboard finishing isn’t just about how you start—it’s equally about how you maintain your work over time. Investing in the right tools and adopting a proactive maintenance routine can extend the lifespan of your projects significantly. For instance, I personally rely on a high-quality oscillating multi-tool for precise caulking removal and touch-up work in showers and around baseboards, saving time and reducing errors. Beyond basic tools, specialized equipment like laser levels or moisture meters become essentials for ensuring long-term stability. A laser level ensures your flooring remains perfectly aligned, while a moisture meter prevents installation over damp subfloors, a mistake that can cause buckling or mold growth—something I’ve experienced firsthand.
What Equipment Do I Recommend for Ongoing Maintenance?
For routine upkeep, I find that a microfiber mop combined with a gentle pH-neutral cleaner—like those designed for hardwood or tile—preserves the finish without stripping protective coatings. Sealing grout lines properly initially makes cleaning easier and prevents stains from setting, ensuring your shower’s appearance endures over years. Regular inspection is key: checking for loose baseboards, cracked grout, or water leaks promptly helps you fix small issues before they become costly repairs. Remember, maintaining your work is about consistency; a monthly walk-through can catch issues early, saving in repair costs and preserving aesthetic appeal.
How do I maintain flooring and showers over time?
Keeping your project in top shape involves a combination of cleaning, periodic sealing, and timely repairs. For example, high-traffic carpet areas benefit from deep cleaning every 6 to 12 months, and I recommend using a professional-grade carpet extractor for thorough removal of dirt and allergens, as documented in this guide on carpet maintenance. Vinyl or tile floors should be resealed as needed to prevent moisture intrusion, especially in bathrooms. Shower enclosures require regular cleaning with non-abrasive cleaners and resealing of grout lines to prevent discoloration or mold buildup. Keep an eye out for signs of water damage or grout deterioration, and address issues immediately. Incorporating routine inspections and minor touch-ups into your maintenance schedule ensures your installations continue to perform flawlessly.
Planning for scalability and future upgrades
Looking ahead, advancements in materials—like waterproof laminate flooring or self-sealing grout—are making long-term maintenance easier. Additionally, tools such as smart moisture detectors integrated with home automation systems can alert you to leaks or dampness early, preventing extensive damage. As trends move toward eco-friendly and low-maintenance materials, adapting your toolkit and routine becomes crucial. I suggest starting with a comprehensive inspection and a plan to upgrade your sealing techniques; even simple upgrades like adopting the double-seal method for grout can significantly extend shower lifespan.
Try one advanced maintenance tip today
Implement a monthly check using a moisture meter on your subfloor and grout lines. This small step can catch issues early and save you from costly repairs. Don’t wait until you notice signs of damage—prevention is the key to longevity in home renovations. Equip yourself with this knowledge and tools to keep your floors, showers, and baseboards looking and functioning like new for years to come.
Looking back, I realize that mastering the nuances of flooring, showers, and baseboards isn’t just about tools or techniques—it’s about embracing the little lessons that often go unnoticed. One of the most impactful insights I gained was the importance of patience and meticulous preparation. Rushing through measuring or neglecting the significance of expansion gaps can introduce headaches that seem insurmountable at the time. Yet, every mistake became a stepping stone, reminding me that excellence in home renovation is rooted in attention to detail and a willingness to learn from every misstep. If I could distill my experience into a guiding principle, it would be this: every small adjustment, no matter how insignificant it seems, contributes to a flawless finish and long-lasting results. So, whether it’s applying a precise back-bevel cut or consistently checking moisture levels, trusting the process pays off. Remember, the journey of achieving professional-quality flooring and remodeling isn’t linear—it’s a series of lessons that build your confidence and craftsmanship, one step at a time.