

I sat there on my haunches, staring at a hairline fracture that snaked across three of my gorgeous, 24-inch porcelain tiles. I’d done everything “right”—or so I thought. I used the proper trowel notch secret for better adhesion and even bought a high-end leveling system to stop lippage. But I’d ignored the one thing my old man told me: “Everything breathes, kid.” I thought expansion joints were for ugly commercial lobbies, not my sleek, modern kitchen. I was wrong. My floor wasn’t just a surface; it was a living, breathing thing that eventually ran out of room to grow.
Your Floor is Moving Even if You Can’t See It
Large format tiles are the divas of the flooring world. They look stunning, but their size creates a massive amount of tension. When your house settles, or the humidity swings, your subfloor and your tiles expand at different rates. If you’ve tiled a large open space without a break, that energy has nowhere to go but up. It’s why you see flooring installation mistakes like “tenting” or grout that turns to powder. I learned the hard way that a beautiful floor isn’t just about the tile you choose; it’s about the durable installation techniques that keep it from self-destructing. Today, I’m going to show you how to follow the ‘expansion-joint’ rule so you never have to hear that sickening ‘crack’ in the middle of the night.
Is a visible joint actually going to kill the vibe?
This is the biggest hurdle for most DIYers and even some “pros.” You want that seamless sea of stone, and a 3/8-inch gap filled with sealant feels like a scar. But here’s the reality: a color-matched 100% silicone joint is nearly invisible, whereas a cracked tile is an eyesore you’ll stare at every single morning. According to the Tile Council of North America (TCNA) handbook, specifically Method EJ171, these movement joints aren’t optional recommendations; they are structural requirements for any run of tile exceeding 20 to 25 feet. If you ignore this, you aren’t just being a “minimalist”—you’re gambling with your budget. Have you noticed any mysterious grout cracks in your longest hallway lately?
The Mistake I Will Never Make Again
Early in my career, I skipped a perimeter expansion gap because the baseboard styles I chose were too thin to cover a proper 1/4-inch space. I thought I could just butt the tile right against the drywall. When winter hit and the house contracted, the pressure was so intense it actually bowed the bottom of the wall out. Now, I always use the wood shim secret or wider molding to ensure the floor has the room it needs to shift. It’s about planning for the physics of your home so your step-by-step flooring installation actually lasts a lifetime.
Map Your Expansion Joints Before You Mix the Mortar
I used to think I could eyeball it until I tiled a forty-foot expanse in a beach house that had massive floor-to-ceiling windows. I didn’t account for the thermal expansion from the afternoon sun, and by August, the center of that floor sounded like a drum because the tiles had tented right off the slab. Now, I start every step-by-step flooring installation by snapping a chalk line exactly where the movement joint needs to live. You have to treat your floor like a bridge; it needs gaps to sway and shift without snapping.
The 25-Foot Rule in Real Life
The TCNA guidelines tell us to place a movement joint every 20 to 25 feet in interior spaces, but if your room gets direct sunlight, that distance drops to every 8 to 12 feet. When I’m setting my layout using the chalk line move for keeping long tile rows perfectly straight, I identify these ‘soft’ joints early. Instead of filling that specific 3/8-inch gap with rigid grout, I leave it completely empty during the tiling process. This is the ‘breathing room’ that prevents your porcelain from turning into a jigsaw puzzle of cracks. 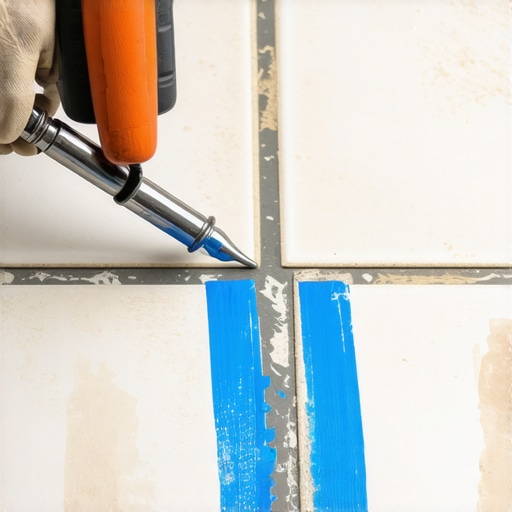
Stop Fighting the Physics of Your Subfloor
The biggest mistake is thinking the tile is the boss. The subfloor is the boss, and it moves constantly. If you are transitioning from a large tiled area into a cozy bedroom, you need to handle that junction with care. I’ve seen beautiful installs ruined because the installer tried to butt the tile directly against the carpet tack strip. I always recommend the transition strip move for carpet to bathroom tile to ensure both materials have a clean, finished edge that allows for independent movement. This is especially true if you are dealing with high-traffic areas where carpet install secrets like proper stretching are just as vital as the tile’s thinset bond.
How to Build a Hidden Joint That Does Not Ruin the Look
To make these joints disappear, you need 100% silicone that is color-matched to your grout. Once the rest of the floor is grouted and dry, I come back to my expansion gaps. I use the blue tape trick for cleaning up silicone beads, masking off both sides of the tile edge. When you pull that tape, you’re left with a razor-sharp, flexible line that looks exactly like a grout joint but acts like a shock absorber. This isn’t just about aesthetics; it’s about durable flooring installation that survives the seasons.
Protect the Perimeter to Save Your Walls
Don’t forget the walls. I once saw a floor push so hard against a drywall partition that it actually popped the screws out of the studs. You need a minimum 1/4-inch gap around the entire perimeter of the room. This is where baseboard styles become your best friend. They aren’t just decorative; they are the mask for your expansion gap. If you find yourself with an uneven slab where the gap varies, I use the wood shim secret to keep the molding level while still providing that crucial hidden space behind it. By planning for these physics-based realities, you ensure your floor stays as flat and beautiful as the day you laid it.While we are talking about movement, let us tackle the biggest myth in bathroom remodeling: that a ‘waterproof’ shower is a maintenance-free fortress. Most homeowners—and frankly, too many contractors—believe that once the tile is up, the job is done forever. But here is a contrarian take: your grout is essentially a hard sponge. If you are not using the full bed mortar rule for large format shower tiles, you are leaving air pockets where moisture thrives. This is where the ‘oops’ factor kicks in. People often overlook the curb slope requirement for waterproof shower pans, leading to water sitting against the glass track until it inevitably finds a way into the subfloor. Have you ever noticed a musty smell even in a brand-new bathroom? That is why.
Why do your carpet ripples keep coming back after three years?
It is not just ‘cheap carpet.’ The Carpet and Rug Institute (CRI) Standard 105 specifically states that power stretching is mandatory for all residential installations. Yet, I see installers every day relying solely on a knee kicker. A knee kicker is meant for positioning, not for the structural tension required to keep a carpet flat over a decade. If you do not follow the directional pull rule for power stretching carpet, you are basically setting a timer for when those unsightly waves will appear. It is a classic trap—saving thirty minutes during install only to have to move all the furniture back out three years later for a re-stretch. 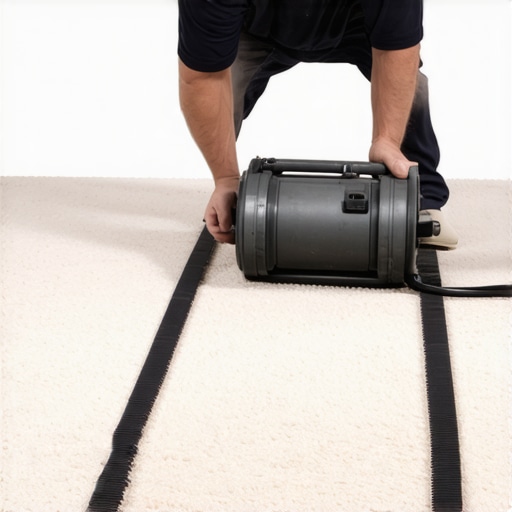
Cope Your Corners Instead of Fighting Miters
Then there is the issue of the ‘perfectly straight’ wall. Newsflash: they do not exist. If you are trying to force a miter joint on an inside corner for your baseboard styles, you are fighting a losing battle against physics. Professionals know the inside corner cope for perfect baseboard installs is the only way to ensure a tight fit as the house shifts. A miter will open up the second the humidity changes; a coped joint stays tucked. I see this mistake even in high-end flips where they try to hide the gap with a mountain of caulk. But caulk shrinks, and the gap returns. If you want that high-end look, you have to use the coping saw technique for flawless inside baseboard corners. We often think we can outsmart the materials, but as the TCNA and CRI guidelines prove, the rules exist because the physics of a home are unforgiving. Whether it is shower repairs or a full living room overhaul, the nuance is where the longevity lives. Have you ever fallen into this trap of skipping the ‘extra’ step only to regret it later? Let me know in the comments.
Stop Guessing and Start Measuring with the Right Tech
I’ve learned that the difference between a floor that looks good today and one that looks good in 2035 isn’t just your steady hand—it’s the precision of your sensors. If you aren’t using a high-quality moisture meter, you’re just throwing money into a pit. I personally use a pinless moisture meter on every single project because checking the the moisture meter requirement for basement flooring jobs is non-negotiable before you even open a box of planks. If that slab is too wet, no amount of glue or click-lock magic will save you from a failure. Likewise, I’ve retired my old bubble levels. To get those dead-flat lines, you need to master the laser level move for perfectly horizontal shower tiles. It’s about removing human error from the equation so your layout is mathematically perfect before the first drop of thinset hits the floor.
How do I maintain my high-end flooring over time?
The secret to longevity isn’t a special mop; it’s protecting the structural integrity of the materials. For stone, that means using the deep-seal tactic for porous natural stone showers every 12 to 18 months. Grout is the weak link, and if you let it go, you’ll eventually be looking for shower repairs rather than just doing a quick scrub. For carpet, maintenance starts with the vacuum. The Carpet and Rug Institute (CRI) Standard 104 emphasizes that for commercial-grade longevity, vacuuming must be done with a high-efficiency particulate air (HEPA) filter to prevent micro-abrasives from sawing through the fibers at the base. If you ignore the grit at the bottom, you’ll end up wondering why your carpet is buckling only three years later because the structural backing has been shredded from the inside out. 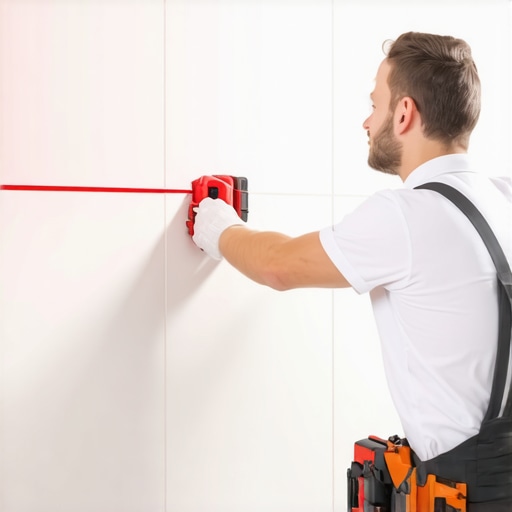
The 2025 Shift Toward Zero-Maintenance Tech
Looking ahead, we are seeing a massive move toward ‘smart’ subfloors and ultra-durable hybrids. In the next few years, I predict we will see more integrated sensors that can alert a homeowner to a leak under the luxury vinyl before it ever reaches the drywall. We are already seeing transform your flooring top trends in installation for 2025 focusing on waterproof cores that are practically indestructible. But remember, even the best ‘waterproof’ floor is only as good as the perimeter. If you don’t use the vapor seal requirement for luxury vinyl on concrete, you’ll still end up with mold issues regardless of how fancy the tile is.
Cope the Corners or Prepare for Gaps
If you want that truly custom, high-end finish on your trim, stop mitering your inside corners. I cannot stress this enough: houses move, and miters open. I always tell my crew that the inside corner cope for perfect baseboard installs is the only way to go. It takes an extra three minutes per corner with a coping saw, but it creates a joint that stays tight even when the house settles in the winter. If you’re dealing with baseboard styles that elevate your interior design, you owe it to the material to install it with craftsmanship that accounts for the physics of wood expansion. Try this on your next room: take a scrap piece of baseboard and practice the coping saw technique for flawless inside baseboard corners. Once you see how that joint locks together like a puzzle piece, you’ll never go back to a standard miter saw cut again. Use that extra bit of effort now to save yourself from staring at ugly caulk lines for the next decade.
What My 20 Years in the Trenches Taught Me
If you treat a floor like a static object, it will eventually remind you that it is a living, breathing part of the house. I used to rush the prep because I wanted the visual gratification of the finished product, but I learned that the prep work is the actual job. Every time I tried to cheat a corner or skip a moisture reading, I ended up back on that floor three years later for expensive repairs. Trust the physics of the house, not your ego. Remember that a floor is only as good as the subfloor beneath it; if you ignore the moisture meter requirement for basement flooring jobs, you are basically building on quicksand. Precision is not just for show—it is the difference between a floor that lasts five years and one that lasts fifty.
Gear That Actually Earns Its Keep
I do not step onto a job site without my pinless moisture meter and a professional-grade laser. These tools remove the guesswork that leads to why your carpet is buckling only three years later or why tiles start to pop. I also highly recommend keeping the TCNA Handbook and CRI Standard 105 as digital references on your phone. These are the industry bibles for a reason. For any bathroom work, I rely on the laser level move for perfectly horizontal shower tiles to ensure my lines are mathematically perfect before the thinset ever touches the wall. These tools do not just make the work better; they give you the confidence to stand behind your craft.
Go Build Something That Lasts
At the end of the day, your home is your sanctuary, and it deserves the care of a true craftsman. Taking that extra fifteen minutes to practice the inside corner cope for perfect baseboard installs instead of settling for a sloppy miter is what separates a DIY project from a professional-grade renovation. As you look toward your next flooring installation, focus on the integrity of the hidden steps—the expansion gaps, the subfloor prep, and the moisture barriers. When you respect the materials and the process, you create a space that remains beautiful and stable for decades to come. Which part of the installation process has given you the most trouble—the layout, the expansion joints, or getting those transitions right? Let me know in the comments.