

I’ll never forget the moment I first laid down a vinyl plank flooring that seemed to resist all my efforts at a seamless look. No matter how carefully I measured or cut, those stubborn seams kept catching my eye, mocking my confidence. It was a lightbulb moment—realizing that the way I arranged the seams mattered as much as the planks themselves. Like many DIY enthusiasts, I learned the hard way that ignoring the ‘Staggered-Seam’ Rule can turn a promising project into a visual headache.
The Hidden Power of Proper Seaming in Vinyl Floor Installations
Are You Falling Into the Seam Trap? Here’s Why It Matters
See, when I started, I thought lining up planks end-to-end would suffice. But I soon discovered that poorly staggered seams not only look unprofessional but also compromise the durability of your floor. Proper staggering distributes the joint stress, preventing future gaps or buckling. It’s like not stacking bricks directly on top of each other—the pattern should be offset, ideally by at least 6 inches, to create a resilient, seamless surface.
Early on, I made the mistake of simply running seams in a straight line across the room, which created weak points and a distracted eye. According to industry experts, following the ‘Staggered-Seam’ Rule enhances the floor’s lifespan and aesthetic appeal (source). This isn’t just about looks; it’s about building a floor that holds up over time. Now, I make sure to plan my layout meticulously, ensuring each row offsets the joints to form a pattern that’s both beautiful and sturdy.
So, if you’ve been frustrated by seams that seem to drift or gaps that develop over time, don’t worry! Today, I’ll guide you through the essential principles and tips for mastering this crucial aspect of flooring installation. Ready to make your vinyl floor not just look good, but stand the test of time? Let’s dive into the how-to’s that can save you headaches and upgrade your space with confidence.
Plan Your Layout Precisely
Start by measuring your room carefully and sketching your pattern on paper. Decide on your staggering offset—aim for at least 6 inches—and determine the number of planks per row. When I installed my vinyl planks, I used painter’s tape to mark the offsets directly on the floor, preventing me from losing track during installation.
Mark Your Starting Point
Locate the first row, ensuring it’s flush against the wall, and mark the position of each plank. Use a chalk line or straightedge to keep your rows straight. For example, I laid out my first row and drew a light chalk line along the edge, which served as a guide for the entire run, maintaining perfect alignment.
Cut and Prepare Every Row
Measure each plank carefully before cutting, especially for the short ends. Use a sharp utility knife and a straightedge to score the vinyl thoroughly, then snap for clean cuts. During my first cut, I learned to double-check my measurements; a small miscalculation at this stage can cascade into noticeable gaps later. After cutting, dry-fit each piece to confirm fit before permanently installing.
Align Seams to Achieve Staggering
Place each row so that the seams are offset from the previous one. Use your initial plan to position planks, staggering joints by the predetermined offset. I found that aligning joints precisely, and avoiding running seams in a straight line across the room, significantly improved the floor’s durability and appearance.
Fasten and Secure the Planks
Connect planks according to manufacturer instructions, typically via locking mechanisms. Apply moderate pressure to ensure a tight fit. When I installed vinyl planks in a tight space, I used a tapping block to gently snap planks together without damaging the surface. This step is critical to prevent joints from loosening, which can cause gaps or creases over time.
Check the Pattern Frequently
Regularly step back and view the floor from different angles, confirming that your staggering pattern remains consistent. During my last session, I noticed a slight deviation in one row and corrected it immediately, avoiding a domino effect of mismatched seams.
Finish with Proper Transitions and Baseboards
Use transition strips between different flooring types, and ensure baseboards are installed with attention to expansion gaps. Properly reseal seams and edges to prevent dirt buildup. I learned that installing baseboards with a small gap allows for floor expansion, reducing the risk of gaps or buckling during seasonal changes. For insights on elevating your space further, check this guide.
By following these detailed steps, you’ll create a vinyl floor with seamless, durable seams. The key is meticulous planning, precise measurement, and consistent pattern alignment—skills that turn a good DIY project into a professional finish.
Many homeowners and even seasoned DIYers fall prey to misconceptions that can undermine their renovation projects. One pervasive myth is that choosing high-quality materials alone guarantees a flawless finish. However, proper installation techniques often make the difference between a durable, professional-looking floor and a costly disaster. For example, while premium flooring can withstand wear, improper acclimation or incorrect underlayment installation can lead to buckling or gaps over time—a nuance often overlooked by beginners.
Another frequent misconception revolves around showers. Many believe that sealing grout alone ensures a waterproof enclosure. Yet, the critical step of properly applying and curing a waterproofing membrane beneath tiles is often neglected. Skipping these details can result in leaks that damage subfloors and create mold issues. Dive into advanced shower renovation tips to avoid these pitfalls.
When it comes to carpeting, the belief that a quick stretch and staple job suffices is widespread. The reality is that quality installation involves precise tensioning and seaming, especially in high-traffic areas. Improper stretching not only leads to ripples or wrinkles but also shortens the carpet’s lifespan. Moreover, many overlook the importance of a clean, level subfloor; uneven surfaces cause uneven wear and premature rips. For insights on achieving flawless results, check out carpet installation secrets.
Baseboards are often treated as cosmetic touches rather than structural elements. A common mistake is attempting to install them directly against uneven walls without scribing or using shims. This shortcuts the process but results in gaps or misalignments that ruin the aesthetic. The nuance lies in carefully measuring wall irregularities and employing techniques like the scribe method to ensure seamless joints. For expert advice on elevating your trim work, explore how to choose the perfect baseboards.
**What most people get wrong about these projects is ignoring the fine details that separate amateur work from professional results. The tricky part isn’t just selecting the right materials but mastering the advanced techniques that ensure longevity and style. For instance, improper sealing in showers can lead to water infiltration, while overlooked subfloor prep can cause flooring failures. Recognizing these nuances can save you headaches and money in the long run.**
Have you ever fallen into this trap? Let me know in the comments. Improving your craftsmanship means understanding these subtleties—so keep learning, and your projects will stand the test of time.
Maintaining your flooring, showers, and baseboards in top condition requires more than just skill—it demands the right tools and established methods to ensure longevity and ease of maintenance. I’ve found that investing in high-quality equipment can pay dividends over the years, especially when tackling complex projects or scaling up your DIY endeavors.
Choosing the Right Power Tools for Flooring and Shower Work
For flooring installations, a dependable multitool like the oscillating tool is invaluable. I rely on mine for precision cuts around irregular patterns or vent openings, saving me hours of manual work and reducing errors. When working with vinyl planks, a taping system akin to the one recommended by professional installers ensures tight joints and seamless appearance. Additionally, a high-quality orbital sander helps prep surfaces before laying new floors, removing imperfections that could compromise adhesion or appearance.
In shower renovations, waterproofing is critical. I swear by a good-quality caulking gun paired with silicone sealants designed specifically for wet environments. For more durability, combining these with a professional-grade waterproof membrane, like the epoxy grout mentioned in this article, offers peace of mind against leaks and mold growth.
Tools to Make Baseboard and Trim Work Effortless
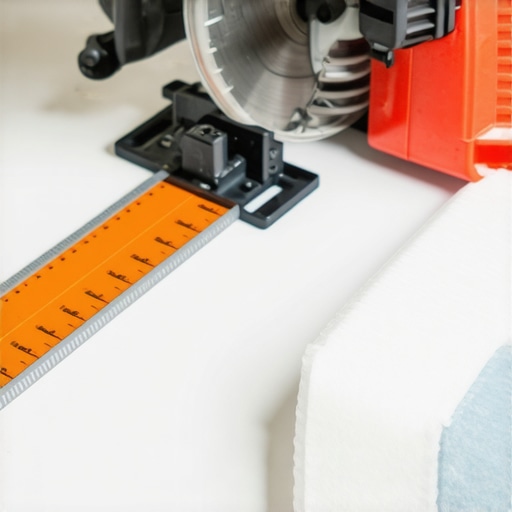
When installing or maintaining baseboards, a high-precision miter saw is a game-changer. It ensures perfect angles for corners and joint caulking, reducing the need for extensive fussing. For delicate scribing along uneven walls, I use a contour gauge, which allows me to trace the wall’s profile accurately, resulting in a flawless fit. Combining these with a power nailer streamlines the process, preventing splitting or misalignment.
Planning for Long-Term Results and Scaling Up
As projects grow in scope, automation and software tools become increasingly valuable. I use floor planning software like RoomSketcher to visualize layouts before cutting materials, preventing costly mistakes. For managing your tools and supplies, a dedicated storage solution with labeled compartments helps keep track of essentials, avoiding last-minute scrambles or missing items.
Looking ahead, trends in sustainable and smart materials hint at even more specialized equipment on the horizon. Tools that integrate sensors for moisture levels or detect substrate issues are being developed, promising to transform maintenance routines into proactive care rather than reactive fixes.
How do I maintain my tools and ensure long-term performance?
Regular cleaning and proper storage are fundamental. After each project, I clean my power tools with compressed air, lubricate moving parts, and store them in climate-controlled environments. Sharpening blades and bits periodically ensures clean cuts and reduces strain on your motor, extending their lifespan. These practices not only keep your tools reliable but also enhance safety during operation.
Then there’s the importance of using the right consumables—high-quality adhesives and sealants that match your specific project needs. For example, selecting a marine-grade silicone for shower seals or a heavy-duty flooring adhesive prevents premature failure and costly repairs.
Ready to elevate your DIY game?
Try implementing one of these advanced maintenance tips today—whether it’s upgrading to a professional-grade waterproof membrane or investing in a contour gauge for baseboard scribing. Doing so will make your projects smoother and help ensure your investments stand the test of time.
The Hardest Lesson I Learned About Flooring and Finishes
One night, after a long day of meticulous planning, I realized that overlooking the significance of pattern staggering had compromised my entire flooring project. It struck me that the beauty of a seamless vinyl floor isn’t just in the material but in the thoughtful arrangement of each plank. This lightbulb moment reshaped my approach to every project, emphasizing the importance of every detail that often seems insignificant but makes all the difference.
3 Myths About Flooring and Home Finishes That Held Me Back
Truthfully, I spent years believing that high-quality materials alone would produce a flawless finish. I also thought that sealing grout in showers was enough to prevent leaks, which isn’t true without proper waterproofing techniques. Finally, I used to assume that DIY was just about tools and speed, ignoring the critical nuances of planning and pattern alignment. Challenging these myths was the key to elevating my craft and avoiding hidden pitfalls that even seasoned DIYers can encounter.
What Experts Won’t Tell You About Achieving Professional Results
Many pros keep a few secrets—like the importance of accurate subfloor prep, the correct use of expansion gaps, or the nuanced scribing techniques for uneven walls. I learned that investing in quality tools, like a contour gauge for molding, or understanding the subtlety of joint sealing, can dramatically improve your finish. These insights are what truly distinguish amateur efforts from durable, professional-looking results, guiding me toward mastery and giving my projects a lasting edge.
Curated Gems for Elevating Your Craft
One of my most trusted resources is Step-by-step flooring guides—they provide clarity on complex techniques like pattern staggering and seam sealing. For choosing the right tools, I rely on professional-grade equipment reviews. Books such as Mastering Home Finishes revolutionized my understanding of how small details influence the overall aesthetic, making a huge difference in my confidence and results. These resources continue to elevate my work as a dedicated DIYer striving for perfection.
Your Next Step: Embrace Continuous Growth
Remember, every project is an opportunity to learn, adapt, and refine your skills. Whether it’s perfecting the art of pattern staggering, mastering the right seaming techniques, or understanding tool maintenance, each step builds toward mastery. Don’t let hesitation stop you—integrate these insights, stay curious, and watch your craftsmanship transform. The future of your home improvement journey is in your hands—seize it with confidence and a passion for excellence.