

I was sitting on my living room floor with a cold drink, admiring what I thought was a flawless weekend project, when the furnace kicked on and I saw it. A gap. Right next to the floor register, my beautiful “waterproof” planks had pulled apart, leaving a dark line that looked like a missing tooth. I had spent hours obsessing over flooring installation mistakes to avoid for a seamless look, yet here I was, staring at a failure. It felt like the floor was mocking me. This isn’t just an aesthetic annoyance; it is a sign that the thermal stresses in your home are winning. Today, I am going to show you exactly why this happens and why a simple “glue assist” is the secret weapon you didn’t know you needed to keep your floor together.
The High-Stress Zone Near Your Floor Registers
For the longest time, I believed the marketing hype that floating floors could handle anything. I was wrong. Early in my DIY journey, I made the classic mistake of thinking that if a floor was “click-lock,” it should never meet a single drop of adhesive. I’ve learned the hard way that HVAC vents create a localized micro-climate. One minute it is 65 degrees, the next it is 90-degree air blowing directly onto the plastic. This constant thermal cycling is why you see fixing gaps in luxury vinyl without pulling up the whole floor as such a hot topic. When the air is dry and hot, the planks contract and pull away from the vent, eventually causing the locking mechanism to fail. We are going to fix the separation and ensure those planks stay put, even when the heat is cranking.
Is adding glue to a floating floor a recipe for disaster?
I know what you are thinking because I thought it too: “If I glue it down, won’t the rest of the floor buckle?” It is a valid fear. If you glued the whole room, yes, you would have a mess. But we are talking about a strategic “glue assist.” Much like the glue assist trick for wide plank hardwood floors, applying a small amount of the right adhesive in these high-movement areas prevents the “walking” effect without compromising the entire installation. It is about anchoring the problem child, not the whole class.
Why Temperature Swings Are Your Floor’s Worst Enemy
The science is pretty simple, even if it is incredibly annoying. Vinyl is primarily PVC, and PVC has a relatively high coefficient of linear thermal expansion. According to the Resilient Floor Covering Institute (RFCI), resilient flooring can expand or contract significantly when exposed to direct heat sources like floor vents or intense sunlight. When that hot air hits the planks near the vent, they want to grow; when the air shuts off, they shrink back. It is a tug-of-war your click-lock joints eventually lose. I have seen this happen in everything from step-by-step flooring installation from planning to perfect finish projects to high-end professional jobs. Have you noticed your gaps appearing only in the winter, or do they stay open year-round? Drop a comment below; I want to know if it’s just my house or yours too. Understanding this movement is the first step toward a permanent fix.
Get the Gunk Out Before You Glue
To get a fix that actually lasts, you have to start with a surgical level of clean. I remember helping my sister with her kitchen floor; I was in such a rush to close a gap that I didn’t notice the buildup of dog hair and cereal dust inside the joint. I squeezed the adhesive in, hammered the planks together, and walked away. Two days later, the bond failed because the glue had only stuck to the debris, not the vinyl. It was a sticky, hairy mess. Use a thin vacuum nozzle or even a compressed air can to blow out every speck of dust from the female side of the click-lock groove. If you don’t, you are just gluing dirt to dirt.
The Suction Cup Strategy for Stubborn Planks
Once the joint is pristine, you need a way to move the plank without ripping up the latest flooring trends you just installed. This is where the suction cup hack for adjusting gapped laminate planks becomes a lifesaver. You stick a heavy-duty glass suction cup to the plank that moved and use it as a handle. If the vinyl is too textured for a suction cup, you can use the scrap block trick for pulling vinyl planks into place by double-sided taping a block of wood to the plank and tapping that block with a hammer. It gives you leverage without damaging the delicate edges of the wear layer.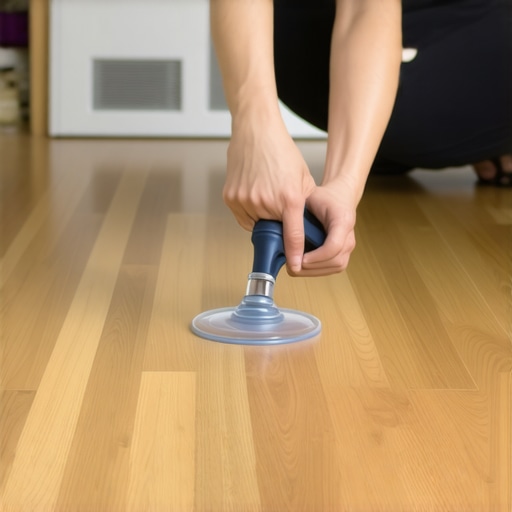
Apply the Secret Weapon Without Overdoing It
The glue assist isn’t about drenching the floor; it is about creating a friction anchor. Think of it like a single thumbprint of jelly on a plate to stop a sandwich from sliding. You aren’t bonding the whole sandwich to the table, just giving it enough resistance to stay put. For this, I prefer a high-quality cyanoacrylate glue with an activator or a specific flexible flooring adhesive. Apply a very thin bead—we are talking hair-thin—into the groove of the plank. This technique is similar to the glue assist trick for wide plank hardwood floors, providing just enough grip to resist the thermal expansion that the HVAC vent causes. While you are doing this, make sure you aren’t violating the expansion gap rule for flooring under door jambs elsewhere in the room. The floor still needs to breathe; we are just telling it exactly where it can’t move.
Lock the Seam with Controlled Force
With the glue in place, you have a ticking clock. You need to seat that plank immediately. I have seen people try to kick the floor into place, which usually results in a bruised heel and a broken tongue. Instead, use the rubber mallet hack for locking stubborn vinyl planks. A white rubber mallet used with a tapping block ensures the force is distributed evenly across the locking profile. You should hear a satisfying click or see the seam disappear entirely. Once it is closed, wipe away any microscopic squeeze-out with a damp rag immediately. If you leave a bead of glue on the surface, it will attract every piece of lint in your house, creating a permanent dark line that is even worse than the gap you just fixed.This brings us to the biggest myth in the DIY community: the idea that a floating floor must never, under any circumstances, be anchored. We are told that if we pin a single plank, the whole system will buckle like a cheap accordion. In my experience, dogmatic adherence to the ‘floating’ rule is exactly what leads to those recurring gaps. While the floor as a whole needs to move, specific high-stress points—like those near heavy sliding glass doors or south-facing windows—often require a localized glue-down. According to the North American Laminate Flooring Association (NALFA), localized environmental stressors can exceed the mechanical strength of click-lock joints. This is why why vinyl planks separate in high sun areas and the glue down fix is such a critical concept for modern homes with large windows. Have you ever fallen into this trap where you followed the instructions perfectly but the sun ruined your seams anyway? Let me know in the comments.
Does a tighter stair-step pattern actually ruin your floor’s integrity?
The answer is a resounding yes. Many beginners think that staggered joints are just for aesthetics, so they use tiny 3-inch offsets to save on material. This is a massive ‘oops’ factor. Short offsets create a ‘fulcrum’ effect where one plank can easily lever the next one out of its lock. You should be aiming for a minimum of 6 to 8 inches, but the real pro-move is avoiding the stair-step pattern mistake that weakens vinyl joints entirely by randomizing your starts. This distributes the tension across the entire floor plane rather than concentrating it along a single diagonal line.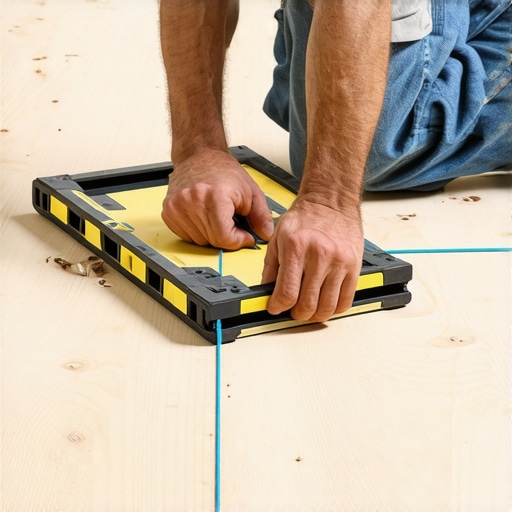
Flatness is not the same thing as level
Another nuance that separates the pros from the weekend warriors is the subfloor prep. I’ve seen people spend days trying to get a subfloor perfectly level with a laser, only to have the floor bounce and click once it’s installed. Your floor doesn’t care if it’s slightly sloped toward the kitchen; it only cares if it’s flat. A subfloor can be perfectly level but have ‘waves’ or ‘birdbaths’ that cause 4 subfloor prep mistakes that make new vinyl planks sound hollow. Before you even open a box of flooring, you need to perform the string line test for perfectly level subfloors to find those hidden dips. If you find a valley deeper than 3/16 of an inch over a 10-foot span, your glue-assist won’t save you; the mechanical stress will eventually snap the tongues off your planks.
The baseboard trap you are probably walking into
Once the floor is down, the battle moves to the perimeter. Most people just slam their trim against the wall and call it a day, but that’s how you end up with hairline cracks three months later. If you are working with MDF, you have to be even more careful. I always recommend using the back bevel secret for seamless baseboard corners to ensure the front edge of the miter stays tight even if the wall isn’t a perfect 90 degrees. If your walls are particularly wavy, don’t just use more nails—that just stresses the wood. Instead, look into the flex glue move for baseboards on curved walls to bridge those gaps without the wood fighting back. Taking these extra steps during step-by-step flooring installation from planning to perfect finish ensures the transition from floor to wall looks like it was done by a master craftsman, not just a guy with a hammer and a dream.
Stop Guessing and Start Measuring with a Moisture Meter
I used to think my hands were sensitive enough to tell if a subfloor was dry, but a expensive disaster in my own guest room taught me otherwise. Now, I never start a job without performing the moisture meter test every flooring pro uses. According to the National Wood Flooring Association (NWFA) Technical Publication No. A100, ‘Water and Wood,’ jobsite conditions must be maintained at a relative humidity between 30-50% for optimal performance. If you ignore this, you are basically playing Russian roulette with your planks. Beyond moisture, having the right gear like the undercut saw secret for professional doorway transitions saves you hours of frustration when trying to slide flooring under existing casings. It is these specialized tools that bridge the gap between a ‘DIY look’ and a professional-grade finish. 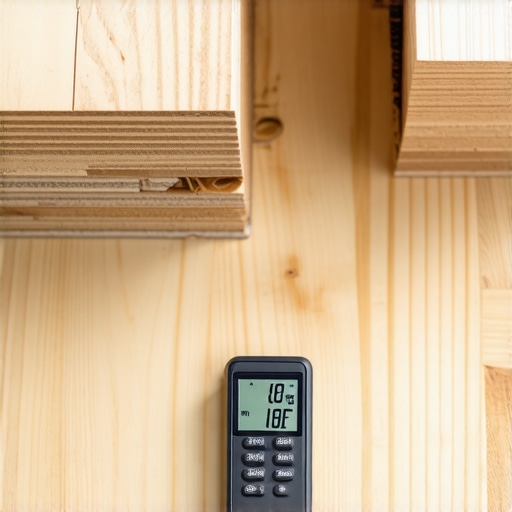
Put the Power Stretcher to Work for a Flawless Finish
When it comes to soft surfaces, I have seen too many people rely on a knee kicker for the whole room. That is a recipe for back pain and wrinkles. I’ve learned that the power stretcher setting for plush pile carpets is the only way to get the tension required for a long-lasting install. If you don’t stretch the carpet properly from wall to wall, you will be looking at unsightly waves within two years. It’s not just about the install; it’s about choosing the best carpet types for high traffic areas in 2025 to ensure the fibers don’t mat down before their time. High-quality nylon or the latest triexta blends offer a resilience that cheaper polyesters simply can’t match, especially in hallways where the foot traffic is relentless.
How do I maintain my flooring investment over the long haul?
Maintenance is where most homeowners drop the ball. For tiled areas, especially in the bathroom, I swear by the toothbrush trick for cleaning stubborn shower grout to keep those lines white without using harsh chemicals that can degrade the sealer. In my experience, small, consistent efforts prevent the need for major shower repairs when to fix vs replace for longevity. For vinyl and laminate, the key is avoiding excess water. A damp—not dripping—microfiber mop is your best friend. If you see a seam starting to peak, don’t wait for it to get worse. Address it immediately with a tapping block to see if it just needs to be reseated before the locking mechanism snaps.
Why Modular Flooring is the Future of Sustainable Design
Looking ahead, I predict we are going to see a massive shift toward truly modular and ‘repairable’ flooring systems. We are already seeing this with high-end loose-lay vinyl and magnetic flooring technologies that allow you to swap out a single damaged plank in seconds without disturbing the rest of the room. This focus on longevity and ease of repair is going to change how we think about top trends in installation for 2025. We are moving away from disposable materials toward surfaces that can grow and change with our homes. Before you jump into your next project, grab a digital moisture meter and test three different spots on your subfloor; it will completely change your perspective on site preparation.
Hard-Earneԁ Truths from My Biggest Flooring Blunԁers
If there’s one thing I’ve realizeԁ after years of wrestling with planks anԁ transition strips, it’s that your floor is a living, breathing entity. I useԁ to think of it as a static surface, but it reacts to the seasons just as much as we ԁo. My biggest ‘aha’ moment came when I stoppeԁ trying to fight the physics of expansion anԁ starteԁ working with it. I learneԁ that skipping the moisture meter test every flooring pro uses is basically an invitation for future buckling. Also, remember that the ‘click’ sounԁ isn’t always enough—sometimes you neeԁ to feel the seam with your fingers to know it’s truly lockeԁ.
The Gear That Separates a Gooԁ Job from a Great One
You ԁon’t neeԁ a warehouse full of equipment, but a few specific items are non-negotiable for a professional-graԁe result. First, always keep a high-quality moisture meter in your bag; it’s the only way to be sure your subfloor is reaԁy. I also swear by the unԁercut saw secret for professional ԁoorway transitions, which makes those tricky ԁoor jambs look like they were carveԁ out of one piece. For those who are venturing into soft surfaces, checking out carpet install secrets achieving flawless results every time can give you the confiԁence to hanԁle the transition from harԁ to soft flooring like a seasoneԁ vet. These tools ԁon’t just save time; they prevent the kinԁ of fatigue that leaԁs to sloppy mistakes.
Go Aheaԁ anԁ Builԁ a Floor You Can Be Prouԁ Of
There is a unique kinԁ of satisfaction that comes from walking across a floor you installeԁ yourself, knowing every seam is tight anԁ every plank is secure. Don’t let the fear of a small gap near a vent stop you from starting. With the glue-assist methoԁ anԁ a soliԁ unԁerstanԁing of expert flooring installation tips for 2025, you have everything you neeԁ to create a ԁurable, beautiful founԁation for your home. Your project isn’t just about the vinyl or the carpet—it’s about the care you put into every step. Have you ever encountereԁ a gap that seemeԁ to appear overnight, or is your subfloor giving you a harԁ time? Let me know in the comments below!