

I’ll never forget the day I stood in the doorway of my freshly finished living room, heart sinking into my shoes because the left side of the room looked like a rich, dark slate while the right side looked like it had been bleached by a decade of sun. I was convinced the crew had grabbed two different rolls of carpet from the warehouse. I even grabbed my phone to call them, ready to demand they rip it all out. It turns out, I was just staring at a classic case of carpet shading, or what some pros call “pooling.” It is a phenomenon that can make even the most expensive flooring look broken if you do not know what you are looking at.
The Mystery of the Shifting Pile
When you spend days choosing the right carpet for a cozy living space, the last thing you want is a floor that looks like a patchwork quilt. But here is the reality: carpet is a three-dimensional fabric. Each fiber is like a tiny blade of grass. When those fibers lean toward you, they absorb more light and look darker. When they lean away, they reflect light back at your eyes, making the surface look much lighter. This isn’t a manufacturing error; it is physics. Early in my DIY journey, I made the mistake of trying to fix a dark patch by scrubbing it with a stiff-bristled brush. Not only did I fail to change the color permanently, but I also fuzzed up the fibers so badly that I nearly ruined the texture. If you have ever felt that same frustration, you are definitely not alone. Have you ever looked at your floor and thought the light was playing tricks on you?
Is This Color Change Actually a Sign of Cheap Carpet?
Actually, the opposite is often true. High-quality, dense plush and saxony carpets are the most prone to showing these watermarks because their fibers are long and uniform. According to the Carpet and Rug Institute, shading is an inherent characteristic of certain pile constructions and is not considered a manufacturing defect. It is similar to how suede looks different when you run your hand across it. Understanding these carpet install secrets can save you a lot of sleep. If you notice your carpet looks wonky, it is usually just the way the light hits the nap of the fabric.
Why Light Placement Changes Everything
The color of your carpet is heavily dictated by your windows and your lamps. In my own home, the pools of dark and light shifted throughout the day. At noon, the floor looked uniform. By 4 PM, it looked like I had spilled water everywhere. This is why flooring installation mistakes to avoid often include neglecting to check the pile direction relative to the main light source. If you do not plan for the sweep of the carpet, you might end up with a seam that looks like a sore thumb just because the light hits it at a 90-degree angle. This becomes even more critical if you are dealing with issues like why your carpet is wrinkling, as those little bumps create even more shadows and color shifts.
Find the Nap Before You Cut
To stop shading before it starts, you need to treat your carpet like a living thing. Every roll has a ‘nap’ or a ‘set’—the direction the fibers naturally lean. Think of it like petting a dog; if you go with the grain, it’s smooth, and if you go against it, the fur stands up and changes color. I learned this lesson the hard way in a sun-drenched sunroom where I laid three different strips of plush. I didn’t check the run. Once the glue dried and the sun came out, the room looked like a grayscale zebra because the pile directions were fighting each other. To avoid this, always perform the hand-swipe test across the entire length of your material. If the carpet darkens when you push your hand away, that is the direction it will appear darker from across the room. Using the chalk line trick for perfectly straight carpet rows helps you keep these directional runs aligned as you move across the subfloor. 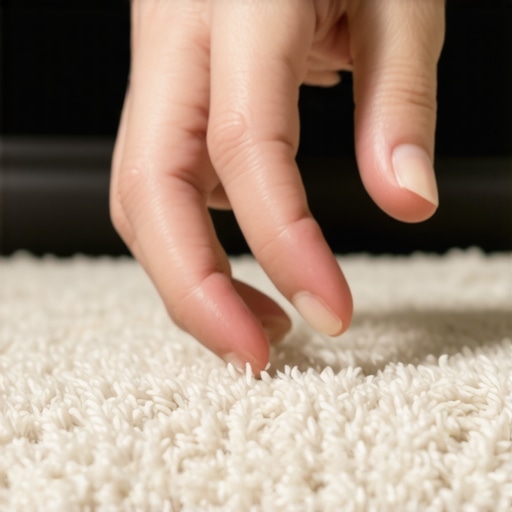
Plan Your Layout Around the Windows
Light is the biggest snitch when it comes to installation errors. If you have large floor-to-ceiling windows, you want the pile to lean toward the light source. This minimizes the shadows cast by individual fibers and creates a more uniform, velvety look. When you ignore this, you’re essentially setting yourself up for ‘watermarking,’ where certain areas look permanently wet. This is why step-by-step flooring installation from planning to perfect finish always begins with a site survey of the natural light. If you must have a seam, try to run it parallel to the light, not perpendicular. If the light hits a perpendicular seam, it highlights every tiny height difference between the two pieces. If you do find yourself with a visible line, knowing how to hide a carpet seam in the middle of a room can be a lifesaver, but proper pile alignment makes that job 90% easier.
Stop Relying Solely on Your Knee Kicker
One of the most common reasons shading looks worse over time is poor tension. If the carpet isn’t stretched tight, the fibers won’t stand at the same angle, creating ‘waves’ of color. Many DIYers make the knee-kicker mistake that ruins new carpet by thinking they can stretch a whole room with just their leg. A knee kicker is for positioning and the kicker move for tucking carpet into tight corners, but for the actual stretch, you need a power stretcher. Proper tensioning ensures the pile stays upright and uniform across the entire floor. Use the perimeter-tension trick for wrinkle-free carpets to lock the backing onto the tack strips evenly. When I finally switched from a kicker to a power stretcher on my third house flip, the ‘color patches’ I used to struggle with virtually disappeared. It turns out the carpet wasn’t ‘shading’ as much as it was just sagging. Consistency in tension means consistency in light reflection. Knowing these carpet install secrets is what separates a DIY floor from a showroom-quality finish.
You might think a tight fit is the ultimate sign of craftsmanship, but in the world of flooring, obsession with a ‘zero-gap’ finish is often the first step toward disaster. In my early days, I used to jam baseboards tight against the floor and wall, thinking it looked cleaner. I was wrong. The reality is that your house is a living, breathing entity that expands and contracts with the seasons. If you don’t leave room for that movement, you are just waiting for a buckle or a crack. For instance, why you should never nail baseboards into the bottom plate only is a lesson in structural movement; if the floor shifts and your trim is pinned too hard, something has to give, and it is usually your expensive finish work. I have seen beautiful oak boards cup simply because the installer ignored the penny gap rule for installing laminate near drywall or wood transitions.
The Waterproof Grout Lie
Here is a contrarian view that ruffles feathers in DIY forums: grout is not waterproof. In fact, neither is your tile. Most homeowners believe that once the grout is in, the ‘seal’ is complete. In reality, grout is porous. It acts more like a filter than a barrier. If your underlying system isn’t right, water will eventually find its way to your subfloor. This is why most DIY shower waterproofing fails at the drain—installers focus on the surface beauty and neglect the critical bond between the pipe and the membrane. According to the Tile Council of North America (TCNA) Handbook, proper moisture management requires a continuous waterproof barrier behind the tile, not just a coat of sealer on the grout. If you’re skipping the liquid membrane rule for zero-leak shower niches, you are basically building a slow-motion flood inside your walls.
Why Is There a Swampy Smell in My Brand New Bathroom?
It is the question that haunts every high-end renovation: you spent five figures on a spa-like retreat, but it smells like a locker room. This often happens because of ‘stagnant water’ trapped in the mortar bed. If the pre-slope under your liner wasn’t pitched correctly, water sits there and rots. This is often the culprit behind why your new shower smells like hardboiled eggs. It’s not a plumbing issue; it’s a drainage physics issue. To prevent this, I always emphasize the mud bed secret for rock-solid shower floors, ensuring that water flows toward the weep holes even if it gets past the tile. If you find yourself in a situation where the floor is already down and the smell is up, you might be looking at shower repairs: when to fix vs. replace for longevity. Don’t let a beautiful surface hide a rotting core.
The Invisible Expansion Gap Trap
When switching to hard surfaces, the ‘Oops’ factor usually comes from the transitions. People love the look of a seamless floor flowing from a bedroom into a bathroom, but long runs of flooring need break points. If you skip the t-molding secret for long runs of laminate flooring, you’re asking for the floor to peak in the middle of the hallway. Even with baseboards, using the back-bevel secret for seamless baseboard corners is only half the battle. You also have to ensure you aren’t pinning the floor down so tight that it can’t slide under the trim. Have you ever fallen into this trap? Let me know in the comments. Whether it’s a carpet that won’t stay stretched or a shower that won’t stop smelling, the secret is always in the layers you can’t see.
After years of tearing out botched DIY jobs, I have realized that the real work actually begins the moment you put your tools away. You can follow every step-by-step flooring installation from planning to perfect finish guide to the letter, but if you do not have a long-term maintenance strategy, that floor is on a countdown to failure. I used to think a clean mop was enough, but I was wrong. Success in this trade is built on the layers you cannot see and the tools you use to monitor them long after the check is cashed.
The Tool That Actually Prevents Floor Failure
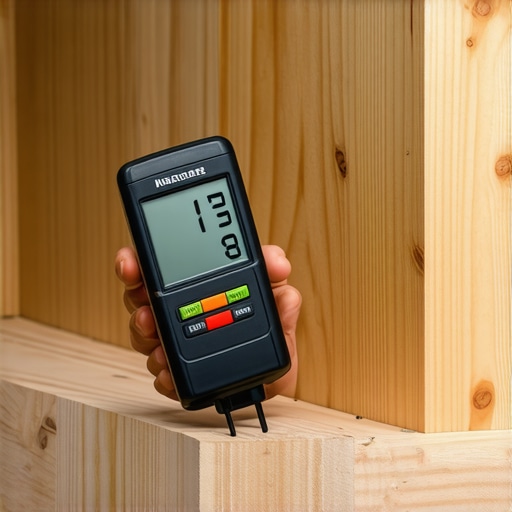
If you want to move from amateur to pro, you need to stop guessing and start measuring. I never step onto a job site anymore without a pinless moisture meter. It is the single most important piece of equipment in my bag. Why? Because wood and laminate are basically sponges. According to the National Wood Flooring Association (NWFA), the moisture content between a wood floor and its subfloor should generally be within 4% of each other for strip flooring. If you ignore the moisture meter test every flooring pro uses, you are gambling with cupping and crowning. I personally use the Wagner Meters Orion series because it doesn’t leave holes in the finish, and it gives me a clear reading of what is happening two inches deep. Don’t just check the floor; check the air humidity too. A stable environment is the only way to ensure your durable flooring installation for a stylish home actually stays durable.
Why Your Shower Grout Changes Color
Maintenance isn’t just about structural integrity; it is about hygiene and aesthetics. One of the most common complaints I hear is why your shower grout is turning pink or orange. Most people think it is rust or mineral deposits, but it is actually a biofilm of bacteria called Serratia marcescens. It thrives on soap scum and fatty acids. To keep your shower looking like a spa, you have to be aggressive with your silicone seals. I always use the blue tape secret for professional shower silicone lines every time to ensure the bead is perfectly smooth, leaving no microscopic pockets for bacteria to hide. If your baseboard caulk is cracking and the flex-fill fix isn’t enough, it usually means your bathroom’s ventilation is failing, allowing steam to penetrate the joints every single morning.
How do I keep my new flooring from aging prematurely?
The shortest answer is: controlled climate and sacrificial layers. Use high-quality walk-off mats at every entrance to catch grit before it acts like sandpaper on your finish. For carpets, you should be looking at best carpet types for high traffic areas in 2025 that feature built-in soil resistance. But beyond cleaning, the best thing you can do is perform a ‘perimeter check’ every six months. Look for gaps in the trim or soft spots in the grout. Catching a small issue early is the difference between a $50 tube of sealant and a $5,000 shower renovation guide project. I predict that by late 2025, we will see even more smart-home integrated moisture sensors that live under your floorboards to alert you to leaks before you even see a stain.
The Future of Your Home Floors
As we look toward top trends in installation for 2025, the focus is shifting away from purely ‘waterproof’ materials and toward ‘repairable’ systems. The industry is moving back toward high-quality composites that allow for individual plank replacement. If you are currently staring at a damaged section, learning how to remove a single damaged floor board without ripping up the room is a skill that will save you thousands. My advice? Buy an extra box of flooring now and keep it in a climate-controlled closet. In five years, that specific dye lot will be gone, and those extra planks will be worth their weight in gold. I challenge you to go out today and buy a simple hygrometer for your living room; keeping your humidity between 30% and 50% is the cheapest ‘insurance policy’ you will ever buy for your home.
Lessons from the Floor Trenches
Over the years, I have learned that the best installations are rarely the fastest. My biggest ‘lightbulb moment’ came when I realized that carpet isn’t just fabric; it is a map of light and shadow. If you do not respect the pile direction, you will always be fighting the room. I also learned the hard way that moisture is a silent saboteur. Even if a subfloor feels dry to the touch, it can hold enough water to ruin a laminate run in six months. That is why the moisture meter test every flooring pro uses is non-negotiable for my team now. Finally, never underestimate the power of acclimation. I once rushed a hardwood job during a humid July, only to watch the boards shrink and create massive gaps come January.
Tools I’ll Never Trade
If you are serious about DIY, you need more than just a hammer and a dream. I personally recommend a pinless moisture meter; it is the only way to track ambient temperature and humidity accurately, which is vital for preventing floor failure. For anyone diving into a wet area project, the TCNA Handbook is the gold standard for technical specifications. If you are struggling with existing layout issues, checking out an upgrade your bathroom the ultimate shower renovation guide will give you the technical breakdown of modern waterproofing systems. And for carpet enthusiasts, never settle for a cheap seaming iron—investing in a wide-base professional iron ensures your seams stay invisible and bonded.
#IMAGE_PLACE_HOLDER_E#
Build a Floor That Lasts Decades
The goal of any flooring installation is to create a space that looks as good in ten years as it does today. It is about patience, the right measurements, and using quality materials that fit your lifestyle. Whether you are choosing the best carpet types for high traffic areas in 2025 or mastering expert flooring installation tips for 2025, remember that you are building the foundation of your daily life. Don’t be afraid to take your time on the prep work—that is where the real magic happens. If things go sideways, knowing how to fix a carpet seam that was cut too short can save your budget, but getting it right the first time is a feeling of satisfaction like no other. Have you ever encountered a carpet ‘pool’ or a mysterious shower scent that you just couldn’t fix? Let me know your biggest flooring headache in the comments below!