

I’ll never forget the morning I walked into my guest bath and saw it: a network of fine, jagged cracks snaking across the very floor I’d spent two hundred dollars leveling just twelve hours prior. It felt like a personal insult from the hardware store gods. I had followed the bag instructions—or so I thought—yet there I was, staring at a failure that threatened to ruin my entire weekend plans for a [step-by-step flooring installation](https://tilecraftsmens.com/step-by-step-flooring-installation-from-planning-to-perfect-finish). If you’re seeing those same cracks right now, don’t panic; I’ve been in those muddy work boots, and I’ve learned exactly where we both likely tripped up. The feeling of that brittle surface crunching under your shoe is enough to make any DIYer want to give up, but most of the time, the fix is simpler than you think.
The Real Reason Your Floor Looks Like a Dry Riverbed
When I first started doing my own renovations, I figured self-leveling compound was like pancake batter: just mix it, pour it, and let gravity do the heavy lifting. I was wrong. The most common [flooring installation mistakes to avoid](https://tilecraftsmens.com/flooring-installation-mistakes-to-avoid-for-a-seamless-look) usually start with the prep work before the bag is even opened. In my case, I neglected the primer. I thought my plywood subfloor was thirsty enough to grab onto the mix, but instead, the wood sucked the moisture out of the compound so fast it shrank and snapped. Whether you are dealing with [4 subfloor prep mistakes](https://tilecraftsmens.com/4-subfloor-prep-mistakes-that-make-new-vinyl-planks-sound-hollow-3) or just a bad mix ratio, the result is the same: heartbreak in a bag. I learned the hard way that skipping that sticky blue or green primer bottle is like trying to paint a dusty wall—it just won’t end well.
Is this expensive mud actually worth the hassle?
You might be wondering if you should have just lived with the dip in the floor and called it “character.” The truth is, skipping the leveler leads to even worse problems later, like clicking joints or a [bouncing floor](https://tilecraftsmens.com/why-your-floor-is-bouncing-and-how-to-stiffen-the-joists). According to the Tile Council of North America (TCNA), proper substrate preparation is the single most critical factor in the longevity of any floor covering. My big mistake was thinking I could eyeball the water. Even a half-cup too much water breaks down the polymers, leaving you with a chalky, cracked mess that has no structural integrity. If your subfloor is concrete, you might have even missed a crucial [concrete moisture test](https://tilecraftsmens.com/the-concrete-moisture-test-that-saves-your-vinyl-floor), which can cause the compound to pop right off the surface. Have you ever poured a floor only to have it fail overnight? Drop me a message through my [contact-us](https://tilecraftsmens.com/contact-us) page and let me know, because I’ve found that we usually learn more from these messy disasters than from the easy wins. Before you rip it all up in a fit of rage, we need to talk about why that bond failed and how to save your sanity.
Stop the Cracks Before They Start
To get that glass-smooth finish, you have to treat the subfloor like a surgical site. Any dust or debris acts as a bond-breaker, meaning your expensive compound will just sit on top of the dirt instead of grabbing the floor. I learned this the hard way during a bathroom remodel where I thought a quick sweep was enough. Two days later, I could hear the leveler crunching underfoot. Now, I always use a shop vac and then a damp microfiber mop to ensure total cleanliness. You also need to perform [the moisture meter test every flooring pro uses](https://tilecraftsmens.com/the-moisture-meter-test-every-flooring-pro-uses) if you are working over concrete. If the slab is too damp, the leveler won’t cure correctly; if it is bone-dry and unprimed, it will steal the water from your mix too quickly, leading to those jagged cracks.
Scrub Every Inch of That Subfloor
Don’t just pour the primer and walk away. You need to work it into the pores of the wood or concrete with a soft-bristle broom or a large brush. This avoids those [4 subfloor prep mistakes that make new vinyl planks sound hollow](https://tilecraftsmens.com/4-subfloor-prep-mistakes-that-make-new-vinyl-planks-sound-hollow-3) because it ensures the leveler becomes one with the house structure. Think of it like [the back-buttering secret for large format shower tiles](https://tilecraftsmens.com/the-back-buttering-secret-for-large-format-shower-tiles); you want 100% coverage to prevent any air pockets from forming underneath. I remember skipping the edges once, thinking gravity would push the primer there anyway, but the leveler just curled up at the baseboards like a dried leaf.
Stop Guessing the Water Ratio
This is where most DIYers fail. I once tried to eyeball the water in a five-gallon bucket for a hallway project, thinking I could feel the consistency. I ended up with a speed bump of hardened, lumpy mud that forced me to learn [how to fix a high spot in concrete without a grinder](https://tilecraftsmens.com/how-to-fix-a-high-spot-in-concrete-without-a-grinder) the hard way. Use a dedicated measuring pitcher for every single bag. If the manufacturer calls for 5.2 quarts, do not use 5.5. Extra water does not make it more level; it separates the sand from the polymers, leaving you with a chalky surface that will fail under your [step-by-step flooring installation](https://tilecraftsmens.com/step-by-step-flooring-installation-from-planning-to-perfect-finish). 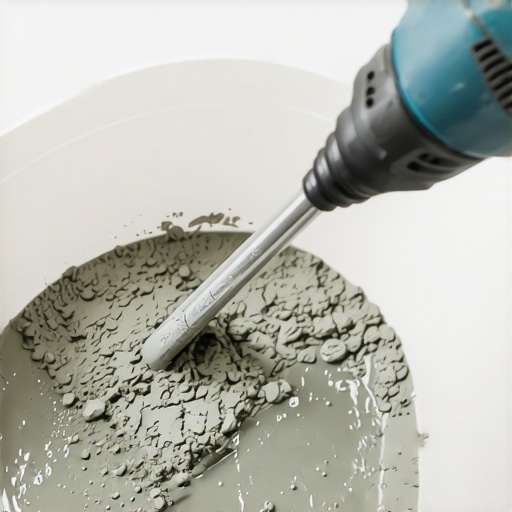
Move Fast and Don’t Overwork the Mix
You have about 10 to 15 minutes of open time before the chemical reaction makes the compound too stiff to flow. If you keep poking at it with a trowel, you will leave ridges that won’t disappear. I have seen people treat it like they are spreading frosting on a cake, but it is more like pouring liquid gold—let it go where it wants. Use a gauge rake to set the overall depth, and then a spiked roller to release the tiny air bubbles. This is as critical as [the dry-fit rule for no mistake shower drain alignment](https://tilecraftsmens.com/the-dry-fit-rule-for-no-mistake-shower-drain-alignment); once it is down, you have to trust your prep work. If you mess with it too long, you will end up needing [the scrap block trick for pulling vinyl planks into place](https://tilecraftsmens.com/the-scrap-block-trick-for-pulling-vinyl-planks-into-place) just to hide the dips and tool marks you created.Once you have conquered the self-leveling compound and your floor is finally flat, you enter a ‘danger zone’ where overconfidence often leads to the most expensive mistakes. In my experience, the biggest myth in home renovation is that the pretty stuff—the tile, the carpet, the wood—is what protects your home. That is completely backward.
Why Your Tile Choice Matters Less Than the Membrane
I see many homeowners pour thousands into shower renovation ideas only to find mold behind the walls a few seasons later. The common belief is that tile and grout are waterproof; they aren’t. Grout is essentially a hard sponge. If you aren’t obsessed with the liquid membrane rule for zero leak shower niches, you are just waiting for a disaster. The Tile Council of North America (TCNA) specifies that a waterproofing system must be completely continuous to be effective. I once skipped the ‘band’ treatment on a corner, thinking the thinset would plug the gap—it didn’t. Have you ever fallen into this trap where you trusted the finish more than the prep? Let me know in the comments. 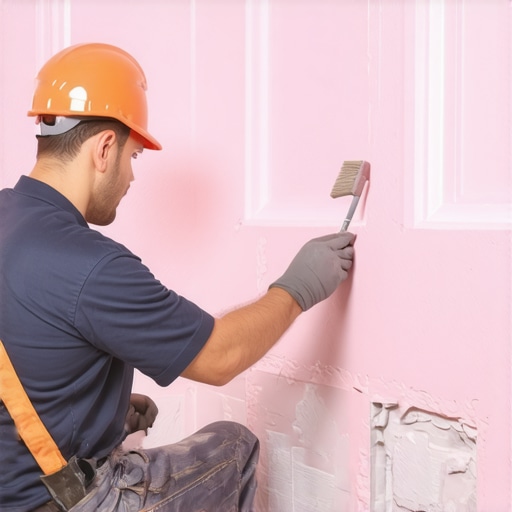
Stop Nailing Your Baseboards Into No Mans Land
When transitioning to the finishing touches, most people aim for the tightest fit possible without considering physics. If you don’t respect the expansion gap rule for flooring under door jambs, your floor will eventually push against the trim and buckle. Furthermore, why you should never nail baseboards into the bottom plate only is a lesson I learned after seeing my trim pull away from the wall within a month. You need to hit the studs. To get that high-end look on wonky walls, I rely on the back bevel secret for inside baseboard corners rather than just mashing them together with caulk.
Does a Power Stretcher Really Make a Difference in a Bedroom?
You might think a simple knee kicker is enough for a small space, but that is a dangerous ‘oops’ factor. The Carpet and Rug Institute (CRI) 105 standard is very clear: power stretching is a requirement, not an option, for all residential installations. If you skip this, you are almost guaranteed to see why your carpet is wrinkling two years after install. Using the knee kicker mistake that ruins new carpet as your only stretching method actually risks tearing the secondary backing because it applies localized, violent force rather than the smooth, even tension a power stretcher provides. It is the difference between a floor that stays flat for a decade and one that looks like a topographical map by next Christmas.After the dust settles, the difference between a floor that lasts and one that fails comes down to the gear you keep in your truck. I used to think a standard rubber mallet was fine for vinyl planks until I started seeing tiny fractures in the locking tongues. Now, I swear by the dead blow hammer secret for flat floor seaming because it delivers force without the bounce-back that ruins delicate joints. It’s a small investment that prevents the ‘click-clack’ sound of loose boards six months down the road. For my baseboards, I stopped using standard primer and switched to the high-build primer secret for smooth baseboard paint. It fills the grain of cheaper MDF or pine so well that the final finish looks like high-end custom cabinetry rather than a DIY weekend project.#IMAGE_PLACE_HOLDER_D#
How do I keep my shower looking brand new?
Longevity in wet areas isn’t just about the initial seal; it’s about managing movement. The ANSI A108.01 standard specifically mandates that movement joints be placed at every change of plane, yet I see people grout their corners every day. Grout will crack—it’s a matter of when, not if. I finally found peace of mind when I learned how we fixed the grout crack in the shower corner for good by replacing that hard grout with a high-quality color-matched silicone. To get those lines perfect, I use the blue tape secret for professional shower silicone lines every time. This prevents the ‘smeared’ look that ruins an otherwise beautiful shower renovation. If you’re debating shower repairs: when to fix vs. replace for longevity, always look at the substrate first. If the bones are good, a surface refresh with new silicone and a deep clean of the grout can add years to the room’s life. Looking toward the future, I see the industry moving away from ‘one-size-fits-all’ solutions toward performance-driven materials. We’re already seeing top trends in installation for 2025 focusing on smart acoustics and thermal stability. This means using denser underlayments and specific adhesives that can handle the high-sun exposure that often leads to why vinyl planks separate in high sun areas. My advice? Don’t just follow the trend; follow the technical data sheets. If you really want to level up your game, try the silicone tape method on your next shower corner instead of reaching for the grout bag—it’s the single biggest change you can make to stop call-backs and leaks.
Mistakes That Taught Me More Than a Five-Star Review
Over the years, I’ve realized that the most expensive tool in your shed is actually your ego. When I stopped assuming I knew it all and started respecting the technical data sheets, my results changed overnight. First, I learned that ‘clean enough’ is never clean enough; if there is a single grain of sand on that subfloor, you are risking a bond failure. Second, I stopped rushing the drying times. It is tempting to walk on a self-leveled floor after four hours, but waiting the full twenty-four is what separates an amateur from a pro who is interested in flooring installation mistakes to avoid. Finally, I discovered that lighting is your greatest ally. Bringing in a high-lumen work light to cast side-shadows will reveal ridges you’d never see under standard room lights, allowing you to sand them down before they ruin your layout.
Tools I Would Buy Again Without Question
If you are building your kit, don’t just buy the cheapest options at the big-box store. There are a few items that moved me from a ‘struggling DIYer’ to a ‘confident installer.’ I never start a pour without the moisture meter test every flooring pro uses because it removes all the guesswork from the substrate prep. For the final aesthetic, I always keep a specific filler on hand for how to fix baseboard gaps without replacing the trim, which saves hours of frustration when walls aren’t perfectly plumb. Lastly, a professional-grade power stretcher is non-negotiable if you want to apply carpet install secrets to your own bedrooms; it is the only way to guarantee a wrinkle-free finish for the next decade.
Building a Floor You Can Be Proud Of
At the end of the day, your home is a reflection of the care you put into the hidden layers. Whether you are prepping for a luxury vinyl plank or a plush carpet, the effort you invest in the leveling and the membranes today will be the reason you aren’t tearing it all up five years from now. Take the time to transform your home with expert flooring installation tips that prioritize longevity over speed. You have the tools, the plan, and the insider secrets to get this right. Don’t be afraid to make that first pour or cut that first piece of trim—perfection is just a series of small, intentional steps. Have you ever had a self-leveling project go sideways on you? Let me know in the comments below!