

I was on my knees, sweat dripping onto a fifty-dollar plank of luxury vinyl, trying to trace the base of my toilet with a dull pencil. It was a disaster. I thought I was a pro, but that porcelain curve humbled me real quick. I had tried to freehand the cut, thinking my steady hand was enough to navigate the tricky, oblong curve of a standard commode. Spoiler alert: it wasn’t. I ended up with a three-inch gap that even the thickest bead of caulk could not hide. Whether you are working on a full bathroom upgrade or just refreshing the floor, the toilet area is where dreams of a seamless look go to die. I have seen plenty of flooring installation mistakes in my time, but this one is the most painful because it is so visible. But here is the good news: I eventually learned that a simple scrap of cardboard is more valuable than the most expensive scribe tool in your bag. Today, I am going to show you how to stop the guess-and-cut cycle and master the cardboard template hack. It costs zero dollars but yields results that look like you hired a high-end contractor.
Stop Wasting Expensive Planks on Bad Guesses
The frustration of a botched cut is real. Vinyl flooring is tough and water-resistant, which makes it perfect for bathrooms, but its rigidity means you cannot exactly tuck it under the porcelain if you cut it too short. Early in my DIY journey, I made the classic blunder of measuring the widest part of the toilet base and hoping for the best. It looked terrible, and I knew I had to do better if I wanted a professional finish. If you are aiming for a durable flooring installation, you cannot afford to leave gaps that allow moisture to seep into your subfloor. According to the National Association of Home Builders, bathroom remodels remain one of the top three home improvement projects, yet floor-to-fixture transitions are cited by pros as the most common point of DIY failure. We are going to ensure you are not part of that statistic. This hack is about more than just aesthetics; it is about protecting your home from water damage that happens when cuts are imprecise.
Does This Cheap Trick Really Work Better Than Real Tools?
You might be skeptical. I get it. We live in a world where there is a specialized plastic gadget for everything. Why use a piece of an old Amazon box when you could buy a contour gauge? Well, because most contour gauges are not deep enough to capture the full sweep of a toilet base, and they tend to shift when you try to transfer the shape to your plank. Cardboard is rigid, customizable, and most importantly, forgiving. I once spent forty dollars on a pro scribing tool only to realize it did not fit in the tight space between the toilet and the bathtub. I went back to my cardboard scrap and had the cut done in five minutes. Have you ever finished a flooring project only to realize you will be staring at a messy cut every time you sit down in the bathroom? If you are worried about avoiding hollow spots or making sure your vinyl does not buckle, you have to start with a precise layout. No one wants to be fixing gaps in luxury vinyl later when a simple template could have prevented the issue from the start. Grab a pair of scissors and a box from the recycling bin; we are going to get this right the first time.
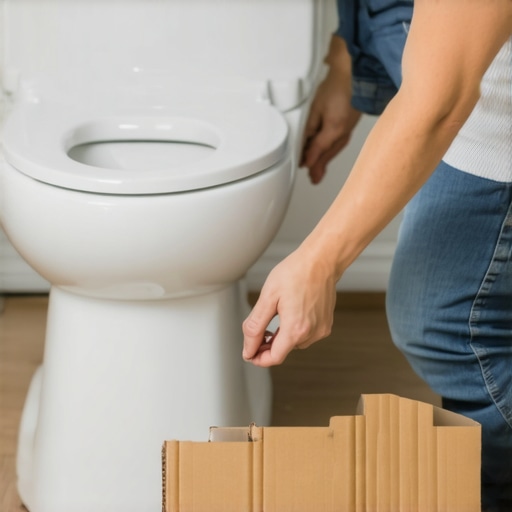
Start by grabbing a piece of rigid cardboard—cereal boxes or shipping cartons work best because they are thin enough to cut with scissors but stiff enough to hold a shape. Think of the cardboard as a stunt double for your expensive flooring. You want the stunt double to take all the hits and mistakes so your actual flooring installation remains flawless. Cut a piece of cardboard roughly the same width as your vinyl plank and long enough to reach from the previous row’s locking edge to the back of the toilet. If you find the space is too cramped, you might even find that the scribing tool every diyer needs isn’t as helpful as this manual hack because you can fold cardboard into corners where metal tools won’t go.
Ditch the Guesswork for a Piece of Cardboard
Once your template piece is sized, slide it up against the base of the toilet. You won’t get it flush immediately because of the curve. This is where you use a series of small, vertical relief cuts. Snip the edge of the cardboard every half-inch. As you push the cardboard toward the toilet, these little fingers will bend upward, hugging the porcelain. Use a pencil to trace the line where the cardboard meets the floor at the base of the toilet. I remember my first guest bathroom remodel where I ignored this step. I spent two hours trying to eye-ball a cut around a pedestal sink and wasted four planks of luxury vinyl. Every ‘crunch’ of the utility knife felt like throwing a ten-dollar bill in the trash. When I finally used the relief-cut method, I got a perfect fit in one try.
The Trace and Trim Technique That Never Fails
After you have your pencil line on the cardboard fingers, take the template back to your workbench. Cut along that line with sharp shears. Now, take that cardboard ‘puzzle piece’ and place it back on the floor. It should fit against the toilet like a glove. If there is a gap, don’t worry—just tape a new scrap of cardboard over the hole and re-trace. This is much cheaper than fixing gaps in luxury vinyl after the fact. Once the template is perfect, lay it directly on top of your vinyl plank. Align the edges exactly. Use a permanent marker to transfer the curve onto the vinyl. Because you are working with a solid template, your hand won’t wobble like it does when you’re trying to reach behind a tank in a dark bathroom.
Locking Your Perfect Cut into Place
When it comes time to cut the vinyl, do not rush. Use a fresh blade in your utility knife. Score the curve three or four times, going deeper with each pass. Vinyl is essentially a dense sandwich of plastic and stone dust; it doesn’t like to snap on a curve like it does on a straight line. You may need to use pliers to gently nibble away the waste piece. Once the cut is made, use a dead blow hammer to gently tap the plank into the locking mechanism of the previous row. If you’ve done it right, the plank will slide right under the slight ‘lip’ of the porcelain or sit so close that a tiny bead of silicone makes the transition invisible. This same precision is what pros aim for in a carpet install when tucking edges, or when using the back bevel secret for baseboards. You are aiming for a zero-tolerance fit that keeps water out and looks like it was factory-made for your bathroom.
Don’t Let the Term Waterproof Give You False Confidence
Many homeowners believe that because they are installing luxury vinyl, the subfloor is magically protected from all harm. This is a dangerous myth. While the planks themselves won’t swell, water is a persistent traveler. If you don’t address the perimeter, moisture can still find its way underneath, leading to mold or a subfloor that rots out from the inside. I’ve seen perfectly installed planks ruined because the installer skipped the moisture meter test every flooring pro uses. You have to treat the edges with as much respect as the center of the room. This is especially true in wet areas where most diy shower waterproofing fails at the drain or along the transition to the main floor. Precision isn’t just for looks; it’s your first line of defense against structural damage.
Why Does Your New Floor Still Sound Hollow When You Walk?
You followed the instructions, used the right spacers, and even used the rubber mallet hack for locking stubborn vinyl planks, yet there’s a clicking sound. This usually points to a nuance many skip: subfloor flatness. The industry standard, often cited by the World Floor Covering Association (WFCA), requires a subfloor to be flat within 3/16 of an inch over a 10-foot span. If you miss this, your ‘waterproof’ floor becomes a drum. To fix this before it starts, I always recommend the string line test for perfectly level subfloors. It’s a low-tech way to find high spots that even expensive laser levels can sometimes misinterpret in small, cramped bathrooms.
The Expansion Gap Trap Most Pros Won’t Tell You About
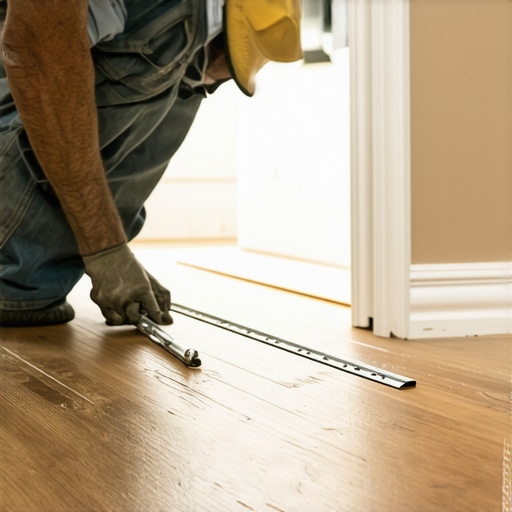
Common wisdom says to leave a quarter-inch gap around the room. But here is the nuance: in a small bathroom, that gap can actually be too much of a good thing if your baseboards are thin. If you leave a massive gap and then use a standard 3/8-inch baseboard, you’re left with zero room for error. I prefer a tighter 1/8-inch gap in bathrooms where temperature fluctuations are minimal, but humidity is high. However, if you are choosing the perfect baseboards, ensure they are thick enough to cover the movement without needing a separate shoe molding. If you find yourself with a gap that’s visible even after the trim is on, don’t panic. You can often learn how to fix baseboard gaps using flexible fillers that move with the house rather than cracking like traditional caulk.
Avoid the Pinch Point Nightmare Near Heavy Fixtures
One of the biggest mistakes I see is what I call the ‘pinch point.’ This happens when you install a heavy vanity or a clawfoot tub directly on top of a floating floor. A floating floor needs to move; if you pin it down with a 200-pound vanity, the floor will eventually buckle at the opposite side of the room. This is why vinyl plank floors buckle at the windows—the heat expands the material, but it has nowhere to go. Always install your heavy fixtures first and floor around them, or use a glue-down method in those specific zones. For those dealing with existing issues, the suction cup hack can sometimes pull shifted planks back into place without a full teardown. Have you ever fallen into this trap where you thought you were being thorough, only to have the floor rebel against you six months later? Let me know in the comments. We can all learn from those ‘oops’ moments that make us better builders.
Even the best-looking installation can fall apart if you do not have a plan for the long haul. I have learned that the difference between a floor that lasts five years and one that lasts twenty often comes down to the gear you use in the final hour. For instance, if you are finishing a transition into a hallway, skip the manual handsaw. I always rely on the undercut saw secret for professional doorway transitions because it allows the vinyl to slide perfectly under the jamb without that ugly jagged gap. And please, do not just trust your eyes when it comes to water. I never start a bathroom project without running the moisture meter test every flooring pro uses. If your subfloor is holding onto dampness from a previous leak, your new ‘waterproof’ floor is just trapping a mold factory underneath it. This isn’t just my opinion; the Carpet and Rug Institute (CRI) notes that improper moisture management and stretching are the leading causes of early floor failure in residential settings.
The Secret Gear That Separates Amateurs From Pros
If you are moving from the bathroom into a carpeted bedroom, do not make the mistake of using a cheap knee kicker for the whole room. I have seen too many DIYers deal with ripples a year later because they ignored the power stretcher setting for plush pile carpets. A power stretcher is a beast to carry, but it is the only way to ensure the backing is under enough tension to stay flat. The same level of detail applies to your trim. Once those planks are down, your baseboards need to look like they grew out of the wall. To get that high-end look on a budget, I use the high-build primer secret for smooth baseboard paint. It fills in the grain of cheap MDF and makes it look like custom-milled hardwood. If you still see tiny gaps after the paint dries, I swear by the caulk and dab method for perfect baseboard joints. It’s a five-minute fix that makes a world of difference. 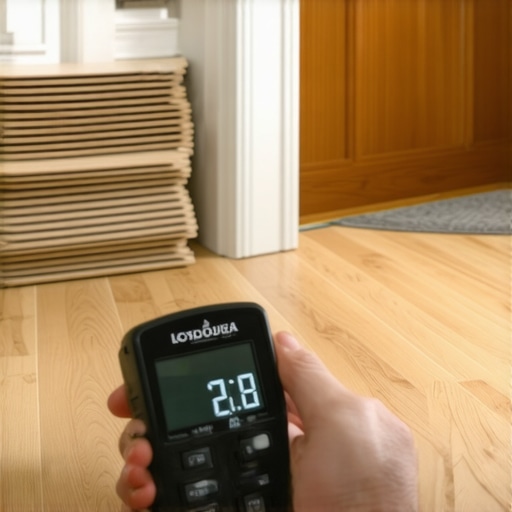
Why Harsh Chemicals Are Killing Your Grout
I used to think that the smell of bleach meant a bathroom was clean. I was wrong. Over time, aggressive cleaners actually eat away at the binders in your grout, making it porous and prone to staining. If you want to keep your tile work looking fresh, you need to know how to deep clean sanded grout without scuffing tile. Using a pH-neutral cleaner is the only way to protect the seal. This is especially vital when you are weighing the options of shower repairs when to fix vs replace for longevity. Sometimes, a deep clean and a fresh bead of silicone can save you a five-thousand-dollar renovation bill. I predict that in the next five years, we will see a massive shift toward AI-integrated apps that can scan your room and print custom-fit trim pieces, but until then, your hands and your maintenance routine are the most important tools you own.
How do I keep my new bathroom floors looking pristine for a decade?
The key is consistency and prevention. Aside from using the right cleaners, keep an eye on your transitions. If you notice a gap opening up, address it immediately. Go grab a moisture meter this weekend and check the areas around your tub and toilet. It is a thirty-dollar investment that can save you thousands. If you find a soft spot, do not ignore it—investigate the source before it compromises the structural integrity of your joists. Experience has taught me that the homeowners who are proactive about small repairs are the ones who never have to deal with the ’emergency’ total gut job.
Hard Truths About Bathroom Floors I Wish Someone Told Me Sooner
After years of wrestling with luxury vinyl, I’ve realized that the plank is only half the battle. A truly professional finish comes from the things you can’t see once the trim is on. First, remember that waterproof doesn’t mean flood-proof; moisture trapped under a floor is a recipe for disaster. Second, your eyes will lie to you, but a straightedge won’t. I’ve seen many subfloor prep mistakes that make new vinyl planks sound hollow simply because the installer didn’t check for low spots. Finally, don’t be afraid of modern aesthetics. Integrating baseboard trends in 2025 can turn a simple flooring job into a high-end designer space.
My Go-To Kit for Zero-Stress Installations
If you’re serious about a durable flooring installation, stop guessing and start measuring. I never walk onto a job site without the moisture meter test every flooring pro uses to ensure the subfloor is ready for its new skin. To get those seams perfectly flush without damaging the delicate locking tongues, I rely on the dead blow hammer secret for flat floor seaming—it delivers the force without the rebound. For the finishing touch, skip the brittle caulk and stop baseboard hairline cracks with a flexible filler that handles the house’s natural settling. These three items are the difference between a floor that looks good today and one that looks good in a decade.
#IMAGE_PLACEHOLDER_E#
Take the Leap and Transform Your Space
Installing your own bathroom floor is one of the most rewarding home improvements you can tackle. Yes, that porcelain throne can be intimidating, but with a simple scrap of cardboard and a bit of patience, you can achieve a fit that rivals any pro. Don’t let the fear of a tricky cut stop you from creating the home you deserve. Use these expert flooring installation tips to guide your hands, and remember that every pro started with one bad cut and a pile of wasted planks. You’ve got the tools and the knowledge—now it’s time to get to work. Have you ever ruined a perfectly good plank trying to cut around a pedestal sink or a toilet flange? Let me know your “oops” stories in the comments!