

I’ll never forget the first time I tried to install vinyl planks in my hallway. I thought I was being clever, tracing the intricate shape of the door casing onto the plank with a pencil and then hacking away with a jigsaw. It was a disaster. The gap was big enough to lose a nickel in, and my attempt to hide it with ‘matching’ caulk only made it look like a messy art project. It was a classic rookie mistake, and it’s exactly why your floor looks like a DIY job instead of a pro install. Today, I’m going to show you the one move that changed everything for me: the under-cut. This simple technique allows you to slide your floor right under the trim for that flush, high-end finish we all want.
Why Your Door Jambs Are Ruining Your Floor’s Look
Most people treat the door frame like a wall and try to butt the flooring up against it. But wood and vinyl need room to breathe, and following the expansion gap rule for flooring under door jambs is nearly impossible if you aren’t under-cutting. If you try to cut around the molding, you’ll almost always end up with a jagged edge. When I finally learned to use a pull saw to take a sliver off the bottom of the casing, it was like a lightbulb went off. It’s a core part of avoiding common flooring installation mistakes to avoid for a seamless look. Have you ever spent hours trying to scribe a piece of wood only for it to look like a beaver chewed on it?
Do You Really Need Fancy Tools for This?
You might be worried that this requires a specialized power tool that will sit in your garage for the next decade. While a powered jamb saw is great, a simple, inexpensive hand-held pull saw and a scrap piece of your new flooring are all you really need to get the job done. In fact, professional-grade finishes significantly impact a home’s resale value—and according to the National Association of the Remodeling Industry (NARI), quality flooring upgrades consistently offer one of the highest returns on investment for homeowners. I learned the hard way that skipping this step makes even the best durable flooring installation look sloppy. By under-cutting, you aren’t just hiding the edge; you are creating a professional-grade transition that handles house settling and temperature changes without showing a single gap. Now, let’s get into the nitty-gritty of how to actually pull this off without ruining your door frame.
I learned the hard way that guessing the height of a door jamb is a recipe for a gap that even the thickest caulk can’t save. I once took a wild swing at a guest bedroom door with a vibrating multi-tool, thinking I could eyeball it. The result? A jagged, sloping cut that looked like I’d attacked it with a butter knife. To avoid that, you need to use the actual material you’re installing as your guide. Lay a scrap piece of your vinyl or laminate upside down on the subfloor right against the jamb. This protects the finish while giving you the exact thickness you need.
Use a Scrap Piece to Get the Height Right
Before you even reach for the saw, if you’re dealing with uneven surfaces, it’s a good time to check your work. Following the string line test for perfectly level subfloors before the plank hits the floor is a pro move that prevents bouncing once it’s tucked in. Place your saw flat on top of that scrap piece. The teeth of the saw should be parallel to the subfloor. Now, with gentle, slow strokes, cut through the casing and the stop molding. Don’t force it; let the saw do the work. This ensures your cut is perfectly level with the future floor surface.
The Correct Way to Slide and Lock Planks
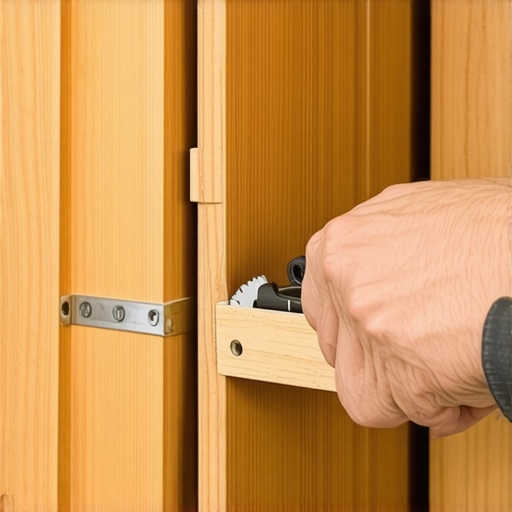
Once the wood is cut, use a flat-head screwdriver or a small chisel to pop out the bottom piece of the jamb. It’s incredibly satisfying when that little sliver of wood slides out, leaving a perfect ‘cave’ for your plank. This is where most people get stuck: getting the plank into the hole while still locking it into the previous row. Think of it like a puzzle piece that needs to slide in sideways rather than clicking down from the top. You might need to shave off the locking ‘tongue’ of the plank in some cases and use a bit of glue, especially if the door frame is in a tight corner. This is similar to the glue assist trick for wide plank hardwood floors. If the plank won’t cooperate, don’t reach for the heavy hammer yet. Using the rubber mallet hack for locking stubborn vinyl planks will prevent you from damaging the delicate edges.
Why the Pull Saw is Your New Best Friend
You aren’t just dealing with door jambs; you’re dealing with the transition to the walls. Many people forget that baseboards should ideally sit on top of the floor, not have the floor butt against them. If you’re keeping your old trim, you’ll need to under-cut that too, or use a shoe molding. For those upgrading their look, choosing baseboard styles that elevate your interior design makes a world of difference. I remember trying to install a thick vinyl plank against a wavy 1920s wall. It looked terrible until I used the scribing tool every diyer needs for tight baseboards to match the trim to the floor’s actual path. Ensuring the floor is perfectly tucked isn’t just about aesthetics; it’s about stability. If you’re working near a wet area, like a bathroom, ensure you follow the step-by-step flooring installation from planning to perfect finish to maintain structural integrity. This technique ensures that even if the house shifts, your floor won’t reveal a single gap at the most visible part of the room.
Let’s dig deeper into why even “perfect” installs sometimes feel off. One common myth I see all the time is the idea that if a subfloor looks level, it’s ready for planks. In reality, “level” and “flat” are two different beasts. You can have a perfectly level floor that is as wavy as a potato chip, leading to those annoying 4 subfloor prep mistakes that make new vinyl planks sound hollow. If you ignore this, your floor will inevitably start to bounce, making why your laminate floor sounds like a drum the only thing you hear when you walk through your home.
Why Does Your New Floor Still Click and Pop?
The culprit is usually a high spot you didn’t see. Most people reach for a spirit level, but a long straightedge is your best friend here. According to the National Wood Flooring Association (NWFA), a subfloor should be flat within 3/16-inch over a 10-foot radius. If you skip this, you’re basically setting up your locking mechanisms for failure. I once spent three days on a laminate job only to realize later that I had to learn how to fix a high spot in concrete without a grinder because the clicking was driving the homeowner crazy. You have to be ruthless about the prep before the first plank even touches the ground.
Stop Nailing Your Baseboards Into the Bottom Plate
Here is a contrarian take: most DIYers (and even some pros) think you should nail the baseboard directly into the bottom plate of the wall for maximum strength. I completely disagree. When you pin the board that low, you aren’t leaving any room for the flooring to expand and contract under the trim. This is exactly why your baseboard caulk is cracking and the flex fill fix becomes a necessary headache later. Instead, nail into the studs at a slight downward angle about two inches up. It provides plenty of hold while allowing the house—and your floor—to breathe. If you’re dealing with uneven floors, you might even need the shimming secret for making mdf baseboards look custom to hide the gaps without pinning the floor down.
The Drain Trap That Ruins Modern Showers
When it comes to bathrooms, people obsess over the tile but ignore the waterproofing nuances. The biggest “oops” factor? Thinking a centered drain is a safe drain. Actually, why most diy shower waterproofing fails at the drain is often due to poor integration between the liquid membrane and the flange itself. You can have the most beautiful shower renovation ideas modern designs for a luxury feel, but if that seal isn’t the triple point seal for leak proof shower corners, you’re just building a very expensive bathtub for your subfloor to rot in. Finally, let’s talk carpet. The biggest mistake is over-relying on a knee kicker. Professionals know that the knee kicker mistake that ruins carpet tension is real—it can stretch the backing unevenly. Use a power stretcher if you want to avoid those ripples that show up two years down the line. Have you ever fallen into this trap or found a ‘pro’ trick that actually made things worse? Let me know in the comments.
You’ve done the hard work of the install, but the real battle for your home’s value happens in the months following. I’ve walked into high-end homes and seen stunning bathrooms ruined simply because the homeowner didn’t understand why your shower grout is turning pink or orange. It’s usually Serratia marcescens, a bacteria that feeds on fatty deposits in soap and shampoo. If you want to keep that showroom look, you have to learn how to deep clean sanded grout without scuffing tile. I personally never use a wire brush; I stick to a stiff nylon brush and a pH-neutral cleaner to protect the sealant. If you use harsh acids, you’ll strip the sealer and find yourself back at square one within weeks.
Trust the numbers more than your eyes
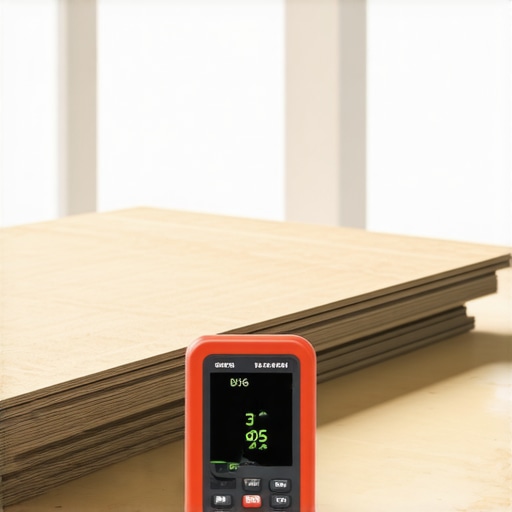
The most important tool in my bag isn’t a trowel—it’s a digital moisture meter. I don’t care how dry a concrete slab looks; I’ve seen ‘dry’ floors ruin expensive LVP because of hydrostatic pressure. Using the moisture meter test every flooring pro uses is the only way to know for sure if your subfloor is ready for a finish. According to the Tile Council of North America (TCNA) Handbook, the performance of any flooring system is fundamentally tied to the moisture content of the substrate. I’ve made it a rule to photograph my meter readings next to the date—it’s the best insurance policy you can have if a manufacturer ever questions your installation quality.
How do I maintain my flooring and trim over time?
For the flooring itself, maintenance is more about climate control than just mopping. In areas with floor-to-ceiling windows, you’ll likely notice why vinyl planks separate in high sun areas and the glue down fix becomes your best friend for those specific hot spots. I’ve started using a high-temperature resistant adhesive in sunrooms to prevent that ‘walking on potato chips’ sound. On the trim side, keep a close eye on your corners as the seasons change. You can stop baseboard hairline cracks with this flexible filler as soon as the house settles in the winter. If you catch them early, you prevent the paint from flaking off entirely and keep the home looking crisp.
The future of smart subfloors
Looking toward the future, I believe we are entering the era of ‘active’ flooring. We’re already seeing leak-detection cables that can be installed around the perimeter of a room before the baseboards go on. In just a few years, your floor will likely text you if the refrigerator starts leaking behind the cabinets. This technology will completely change the calculus for shower repairs when to fix vs replace for longevity because we’ll catch failures before the wood rot even starts. For now, my advanced tip for you is this: buy a professional-grade moisture meter before you lay your next plank. Documenting your subfloor state is the ultimate peace of mind. Have you ever had a floor fail because of a moisture issue you couldn’t see?
The Hardest Lessons I Learned on the Job Site
After years of wrestling with planks and trim, I realized that the secret isn’t just in the tools, but in the patience to do the prep. One of the most painful realizations I ever had was that a ‘good enough’ subfloor eventually leads to a ‘noisy’ room. I’ve seen homeowners ignore the subfloor, only to have to go back and learn why your laminate floor sounds like a drum when they could have fixed it in an afternoon. Another lightbulb moment? Realizing that door jambs are the ‘face’ of your flooring project. If you rush that cut, the whole room feels off. I also learned that you should never underestimate the power of documentation. Using the moisture meter test every flooring pro uses before laying a single plank saved me from a major headache on a humid basement job. Lastly, remember that your trim is the frame of your masterpiece; taking the time to learn how to choose the perfect baseboards for your homes style is just as important as the floor itself.
My Reliable Toolkit for Flawless Finishes
I don’t leave my garage without a few specific items that make these jobs manageable. First is a high-quality Japanese pull saw. It’s thin, flexible, and gives you that surgical precision when under-cutting casing. Second, I always carry a dedicated scribing tool; it is absolutely the scribing tool every diyer needs for tight baseboards if your walls aren’t perfectly straight (and let’s be honest, they never are). Third, I swear by a heavy-duty rubber mallet combined with a tapping block to avoid common flooring installation mistakes to avoid for a seamless look. Finally, I always keep a tube of flexible filler nearby to stop baseboard hairline cracks with this flexible filler as the seasons change, ensuring the work looks just as good in two years as it does today.
#IMAGE_PLACEHOLDER_E#
Take the Leap and Start Your Next Project
The first cut is always the scariest, but once you slide that first plank under a perfectly under-cut door jamb, you’ll feel a surge of confidence that no tutorial can truly replicate. Flooring is one of the most transformative things you can do for your home, and with these transform your home expert flooring installation tips for 2025, you are already ahead of most DIYers. Don’t let the fear of a small gap stop you from creating a space you love. Remember to follow a solid step-by-step flooring installation from planning to perfect finish and take it one row at a time. Your home—and your resale value—will thank you for it. Have you ever accidentally cut a door jamb too high, or did you find a creative way to hide a gap I didn’t mention? Let me know in the comments below!