

I stood in my living room, staring at a jagged, fist-sized hole in the drywall that definitely wasn’t there ten minutes ago. I was supposed to be tackling a simple flooring installation, but instead, I was looking at a weekend of patching, sanding, and repainting. My wife walked in, took one look at the gypsum dust on the carpet, and just sighed. That sigh hurt worse than the blister on my thumb. I had committed one of the most common flooring installation mistakes: I assumed that brute force and a standard pry bar were all I needed to move some trim. I was wrong, and my walls paid the price.
Stop Ripping Your Walls to Shreds
If you are planning to refresh your space with new baseboard styles, you have to get the old stuff off first. The problem is that most people treat a pry bar like a lever of destruction rather than a precision tool. We’ve all been there—wedging the metal tip behind the wood, giving it a good yank, and hearing that sickening crunch as the bar sinks right through the soft drywall. It’s a nightmare that turns a two-hour job into a two-day ordeal. Today, I’m going to let you in on the simple ‘Pry-Bar’ secret that professional finish carpenters use to keep walls pristine. We are going to solve the mystery of stubborn nails and brittle paint once and for all. Have you ever felt that heart-sinking moment when you hear the drywall crack? I’d love to hear your horror stories in the comments so I know I’m not alone in my past clumsiness.
Is This Secret Just Too Good to Be True?
I used to be a skeptic too. I thought that some level of wall damage was just the ‘cost of doing business’ when remodeling. Early in my DIY journey, I didn’t even bother with a protector block; I just shoved a screwdriver back there and hoped for the best. Big mistake. According to data from HomeAdvisor, professional drywall repair can cost anywhere from $300 to $900 depending on the extent of the damage, which is money much better spent on fresh baseboard trends. The ‘secret’ isn’t actually about buying a $100 specialty tool; it’s about a specific sequence of cuts and a humble scrap of wood that acts as a sacrificial lamb for your walls. Before you even touch that pry bar, you need to understand that the paint is actually acting as a bridge between your wall and the trim. If you don’t break that bridge, you’re not just pulling wood; you’re pulling the paper right off the studs. Whether you are prepping for a carpet install or laying down luxury vinyl, mastering this one move will save your sanity.
Break the Paint Seal Before You Even Think About Prying
If you skip this first step, you are essentially gambling with your drywall’s lives. Paint and caulk act like a high-strength adhesive over time. If you just shove a bar in there and pull, the trim will take the top layer of your wall’s paper with it. I learned this the hard way during a carpet install in our guest room. I was in a rush and thought I could skip the prep. Within three minutes, I had a jagged three-foot strip of drywall paper hanging off the wall like a peeled sunburn. It was a disaster. To avoid my fate, take a sharp utility knife and run it firmly along the seam where the wood meets the wall. You aren’t trying to cut through the stud; you just want to sever that bridge of paint. Think of it like a surgical incision before the main operation. This ensures that when the wood moves, it moves alone, leaving your wall surface perfectly intact for your next step-by-step flooring installation phase.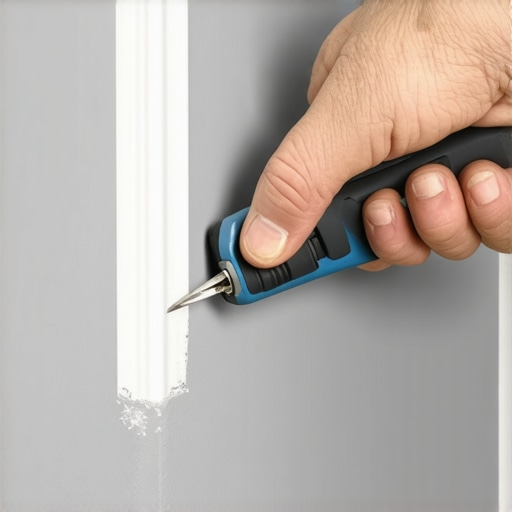
Give Your Wall a Bodyguard with a Scrap Block
The biggest mistake DIYers make is using the wall as a direct fulcrum. Your pry bar is a concentrated point of extreme pressure. Even if you aren’t a bodybuilder, that metal tip can exert enough force to punch right through the gypsum board. The secret is the ‘sacrificial block.’ Grab a small, flat scrap of 1/4-inch plywood or even a sturdy shim. When you slide your pry bar behind the trim, you must place that block between the back of the bar and the wall. This tiny piece of wood acts as a bodyguard, distributing the prying force across a wider surface area. It’s the same logic used in the scrap block trick for seating floor planks—distribution of force is the key to preventing damage. I keep a handful of these scraps in my pocket now; they are the difference between a clean finish and a messy patch job.
Work the Nails Instead of Fighting the Wood
Once your block is in place, don’t just yank the board toward the center of the room. Baseboards are usually held on by finish nails that are angled into the wall studs. If you pull too hard at one end, you risk snapping the board, which is a nightmare if you were planning on elevating your interior with simple updates using the same trim. Instead, work in a ‘zipper’ motion. Pry just enough to see the first nail, then move the bar six inches down to the next one. You want the whole board to move out incrementally. If a nail stays stuck in the wall, leave it. You can pull it out later with pliers. If the nail stays in the wood, use the ‘pull-through’ method from the back of the board to avoid damaging the face. This level of care is what separates a hack job from a professional flooring installation. Dealing with the hardware carefully now means you won’t have to worry about how to fix baseboard gaps or splintered wood later. It’s about finesse, not muscle. Keeping the trim in one piece gives you the option to sand it down using a sanding block hack and reuse it, saving you a fortune at the lumber yard.”,”image”:{“imagePrompt”:”A close-up shot of a professional carpenter using a utility knife to score the caulk line between a white baseboard and a grey wall, showing the precision of the cut.”,”imageTitle”:”Scoring the paint line on baseboards”,”imageAlt”:”A utility knife cutting the paint seal between baseboard and drywall”},”categoryId”:0,”postTime”:””}Once those baseboards are safely out of the way, you’re staring at the raw edge of your project—which is where the real nuance begins. Most people think a floating floor is the ultimate ‘set it and forget it’ DIY task, but I’m going to challenge that common belief. Everyone says floating floors are forgiving, but in my experience, they are the most temperamental surfaces in the house. If you don’t respect the penny gap rule for installing laminate near drywall, the physics of your home will eventually win. I once saw a homeowner who was so proud of his tight fit that he didn’t leave a gap at all; three months later, in the humid summer, his floor rose up like a tectonic plate. He made the classic ‘Oops’ mistake: he tried to fix the bounce by nailing his baseboards directly into the flooring planks. This pins the floor in place, preventing natural movement and leading to snapped locking tabs. According to the National Wood Flooring Association (NWFA), failing to provide adequate expansion space is the leading cause of post-installation buckling. When you are looking for expert flooring installation tips for 2025, ‘room to breathe’ should be at the top of your list.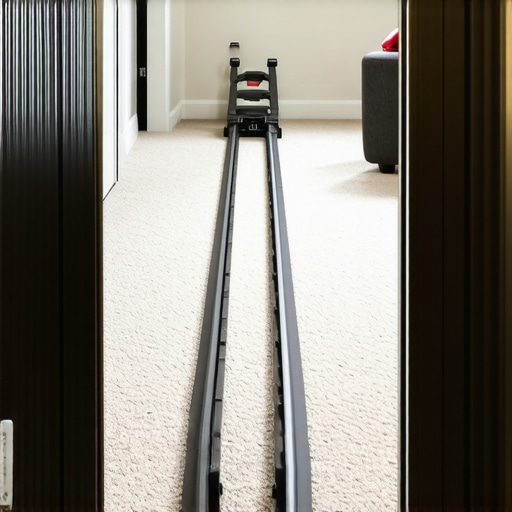
Why does my carpet seam peak even after I followed the rules?
It’s a common expert-level frustration. You’ve done the carpet install, but there’s a visible ridge where the two pieces meet. Most beginners blame the subfloor, but the nuance usually lies in the tension and the tape. If you don’t understand why your carpet seam peaks and how to flatten it, you’ll spend years tripping over a line that shouldn’t be there. The trap here is often over-relying on a knee kicker. While it’s great for positioning, the knee kicker mistake that ruins carpet tension is assuming it provides enough force for a permanent stretch. Without a power stretcher, the backing of the carpet isn’t fully engaged, which causes the seam to buckle under the pressure of foot traffic. And don’t panic if your vacuum bag is full after the first week; understanding why your new carpet is shedding so much is part of the process, but if the fibers are pulling out in clumps, you likely have a tension issue at the tack strip.
The Trowel Trap That Destroys Shower Tile Bonds
The same level of hidden nuance applies to your bathroom. When it comes to showers, many think that ‘more thin-set is better.’ This is a dangerous myth. Using a trowel that is too large can actually prevent a proper bond because the ridges are too high to collapse properly when you set the tile. This is the trowel size mistake that ruins your shower tile bond. Conversely, if the base isn’t right, no amount of tile will save you. You have to master the mud bed secret for rock-solid shower floors to ensure there is zero flex. A shower floor that flexes even a fraction of a millimeter will eventually cause grout failure and leaks. Have you ever fallen into this trap of over-building or under-prepping? Let me know in the comments below! If you’re still early in the planning phase, don’t forget to check our privacy policy and contact us if you need a professional set of eyes on your project.But even with the best pros on speed dial, the long game is won through maintenance and the right gear. After the dust settles, your biggest enemy isn’t foot traffic—it is moisture. I never start a project anymore without the moisture meter test every flooring pro uses. If you are installing over concrete, you might think it’s dry because it looks grey, but concrete can hold a reservoir of water that will eventually delaminate your expensive new planks. I’ve seen beautiful installs ruined in six months because the installer ignored the humidity levels in the slab. In the future, I predict we will see smart sensors embedded directly into subfloors that alert your smartphone the second a pipe leaks behind your baseboards. Until then, you have to be the sensor.
Don’t Let Invisible Moisture Rot Your Subfloor
The Tile Council of North America (TCNA) Handbook explicitly states that movement joints and proper sealant applications are the difference between a lifetime floor and a five-year failure. This is especially true where your tile meets the tub or the corner of the wall. If you use standard grout in these spots, it will crack—period. I spent years fighting this until I learned how we fixed the grout crack in the shower corner for good by using 100% silicone. To get that perfect, professional bead that looks like it was done by a robot, use the blue tape secret for professional shower silicone lines every time. It is a game-changer for anyone who struggles with messy caulk tubes.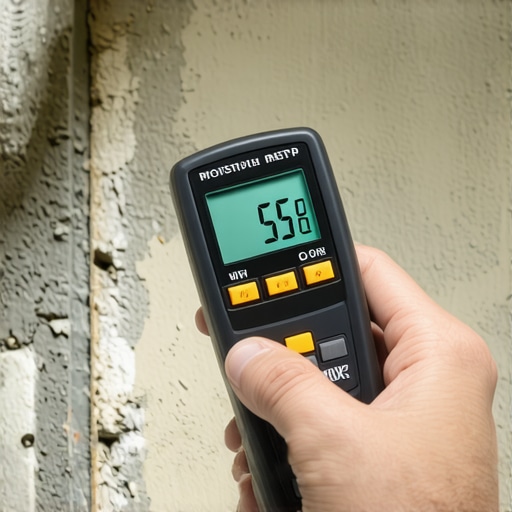
How do I maintain my flooring and showers for the next decade?
Longevity is about proactive small fixes. If you notice a gap opening up in your luxury vinyl, don’t ignore it. Sunlight hitting a specific spot can cause expansion that pushes planks apart, which is why vinyl planks separate in high sun areas and the glue down fix is often the only permanent solution. For laminate, you can often close these gaps without tearing up the room by using the suction cup hack for adjusting gapped laminate planks. It’s a trick I wish I knew ten years ago. It saves your knees and your sanity.
Stop Gaps Before They Become Tripping Hazards
Even your trim needs a bit of love over time. As your house settles, those perfect miter joints you worked so hard on might start to show a sliver of light. You can stop baseboard hairline cracks with this flexible filler that moves with the wood instead of drying brittle. It’s these small, specialized tools and materials that elevate a home from ‘DIY-looking’ to ‘professionally maintained.’ I strongly encourage you to try the blue tape trick on your next bathroom touch-up; it’s the easiest way to see an immediate, professional result in under ten minutes. Staying on top of these details ensures your durable flooring installation remains the centerpiece of your home for years to come.
The Expensive Lessons I Learned the Hard Way
Reflecting on years of dusty knees and sore thumbs, the biggest takeaway isn’t about strength—it’s about patience. I used to think I could outsmart a carpet install by skipping the power stretcher, only to find out why your carpet is wrinkling two years after install is almost always a tension issue. Similarly, in the bathroom, I learned that the hidden spacers for perfectly even shower grout lines are the difference between a high-end spa look and a DIY disaster. My ‘lightbulb moment’ happened when I realized that every material in your home—wood, carpet, and even tile—is constantly moving. If you don’t build for that movement, the house will eventually break your work. I once ignored a slight subfloor dip, and that ‘minor’ shortcut led to a clicking sound that haunted my hallway for years.
My Go-To Kit for a Flawless Finish
I don’t walk onto a job site without a few specific items. First, a high-quality moisture meter is non-negotiable; ignoring the subfloor’s health is the fastest way to ruin a durable flooring installation. For trim work, the scribing tool every diyer needs for tight baseboards has saved me hours of frustration on wavy walls. I also highly recommend the TCNA Handbook for anyone tackling showers, as it provides the industry standards that prevent leaks before they start. Lastly, always keep a stash of scrap wood for the back bevel secret for inside baseboard corners in your mental rolodex for those tricky 45-degree joins that never seem to sit flush on the first try.
#IMAGE_PLACEHOLDER_E#
Time to Bring Your Vision to Life
You’ve seen the mistakes and learned the professional workarounds, so now it is time to stop planning and start doing. Whether you are picking out the best carpet types for high traffic areas in 2025 or finalizing a full bathroom renovation, remember that the beauty is in the details. A successful flooring installation isn’t just about the planks you see; it’s about the prep work you don’t see. Don’t be afraid to take it slow and double-check your measurements—your future self will thank you when those baseboards snap into place perfectly. Have you ever run into a baseboard corner that just wouldn’t close properly no matter what you did? Let me know your biggest DIY struggle in the comments below!