

I was standing in my half-finished bathroom, sweat dripping off my nose, staring at a $40 piece of oversized porcelain that I had just snapped into three jagged pieces. I had tried to be “clever” by using a standard tile nipper to carve out a circle for the toilet drain. It didn’t work. In fact, it was a total embarrassment. If you’ve ever felt that pit in your stomach when a project goes sideways, you know exactly why I’m writing this today. Cutting a perfect circle in a floor tile for a toilet drain isn’t just about aesthetics; it’s about making sure your flange sits flush and your wax ring actually does its job.
Stop Hiding Ugly Cuts Under the Toilet Base
[IMAGE_PLACEHOLDER]We’ve all seen it—or maybe we’ve done it. You hack a rough, square-ish hole in the tile because “the toilet will cover it anyway.” But let me tell you, that approach is a recipe for flooring installation mistakes to avoid for a seamless look. When the hole is too large or too messy, you lose the structural support the tile provides around the flange. I learned the hard way that a sloppy cut can lead to a rocking toilet, which eventually leads to a leaking wax ring and a ruined subfloor. When you are working on your ultimate shower renovation guide, the precision you apply to the walls should match what you do on the floor. It’s about pride in the craft. Today, I’m going to show you how to get that factory-finish look using tools you probably already have—or can grab for a few bucks at the hardware store. We aren’t just aiming for “good enough” for a stylish home; we are aiming for perfection.
Does a Round Hole Really Matter If It Is Covered?
You might be thinking, “Hey, the porcelain throne is going to sit right on top of this, so why bother with a perfect circle?” It’s a fair question. But here’s the reality: precision matters for the seal. According to the Tile Council of North America (TCNA), proper support around plumbing penetrations is vital for the longevity of the installation. If your cut is too wide, your mounting bolts might not have enough solid tile to grip against, leading to that annoying “wobble” every time you sit down. Early in my career, I ignored the dry-fit rule for no-mistake shower drain alignment and ended up with a toilet that felt like a rocking chair. It was a nightmare to fix once the grout was dry. Have you ever cracked a tile right at the finish line of a long day? It’s the worst feeling in the world, isn’t it? I want to help you avoid that frustration. While we often use a cardboard template hack for cutting vinyl around toilets, tile requires a bit more finesse and a lot more patience. We’re going to walk through the exact steps to ensure your next bathroom floor looks like a pro did it—without the pro-level price tag.
Map Your Cut Before You Break the Glaze
Before you even think about power tools, you need an exact map of where that hole belongs. I once tried to “eyeball” a drain location on a $60 piece of hand-painted terra cotta. I was off by three-quarters of an inch, and that mistake cost me an entire afternoon of prying up thinset and wasting material. To avoid this, use the cardboard template hack for cutting vinyl around toilets, but apply it to your tile layout. Cut a piece of cardboard to the exact size of your tile, find the center of the drain pipe, and cut your circle out of the cardboard first. Once the template fits perfectly over the flange, transfer those marks to your tile with a grease pencil. This is the foundation of step-by-step flooring installation from planning to perfect finish. Use two measurements: one from the back wall to the center of the pipe, and one from the side wall. Where they cross is your bullseye. If you are working on a complex layout, applying the dry-fit rule for intricate tile patterns here will save you from expensive mistakes before the mortar even touches the floor.
Use a Diamond Hole Saw to Save Your Sanity
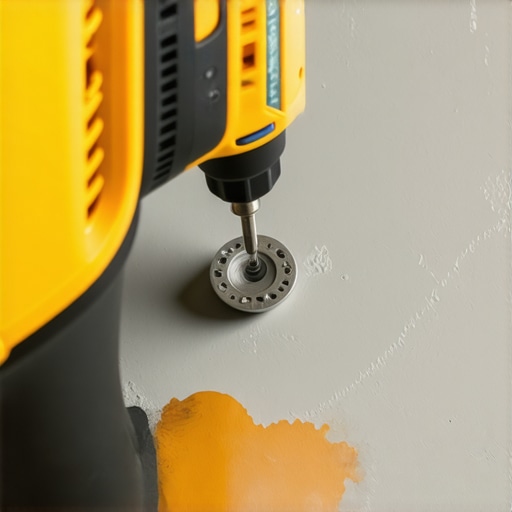 Forget about using a hammer and a chisel like it is the 1950s. You need a diamond-grit hole saw specifically rated for porcelain or stone. If you try to use a cheap carbide bit, you will generate enough heat to crack the tile before you are halfway through. When you start the cut, here is the secret: do not start flat. If you place the hole saw flat on the tile, it will “walk” across the surface, scratching the glaze and ruining your your guide to durable flooring installation for a stylish home. Instead, hold the drill at a 45-degree angle. Let the edge of the bit “bite” into the tile to create a small crescent-shaped groove. Once that groove is deep enough to hold the bit steady, slowly bring the drill up to 90 degrees. This technique ensures your expert flooring installation tips for 2025 actually result in a professional look. Don’t push too hard; let the weight of the drill do the work so you don’t blow out the back of the tile.
Keep the Bit Wet or Watch the Tile Snap
Friction is a silent killer in tile work. As the diamond bit grinds through the porcelain, the temperature spikes instantly. If the tile gets too hot, the internal tension will cause a hairline fracture that ruins the piece. I always keep a spray bottle or a soaked sponge nearby to keep the cutting surface wet. This lubrication also prevents the “hollow” sound often associated with poor bonding—something you can learn more about in our guide on how to avoid hollow spots under your new tile. Think of the water as the coolant in your car; without it, everything seizes up. This same level of precision is required when you move from the floor to the walls, especially when you are trying to master the blue tape secret for professional shower silicone lines every time. Once the hole is through, use a sanding stone to smooth the edges. This level of finish is what separates a DIY job from a masterpiece, much like knowing how to choose the perfect baseboards for your homes style to wrap up a room aesthetic.Wait, before you slap that perfectly cut tile onto the floor, let’s talk about the biggest lie in the industry: ‘The thinset will level it out.’ I’ve heard this from seasoned pros and weekend warriors alike, but it’s a dangerous path to take. If you’re dealing with a dip in the subfloor near the flange, trying to build up a mountain of mortar is a recipe for disaster. Thinset is designed to shrink as it cures. If one side of your tile has a 1/8-inch bed and the other has 1/2-inch, that uneven shrinkage will pull the tile down, creating a ‘lip’ or, worse, a hollow void. This is exactly how you end up needing how to avoid hollow spots under your new tile. Instead, you need to address the substrate first.
Why More Mortar Doesn’t Fix a Wobbly Floor
In my years of fixing failed DIY jobs, I’ve seen beautiful porcelain shattered because the installer ignored the mud bed secret for rock-solid shower floors and tried to use adhesive as a structural filler. According to the National Tile Contractors Association (NTCA), thinset mortar should generally not exceed a cured thickness of 3/16 of an inch unless it is a specific ‘Large and Heavy Tile’ (LHT) mortar. Anything more invites the tile to crack under the weight of the toilet—or the person sitting on it. If you find a low spot, use a self-leveling compound before the tile goes down. It’s an extra step, but it’s the difference between a floor that lasts twenty years and one that fails in two. #IMAGE_PLACE_HOLDER_C# One common ‘trap’ I see is people forgetting that even a toilet cutout needs an expansion gap. We talk a lot about the expansion gap rule for flooring under door jambs, but the same physics apply to your plumbing penetrations. If the tile is pressed tight against the metal flange, any house movement or thermal expansion will put pressure directly on the tile, causing it to snap right at the thinnest point of your circle. Always leave a 1/8-inch gap and fill it with 100% silicone, not grout. Grout is rigid; silicone moves. This is the same principle behind the blue tape secret for professional shower silicone lines every time. Precision isn’t just about the cut; it’s about understanding how materials behave over time. Have you ever fallen into this trap where a ‘perfect’ install cracked a year later? Let me know in the comments! If you are moving from the bathroom to the hallway, don’t forget that your transitions matter just as much as your drains. Whether you are learning carpet install secrets for flawless results or figuring out how to choose the perfect baseboards for your homes style, the devil is in the details. A master-level finish requires you to look at the project as a whole system, not just a series of individual cuts.
Ditch the Hardware Store Bargain Bin
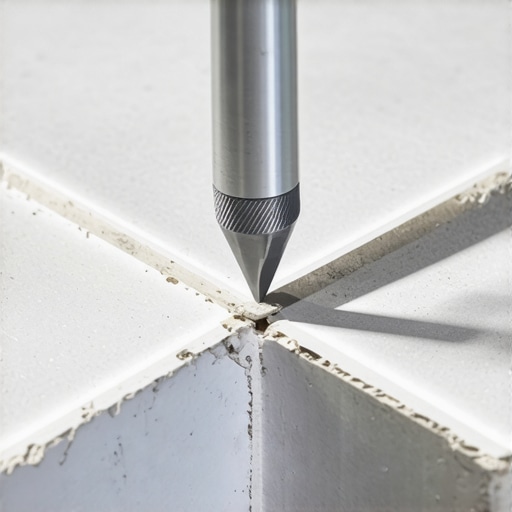
I’ve spent thousands of dollars on tools over the last decade, and if there is one thing I’ve learned, it is that a cheap tool is the most expensive thing you can buy. When I started, I used those $10 ‘universal’ tile bits. They’d last for exactly two holes before they were as dull as a butter knife. Now, I strictly use vacuum-brazed diamond bits. I prefer the Milwaukee Diamond Plus series because the slotted design makes it incredibly easy to eject the porcelain ‘slug’ that gets stuck inside the bit. According to ANSI A108.02, the standard for tile installation, the substrate must be within a specific flatness tolerance—usually 1/8 inch over 10 feet for large format tiles—and you simply cannot achieve that level of precision without a high-quality kit. I never walk onto a job site without a moisture meter anymore either. Performing the moisture meter test every flooring pro uses is my first line of defense against future failures. If the subfloor is holding too much water, that tile is going to pop, no matter how good your cuts are.
How can I keep my shower and floor looking brand new for years?
Maintenance is the part of the job that nobody wants to talk about, but it’s where the real pros shine. You can have the most beautiful ultimate shower renovation guide results in the world, but if you don’t treat the grout properly, it will look like a dungeon in six months. I’m a huge advocate for epoxy grout in high-moisture areas, but if you’ve used traditional cementitious grout, you must seal it. And I don’t mean the cheap spray-on stuff. Use a high-quality penetrating sealer. If you’ve already got some staining, don’t reach for the bleach—that just eats away at the structure of the grout. Instead, I recommend the toothbrush trick for cleaning stubborn shower grout using a pH-neutral cleaner. Looking ahead, I suspect we will see more AI-integrated moisture sensors built into subfloors within the next five years, alerting homeowners to leaks before they ever see a drop of water. This kind of tech will change how we approach shower repairs when to fix vs replace for longevity.
Protection doesn’t stop once the grout is dry
The biggest mistake I see during a remodel is people ‘finishing’ the floor and then dragging heavy tools across it to finish the baseboards or paint. If you are moving between phases, you need the tape and seal strategy for protecting carpet during a bathroom remodel to ensure your new transition doesn’t get ruined by dust or paint spills. Once the floor is protected, focus on the perimeter. Poorly installed trim can ruin a high-end tile job. I’ve found that why your baseboard caulk is cracking and the flex fill fix is a frequent pain point for my clients. They see a gap and think the house is falling down, when really, they just used the wrong filler. Use a high-performance elastomeric caulk that can handle the expansion and contraction of your home. My best advice for your next project? Grab a scrap piece of porcelain and practice that 45-degree ‘angle-in’ start with a diamond bit today—it’s the single most important skill for a clean plumbing cutout.
The Hard Lessons I Learned About Precision Tilework
Looking back at my early years, I realized that the biggest “aha!” moment didn’t come from a textbook, but from a pile of shattered porcelain. If you want to elevate your craft, keep these reflections in mind:
- Speed is the enemy of precision. The second you try to “force” a bit through tile to save five minutes, you’ve already lost an hour of cleanup and the cost of a replacement tile. Let the diamonds do the work.
- Preparation beats luck every time. Using the right substrate is non-negotiable. Before you lay your masterwork, make sure you stop floor tile cracking with this uncoupling membrane to give your precision cuts the stable foundation they deserve.
- Adaptability is a superpower. Sometimes the rough-in isn’t perfect. I’ve had to learn how to install a shower drain when the plumbing is off center more times than I’d like to admit, and having the right techniques for those unexpected moments is what separates the veterans from the rookies.
[IMAGE_PLACEHOLDER]
What’s Actually in My Daily Tool Bag
You don’t need a van full of gadgets, but you do need these specific items if you want to avoid the headache of “good enough” results. First, always carry a high-quality scribe tool. It isn’t just for wood; it is the scribing tool every diyer needs for tight baseboards and complex tile-to-wall transitions. Second, I swear by a dedicated vacuum-brazed hole saw kit. It turns a stressful cut into a thirty-second task. Finally, never trust your eyes when it comes to moisture. Performing the moisture meter test every flooring pro uses before any tile or wood goes down is the only way to ensure your hard work won’t warp or pop in six months. These tools aren’t just purchases; they are insurance policies for your reputation.
Your Path to a Flawless Bathroom Remodel
There is a special kind of satisfaction that comes from setting a toilet down and knowing the tile underneath is as perfect as the finish on the walls. You’ve moved past the “hack and hide” phase and into the realm of true craftsmanship. Don’t be afraid to take that extra ten minutes to measure three times and cut once. Whether you are following my ultimate shower renovation guide or just refreshing a powder room, the pride you take in these hidden details will show in the final product. You have the tools, you have the techniques, and now you have the confidence to get it done right the first time. Have you ever tried to “eye-ball” a plumbing cut and regretted it later? Tell me about your most challenging tile moment in the comments below!