

I stood there, staring at a hole in my subfloor that was exactly two inches to the left of where it needed to be. My back ached, the sun was going down, and I realized I had just spent three hours prepping a space for a shower pan that didn’t fit the reality of my plumbing. It was a classic DIY gut-punch. I felt like a failure. But that moment taught me something crucial: the house is never as straight or as logical as the blueprint says it is. If you are currently looking at a misaligned pipe and wondering if you have to rip out the entire floor, take a deep breath. You don’t. Today, I am going to show you how to bridge that gap without calling an emergency plumber. We are going to tackle the plumbing reality versus the floor-plan dream using some hard-won tricks from my own trial-and-error sessions. Have you ever felt that sinking feeling when your measurements clash with the physical world? Drop a comment and tell me about your most frustrating ‘close but no cigar’ moment.
Stop Panicking and Start Measuring
When I first started doing my own bathroom work, I made a massive mistake: I tried to ‘force’ a shower pan over a pipe that was slightly off-center. I figured the weight of the mortar would just hold it down. Spoiler alert: it didn’t. I ended up cracking the flange, which led to a slow leak that I didn’t discover until the ceiling in the kitchen below started to sag. It was an expensive lesson in why you should always follow the dry-fit rule for no-mistake shower drain alignment. Dealing with an off-center drain is a common hurdle during a major shower renovation, and it usually happens because someone didn’t account for the thickness of the new wallboard or the specific dimensions of a new acrylic base. According to This Old House, plumbing codes generally allow for horizontal offsets as long as the pitch of the pipe remains at a steady 1/4 inch per foot to ensure proper drainage. Understanding this flexibility is the key to a stress-free install. Before you start cutting, you need to know exactly how much room you have to play with in the joist cavity. Often, DIY shower waterproofing fails at the drain because the installer tried to shortcut the alignment process.
Is it actually safe to move the drain pipe yourself?
I know what you’re thinking. ‘If I move this pipe, am I going to mess up the venting or cause a clog later?’ It is a valid fear. The truth is, shifting a drain by a few inches is a standard part of the job, provided you aren’t cutting through structural joists or messing with the P-trap’s essential function. If your pipe is only slightly off, an offset flange or a simple pair of 45-degree elbows can solve the problem without a major overhaul. You just have to ensure the mortar bed is rock solid to support the new configuration. In the following sections, we will walk through the specific tools you need to shift that PVC and get your shower project back on track.
Clear the Path to a Perfect Drain
Before you touch a single piece of PVC, you have to map the ‘no-go’ zones. Think of your joist cavity like a busy subway tunnel; there is only so much room for the train to move. If your drain is off-center, you are likely looking at a joist blocking your path. I once spent an afternoon hacking at a joist with a dull reciprocating saw, sweating through my shirt, before I realized I was compromising the entire floor’s structural integrity for a three-inch shift. It was messy and dangerous. The smarter move is to work within the existing space using a combination of street elbows. When you are looking at that hole in the subfloor, don’t just see a problem; see an opportunity to practice step-by-step flooring installation from planning to perfect finish by ensuring your foundation is correct first.
The Two-Elbow Shift for Stubborn Pipes
The easiest way to move a drain without moving the main stack is the ‘S-curve.’ You cut the existing vertical pipe, glue on a 45-degree elbow, add a short length of pipe, and then another 45-degree elbow to bring it back to vertical exactly where the new shower pan needs it. It’s like a lane change on the highway—smooth and gradual. On that failed Saturday I mentioned earlier, I tried to force a 90-degree turn, but the water didn’t flow right and the pipe sat too high. Switching to 45s kept the profile low enough to fit under the subfloor while maintaining the pitch. If you are also dealing with height issues, the cardboard trick for leveling a wobbly shower base before the mortar sets can be a lifesaver during the final fit.
Support Everything with a Rock Solid Base
Once the pipes are glued and set, the biggest risk is movement. A floating pipe is a ticking time bomb for leaks. You need to pack the area around the new ‘S-curve’ with support. I learned the hard way that even a tiny bit of ‘bounce’ in the pipe can eventually crack the solvent weld. I now swear by the mud bed secret for rock solid shower floors. By packing a stiff mortar mix around the trap and the new offsets, you create a stone-like cradle that prevents the plumbing from vibrating or shifting when you step into the shower.
Seal the Deal at the Corners
While you are under the floor, check your perimeter. Many people focus so much on the drain that they forget about the edges. To prevent future headaches, integrate the triple point seal for leak proof shower corners into your waterproofing strategy. This ensures that even if a small amount of moisture gets past your tile, your new plumbing work won’t be the cause of a rotted subfloor five years from now. Always remember that a successful bathroom project is built from the bottom up, avoiding the usual flooring installation mistakes to avoid for a seamless look that ruin many DIY dreams.
Forget What You Know About Tight Tolerances
I often see DIYers bragging about ‘zero-clearance’ joints where their flooring meets the wall. While it looks clean on day one, that tight fit is actually a ticking time bomb. The most common myth in home renovation is that gaps are a sign of poor craftsmanship. In reality, according to the National Wood Flooring Association (NWFA), wood and laminate products require a minimum 1/4-inch to 1/2-inch expansion gap to account for seasonal humidity shifts. If you ignore the penny gap rule for installing laminate near drywall, your floor will eventually have nowhere to go but up, resulting in peaked seams and snapped locking tabs. I’ve walked into dozens of ‘professional’ looking jobs only to find the planks buckling because the installer treated the floor like a piece of furniture rather than a living, breathing system. Have you ever fallen into the trap of making things too tight? Let me know in the comments.
Why does your floor sound like a drum even after leveling?
You can spend days grinding down concrete and still end up with a hollow ‘click-clack’ sound when you walk. This usually happens because people mistake ‘level’ for ‘flat.’ A floor can be perfectly level but have micro-dips that cause the underlayment to hover. This is one of the most frustrating subfloor prep mistakes that make new vinyl planks sound hollow. To fix this, I always use the string line test for perfectly level subfloors before a single plank hits the ground. If you skip this, no amount of expensive padding will save the acoustics of your room. 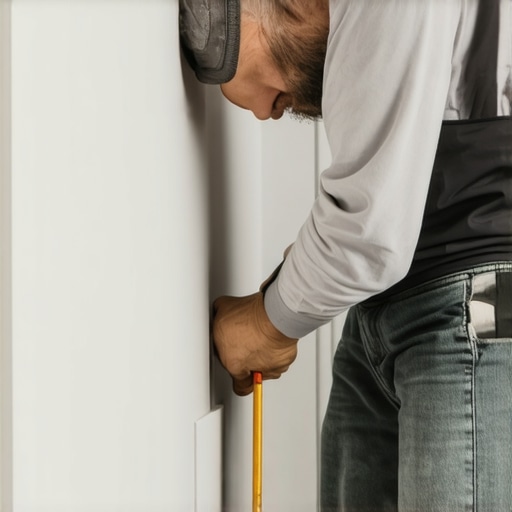
The Baseboard Trap That Ruins Transitions
Once your floor is down, the baseboards are where most people lose their momentum. The ‘oops’ factor here is usually the nailing pattern. I once saw a homeowner nail their baseboards directly through the flooring and into the subfloor to ‘hold everything steady.’ They effectively locked the expansion gap, causing the floor to pull apart at the other end of the room. You should never nail baseboards into the bottom plate only if you can help it; you need to hit the studs. For those tricky out-of-square corners, I’ve stopped trying to ‘caulk the gap.’ Instead, I use the back bevel secret for seamless baseboard corners. By cutting a slight angle on the rear of the miter, you allow the front edges to touch perfectly even if the wall is at 91 degrees instead of 90. It’s these small, invisible nuances that separate a weekend project from a legacy renovation. If you are struggling with a specific transition, don’t just force it—re-examine the physics of the materials. Check out flooring installation mistakes to avoid for a seamless look to ensure your project stays beautiful for decades, not just weeks.When you have moved past the initial panic of plumbing and the precision of baseboards, you enter what I call the ‘Pro Zone.’ This is where you stop borrowing tools and start investing in the ones that make a $2,000 job look like a $10,000 one. For me, the game-changer was finally buying a dedicated scriber. I used to mess around with pencils and compasses that slipped, but the scribing tool every DIYer needs for tight baseboards is the only way to handle a wavy drywall without losing your mind. It is about creating that seamless line that looks like the wood grew right out of the wall. For my carpet projects, I stopped relying on a knee kicker for anything other than tight corners. According to the Carpet and Rug Institute (CRI) Standard 105, a power stretcher is mandatory for all professional installations to prevent premature wear and delamination. If you skip this, you are practically inviting wrinkles. I learned this after seeing a guest bedroom I did with just a kicker turn into a wavy mess after two summers of humidity. Now, I always dial in the power stretcher setting for plush pile carpets to ensure the tension is uniform across the entire subfloor. It feels like more work upfront, but it is the difference between a floor that lasts twenty years and one that needs a re-stretch in three.
How do I keep my new floors looking like Day One for a decade?
The secret to longevity isn’t a special chemical; it is a maintenance schedule that respects the material. For showers, I have found that most people scrub too hard with the wrong stuff. You don’t need industrial acid; you need to understand how to deep clean sanded grout without scuffing tile to keep your sealant intact. If you wait until the grout is black to clean it, you have already lost the battle. I personally use the toothbrush trick for cleaning stubborn shower grout in the corners once a month. It sounds tedious, but it prevents the moisture buildup that leads to expensive shower repairs down the road. For carpets, the trick is knowing carpet install secrets achieving flawless results every time, like ensuring your transitions are properly tucked. If a transition is loose, dirt gets under the pile and acts like sandpaper, grinding away at the fibers from the bottom up. This is often why your carpet is wrinkling two years after install—it is not just the initial tension, it is the structural failure of the edges. In the next few years, I predict we will see a massive shift toward ‘smart’ underlayments that can detect moisture or structural shifts before it reaches your baseboards. Until then, we rely on our eyes and the right gear. My challenge to you: next time you have a transition that isn’t quite right, don’t just caulk it. Go out and get a proper scribing tool or a contour gauge and fit it perfectly. You will feel a level of pride that no tube of silicone can provide.
The Hidden Truths Behind My Toughest Flooring Battles
Looking back at that misaligned shower drain, I realize my biggest error wasn’t the measurement; it was the lack of patience. Every renovation has a ‘messy middle’ where you feel like you have made a massive mistake. One lightbulb moment for me was realizing that flooring installation mistakes to avoid for a seamless look often start with the subfloor, not the finish material. If the foundation isn’t perfect, the fancy planks won’t save you. I also learned that ‘good enough’ is the enemy of ‘great’ when it comes to waterproofing. I used to think a little extra caulk could fix a gap, but now I know that following the back bevel secret for seamless baseboard corners is the only way to get that high-end look without the frustration.
The Tool Chest Upgrades That Actually Save Your Sanity
If you are serious about finishing these projects, put down the budget multi-pack of drill bits and invest in these three things. First, the scribing tool every DIYer needs for tight baseboards is non-negotiable for anyone working in an older home with wavy walls. Second, a quality contour gauge will save you hours of guess-and-check cutting around toilet bases. Finally, don’t skimp on your knee protection; flooring is a marathon, not a sprint. I trust these tools because they allow me to focus on the craftsmanship rather than fighting the limitations of my gear. #IMAGE_PLACEHOLDER_E#
Your Path to a Professional-Grade Home Transformation
You have the knowledge now to tackle the plumbing hurdles, the expansion gaps, and the intricate trim work. Remember that every pro you see started with a crooked pipe and a sense of dread. By applying these carpet install secrets achieving flawless results every time and taking the time to prep your subfloor properly, you are already ahead of most weekend warriors. Don’t let the fear of a small gap stop you from starting your next flooring installation project. You have the tools, the rules, and the drive to make it look incredible. Which part of your current renovation is giving you the most stress right now? Let me know in the comments below!