

I was kneeling on a half-finished oak floor, three cups of coffee deep, staring at a floor vent that looked like it had been chewed by a Great Dane. I’d spent hours meticulously laying planks, only to ruin an entire row because my vent cutout was about a half-inch too wide. It’s that sinking feeling in your chest—the realization that “eyeballing it” just cost you fifty bucks and another trip to the hardware store. We’ve all been there, especially when flooring installation mistakes to avoid for a seamless look are so easy to make in the heat of a project. I remember my wife walking in, looking at the jagged gap, and just sighing. That sigh hurt worse than the wasted wood. It was then I realized that flooring isn’t just about clicking pieces together; it’s about handling the obstacles with finesse.
Stop Wasting Your Flooring on Ugly Vent Cuts
Today, I’m going to show you exactly how to execute the “Box-Cut.” It’s the secret weapon of pros that makes your floor vents look integrated rather than like a sloppy afterthought. [IMAGE_PLACEHOLDER] Whether you are tackling a step-by-step flooring installation or just upgrading a single room, this technique is your ticket to a high-end finish. We’re going to stop the gaps, stop the splintering, and finally get those clean lines that even a baseboard makeover can’t hide if the floor itself is messy. The Box-Cut isn’t just a fancy name; it’s a methodical approach to measuring and removing a precise rectangle from the middle of a plank, or sometimes across two adjacent planks, to create a snug “sleeve” for your HVAC register.
Is the Box-Cut actually worth the extra effort?
You might be thinking, “Can’t I just use a jig saw and hope for the best?” Well, you could, but you’ll likely end up with vinyl flooring separating near vents because the structural integrity of the plank was compromised by a messy, oversized hole. The Box-Cut ensures the weight is distributed properly around the register without creating weak points that lead to floor bounce or clicking sounds later on. Plus, a tight fit prevents dust and debris from falling into your subfloor gaps.
My First Vent-Cutting Disaster and What It Taught Me
Years ago, I made the classic rookie error: I measured from the wall instead of the edge of the last plank I had actually locked into place. I forgot that walls are rarely straight and often have a “wave” to them. According to the National Wood Flooring Association, even a small 1/8-inch deviation in your starting row can lead to massive, unsightly gaps or alignment issues by the time you reach the other side of the room. I learned the hard way that precision at the vent is what separates a DIY job from professional-grade expert flooring installation results. My first attempt left a gap so wide I tried to hide it with an oversized vent cover, but you could still see the subfloor peeking through like a missing tooth. Have you ever had to throw away a perfectly good piece of flooring because of one bad vent cut? Tell me I’m not the only one who has felt that frustration. Let’s get into the nitty-gritty of how to never make that mistake again and make sure your vents look sharp and snug.
Let’s Map Out the Perfect Cut
To get started, you need to mark your piece while it’s dry-fitted against the previous row. Use a speed square—it’s your best friend here. I used to just mark the corners, but now I draw the full rectangle on the back of the board. This keeps my pencil lines from showing on the finish. If you’re doing a step-by-step flooring installation, you know that the subfloor layout dictates everything. I remember a project where I forgot to account for the thickness of the vent’s flange. I cut the hole exactly the size of the register face, and the whole thing sat a quarter-inch too high. Always measure the duct itself, then add your clearance.
Don’t Forget the Quarter-Inch Expansion
You need a 1/4-inch gap for expansion around the vent. If you cut it flush to the metal duct, the floor will buckle the first time the furnace kicks on. It’s like wearing shoes two sizes too small; eventually, something is going to pop. I think of expansion gaps like the relief joints in a sidewalk. Without them, the material has nowhere to go but up. On a job in a drafty old Victorian, I ignored this and the floor literally lifted the vent cover off the ground by mid-February.
Executing the Cut Without Splitting the Tongue
Now, let’s talk about the actual surgery. You want to drill 3/8-inch pilot holes in each corner of your marked rectangle. This gives your jigsaw blade a place to start without chewing up the edges. I remember a project where I skipped the pilot holes and tried to plunge-cut with a circular saw. I ended up with a massive over-cut that even the widest vent cover couldn’t hide. It was a $40 mistake on a single plank of white oak. When you’re cutting, support the board on a workbench or two sawhorses. Vibrations are the enemy. If the board bounces, you’ll get jagged edges. Use a fine-tooth blade. 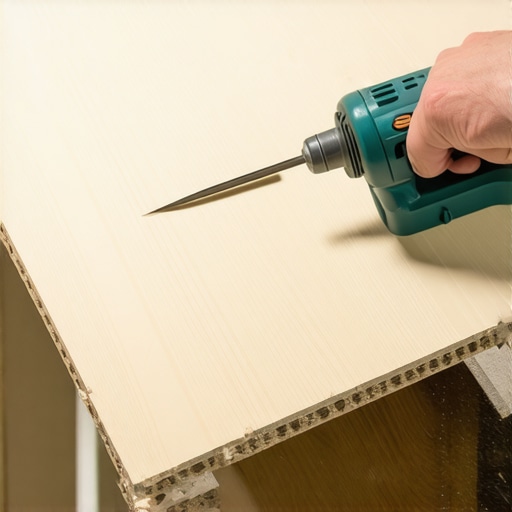
Why I Switched to an Oscillating Multi-Tool
If you’re working with LVP, an oscillating multi-tool is even better because it doesn’t create that massive cloud of dust. Plus, it’s much easier to control than a bulky jigsaw. The straight blade allows you to make vertical plunges that are incredibly precise. I once watched a pro finish an entire living room in half the time because he used a multi-tool for every tricky cut. It’s the difference between using a hatchet and a scalpel. This tool is also a lifesaver when you realize you need to trim an extra sixteenth off a board that’s already half-locked in.
Locking It Down So It Doesn’t Shift
Once the hole is cut, don’t just drop it in. This is where the glue assist trick for wide plank hardwood floors (or even vinyl) comes in handy around the vent. Because the ‘box’ you just cut creates four narrow strips of wood, the structural integrity is lower. If you skip the glue, you’ll end up wondering why vinyl flooring separates near vents after just one season of temperature changes. A small bead of construction adhesive on the subfloor around the vent perimeter ensures those thin sections don’t flex or snap when someone steps on the register. Use a dead blow hammer to gently seat the plank into its neighbor. Avoid the tapping block mistake that breaks vinyl tongues by ensuring you’re hitting the block, not the fragile lip of the plank.
But once the floor is flat and the vents are cut, I see so many people trip at the finish line—specifically when dealing with the transition to walls and wet areas. It is easy to think the hard part is over, but the invisible details are where the real experts earn their keep. Let’s talk about why your beautiful new floor might fail if you treat the perimeter as an afterthought.
The Invisible Nuances That Pro Installers Never Skip
Most beginners think that once the planks are down, they can just slap on some trim and call it a day. I used to believe that too, until I realized that baseboards aren’t just decorative; they are the functional ‘boundary’ for your floating floor. A common belief is that you should nail the baseboard as tightly as possible to the floor to prevent gaps. In my experience, that is a recipe for disaster. If you pin the floor down with the trim, you’re essentially negating the expansion gap you worked so hard to create. You need to leave a hair of space—about the thickness of a business card—between the trim and the floor to allow for natural movement. If you’re struggling with gaps, knowing how to fix baseboard gaps without replacing the trim is a much better approach than forcing a tight fit with a nail gun.
Does a Thicker Carpet Pad Actually Protect Your Floor?
Here is a contrarian view for you: everyone thinks the thickest, softest carpet pad is the best choice for a high-end feel. However, if you go too thick with the pad, you actually risk destroying the structural integrity of the carpet’s primary backing. Too much ‘squish’ allows the carpet to flex excessively at the seams, leading to premature fraying and delamination. This is one of the biggest carpet install secrets the big-box stores won’t always tell you. Stick to a high-density 7/16-inch pad for the best balance of comfort and longevity.
Why Your Shower Fails Behind the Tile
When it comes to bathroom remodels, the ‘Oops’ factor usually hides behind the wall. I’ve seen countless DIYers spend a fortune on marble tile only to have the whole thing leak two years later because they relied on a plastic liner alone. According to the Tile Council of North America (TCNA), the most common cause of catastrophic shower failure is the lack of a pre-slope under the pan liner, a step that nearly 80% of DIYers skip because it is hidden from view. 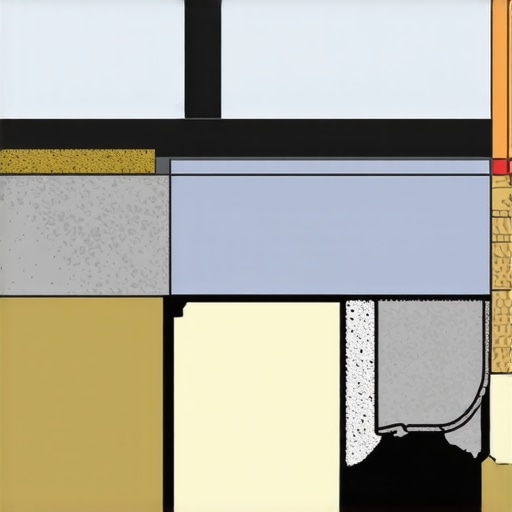 Without that slope, water sits stagnant on the liner, eventually rotting the curb. This is why I always preach the liquid membrane rule for zero leak shower niches and pans. It provides a secondary, seamless barrier that standard liners just can’t match. If you don’t get this right, you’ll eventually be asking why most diy shower waterproofing fails at the drain while you’re ripping out your hard work.
Stop Nailing Baseboards into the Wrong Spot
The biggest trap in the finishing stages is what I call ‘blind nailing.’ I remember a project where the homeowner nailed the trim directly into the subfloor through the expansion gap. When the seasons changed, the floor tried to expand, couldn’t, and buckled in the middle of the room. This is why you should never nail baseboards into the bottom plate only—you need to hit the wall studs to ensure the trim stays independent of the floor’s movement. For those tricky corners, using the back-bevel secret for seamless baseboard corners will give you that professional look without the frustration of gaps that require tubes of caulk. If you find yourself reaching for the caulk gun too often, you might eventually deal with why your baseboard caulk is cracking and the flex fill fix. Have you ever fallen into this trap? Let me know in the comments.
If you want your hard work to last past the first change in seasons, you need to stop guessing. I used to think I could feel if a subfloor was dry, but I was wrong every single time until I started using the moisture meter test every flooring pro uses. According to the NWFA (National Wood Flooring Association) technical manual, subfloor moisture must be within 2% to 4% of the flooring material’s moisture content before you even open the boxes. If you ignore this, you’re just waiting for a disaster. 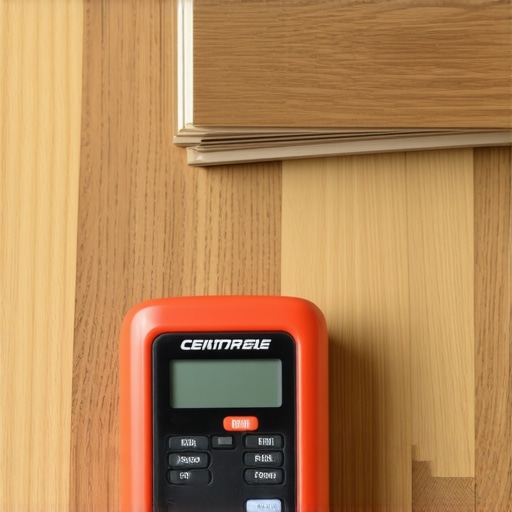
The Power Stretcher Is Your Only Defense Against Carpet Wrinkles
If you’re doing a carpet job, put down the knee kicker for a second. While the kicker is great for the kicker move for tucking carpet into tight corners, it is not a stretching tool. I’ve seen so many homeowners deal with why your carpet is wrinkling two years after install because they didn’t use a power stretcher. A power stretcher uses a long pole system to apply even tension across the entire room, which is the only way to meet the Carpet and Rug Institute (CRI) 104/105 installation standards. Skipping this tool is the knee kicker mistake that ruins new carpet before you even vacuum it for the first time.
How do I maintain my flooring and showers for the long haul?
Maintenance isn’t just about cleaning; it’s about inspecting the ‘weak points’ like transitions and wet-area seals. Once a year, I take a flashlight and check every single transition piece to ensure it’s not loose. If you have transitions on concrete, you might find why your floor transitions keep popping loose on concrete slabs is usually due to the wrong adhesive. For the shower, don’t wait for a leak to show up on the ceiling below. Regularly inspect the grout in the corners. If you see a hairline crack, you need to know how we fixed the grout crack in the shower corner for good by using a color-matched silicone instead of more rigid grout.
Where Flooring and Shower Tech is Heading
Looking toward 2025 and beyond, we’re seeing a massive shift toward ‘smart’ subfloors and AR-guided layouts. I predict that within the next five years, we will all be using phone-based LiDAR to snap the scribing tool every diy-er needs for tight baseboards into a digital template before we even make the first cut. We’re already seeing transform your flooring top trends in installation for 2025 focusing on waterproof, limestone-core products that don’t expand like old-school laminates. Before you start your next row, I challenge you to try the blue tape secret for professional shower silicone lines every time—it’s the fastest way to make your bathroom look like it was done by a high-end contractor.
The Expensive Mistakes That Taught Me Everything
After years of installing everything from tile to luxury vinyl, I’ve realized that the most common failure isn’t a lack of skill—it’s a lack of patience. I once rushed a transition because it was late on a Sunday evening, and that one shortcut led to the entire floor buckling six months later. Don’t let the fatigue of a long project push you toward a “good enough” finish. Another big realization was that your floor is only as stable as the prep work beneath it. If you haven’t checked for level or moisture, no amount of expensive flooring will save you from future headaches. Lastly, remember that every mistake is just a piece of scrap wood in the grand scheme of things; don’t let one botched cut stop your momentum. Small adjustments often make the biggest difference in the final look.
The Tool Bag Essentials for Flawless Finishes
If you’re serious about getting professional results, you need more than just a hammer and a saw. I swear by my oscillating multi-tool for those tricky corners where a jigsaw just can’t reach. I also recommend picking up a high-quality moisture meter; it’s the only way to be certain your subfloor is ready for top trends in installation for 2025 like wide-plank hardwoods or limestone-core vinyl. For the final touches, a contour gauge is a lifesaver for matching your perfect baseboards for your home’s style to irregular wall shapes or doorway moldings. Finally, keep a set of varied spacers handy; consistent gaps are the secret to a floor that doesn’t groan every time you walk across it.
Your Best Floor Is Only One Row Away
Installing a new floor or planning modern designs for a luxury feel in your bathroom can feel overwhelming, but the satisfaction of walking across a room you finished yourself is worth every drop of sweat. You’ve now got the techniques down—from the surgical Box-Cut to the expansion gap rules that keep your planks flat. Now, it’s just about execution and taking that first step. Take your time, measure twice, and trust the process. You are more than capable of achieving a high-end, expert flooring installation that will last for decades and add real value to your home. Have you ever had a specific flooring or shower project go sideways at the very last step? Let me know in the comments below—I’d love to hear how you handled it!