

I’ll never forget the smell first—musty, damp, and expensive. It was three years after I’d finished what I thought was a masterpiece of a master bath. I’d used traditional cement board and enough silicone to seal a submarine. But there it was: a soft spot in the drywall of the hallway, right behind the shower niche. I had to rip out ten rows of custom tile just to find a tiny pinhole leak where the niche met the wall stud. It was a gut-punch that cost me three weekends and a lot of pride. If you’ve ever stared at a leaking wall and wondered where you went wrong, you aren’t alone. Today, we’re going to fix that. I’m sharing the foam-wall secret that changed how I build showers forever, ensuring you never have to deal with why your shower niche keeps leaking through the bathroom wall ever again. Even when I was busy figuring out how to choose the perfect baseboards for your home’s style, that one leaking shower kept me up at night. This solution is about more than just tile; it’s about structural integrity.
Stop Building Showers That Rot From Within
We’ve been taught for decades that “harder is better.” We assume that because cement board is heavy and rock-hard, it must be the best thing for a wet environment. But cement board is porous. It’s basically a sponge that doesn’t rot, but it happily passes water through to your 2×4 studs. When you’re planning an upgrade your bathroom: the ultimate shower renovation guide, you have to think about the physics of water. Water is lazy; it finds the path of least resistance, which is usually the seam between your wall and your niche. Even if you use a roll-on membrane, those corners are prone to cracking as the house shifts. I made the mistake early on of thinking I could just caulk my way out of a bad transition. Spoiler alert: you can’t. This is why the foam-wall secret is so revolutionary. By using high-density foam panels and pre-manufactured niches, you aren’t just piecing together a puzzle; you’re building a seamless tank. Have you ever noticed mysterious grout discoloration around your niche or searched for shower renovation ideas: modern designs for a luxury feel while ignoring the waterproofing? Tell me, have you run into these damp spots before, or are you just starting your first demo?
Doesn’t foam just crumble under the weight of heavy tile?
I get it—you pick up a piece of this waterproof foam and it feels like you could snap it over your knee. You’re thinking about those heavy porcelain tiles and wondering if the whole thing will just sag. It’s a valid fear, but it’s based on a misunderstanding of structural sandwich panels. When that foam is bonded to thinset and tile, it gains incredible rigidity. According to the Tile Council of North America (TCNA) Handbook, these proprietary foam systems meet or exceed the residential requirements for shear and load-bearing capacity when installed correctly. The real trick is avoiding the trowel size mistake that ruins your shower tile bond. If you get the coverage right, the tile provides the armor, and the foam provides the perfect, unyielding waterproof substrate. If you’re currently stuck deciding on shower repairs: when to fix vs replace for longevity, trust me: rip it out and go foam. It’s the difference between a shower that lasts ten years and one that lasts fifty. We’re going to look at the exact way to seal those joints next, because that’s where the real magic happens.
Seal the Seams Like a Professional Diver
The magic of the foam system isn’t just the board; it’s the specialized sealant that turns individual panels into a monolithic shell. You want to apply a continuous bead of sealant to the edges of your foam boards before you join them. When you press the next board against it, that sealant should squeeze out—this is how you know there are no voids. I remember my first time using this stuff; I was stingy with the sealant because it’s expensive. Big mistake. I ended up having to go back and patch gaps that would have been solved with one extra squeeze of the trigger. To ensure you’re truly protected, employ the triple point seal for leak-proof shower corners where the walls meet the floor. Use a small putty knife to spread the excess sealant flat, creating a smooth transition that won’t interfere with your tile layout later. 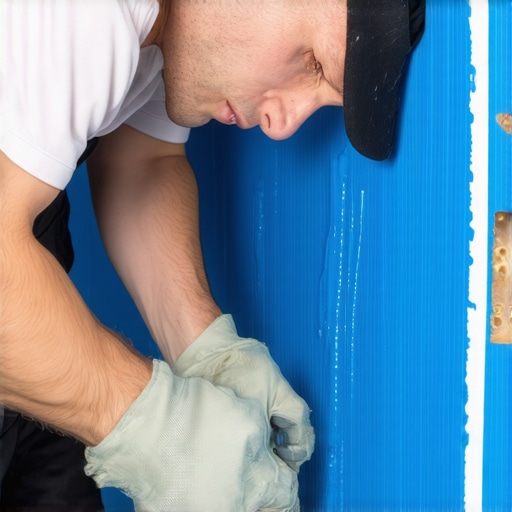
Cut Your Niche Without the Pinhole Risk
The niche is usually the weakest link in a shower. When you’re cutting into your foam wall to install a pre-fab niche, you need to be surgical. I once tried to eyeball a niche cutout in a guest bath, and by the time I realized I’d cut the hole two inches too wide for the flange, I’d wasted fifty dollars in foam. Use a level, mark your studs, and install a horizontal 2×4 brace for the niche to sit on. This prevents the niche from sagging over time. Once the hole is ready, apply a heavy bead of sealant to the flange and press it firmly into the foam. This creates a gasket-like seal that is far superior to any fabric-and-thinset method. This level of detail is exactly what prevents the issues seen in shower repairs: when to fix vs replace for longevity scenarios where water eventually rots the framing behind the tile.
Line Up the Tile Before the Thinset Dries
Once your foam is watertight, the focus shifts to aesthetics and bond. This is where most DIYers get impatient. You’ve just built a waterproof fortress, so don’t ruin it with poor tile adhesion. You must avoid the trowel size mistake that ruins your shower tile bond. Foam boards are incredibly flat, but they aren’t magic; if your wall studs were wonky, your foam will be too. Use a 6-foot level to check for bows and shim the boards if necessary before you apply tile. When you start your first row, use a laser level or a temporary ledger board to ensure everything stays square. Knowing how to align tile patterns across a shower floor and wall makes the difference between a project that looks like a pro did it and one that looks like a weekend accident.
Transitioning Your Focus to the Finish
As the shower enclosure takes shape, the rest of the bathroom demands the same level of precision. Whether you are transitioning into a step-by-step flooring installation from planning to perfect finish or just preparing for the final trim, the fundamentals of clean lines apply. For example, if you’re installing new luxury vinyl or hardwood right up to the bathroom door, you’ll want to think about your baseboards. Learning how to choose the perfect baseboards for your home’s style can help tie the modern look of a new foam-wall shower into the existing architecture of the room. When you get to those tricky corners, remember the back bevel secret for seamless baseboard corners to keep your joints tight even if the walls aren’t perfectly square. Building a shower this way is about creating a system where every layer supports the next, from the studs to the very last piece of trim.
Building a shower or laying a floor isn’t just about following the instructions on the bag—it’s about knowing when those instructions might actually lead you astray. Everyone tells you that more liquid membrane equals a safer shower. But here is a contrarian reality: slathering it on like peanut butter can actually trap moisture in the substrate before it fully cures. This creates a rubbery skin that never quite bonds to the thinset, leading to tiles that sound hollow or, worse, pop off entirely. I always recommend the liquid membrane move for fail-proof shower pans, but you have to apply it in thin, multiple stages. If you don’t use the finger test for checking thinset moisture in a shower, you’re basically guessing when it’s safe to proceed. 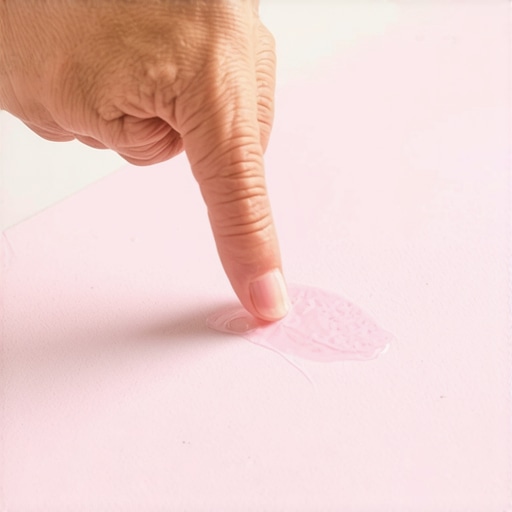 The ‘Oops’ factor often happens when we get overconfident with our tools. In the world of textiles, the knee kicker mistake that ruins luxury carpets is a classic example of using the wrong force for the job. A kicker is for positioning; if you aren’t using a power stretcher, your carpet will develop those ugly ripples within two years. According to The Carpet and Rug Institute (CRI) 104/105 standards, power stretching is a mandatory requirement for residential installations to ensure the backing doesn’t lose its structural memory. Have you ever fallen into this trap and had to move all your furniture back out just to restretch a room? Let me know in the comments.
Will Your New Luxury Vinyl Handle the Summer Heat Without Buckling?
Advanced DIYers often forget that modern flooring is still subject to the laws of thermodynamics. While vinyl doesn’t rot, it expands significantly under heat. I’ve seen beautiful expert flooring installation tips for 2025 that forget to mention heat gain. If you have a large south-facing window, your floor can reach 120 degrees in the sun. This is why vinyl planks separate in high sun areas and the glue-down fix becomes your only saving grace. Finally, when you finish up with the trim, stop relying on caulk to bridge massive gaps. It looks great for a month, but then the house settles and the caulk cracks. Instead, master the 45-degree trick for perfect baseboard outside corners and always stop baseboard splitting with this simple pre-drilling tactic. Precision at the substrate level means you aren’t spending your weekends chasing leaks or cracks. Have you ever fallen into the ‘caulk will fix it’ trap only to see the gap reopen six months later?One tool I will never go to a job site without is my oscillating multi-tool. If you’re still trying to use a handsaw for door casings, you’re making life way too hard. This is the secret behind the under-cut move for fitting flooring perfectly under door casings. It allows for a surgical level of precision that makes your new vinyl or hardwood look like it grew out of the wall. When I’m finishing up a step-by-step flooring installation from planning to perfect finish, that tool is what ensures the transition to the baseboards makeover to elevate your interior is flawless. I’ve seen guys spend hours sanding down a transition strip when five minutes with a multi-tool would have solved the problem.
Don’t Guess When It Comes to Moisture
Beyond the cutting tools, your most important piece of gear is a high-quality moisture meter. I don’t care how dry you think your slab is; concrete is a literal sponge. The National Wood Flooring Association (NWFA) Technical Manual specifically states that moisture content in wood flooring must be within 2% to 4% of the subfloor’s moisture content before you even think about opening a box of planks. This is why we never skip the subfloor moisture test on concrete. If you ignore this, you’re just waiting for your floor to buckle or crown. I always perform the concrete moisture test that saves your vinyl floor at least three days before installation. It’s the difference between a floor that stays flat and one that ends up in a dumpster. 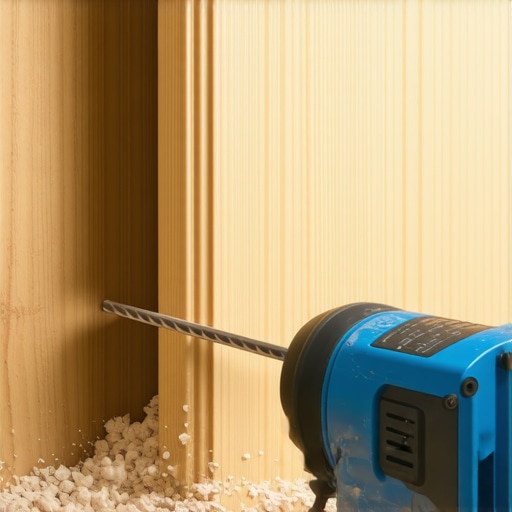
How do I keep my new shower and floor looking professional for years?
Maintenance isn’t just about cleaning; it’s about vigilance. For showers, the first thing to fail is always the silicone in the corners. Once it starts to peel, water gets behind the tile and starts the rot process all over again. I use the blue tape secret for professional shower silicone lines every time to ensure a thick, consistent bead that actually bonds to the surfaces. If your grout starts to look dingy, don’t just bleach it. You might need to learn how to match old grout color when repairing a shower floor to fix small cracks before they become big leaks. For your carpets, stop relying on a vacuum to do the heavy lifting. If you didn’t use the power stretcher rule for large living room carpets, you’ll eventually see ripples that trap dirt and wear down the fibers.
Your Future Bathroom Might Text You About Leaks
Looking ahead to 2025 and beyond, I see the DIY world moving toward ‘smart’ substrates. We are already seeing the emergence of moisture-sensing mats that sit beneath your shower pan or luxury vinyl floor. These systems can sync with your phone and alert you to a leak long before you see a damp spot on your ceiling. It’s an incredible evolution for those of us who have lived through the nightmare of shower repairs: when to fix vs replace for longevity. While these sensors add cost, the peace of mind they offer is worth every penny. I’m currently testing a few prototype systems in my own home, and the accuracy is staggering. If you are about to start a major remodel, I strongly suggest you pick up a digital moisture meter today—it’s the best $30 insurance policy you’ll ever buy for your home.
What a $5,000 Mistake Taught Me About Water
Looking back at that moldy drywall, I realized that my biggest error wasn’t a lack of effort, but a lack of respect for how water behaves at a molecular level. First, I learned that waterproof is a binary state; it is either a 100% sealed tank or it is a failure waiting to happen. There is no such thing as ‘mostly’ waterproof. Second, I realized that the time you spend prepping the subfloor is ten times more valuable than the time you spend laying the actual tile. If you rush through why we never skip the subfloor moisture test on concrete, the most expensive vinyl or tile in the world won’t stay bonded. Finally, I discovered that the ‘foam-wall secret’ isn’t about the foam itself, but about the control it gives you over every seam and joint. If you are struggling with shower repairs: when to fix vs replace for longevity, my best advice is to stop patching and start building a system that doesn’t rely on luck.
The Gear That Makes Your Work Look Professional
You don’t need a truck full of tools, but you do need these three essentials to avoid the ‘DIY look.’ I never start a project without a high-end oscillating multi-tool. It is the only way to master the under-cut move for fitting flooring perfectly under door casings, ensuring your floor looks seamless. Next, get a digital moisture meter. It is your best defense against buckling and crowns. Lastly, invest in a quality laser level. It ensures your baseboards makeover to elevate your interior stays perfectly level even if your floors have a slight dip. These tools provide the precision that separates a weekend accident from a professional-grade installation.
Stop Planning and Start Your Demo
The hardest part of any renovation is the moment you take the first swing with the sledgehammer. It’s easy to get lost in the research phase, but at some point, you have to trust your prep and commit to the process. Whether you are following an upgrade your bathroom: the ultimate shower renovation guide or just refreshing a hallway, the goal is to build something that outlasts your mortgage. When you use the foam-wall system and respect the moisture levels of your home, you aren’t just renovating; you’re engineering a space that stays dry, sturdy, and beautiful for decades to come. Don’t let the fear of a leak hold you back—now that you have the secret to a monolithic seal, you’re ready to build. Have you ever discovered a hidden leak during a demo that completely changed your renovation plans? Let me know in the comments below!