

I still remember the first time I tackled a solid oak floor in my own living room. I spent days prepping, measuring twice, and hammering away with more confidence than I had any right to possess. But when I reached the hallway and looked back? The rows had a subtle, heartbreaking curve—what we in the trade call a “banana.” I’d trusted the drywall to be straight, a rookie mistake that left my beautiful investment looking like a funhouse mirror. It’s a gut-punch that many DIYers and even some pros face, but it’s entirely avoidable. Today, I’m going to show you how a humble piece of nylon string is actually the most powerful tool in your flooring arsenal to ensure your rows stay dead-nuts straight from the first plank to the last.
Why Your Eyes Deceive You and the String Never Does
The biggest hurdle in any flooring installation isn’t the wood itself; it’s the house. Walls are rarely perfectly straight. If you start your first row by just butting up against the baseboard or the drywall, you’re inheriting every bow and kink in that framing. By the time you’re ten rows out, that 1/8-inch deviation has turned into a massive gap or a visible curve. This is why many people struggle with baseboards looking crooked even when the floor is technically “down.” Early in my career, I ignored the subfloor prep and just started nailing. I didn’t use the spacer block rule properly, and I certainly didn’t check for straightness across the room. I learned the hard way that once a hardwood floor starts to “run,” it’s almost impossible to pull it back without starting over. According to the National Wood Flooring Association, subfloor flatness should not vary more than 3/16-inch over a 10-foot span, but even on a flat floor, your alignment can still go sideways if you don’t have a reference point.
Does this old-school method really beat a modern laser level?
You might be tempted to reach for a $200 self-leveling laser, and while those are great for keeping long tile rows straight, a string line has one major advantage: it doesn’t run out of batteries and it doesn’t get “fuzzy” over distance. A tightly pulled nylon string gives you a physical, tactile guide that you can’t accidentally kick out of alignment without noticing. It’s the ultimate reality check for your floor. Have you ever finished a room only to realize the rows were drifting toward the far wall? It’s a common nightmare, but the string-line trick is the “old-school” remedy that works every single time. Before we get into the nitty-gritty of the setup, let’s look at why this method beats out almost every other layout strategy for long-run hardwood.
Find Your True North with Two Screws
To get started, you need to establish a “reference row.” Do not just start at the wall. Instead, measure out from your starting wall at both ends of the room. Let us say your planks are 5 inches wide; measure out 5-1/2 inches (allowing for a 1/2-inch expansion gap) and drive a screw partially into the subfloor. Do the same at the far end. Tie your nylon string between these two screws and pull it tight—and I mean tight. I once worked on a 1920s bungalow where the north wall was two inches wider at one end than the other. I did not panic; I just drove those screws exactly 10 inches from the “best” wall. I stretched that neon orange nylon string until it sang like a guitar string. Every plank I laid was measured back to that string, not the wall. The result was a floor that looked perfectly square even though the house was a trapezoid.
Pulling the Tension Just Right
If there is any sag in that string, your reference is useless. I think of it like a high-wire act; any slack and the whole performance fails. On a massive 40-foot run in a lakefront cottage, I once used a chalk line, but the dust from the drywallers obscured it within minutes. I switched to the string line, and even with boots stomping around, that physical barrier kept my rows honest. This is much like the chalk line move for keeping long tile rows straight, but with a 3D guide you can actually feel with your fingertips as you seat the planks.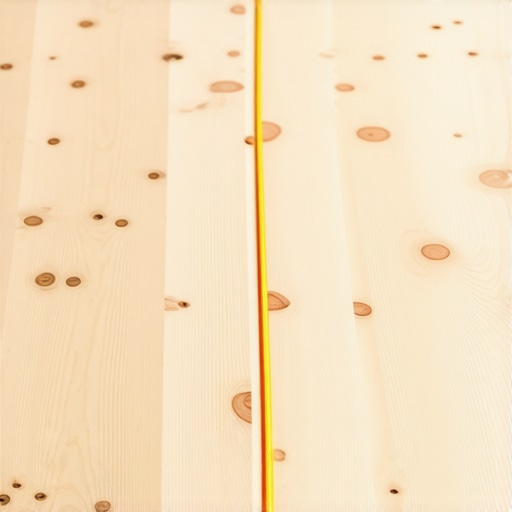
How to Navigate Bowed Walls Without Losing Your Mind
Once that string is taut, you will likely see the gap between the string and the wall grow and shrink. That is the house talking to you. If the wall bows inward, you might need to scribe your first row of boards to fit the curve while the leading edge stays perfectly straight along your string. This is why following a step-by-step flooring installation plan is vital for symmetry. If you are working with modern wide planks, I highly recommend using the glue-assist method for wide plank hardwood floors to prevent any shifting while you are working off your string. This extra stability ensures that once you have aligned a plank to the string, it stays there.
The Spacer Reality Check
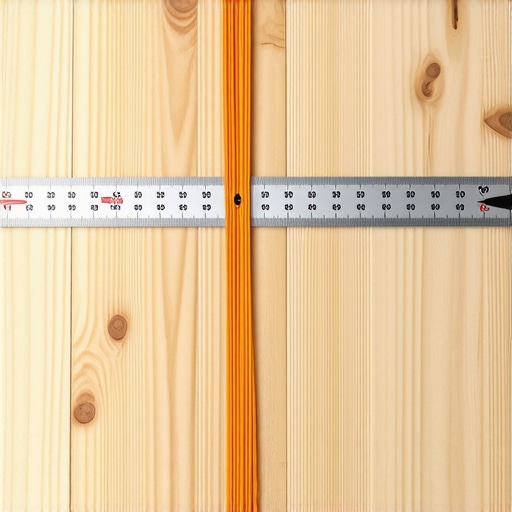
As you lay the first three rows, constantly measure from the tongue of your plank back to the string. It should be identical every single time. If it is off by even 1/32 of an inch, tap it back. This precision prevents you from making common flooring installation mistakes that haunt you when you reach the other side of the room. When you finally reach the doorframes, you will be glad your rows are straight, making the under-cut move for fitting flooring perfectly under door casings a breeze because the wood is arriving at the jamb at a perfect 90-degree angle rather than a slanted mess.
Most DIYers think that a high-tech laser is the pinnacle of accuracy, but let me drop a truth bomb: I have seen more floors ruined by a poorly calibrated laser than a piece of string. A common myth is that if your laser says the room is level, your planks will naturally stay straight. In reality, “level” and “flat” are two very different beasts. Your floor can be perfectly level at 0 degrees and still have a 1/4-inch dip that will cause [why your vinyl plank floors are making a clicking sound](https://tilecraftsmens.com/why-your-vinyl-plank-floors-are-making-a-clicking-sound) as the joints flex over the void. The string line reveals these undulations in a way a beam of light simply cannot.
Flatness Matters More Than Level
Everyone talks about leveling, but in my experience, chasing a perfectly level floor in an old house is a fool’s errand. Instead, focus on the flatness specification. The National Wood Flooring Association (NWFA) states that for nail-down installations, the subfloor should not vary more than 3/16-inch in a 10-foot radius. If you ignore this and just follow your string, you might have straight rows that eventually separate or squeak. This is where [the self-leveler move for perfectly flat vinyl installs](https://tilecraftsmens.com/the-self-leveler-move-for-perfectly-flat-vinyl-installs) becomes your best friend. I once saw a gorgeous white oak floor pull itself apart because the installer trusted the alignment but ignored a massive subfloor crown. It looked straight on day one, but by month six, it was a mess.
Is your subfloor actually stiff enough for the weight?
This is the question that separates the pros from the weekend warriors. You can use the most sophisticated string line setup in the world, but if your joists are undersized, that floor is going to move. If you feel a slight trampoline effect when you walk, you need to learn [why your floor is bouncing and how to stiffen the joists](https://tilecraftsmens.com/why-your-floor-is-bouncing-and-how-to-stiffen-the-joists) before you even think about the first row. A rigid foundation is the only way to ensure your [step-by-step flooring installation](https://tilecraftsmens.com/step-by-step-flooring-installation-from-planning-to-perfect-finish) lasts for decades rather than years.
The Dangerous Trap of the Baseboard Anchor
Here is a trap I see even seasoned pros fall into: they get their rows perfectly straight using the string, and then they ruin it all during the finish work. When you are installing [baseboard styles that elevate your interior design](https://tilecraftsmens.com/baseboard-styles-that-elevate-your-interior-design), the temptation is to pull the trim tight against a bowed wall. If you nail too low and hit the flooring expansion gap, or worse, pin the flooring down too tight, you’ve just created a pressure point. I have had to go back to jobs where the floor started [crowning at the short ends](https://tilecraftsmens.com/why-your-laminate-floor-is-crowning-at-the-short-ends) simply because the baseboards were hammered in so hard they locked the floating floor in place. Always use [the wood shim secret for baseboards on uneven slabs](https://tilecraftsmens.com/the-wood-shim-secret-for-baseboards-on-uneven-slabs) to keep your trim straight without choking your floor’s ability to breathe. Have you ever fallen into this trap? Let me know in the comments.
If you are still using a standard framing hammer for your flooring, you are begging for chipped edges and unnecessary dents. I personally use a 2-pound dead-blow mallet with a white rubber face. Why white? Because black rubber leaves scuff marks on your finish that even the scraper blade fix for dried-glue on new hardwood will struggle to remove without extra elbow grease. Precision requires tools that absorb the shock rather than bouncing it back into your wrist. For those of you working with LVP, do not underestimate the stay-sharp blade rule for cutting luxury vinyl. I swap my utility blade every 50 linear feet because a dull blade causes micro-fractures in the wear layer that eventually lead to delamination and unsightly edge wear.
How can I prevent my new floor from gaps or warping?
The secret isn’t just in how hard you nail it; it’s in how well you control the environment. I tell all my clients that the day the floor is finished is just day one of a lifelong commitment. You need to keep your home’s relative humidity between 30% and 50%. If it drops in the winter, those “straight as a string” rows will shrink and leave gaps. If it spikes, they will swell and cup. I recommend investing in a high-quality humidifier integrated into your HVAC. For daily maintenance, stop using those “shine-enhancing” wet mops. They leave a wax-like residue that actually attracts dirt and dulls the finish over time. Instead, use the vacuum-seal trick for cleaning dust out of floor grooves once a week and stick to a barely damp microfiber cloth for occasional spills. 
The Moisture Meter is Your Best Insurance Policy
Before I even bring wood into a house, I am checking the subfloor with my digital moisture meter. If you are working on concrete, the moisture-barrier move for concrete slabs is non-negotiable, but you still need to know what is happening inside that slab. According to experts at Wagner Meters, the Rapid RH L6 system is the industry gold standard because it measures the relative humidity deep within the concrete, not just on the surface where it might seem dry to the touch. We never skip the subfloor moisture-test on concrete because moisture is the number one killer of floor warranties and homeowner happiness.
Get Ready for Smart Floors That Talk Back
I predict that within the next decade, we are going to see “Smart Subfloors” becoming the standard for luxury builds and high-end renovations. Imagine embedded sensors that alert your smartphone if a pipe leaks under your hardwood or if your waterproof pan begins to fail. We already have the tech to see how we fixed the grout-crack in the shower-corner for good, but imagine if your house told you the crack was coming before it even happened. For now, your best defense is a proactive eye and how to choose the perfect baseboards for your homes style that allow for that vital expansion gap at the perimeter. My advice? Grab a high-quality moisture meter and test your subfloor today—it is the absolute difference between a floor that lasts a lifetime and one that ends up in a dumpster by next year.
Hard-Won Secrets from a Decade of Floor Dust
If I could go back and talk to my younger self before that first ‘banana’ floor in my hallway, I’d tell him that precision is a mindset, not just a measurement. One of the most vital things I learned is that a floor doesn’t just sit on a house; it lives with it. I used to think that as long as my boards were tight, I was winning. But the truth is, a tight floor that isn’t straight will eventually find a way to rebel. You must respect the expansion gap; if you don’t use the spacer block rule religiously, you’re basically building a time bomb for your joints. Another lightbulb moment was realizing that ‘square’ is a relative term. In a 100-year-old house, square doesn’t exist. You have to find a ‘visual square’ that looks right to the eye, even if the math says the walls are wandering. This is why a step-by-step flooring installation always begins with the layout, not the hammer. Finally, never trust the drywaller. Drywall is wavy by nature, and if you follow it, your floor will be too.
The Professional Loadout for Straight Rows
You don’t need a truckload of expensive gadgets to get a pro-level result, but you do need tools that don’t lie to you. Here are the items I never step onto a job site without. First, a high-quality #18 braided nylon line—it’s stronger than cotton and won’t snap under the high tension needed for long runs. Second, I swear by the Wagner Meters Rapid RH system; it’s the only way to be certain about what’s happening inside a slab before performing the moisture-barrier move for concrete slabs. Third, get yourself a dead-blow mallet with a non-marring face. It saves your wrists and your finish. For those tackling more complex projects, I highly recommend checking out the National Wood Flooring Association’s installation guidelines. They are the ‘Bible’ of the industry and have saved me from many flooring installation mistakes over the years. These resources ensure your work stays as durable flooring installation that adds real value to the home.
#IMAGE_PLACEHOLDER_A#
Why Your First Plank Matters More Than Your Last
It’s easy to get excited and rush into the middle of the room where the progress feels fast, but the soul of your floor is in that very first row. When you take the time to set a string line, scribe your boards to the wall, and double-check your measurements, you are setting yourself up for a finish that looks effortless. There is a deep satisfaction in reaching the far wall and seeing that your last row is perfectly parallel, requiring no awkward diagonal cuts. This level of care is what transforms a simple renovation into a legacy. Whether you are choosing the perfect baseboards to hide your expansion gaps or just admiring the way the light hits a straight seam, remember that you built this to last. Don’t be afraid of the technical parts; embrace the process, trust the string, and your flooring installation will be something you’re proud of every time you walk across the room. Have you ever started a floor only to realize the room was a trapezoid halfway through? Let me know how you fixed it in the comments below.