

I still remember the sinking feeling in my chest about six months after I finished my first dream installation of eight-inch white oak. It looked like a magazine cover for exactly one season. Then, the winter dry air hit, and those gorgeous planks started pulling apart like they were trying to escape each other. I had followed the traditional nailing schedule to a T, but it simply wasn’t enough to fight the physics of wide timber. I ended up with a floor that groaned every time I walked to the kitchen for coffee. It was a classic case of flooring installation mistakes to avoid, and it taught me a lesson I will never forget about the power of humidity.
Stop the Squeak Before Your New Floor Starts Moving
If you are looking at those beautiful five, seven, or nine-inch wide planks, you’re probably already in love with the expansive, luxury look. But here is the cold, hard truth: wide planks are temperamental. They have a massive surface area to expand and contract, and relying on nails alone is like trying to hold back a tide with a picket fence. That is where the glue-assist method comes in. By combining a high-quality flooring adhesive with your mechanical fasteners, you create a bond that significantly reduces seasonal movement. This isn’t just about avoiding gaps; it’s about structural integrity. When I first started, I thought I could skip the extra mess and save a few bucks. I was wrong. I eventually had to stop hardwood squeaks later on using far more difficult and invasive methods. Today, I want to show you how a little extra prep during your step-by-step flooring installation ensures your investment stays flat and quiet for decades.
Wait, is the Extra Mess and Cost Actually Worth It?
I get it. You’re already spending a fortune on the wood, and now someone is telling you to buy cases of expensive sausage-pack adhesive and a specialized gun. You might be worried about the cleanup or the extra time it adds to the day. Believe me, I was the biggest skeptic. However, the National Wood Flooring Association (NWFA) explicitly recommends glue-assist for any plank wider than five inches to prevent cupping and crowning. If you’ve ever seen a floor start to bow upward because of moisture changes, you’ll know that a few hundred dollars in glue is the cheapest insurance policy you’ll ever buy. The biggest fear is usually making a mess on the finish. I learned the hard way that you need to keep a clean workspace, or you’ll be reaching for the scraper blade fix for dried glue sooner than you think. Have you ever stood in your living room and heard a floor board pop just by looking at it? That is exactly what we are going to prevent today. Tell me, have you already picked out your wide-plank wood, or are you still on the fence because of the maintenance horror stories you’ve heard?
Prep the Foundation Before You Touch a Single Board
The first mistake I see people make is assuming the subfloor is “good enough.” It isn’t. If you have even a slight hump or a dip, that glue-assist isn’t going to save you; it’s just going to create a hollow pocket that eventually fails. I remember a job in a coastal cottage where I thought I could skip a quick grind on a high spot. Big mistake. Within a month, the homeowner called because the floor sounded like a drum every time they walked by the window. I had to learn how to remove a single damaged floor board without ripping up the room just to fix that one spot. Now, I always check the flat with a six-foot level. If it’s off by more than 1/8th of an inch, you need to address it. Whether you are dealing with wood or concrete, the concrete moisture test that saves your vinyl floor applies just as much to your expensive hardwood. Moisture is the enemy, and the subfloor is where the battle is won.
Lay Down the Adhesive the Right Way
You aren’t troweling the whole floor like you’re setting tile; that’s a different beast entirely. For glue-assist, we use a “serpentine” pattern. Imagine drawing a never-ending ‘S’ down the back of the plank. This allows the wood to still have some microscopic movement while being tethered to the subfloor. I use a sausage-pack gun because it’s cleaner and easier on the forearms. If you get a drip on the face of the wood, leave it until it skims over. Trying to wipe wet glue with a rag usually just smears it into the grain, forcing you to use the scraper blade fix for dried glue on new hardwood later.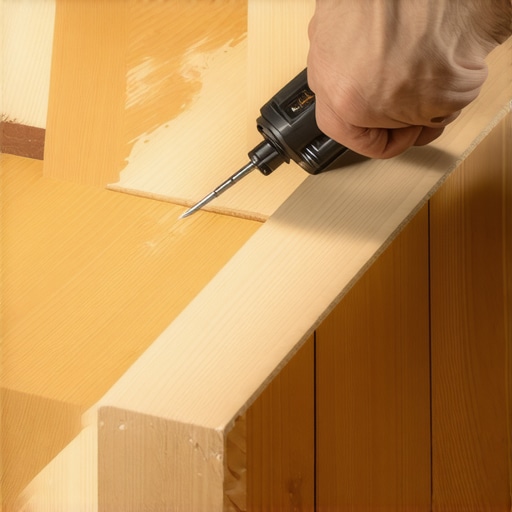
Nail and Gap Like a Professional
Even with the glue, you still need your cleats or staples to hold the board in place while the adhesive sets. Think of the nails as the temporary clamps and the glue as the permanent weld. However, you must maintain your expansion space. Wide planks need room to breathe against the walls. I always use the penny gap rule for installing laminate near drywall as a minimum baseline for hardwood, though usually, I go a bit wider for solid oak. To keep your rows perfectly straight, use the spacer block rule for consistent gaps in hardwood installation. This prevents the “creeping” effect where the floor starts to smile or frown across the room.
Work Around the Hard Spots First
Don’t leave the door casings for the end of the day when you’re tired. Use the under cut move for fitting flooring perfectly under door casings as you go. This ensures the plank slides under the trim rather than having a jagged gap that looks like a DIY disaster. It’s these small details—the glue, the prep, and the undercut—that separate a floor that lasts a lifetime from one that needs you to stop hardwood squeaks with this hidden screw method five years down the road.
While everyone focuses on the wide planks in the middle of the room, the real experts are looking at the edges. I used to believe that more nails meant a more secure baseboard, but that is a rookie mistake that often leads to split wood and ruined finishes. If you are aiming for a professional look, you have to stop thinking about trim as a static decoration and start seeing it as a moving component of your home’s ecosystem.
Stop Nailing Your Baseboards Into Thin Air
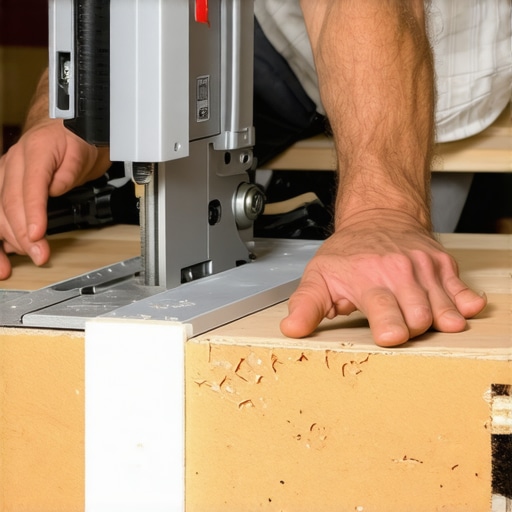
Most DIYers and even some pros think they should just fire a nail whenever they see a gap. However, why you should never nail baseboards into the bottom plate only is a lesson in structural movement. If you only hit the bottom plate, your baseboard cannot flex with the wall, leading to those unsightly gaps at the top. The contrarian truth? You actually want fewer, more strategic nails driven directly into the studs. If you miss and hear a hiss, you need to know how to fix a baseboard nail that hit a water pipe immediately before your new floor becomes a swimming pool. For those tricky corners, stop relying on simple miters and embrace the back-bevel secret for seamless baseboard corners. By cutting the back of the miter at a slight angle, you ensure the front faces touch perfectly even if your walls aren’t a perfect 90 degrees.
Why Does Your Baseboard Caulk Keep Cracking Every Winter?
It is the most common complaint I hear: “I finished the room, it looked great for a month, and now the caulk is pulling away.” This happens because most people use standard cheap caulk that has zero elasticity. According to studies by the Woodwork Institute, wood can expand up to 1/8th of an inch across its width depending on species and humidity. If your sealant can’t stretch, it will snap. This is exactly why your baseboard caulk is cracking and the flex-fill fix is the only real solution. You need a high-performance elastomeric sealant that acts like a rubber band between the trim and the wall. If you’ve already got the gaps, don’t rip the trim down; learn how to fix baseboard gaps without replacing the trim using the right backer rod and flexible fillers.
The Invisible Failure in Your Shower Renovation
If you are pivoting from the living room to the bathroom for a creating a spa-like shower experience, the nuances get even more dangerous. The Tile Council of North America (TCNA) reports that a staggering number of shower failures occur not because the tile was bad, but because the “change of plane” joints—where the wall meets the floor—were filled with grout instead of 100% silicone. Grout is rigid; houses move. When that grout cracks, water seeps behind the system. I always insist on the triple point seal for leak-proof shower corners. This advanced technique ensures that even if the cosmetic layer fails, the waterproof membrane remains intact at the most vulnerable junction. Without this, you’ll eventually be wondering why your shower niche keeps leaking through the bathroom wall despite looking perfect on the outside. Have you ever fallen into this trap where a ‘finished’ project started failing just a few months later? Let me know in the comments.
I’ve seen so many people master the hardwood only to fail at the carpet transitions. One of the biggest carpet install secrets is actually a tool choice. Most homeowners buy or rent a knee kicker and think they are done. However, according to the Carpet and Rug Institute (CRI) Standard 105 for residential installation, a power stretcher is mandatory for all living spaces. Relying solely on a kicker is the knee kicker mistake that ruins carpet tension, eventually leading to those ugly ripples that look like waves in the ocean within eighteen months. I never step onto a carpet job without my power stretcher; it’s the only way to ensure the backing is actually locked into the tack strips for the long haul. 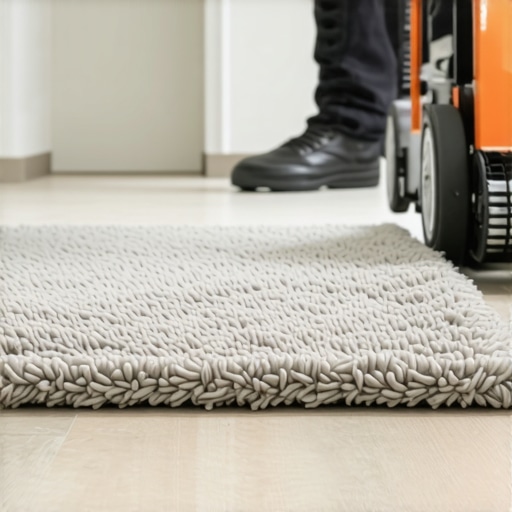
Stop Fighting Your Walls with Better Scribing
When it comes to those baseboards we discussed earlier, stop trying to force the wood to be straight when the wall clearly isn’t. I spent years trying to caulk my way out of bad fits until I realized the scribing tool every diyer needs is the only real solution for a high-end look. It allows you to trace the unique ‘personality’ of your drywall onto the back of the trim, making for a gap-free fit. If you’re dealing with older carpet that’s pulling away at a seam, you might even need the heat iron trick for reactivating old seam tape to save the transition without having to pay for a full replacement.
How do I maintain my new floors and showers for the long haul?
Real maintenance isn’t just about cleaning; it’s about early intervention. For hardwood, keep a damp towel and a clothes iron handy in your closet. It sounds unconventional, but the iron and towel fix for dents in solid wood floors is a miracle worker for pulling minor impact marks back to the surface before they crack the finish. In the bathroom, don’t wait for the mold to appear in the corners. Use the blue tape secret for professional shower silicone lines to refresh your seals every few years. This ensures the moisture barrier remains water-tight. If you have carpet on your steps, I always recommend the stay put glue strategy for carpet on stairs to prevent the dangerous ‘sliding’ effect that occurs as the padding naturally compresses over time.
The Future of Smart Flooring and Integrated Systems
As we look toward top trends in flooring installation for 2025, the industry is shifting toward ‘preventative’ materials. I’m already seeing wide-plank manufacturers experimenting with underside sensors that can detect subfloor moisture levels and send an alert to your phone before cupping starts. We are moving away from reactive fixes and toward systems that tell you they need help before the damage is visible. If you really want to level up your DIY game, my best advice is this: stop buying the ‘all-in-one’ kits at big box stores and start investing in single-purpose professional tools like a high-end scribing compass or a double-head power stretcher. Try using the blue tape method on your next silicone project—you’ll never go back to the old ‘finger-swipe’ method again.
Why My First Three Installs Actually Failed
Reflecting on years of hands-on work, I’ve realized that the biggest hurdles weren’t the tools, but my own assumptions. First, acclimation isn’t optional. I used to think three days was enough, but for wide planks, you need at least a full week in the room’s actual climate. Second, your eyes will lie to you, but a level won’t. If that subfloor has a dip, the glue will eventually pull away. Third, I learned that a floor is a living thing. If you don’t give it space to breathe with the penny gap rule, it will eventually find its own space by buckling. Finally, never underestimate the power of the scribing tool every diyer needs to hide a multitude of drywall sins.
Where I Go When the Subfloor Gets Complicated
I don’t just rely on instinct; I rely on data and professional-grade resources. I highly recommend keeping a moisture meter—specifically a pinless model—to check both your planks and your subfloor before you start. I also frequently revisit industry standards for any new species of wood I haven’t worked with. For visual inspiration and technical deep-dives into bathroom aesthetics, I always check the ultimate shower renovation guide to ensure my wet-room transitions are as solid as my hardwoods. If you’re looking at what’s coming next, stay ahead of the curve by reviewing top trends in flooring installation for 2025.
#IMAGE_PLACEHOLDER_E#
The Future of Your Home’s Foundation
A floor is the most used surface in your home. It’s where your kids learn to walk and where you host your family dinners. Taking the extra time to use glue-assist, properly undercut your door frames, and stretch your carpet with a power stretcher isn’t just about being a perfectionist—it’s about creating a legacy of quality. Following your guide to durable flooring installation for a stylish home ensures that the work you do today remains beautiful for decades. Don’t be intimidated by the complexity; every pro was once a beginner who just decided to do things the right way. Your home deserves that level of care. Have you ever been surprised by how much your hardwood moved after the first winter, or did you catch a mistake before it became a disaster? Let me know your stories in the comments below!