

I’ll never forget the first time I tackled a set of bullnose stairs. I had my trusty stapler, a fresh roll of high-pile carpet, and a lot of unearned confidence. Ten minutes in, the ‘nose’ of the step looked like a crumpled bag of laundry. No matter how many staples I fired, that carpet wouldn’t hug the curve. It ‘smiled’ back at me—you know, that ugly gap where you see the backing instead of the fibers—and I realized I was way out of my league. It was a mess, and honestly, I almost called a pro to bail me out. But then an old-timer showed me the ‘tuck-and-roll,’ and my entire approach to flooring installation changed forever.
Stop Fighting the Curve and Start Tucking Instead
The problem isn’t your carpet or your strength; it’s the physics of that rounded bullnose. Most people try to wrap the carpet tight and staple the life out of it, but that’s one of the biggest flooring installation mistakes to avoid. If you want that high-end, custom-upholstered look, you need a method that accounts for the tension. Today, I’m going to walk you through exactly how to execute this secret move so your stairs look like they belong in a luxury showroom rather than a DIY disaster. We’re going to cover how to manipulate the material so it locks under the tread and stays there.
Will this really hold up under heavy foot traffic?
I get it—you’re worried that if you aren’t peppering the step with a hundred staples, the carpet will eventually slip or sag. I had the same fear when I first started using carpet install secrets like this one. But here’s the reality: when you tuck and roll correctly, you’re using the shape of the wood to create mechanical tension. According to the Carpet and Rug Institute (CRI), proper stretching and securing are the two most critical factors for carpet longevity on stairs. My early mistake was relying on fasteners to do the work that proper technique should have handled. Have you ever tried to carpet a staircase and ended up with those annoying ‘smiles’ on the edges? Leave a comment below and let me know—I’ve likely been there too. Let’s dive into why this matters right now. With the best carpet types for high traffic areas becoming more dense and stiff, the old ways of just ‘pulling hard’ don’t work anymore. You need a strategy that respects the pile and the backing.To get that crisp edge, you have to treat the carpet like a piece of custom upholstery, not a rug you’re just throwing down. It starts with the tack strip placement. If you put the strip right on the edge of the bullnose, you’re asking for a blowout. Instead, you want to set your strip about an inch or so back on the tread and another one on the riser. This creates a ‘valley’ for the carpet to fall into. Think of it like a drumhead; you need points of tension to keep the surface flat while the ‘tuck’ handles the contour. Using a step-by-step flooring installation mindset means planning for that gap before the first staple is even loaded. I remember one job where I thought more padding meant more comfort. I wrapped the pad all the way around the bullnose. By the time I tried to staple the carpet, the step looked like a bloated sausage. I had to rip the whole thing out and trim the pad back so it stopped right at the start of the curve. Lesson learned: the bullnose itself needs to be relatively ‘naked’ so the carpet can grip the wood tightly. 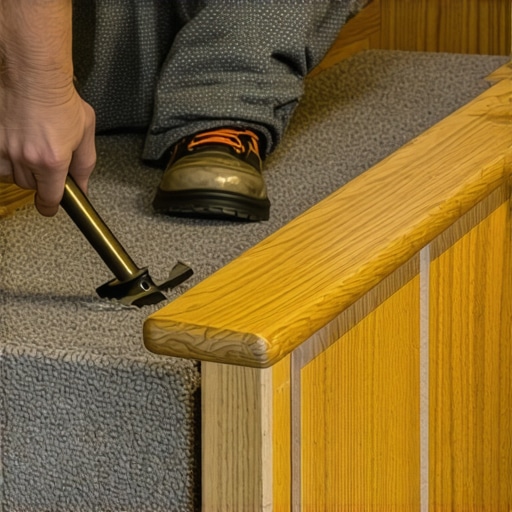
Master the Mechanical Tension of the Tuck-and-Roll
Most rookies make the mistake of thinking the staples do the heavy lifting. They don’t. The tack strips are the unsung heroes of carpet install secrets. You need to ensure the pins on those strips are facing the riser. When you pull the carpet over the nose and tuck it into the crotch, those pins catch the backing and hold it under tension. It’s the same principle as stretching a canvas. If the pins are dull or misaligned, your carpet will eventually sag, creating a trip hazard that even the best carpet types for high traffic areas can’t overcome.
Position Your Tack Strips for Maximum Grip
You have to be surgical with your padding. If the pad is too thick or extends too far over the nose, you lose the sharp definition of the stair. Use a high-density, thinner pad for stairs—something around 7/16 of an inch. Staple it to the tread, but stop it exactly where the curve begins. This allows the carpet to wrap tightly around the actual wood of the bullnose. When you omit this step, you’re committing one of the most common flooring installation mistakes to avoid. The carpet should feel like it’s part of the wood, not a pillow sitting on top of it.
Bury Your Staples to Kill the Smile Forever
Now for the actual ‘roll.’ Once the carpet is hooked onto the tread’s tack strip, roll it over the nose and use your stair tool to jam it into the space between the underside of the nose and the riser. This is where you fire your staples. Do not staple the face of the bullnose. Instead, reach up into that ‘tuck’ and staple vertically into the wood. This hides the staple crowns within the nap of the carpet. It’s a trick I learned while doing a baseboards makeover where I realized that hidden fasteners always look more professional than exposed ones. Even if you’re using a stair nose secret for other materials, the goal remains the same: seamless transitions that can take a beating from daily use.One of the most persistent myths I hear in the flooring world is that if a little tension is good, a lot of tension must be better. We have all seen articles explaining why your carpet is buckling only three years later, and the advice is almost always ‘stretch it tighter.’ But when you are dealing with the delicate anatomy of a bullnose stair, excessive force is actually your enemy. If you over-crank the carpet over that rounded edge, you are putting immense stress on the primary and secondary backing. Over time, this causes ‘delamination,’ where the layers of the carpet literally peel apart, leading to a hollow, bubbly look that no amount of restretching can fix. I learned this the hard way on a high-end wool install where I thought I was being thorough, only to see the fibers start to ‘bald’ at the apex of the curve within six months.
Is your carpet pile actually creating a slip hazard?
This is the ‘oops’ factor that separates the weekend warriors from the true masters of carpet install secrets: pile direction. Most people just cut the carpet to fit the width and call it a day. However, according to the Carpet and Rug Institute (CRI) Standard 105, the pile must always run ‘down’ toward the bottom of the flight. If you install it with the pile facing up, you’re essentially creating a slide. When someone steps on the edge, the fibers collapse in the direction of travel, significantly increasing the risk of a fall. Plus, if you mix directions on different steps, the light will reflect off the fibers differently, making it look like you used two different rolls of carpet. Have you ever accidentally installed a piece of carpet backward or noticed it looks ‘off’ in the morning light? Have you ever fallen into this trap? Let me know in the comments.
Balance the Tension with the Directional Pull Rule
To get that showroom finish, you have to master the directional pull rule for power stretching carpet even in tight spaces like a landing. You aren’t just pulling forward; you are pulling at a slight angle to ensure the grain stays straight across the nose. If your grain is crooked, the pattern—or even just the texture—will look wavy, screaming ‘amateur hour’ to anyone walking up the stairs. While you might know how to stretch carpet in a room full of furniture, doing it on a 10-inch tread requires a much more surgical touch with a knee kicker.
Don’t Let Your Baseboards Sabotage the Finish
Finally, let’s talk about the transition where the carpet meets the wall. I see so many people try to jam the carpet under the baseboard after it’s already installed. This is a recipe for scuffed paint and loose edges. For a truly professional look, you should use the coping saw technique for flawless inside baseboard corners to ensure your trim is tight before the carpet even enters the room. Then, leave a consistent ‘tuck gap’—about the thickness of the carpet—between the bottom of the baseboard and the subfloor. This allows you to tuck the cut edge of the carpet out of sight, creating a crisp, clean line that doesn’t rely on a forest of staples to stay put.
How do I keep my high-traffic stairs from looking matted?
It’s the number one question I get after finishing a job. You’ve spent hours perfecting that bullnose tuck, but three months later, the center of the tread looks like a crushed velvet jacket. Maintenance starts with the right equipment before the first vacuum even touches the floor. I always tell my clients to keep a scrap piece of the carpet specifically for the iron and towel trick. If you notice a heavy furniture dent or a crushed spot on the landing, you can use the iron and towel trick for fixing carpet dents to lift those fibers back to life. But for the stairs themselves, the secret is a stiff-bristled pile lifter. Unlike a standard vacuum, which just sucks up surface dust, a pile lifter agitates the base of the yarn. If you don’t stay on top of this, the dirt acts like sandpaper at the base of the fibers, leading to the exact type of wear that makes people think they need a total step-by-step flooring installation redo long before it’s actually necessary.
Buy the Crain 514 or Prepare for Frustration
I’m very picky about my gear because I’ve seen cheap tools ruin expensive materials. When it comes to carpet install secrets, the Crain 514 Pro Stair Tool is my holy grail. Most DIYers try to use a cold chisel or a wide-blade putty knife, but those are too sharp and too thick. The Crain has a specific offset that lets you drive the carpet into the tack strip without snagging the pile. If you use a tool that’s too sharp, you’ll nick the backing, and that’s when you start seeing those stray threads pulling out six months later. According to the Carpet and Rug Institute (CRI) Standard 105, using the wrong tucking tools is a leading cause of localized delamination on staircases. I also never step onto a job without a high-quality power stretcher. Even for a small landing, a knee kicker isn’t enough to achieve the tension required to prevent why your carpet is buckling only three years later. 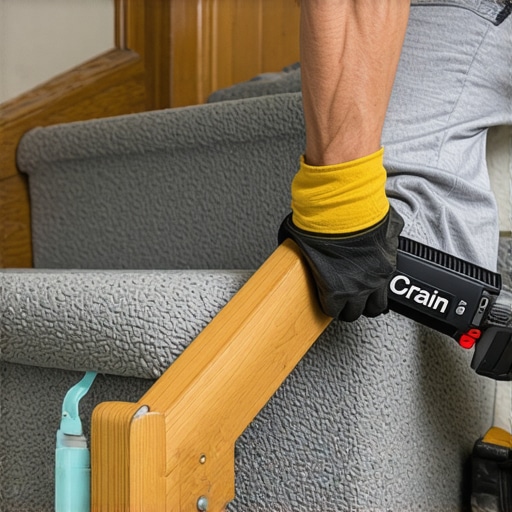
High-Density Backings are Taking Over
Looking ahead to the next few years, I predict we are going to see a massive shift toward high-density polyester backings that mimic the rigidity of wool. This is great for durability, but it’s going to make the ‘tuck and roll’ even harder for the average homeowner. You’ll need to be even more precise with the stay sharp blade rule for cutting luxury vinyl and carpets alike, as these stiffer materials don’t forgive a dull edge. We’re already seeing this in transform your flooring top trends in installation for 2025, where ‘performance’ is outranking ‘plushness’ in every category. If you’re planning a remodel, don’t just look at the color; look at the density of the weave.
Try the Hidden Staple Trick on Your Next Step
If you’re currently staring at a half-finished staircase, I want you to try one thing: instead of stapling through the top of the carpet, spread the fibers with your fingers and bury the staple crown directly against the backing. It’s a small move that takes an extra ten seconds per step, but it’s the difference between a ‘DIY look’ and a professional finish. If you find yourself struggling with transitions to other rooms, especially near the bathroom, remember to check my guide on shower repairs when to fix vs replace for longevity to ensure your subfloor is dry before the carpet goes down. Don’t let a hidden leak under the baseboard ruin your hard work. Go ahead, give that hidden staple a shot on your next tread and watch the ‘smiles’ disappear.
Lessons the Hard Way on Every Single Riser
After years of doing this, I’ve realized that the ‘perfect’ staircase isn’t about being fast; it’s about being deliberate. One major lightbulb moment was realizing that carpet install secrets aren’t about hiding mistakes, but preventing them before the first cut. Here is what I learned while sweating over those curves:
- Always check your grain: I once did an entire flight and realized the pile was sideways on the middle step. It looked like a different color under the hall light.
- Subfloor prep is 90% of the battle: If you have a squeak, it will only get louder once the carpet is on. Use a subfloor screw routine for stopping floor squeaks before you even think about padding.
- Tack strip spacing: If you jam it too close to the riser, you can’t get your stair tool in there to tuck. Give yourself a quarter-inch of breathing room.
My Go-To Gear for a Flawless Finish
I don’t believe in buying every gadget on the shelf, but for stairs, you can’t compromise. The Crain 514 stair tool is a non-negotiable for me because it protects the backing while you work. I also keep a close eye on baseboard trends in 2025 fresh styles for every room to make sure the trim I’m tucking into matches the quality of the floor. Finally, always have a copy of the CRI 105 standards handy—it’s the industry bible for a reason and will save you from common flooring installation mistakes to avoid.
Your Path to a Luxury Staircase Starts Now
There is a unique kind of satisfaction in looking at a finished bullnose and seeing nothing but clean, sharp lines. Whether you are following transform your flooring top trends in installation for 2025 or just trying to fix a messy DIY job, remember that patience is your best tool. If you run into a snag or a weird ripple, don’t just staple over it. You can learn how to fix a carpet ripple without a power stretcher if things get loose later, but doing it right the first time is always the goal. If you’re feeling stuck, feel free to contact us for expert advice.
Have you ever finished a set of stairs only to realize the pattern didn’t line up? Let me know in the comments below—I’ve got a few tricks for that too!