

I was hosting a dinner party when it happened. My neighbor, Greg, tripped right over a “carpet wave” in my hallway, nearly face-planting into the appetizer tray. It was embarrassing. That ripple hadn’t been there six months ago, or at least, I hadn’t noticed it growing. I spent the next morning staring at it, wondering if I needed to call in the pros and drop a few hundred bucks just to pull some fabric tight. I tried to just “smoosh” it back with my foot, but as any seasoned homeowner knows, that’s about as effective as yelling at the rain.
Why Your Floor Has Those Annoying Speed-Bumps
It’s not just you, and it’s likely not even your fault. Most of the time, carpet ripples appear because of high humidity or, more commonly, an initial installation that skipped the heavy lifting. I used to think I could just pull the edges tight by hand. Big mistake. I ended up with sore fingers and a carpet that looked like a topographical map within a month. The “why” matters because these bumps are more than an eyesore; they are a trip hazard and a sign that your carpet is wearing out prematurely. According to the Carpet and Rug Institute (CRI), nearly all residential carpet should be power-stretched during the initial install to prevent this, but let’s be honest: most of us aren’t going to rent a six-foot-long pole stretcher for a two-inch ripple in a small bedroom. Today, I’m going to show you how to reclaim your flat floor using a simple knee kicker and a bit of elbow grease. We’ll look at carpet install secrets that focus on manual tensioning rather than industrial machinery.
Is DIY Stretching Really Going to Hold Up?
You’re probably wondering if a manual fix is just a temporary band-aid. I get it. I was skeptical too until I realized that for small rooms and minor buckling, you can get incredible tension if you know where to push and how to reset the tack strip. The secret isn’t just “stretching”; it’s about the physics of the pull. If you’ve ever tried stretching carpet in a room full of furniture, you know the struggle of working around obstacles. But I promise, you can do this without clearing out the whole house. Have you ever tripped over a mysterious carpet wave and wondered if your house was shifting? Tell me your “speed bump” story in the comments below. Before we grab the tools, you need to be careful. I once made the knee kicker mistake by being way too aggressive and actually tearing the backing of a high-end wool rug. We want to avoid that. Let’s dive into the prep work so you don’t ruin your flooring while trying to save it.
Start by Giving the Carpet Some Slack
Before you can fix the ripple, you have to release the beast. I’ve seen people try to stretch carpet while it’s still firmly tucked under the baseboards, which is like trying to put on a tight t-shirt while your arms are taped to your sides. You need to pull the carpet off the tack strip along the wall closest to the buckle. I usually grab a stiff putty knife or a flat-head screwdriver to gently pry the edge up. Think of it as peeling back a giant, fuzzy sticker. If you find that the subfloor underneath is making noises while you work, this is the perfect time to learn how to fix a squeaky subfloor through the carpet before you lock everything back down. I once skipped this step in my living room, only to realize the buckle was actually caused by a loose plywood sheet underneath clicking every time I stepped on it. It’s much easier to drive a few screws now than to tear everything up again next month.
Mastering the Art of the Knee Pop
Now comes the part where you actually move the fabric. The knee kicker isn’t a sledgehammer; it’s a precision tool. You set the teeth about an inch or two away from the wall, making sure they are deep enough to grab the backing but not so deep they pierce your padding. This is where the the directional pull rule for power stretching carpet comes into play, even if you are just using a manual kicker. You want to kick at a slight angle toward the corner to distribute the tension evenly. 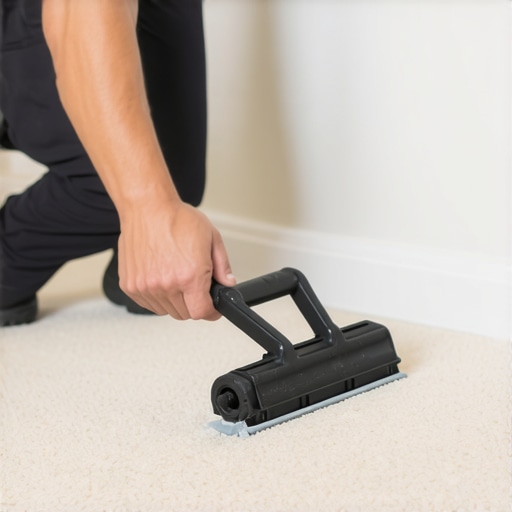 I remember the first time I did this; I was so worried about hitting my kneecap that I barely tapped it. The carpet didn’t budge. You have to give it a solid, authoritative thud with the padded part of your leg—just above the knee. When you feel that ‘pop’ and see the ripple flatten toward the wall, you’ve nailed it. If you are working near a doorway, you might need to adjust how the carpet meets the next room. Mastering how to hide a transition strip between carpet and tile ensures that your newly flattened floor looks seamless and professional.
Locking it Down and Trimming the Fat
Once you’ve successfully migrated that extra fabric to the edge of the room, you’ll notice you have a ‘lip’ of carpet climbing up your baseboards. Don’t just stuff it back down. You need to hook the carpet back onto the tack strip spikes first. I use the head of the kicker to firmly press the carpet onto the pins. If you don’t, the carpet will eventually slide back, and Greg will be tripping over that same ripple by the next dinner party. After it’s hooked, use a sharp utility knife to trim the excess. This is a great moment to evaluate your room’s aesthetics; sometimes a baseboards makeover is the final touch needed to make the whole project look high-end. Trimming the carpet flush to the wall and tucking the edge behind the wood creates that crisp, clean line that separates a ‘DIY job’ from a professional step-by-step flooring installation. Just be careful not to nick the wood; I keep a scrap piece of cardboard between my blade and the baseboard just in case my hand slips.Beyond just the physical trim, there is a technical nuance to the tension itself that most people miss. Most DIYers think that if a little tension is good, a lot of tension must be better. I’ve seen guys treat a knee kicker like they’re trying to kick down a reinforced door, thinking they are securing the room for life. Here is the contrarian truth: over-stretching is just as damaging as under-stretching. When you apply excessive force, you risk delaminating the secondary backing from the primary one. According to the Carpet and Rug Institute (CRI) Standard 105, residential carpet typically requires a stretch of 1% to 1.5% in both length and width. Going beyond that doesn’t make it ‘flatter’; it just creates permanent stress points that will eventually lead to carpet buckling only three years later because the fibers have lost their natural elasticity.
Why More Force Isn’t Always the Answer
This technical threshold is where most projects go south. If you pull too hard, the carpet will eventually ‘relax’ back into a buckled state anyway, but with the added bonus of damaged structural integrity. I always tell my friends that the tool is called a ‘kicker,’ but it should be used with the precision of a surgeon. The goal is uniform tension across the entire surface area, not just pulling the middle tight while the corners remain slack. Failing to balance this tension is one of the biggest flooring installation mistakes to avoid for a seamless look.
Can You Really Over-Stretch Your Flooring?
Yes, and it is the most common ‘oops’ moment for homeowners. If you feel the carpet ‘snap’ or hear a faint tearing sound, you’ve likely crossed the line. This is particularly dangerous with modern luxury materials. I’ve documented the knee kicker mistake that ruins luxury carpets, and usually, it’s because the installer was trying to brute-force a ripple that was actually caused by a poorly fitted pad. 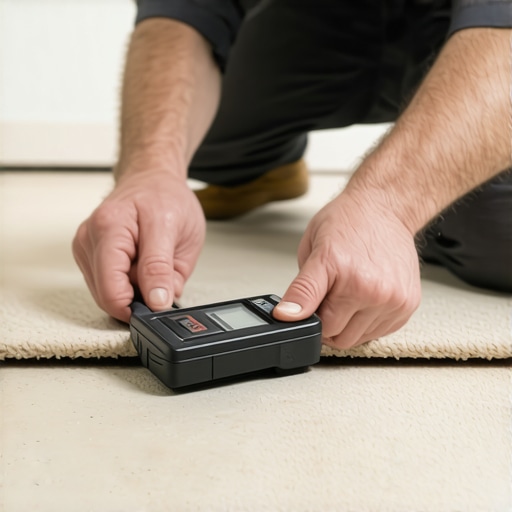 If your padding is even a quarter-inch too thick or too dense for the carpet type, no amount of kicking will keep it flat forever. You have to ensure the foundation matches the face-weight of your carpet choice before you even think about grabbing the tools.
Stop Ignoring the Subfloor Moisture Level
Another nuance that separates the pros from the weekend warriors is the obsession with what’s happening under the carpet. People think carpet ‘breathes,’ so moisture doesn’t matter as much as it does with hardwood. Wrong. I learned this the hard way on a basement job where I skipped the check. Six months later, the room smelled like a damp swamp because the concrete was ‘sweating’ underneath. This is why we never skip the subfloor moisture test on concrete. If the moisture levels are high, that ripple you’re trying to kick out is actually the latex backing reacting to water vapor. It’s a chemical failure, not a mechanical one. When it comes to finishing the look, don’t settle for sloppy miters. Many people think a 45-degree cut is the only way to join baseboards, but the coping saw technique for flawless inside baseboard corners is the real secret. Coping allows for house settling without opening up ugly gaps. Have you ever fallen into this trap of over-stretching or ignoring the ‘invisible’ moisture? Let me know in the comments—I’d love to help you troubleshoot your next project.My garage is a graveyard of cheap tools I bought thinking I was saving money, only to realize I was actually buying frustration. For instance, when I talk about carpet install secrets, I always point to the Roberts 10-412 Deluxe Knee Kicker. I don’t get paid to say that; I say it because the extra-thick bumper saves my knee from the bruising that cheaper, thinner versions cause. If you’re tackling more than one room, that padding is the difference between finishing the job and being on crutches by Tuesday. Beyond the kicker, I never start a flooring project without my Tramex moisture meter. The National Wood Flooring Association (NWFA) states in their technical guidelines that subfloors must be flat to within 1/8 inch over a 6-foot radius, and a good meter confirms that the environment won’t cause your materials to expand or contract the moment you leave the room. 
The Tools That Actually Make a Difference
Having the right gear changes the way you approach a problem. Instead of forcing a fit, you create it. I always carry a pack of high-carbon blades because the stay sharp blade rule for cutting luxury vinyl applies to carpet just as much. A dull blade pulls the carpet fibers rather than slicing the backing, which leads to those messy, frayed edges that are impossible to hide. If you are working on baseboards, stop using a standard hammer for your finishing nails. I switched to a dedicated 18-gauge brad nailer years ago, and I have never looked back. It allows you to hold the molding perfectly in place with one hand while securing it with the other, ensuring your miter joints don’t shift at the last second.
How do I maintain my floors and baseboards over the long haul?
Once the install is done, the real work of longevity begins. For carpets, you need to combat the two silent killers: grit and odors. I’m a huge fan of the baking soda vacuum trick to keep the backing from holding onto moisture-based scents. If you’ve moved on to hard surfaces, the felt pad routine is non-negotiable for every piece of furniture. I’ve seen ten-thousand-dollar floors ruined by a single twenty-dollar chair with worn-out plastic feet. When it comes to the wet areas, performing regular shower repairs like refreshing the silicone beads is the only way to prevent structural rot behind the tile. In the future, I expect we’ll see ‘smart’ subfloors with integrated sensors that alert your phone the second a leak starts under your LVP or carpet. For now, we rely on good old-fashioned precision.
Try This Precision Finishing Move on Your Next Room
Before you wrap up your next project, I want you to try the pin nail secret for delicate baseboard moldings. It involves using a 23-gauge pinner which leaves a hole so small you don’t even need putty. It is a total game-changer for that high-end, custom look where the fasteners are virtually invisible to the naked eye. Give it a shot on your next transition piece and see the difference for yourself.
The Nuances of Tension That Most DIYers Skip
After years of fixing my own floor mistakes, I’ve realized that a perfect stretch isn’t just about the physical pull; it’s about the environment. One thing most people don’t realize is that the temperature of the room matters. If you try to stretch a cold carpet, the latex backing is stiff and resistant. I always turn up the heat or let the sun hit the room for an hour before I start; it makes the fabric much more pliable. Also, don’t overlook the material under your feet. If you notice a strange texture while walking, you might want to investigate why your carpet pad feels crunchy under your feet before you finalize the stretch, as a failing pad will just cause new ripples in a few months. When planning a room refresh, I always balance my choices between aesthetics and durability, often looking for the best carpet types for high traffic areas in 2025 to ensure I’m not doing this work again in three years. If you are starting from scratch, take the time to learn how to choose the right carpet for a cozy living space so the tension and weave work in your favor from day one.
What I Keep in My Toolbox for Every Room
My toolkit has evolved from ‘whatever is in the garage’ to a curated selection of items that prevent frustration. Beyond the heavy-duty kicker, I always keep a 23-gauge pinner handy. It allows me to use the pin nail secret for delicate baseboard moldings, which is essential when you have to pull baseboards to reset a carpet edge. I also stay updated on how the industry is changing; reading up on how to transform your flooring top trends in installation for 2025 has helped me realize that the transition points are where most DIY jobs fail. Investing in a professional-grade moisture meter and a high-carbon utility knife might seem like overkill, but these are the tools that ensure your your guide to durable flooring installation for a stylish home is more than just a weekend project—it’s a long-term investment.
Give Your Home the Foundation It Deserves
There is a unique sense of satisfaction that comes from walking across a floor that no longer shifts or bunches under your weight. It changes the entire energy of a room from ‘neglected’ to ‘maintained.’ Don’t let a small ripple or a loose corner intimidate you. Whether you are tackling a single hallway or a full step-by-step flooring installation, the key is patience and the right technique. Take it one kick at a time, respect the limits of the fabric, and you’ll have a floor that Greg—and your appetizers—can navigate safely for years to come. Have you ever tried to kick out a carpet ripple only to have it come back a month later? Let me know your experience in the comments below!