

I remember kneeling on my living room floor, staring at what was supposed to be a ‘professional’ carpet join, but all I saw was a hairy, frayed canyon. I had spent six hours meticulously trying to match the pile, yet every time the morning sun hit the room, that seam screamed at me. It was devastating. I felt like a complete failure in my own home, surrounded by expensive remnants that just wouldn’t play nice. That moment of frustration was my turning point. I realized that the standard ‘butt-up’ method I’d seen in old manuals was a recipe for disaster. If you have ever felt that sinking feeling when your hard work looks amateur, you are not alone. Today, I am going to show you exactly how to move past those ‘scar’ lines using a technique that professionals usually keep close to their chest.
The Pro Method That Makes Factory Edges Obsolete
When I first started, I made the classic rookie mistake of trusting the factory edges. I thought that because the carpet came off a roll, those edges must be perfectly straight and ready to meet. I was wrong. Relying on those edges is exactly why your new carpet has a visible line through the center. The secret is that we don’t actually want to use the edges the manufacturer gave us; we want to create our own perfectly mirrored cuts. This is where the ‘overlap-and-cut’—or the double cut—comes into play. By overlapping the two pieces and cutting through both at the same time, you create a microscopic ‘lock and key’ fit. This is the foundation of achieving flawless results every time. It sounds intimidating to slice through two layers of expensive plush, but it is the only way to ensure the backing matches up without a gap.
Is this technique actually worth the risk of ruining my carpet?
I get it—taking a sharp blade to a double layer of carpet feels like performing surgery without a license. You’re worried about wandering off-line or cutting too deep into the pad. But let me tell you, the alternative is much worse. Without this, you’ll likely end up searching for how to patch a carpet seam that is coming apart within six months because the tension wasn’t distributed correctly. According to the Carpet and Rug Institute (CRI) 105 installation standards, a seam is only considered successful if the edges are properly prepared and sealed to prevent delamination. Have you ever tried to hide a bad seam with furniture only to realize the light catches it from every angle anyway? If so, tell me—what’s been your biggest struggle with floor transitions? We’re going to fix that today. We aren’t just joining fabric; we are engineering a continuous floor that stands up to foot traffic and looks like a single, seamless piece of art.
I once spent a whole afternoon trying to ‘match’ the factory edges on a Berber carpet in a small nursery. I thought I was being precise, but the result looked like a zipper gone wrong. That was the last time I ever trusted the machine-cut edge. To start your own professional-grade seam, you need to overlap the two pieces by about two inches. Think of it like shingles on a roof; you want enough ‘meat’ so that when you slice through, both pieces share the exact same DNA. This is the core of the double cut method for invisible carpet seams. It creates a mirrored edge that factory machines simply can’t replicate in a residential setting. 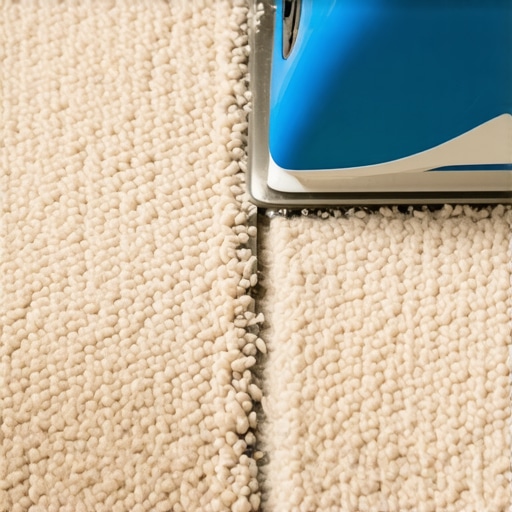
Find the Row Before You Make the Cut
Use a screwdriver or a row-finder tool to spread the fibers apart. You aren’t just cutting fabric; you’re navigating a forest. If you cut across the ‘grain’ of the pile, you’ll end up with those ugly frayed bits that catch the light. Once you’ve cleared a path, take your slotted blade—make sure it’s fresh, because a dull blade is your worst enemy—and cut through the top layer into the bottom. This isn’t just about carpet install secrets; it’s about physics. A sharp blade minimizes the crush on the latex backing and ensures the transition remains hidden even under heavy foot traffic. I remember the first time I rushed this step; the carpet looked like it had a ‘cowlick’ that wouldn’t lay flat no matter how much I brushed it.
How to Keep Your Knife Straight When the Pressure is On
The trick is to keep the knife perpendicular. If you tilt it even a fraction of a degree, you’re creating a bevel, and a bevel means a gap. This is where flooring installation mistakes to avoid for a seamless look usually happen. You need to apply consistent, downward pressure. If you feel the blade dragging or snagging, stop and change it immediately. Think of the blade as an extension of your eye; it needs to stay perfectly vertical to ensure the two new edges butt up against each other with zero tolerance for air or visible backing. I use a straight edge as a guide when I’m feeling less than confident, but eventually, your hand learns the ‘feel’ of the subfloor beneath.
The Sealant Step Everyone Skips
Before you even think about the iron, you have to seal those edges. Professional installers use a bead of seam sealer along the primary backing. This prevents the fibers from ‘blossoming’ or fraying out later. Without this, you’ll eventually be looking up how to patch a carpet seam that is coming apart because the structural integrity of the edge has failed under the stress of daily vacuuming. It’s a five-minute step that adds a decade to the life of the install.
Heat the Glue but Save the Fibers
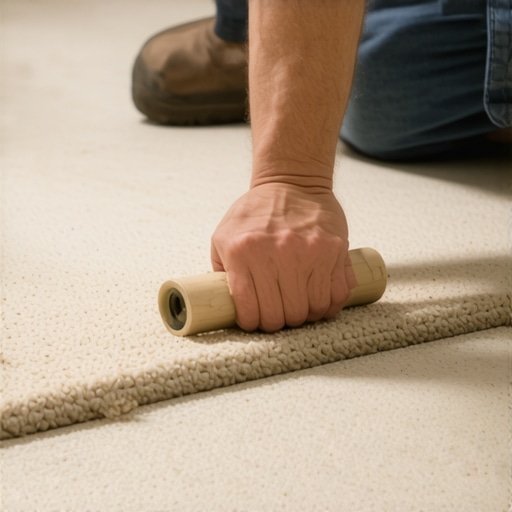
Slide your seaming iron under the joint, letting it melt the adhesive on the tape. Don’t rush this. It’s like grilling a perfect steak; you need the right internal temperature for the bond to hold. As you move the iron, follow behind with a seam roller or a heavy board to press the carpet into the molten glue. This ensures the backing is fully embedded. If you’re dealing with loose areas elsewhere, you might also need the power stretcher move to fix loose carpet bubbles to keep the tension uniform. The goal is to move the iron at a steady pace—usually about two inches per minute—to ensure the glue is ‘tacky’ but not scorched. When I first tried this, I stayed in one spot too long and actually smelled the backing start to singe. Since then, I’ve learned that timing and even pressure are the two pillars of a seam that survives 2025’s toughest foot traffic.
One of the most persistent myths I hear from DIYers—and even some ‘pro’ contractors who should know better—is that a carpet seam needs to be squeezed together with maximum force. There is this idea that if you compress the edges hard enough, they will eventually fuse into one. In my experience, this is the quickest way to end up with a ‘peaked’ seam. When you over-compress the backing, the tension has nowhere to go but up, creating a literal ridge that runs the length of your room. It is one of those flooring installation mistakes to avoid for a seamless look because once that peak is set in the hot glue, it is almost impossible to flatten out without starting over.
Stop Squeezing Your Seams Too Tight
According to the Carpet and Rug Institute (CRI) 105 residential installation standards, carpet edges should be prepared so that they just touch—never overlap or compress under pressure. If you push them together too hard, you’re fighting the physical properties of the latex backing. I once worked with a guy who insisted on ‘ramming’ the edges together; three months later, the customer called because the seam looked like a small speed bump in their hallway. The secret is a neutral fit. You want the fibers to intermingle, but the backing should sit flush and flat. This is a nuance often missed in a step-by-step flooring installation guide that prioritizes speed over long-term stability.
Can a power stretcher actually ruin a perfectly good seam?
Yes, absolutely. This is the ‘trap’ most people fall into: they finish a beautiful seam, and then immediately bring in the heavy equipment. If you use a power stretcher while the seaming tape is still warm, you will pull the seam apart before the adhesive has a chance to crystallize. You must let the seam cool completely—usually about 15 to 20 minutes—before applying any lateral tension. When you do start stretching, you have to follow the directional pull rule for power stretching carpet to ensure you aren’t putting unequal stress on the join. I’ve seen gorgeous, invisible seams turn into gaping maws because the installer was in too much of a hurry to finish the room. Have you ever fallen into this trap of rushing the ‘cool down’ period? Let me know in the comments.
Beyond the seam itself, the integrity of the floor depends on what’s happening underneath. If you’ve spent hours perfecting your carpet install secrets but ignored a loose floorboard, the movement will eventually fatigue the seam. I always carry a box of screws to handle the subfloor before the pad goes down. Knowing how to fix a squeaky subfloor through the carpet is a great skill for repairs, but doing it right the first time is the mark of a true craftsman. If the floor flexes, the seam fails. It’s that simple. If you are struggling with a particularly stubborn area, you might need the power stretcher move to fix loose carpet bubbles, but always remember: the seam is the most vulnerable part of your floor. Treat it with patience, and it will reward you with a decade of invisibility.
Why a Specialized Row-Runner is Your Best Friend
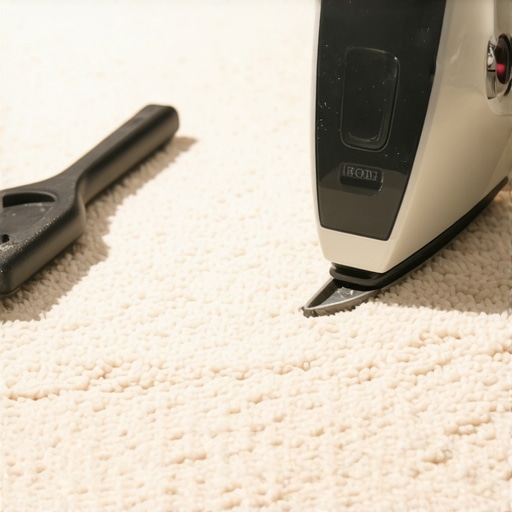
If you’re still using a utility knife to separate rows in a plush carpet, you’re playing a dangerous game with the pile. I personally swear by the Crain 194 Row-Runner. The reason is simple: it finds the natural valley between rows of tufts without shearing the fibers. When you shear fibers, you create a permanent ‘trail’ that no amount of steam will ever fix. This tool is the bridge between a DIY look and expert flooring installation tips for 2025. I also never step onto a job site without my Taylor Tools seaming iron. Unlike cheap big-box store versions, it has a shielded heating element that prevents the top of the carpet from overheating while the adhesive melts. This nuance is vital because according to the Shaw Industries Carpet Installation Technical Bulletin, inconsistent heat is the primary cause of adhesive failure in high-traffic zones.
How do I maintain my carpet install over time?
Maintenance starts the second you finish the step-by-step flooring installation. For the first 72 hours, keep the room’s temperature stable to allow the adhesives to fully crystallize. Long-term, you need to be careful with your vacuum. While you might have chosen the best carpet types for high-traffic areas in 2025, a heavy-duty beater bar can actually ‘unzip’ a seam if it’s set too low. I tell my clients to use a suction-only setting over the seam lines. If you have pets, accidents are inevitable, but knowing how to remove pet odors from deep carpet padding without soaking the seam is crucial. Excess moisture is the enemy of seaming tape; it can soften the glue and cause the edges to curl over time.
Robot Installers and the Future of Your Living Room
I’ve been watching the industry closely, and the trend is moving toward ‘intelligent’ materials. We are already seeing the rise of bio-based, PVC-free adhesives that are stronger than the traditional hot-melts we’ve used for decades. I predict that by the end of the decade, we’ll see laser-guided stretching systems that ensure the tension is mathematically perfect across the entire room. This will eventually make carpet install secrets like manual power stretching seem like a relic of the past. Even as technology changes, the finishing touches remain constant. You still need to pair your new floor with the right trim, so checking out baseboard trends in 2025 is the best way to ensure your ‘future-proof’ floor looks the part. My big advice for you today? Don’t skip the seam sealer bead on the carpet backing; it’s a five-minute insurance policy against a lifetime of fraying.
The Expensive Lessons That Taught Me to Respect the Pile
Over the years, I’ve learned that the most flawless-looking seams are often the result of what you don’t do. First, never trust artificial light; always check your work when the morning sun hits the room, as it reveals every shadow and ‘hair’ you missed. Second, tension is your friend during the stretch, but your enemy during the seaming process. A neutral, relaxed fit is always superior to a forced, compressed edge. Finally, I realized that the ‘thumb test’—checking if the backing is still warm to the touch—is the only way to prevent a permanent ‘peaked’ seam. If you rush and move the carpet while the glue is still a liquid, you’re essentially undoing all your hard work.
The Gear I Actually Keep in My Truck for Every Job
I don’t believe in buying every gadget on the shelf, but three items are non-negotiable for me. The Crain 194 Row-Runner is my go-to because it protects the integrity of the tufts better than any standard knife. For bonding, I trust the Taylor Tools seaming iron because its heat distribution is surgical—preventing the kind of accidents that lead people to search for how to fix a burnt carpet spot without a pro kit. Lastly, a high-quality seam sealer is my insurance policy against fraying. I trust these brands because they’ve survived 15-hour workdays without failing me.
#IMAGE_PLACEHOLDER_E#
Stop Worrying and Start Cutting Your Way to a Better Home
Mastering these carpet install secrets takes practice, but the confidence of walking across a room that looks like a single, continuous sheet of comfort is worth every drop of sweat. You don’t need to be a third-generation installer to get results that look like a step-by-step flooring installation from a high-end magazine. All you need is patience, a sharp blade, and the willingness to slow down when the heat is on. Your home is your canvas—now go make that seam disappear. Have you ever tried the double-cut method only to find your blade was too dull to finish the job? Let me know your biggest struggle in the comments below.