

The smell hit me like a physical wall the moment I opened the nursery door. My sweet, aging Lab had a rough night, and despite my frantic scrubbing with every ‘miracle’ spray in the cabinet, that pungent, ammonia-heavy scent lingered like an uninvited guest. I realized then that I wasn’t just fighting a stain on the fibers; I was battling a biological soak-pit hidden in the foam beneath. If you’ve ever found yourself sniffing the floor like a bloodhound trying to pinpoint ‘the spot,’ you know exactly the frustration I’m talking about. Today, I’m going to show you how to actually reach that deep-seated funk without losing your mind or your security deposit.
Stop Wasting Your Time on Surface Scrubbing
When I first started dealing with pet messes, I made a massive rookie mistake: I thought more liquid meant more cleaning. I dumped soapy water onto the carpet, thinking it would flush the smell out. In reality, I just helped the urine travel further into the padding and even down to the wood. Now, if you are already looking at your floor and wondering if it’s too far gone, you might want to check out these carpet install secrets for when it’s time to start fresh. But before you give up, understand that pet urine contains uric acid crystals that are not water-soluble. According to the IICRC (Institute of Inspection Cleaning and Restoration Certification), these crystals are hygroscopic, which means they actually attract moisture from the air, reactivating the odor every time the humidity rises. This is why your house smells fine in the winter but like a kennel in July. You have to break those crystals down, not just wet them. Have you ever felt like no matter how much you clean, the smell just comes back on rainy days? [image_placeholder]
Is it actually possible to save the padding?
You might be skeptical. I certainly was after my third failed attempt at ‘home remedies.’ You’re probably thinking that the only real solution involves a 20 yard dumpster and a complete tear-out. While sometimes the padding is truly unsalvageable, most of the time we can win this fight with the right enzymatic approach. We need to treat the padding as its own ecosystem. If you’ve already noticed ripples from your cleaning frenzies, you might also need to learn how to fix a carpet ripple caused by over-saturation. The key is reaching the ‘depth’ of the problem without turning your subfloor into a mold factory.
Find the Invisible Enemy with Ultraviolet Light
To get started, you need to stop guessing where the smell is coming from. I spent weeks cleaning a three-foot radius around where I thought the accident happened, only to realize my Lab had actually backed up against the wall. The urine had wicked up the drywall and behind the baseboard. This is why a high-quality UV flashlight is non-negotiable. Turn off the lights, and you’ll see the glow of the uric acid crystals. If you notice the spots are right at the edge of the room, you might be looking at a repair involving baseboard styles that elevate your interior design if the moisture has compromised the wood trim over time. Once located, the goal is to mirror the accident. If two ounces of liquid went down, you need four ounces of enzymatic cleaner to go down after it. I once made the mistake of just misting the top of the carpet. The smell vanished for an hour, then came back with a vengeance because the padding was still a buffet for bacteria. You want to pour the cleaner directly onto the spot, letting it soak through the primary and secondary backings until it reaches the same depth as the original mess.
Give the Enzymes Time to Eat
Enzymes are like little biological Pac-Men. They don’t just mask the scent; they physically consume the urea and proteins. But they need moisture and time to work. I usually cover the treated area with a damp towel or a plastic bin to keep it from drying out too fast. If the area stays wet for too long, however, you risk issues with the wood beneath. If you start hearing noises when you walk over the treated area after it dries, you should learn how to fix a squeaky subfloor through the carpet to ensure no structural damage was done by the standing liquid. 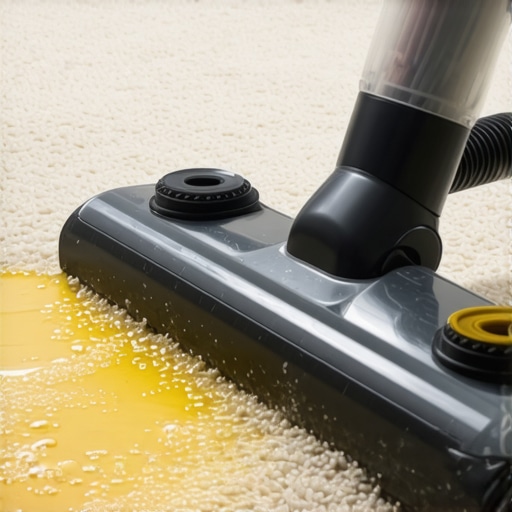
Extract the Gunk Using a Sub-Surface Tool
This is the pro secret that saves your security deposit. You don’t need to rip the carpet up if you have a sub-surface extraction tool—often called a water claw. It’s a specialized attachment for your vacuum or carpet cleaner that focuses all the suction into a small, concentrated area to pull liquid directly out of the foam padding. When I first used one, I was horrified to see yellow-tinted foam coming up from a spot I thought was clean. It’s like using a straw to drink from the bottom of a glass rather than trying to soak it up with a napkin from the top. If you find that the carpet looks loose or wavy after this deep-saturation process, don’t panic. Over-wetting can temporarily relax the latex backing. You might need to revisit the directional pull rule for power stretching carpet once the area is completely dry to get that factory-tight finish back. Also, keep an eye on your seams; moisture can sometimes make why your carpet seams are visible in morning light a bigger issue if the adhesive softens. Finally, check the perimeter. If the urine hit the tack strip, those wooden strips will rot and hold the smell forever. If you’re seeing black or dark brown staining on the wood strips under the carpet, you’re looking at a situation where carpet install secrets will come in handy for replacing those small sections. To prevent future leaks from reaching the wall cavity, especially in high-risk areas, I’ve even started using the silicon bead secret for waterproofing baseboards in bathrooms on my baseboard transitions to create a tiny barrier against spills.While deep-cleaning the padding saves the room’s smell, many homeowners overlook the collateral damage to the surrounding structure. One contrarian truth I’ve learned is that most ‘pet odors’ that won’t go away aren’t in the carpet at all—they’re in the unsealed edges of your baseboards. Everyone says to just caulk the top, but if you don’t address the bottom edge, moisture from your cleaning efforts—or future accidents—will wick right back up. This is often why your caulked baseboards are cracking within weeks; the wood is expanding and contracting against a rigid seal it can’t handle.
Expansion Gaps Save Your Sanity
The ‘Oops’ factor usually hits when someone finishes a beautiful floor and forgets the expansion gap. I’ve seen stunning installs ruined because the owner wanted a ‘seamless’ look and pushed the flooring tight against the wall. Without that tiny 1/4-inch space, the floor has nowhere to go when it gets humid. This is one of the most common flooring installation mistakes to avoid for a seamless look that actually lasts. If you’re seeing your baseboard miters keep gapping in the winter, it’s often a sign that your house is moving more than your trim can accommodate.
Why does my floor feel spongy after a deep clean?
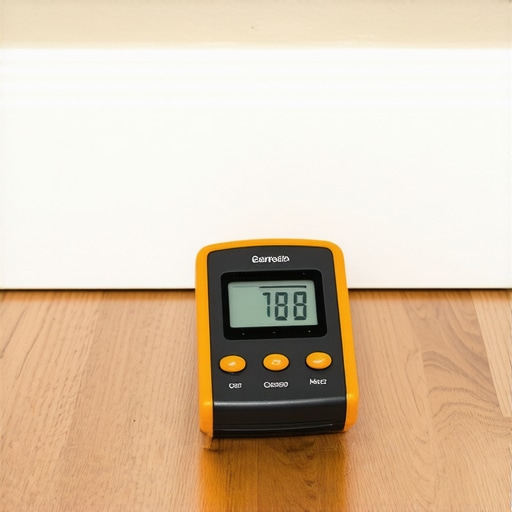
If you’ve been aggressive with the liquid enzymes, you might notice a soft, almost bouncy feel in certain spots. Many assume the carpet is just wet, but you might have actually compromised the subfloor or the adhesive bond. According to the National Wood Flooring Association (NWFA), wood subfloors should stay within 2-4% of the flooring’s moisture content to maintain structural integrity. This is why the moisture meter requirement isn’t just for pros; it’s your best defense against long-term rot. If you ignore the moisture levels, you’re basically building a greenhouse for mold under your feet. 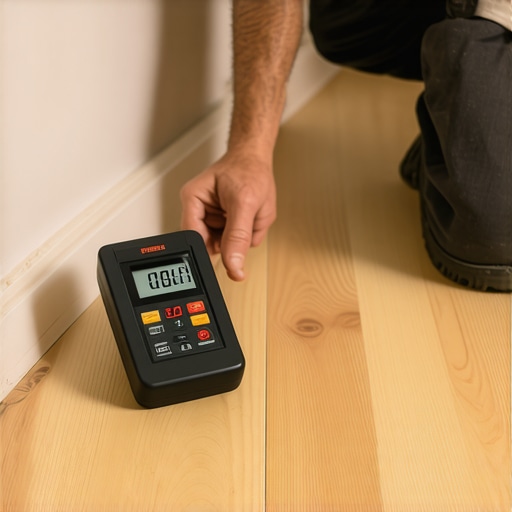 Another nuance people miss is the difference between a surface stain and a subfloor saturation point. If you’re working on a large area, you must respect the expansion joint rule for large tile floors or wood layouts. Forcing a patch or a deep-clean without considering how the materials interact is how you end up with ‘hollow’ spots. Have you ever fallen into this trap where a simple cleaning turned into a structural repair? Let me know in the comments. If you’re struggling to get the trim right after a floor shift, check out baseboard styles that elevate your interior design to see if a taller profile might hide those stubborn perimeter issues better.If you’re going to tackle these deep-cleaning projects yourself, stop using the twenty-dollar moisture meters from the bargain bin. I personally use the Wagner Orion 950 because it allows me to check the moisture content of the subfloor without poking holes in my expensive finish. This is crucial when you’re deciding if a room is truly dry after a pet accident or if you’re ready for a step-by-step flooring installation. If that meter reads high, you wait. No exceptions. The National Wood Flooring Association (NWFA) Technical Manual explicitly states that moisture content should be within a 4 percent margin for strip flooring and 2 percent for plank flooring before you even think about closing up a repair. Ignoring this is the fastest way to turn a clean floor into a warped mess.
How do I maintain my floor health over time?
Consistency beats intensity every single time. Once you’ve saved the padding and neutralized the odors, the goal shifts to prevention. I’ve started implementing the microfiber mist rule for cleaning matte floors because it prevents the over-saturation that led to my initial padding problems. For high-moisture areas like the master bath, keep an eye on your sealant. Knowing shower repairs when to fix vs replace for longevity is a skill that saves thousands of dollars. I make it a habit to check the perimeter every six months. If I see a gap in the caulk or a loose baseboard, I address it immediately using the silicon bead secret for waterproofing baseboards in bathrooms to ensure that next time a spill happens—or my Lab has another rough night—it stays on the surface where I can see it. Looking ahead, I predict we are moving toward ‘smart’ subfloors. We are already seeing the beginning of this in transform your flooring top trends in installation for 2025, where moisture-sensing underlayments can actually alert your phone if a leak occurs beneath the surface. Until those become standard, you are the primary sensor. Don’t wait for the smell to return to check the health of your subfloor. If you really want to level up your DIY game, go grab a professional-grade moisture meter today and map out your home’s baseline levels; it’s the only way to know for sure what’s happening under your feet.
Why Humidity is Your Carpet’s Worst Truth Teller
After years of fixing spots only to have them return every July, I realized that uric acid is a magnet for moisture. If you don’t use a professional enzyme to break down those crystals, you’re essentially leaving a biological sponge under your feet. I also learned the hard way that the carpet is only half the battle. If the moisture wicks into the trim, you’ll find why your caulked baseboards are cracking within weeks as the wood swells and shrinks. My biggest lightbulb moment? The odor isn’t gone until the padding and the subfloor are both reading bone-dry on a meter.
The Gear That Actually Rescues Your Subfloor
To stop the cycle of endless scrubbing, I’ve narrowed my kit down to three non-negotiables. First, a high-intensity UV light to find the map of the accident. Second, a sub-surface extraction tool—it’s the only way to pull liquid out of the foam. Finally, I never start a repair without checking the moisture meter requirement to ensure I’m not trapping rot under a fresh patch. These aren’t just pro tools; they are the barrier between a clean home and a costly floor failure. If you are starting fresh, following a step-by-step flooring installation guide will ensure your new materials are protected from day one.
[image_placeholder]
Take Back Your Home One Room at a Time
Cleaning up after an aging pet or a messy renovation can feel like a losing game, but you have the tools to win. Don’t be afraid to get deep into the padding. When you understand the science of the soak, you can stop reacting to smells and start preventing them. If the damage is too deep, you might consider how to choose the right carpet for a cozy living space that features moisture-resistant backing. You deserve a home that smells as good as it looks. Remember, transform your home expert flooring installation tips for 2025 are all about longevity and air quality. Have you ever had a mystery smell that drove you crazy until you used a UV light? Let me know in the comments below!