

I remember staring at the floor of my first ‘real’ home, a cold beer in one hand and a utility knife in the other, feeling like an absolute failure. I’d spent all weekend trying to make two pieces of plush carpet look like one, but no matter how much I tucked or prayed, that line screamed at me every time the morning sun hit it. It looked like a giant, fuzzy zipper running right through the middle of the room. This wasn’t the carpet install secret I was hoping for. I realized then that ‘close enough’ is the enemy of professional results. I had made the classic rookie mistake: I tried to join the factory edges and simply hoped the pile would hide the gap. It didn’t.
Say Goodbye to That Ugly Line in Your Living Room
The frustration of a visible seam is real. It’s the first thing guests see and the only thing you’ll notice when you’re trying to relax. Many people think you need a magic wand or thirty years of experience to hide a seam, but it really comes down to a technique called the ‘double-cut.’ Today, I’m going to show you exactly how to execute this so your carpet looks like one continuous, luxurious piece. We aren’t just talking about flooring installation mistakes to avoid; we’re talking about a specific skill that separates the pros from the frustrated weekend warriors. If you have followed a step-by-step flooring installation guide before, you know that the finishing touches are where the battle is won or lost. If you’ve ever wondered why your carpet seams are visible in morning light, this is your answer.
Will This Method Really Save Your DIY Reputation?
I get the skepticism. You’re probably worried about cutting through both layers of carpet and ruining the subfloor, or worse, the expensive new carpet itself. I’ve been there—I once butchered a $2,000 roll of premium frieze because I was too timid with my cuts and didn’t overlap enough. But here’s the thing: according to the Carpet and Rug Institute, proper seam construction is the single most important factor in the durability of a carpet installation. Without a tight, precise join, the edges will eventually fray, pull apart, and become a trip hazard. Have you ever spent hours on a project only to have one tiny line ruin the whole look? Tell me about your worst flooring mishap in the comments! Before you start cutting, make sure you know how to choose the right carpet for your space, as thicker piles are often much more forgiving for beginners using the double-cut method. Now, let’s get into the nitty-gritty of why this works better than any other method.
Overlap Your Carpet Like a Pro
The first mistake most people make is trying to butt the factory edges together. Factory edges are rarely straight; they often have a slight bow that creates gaps. Instead, you need to overlap your two pieces of carpet by about three inches. Think of it like shingles on a roof or overlapping pieces of tape. You want to make sure the pile—the nap of the carpet—is running in the same direction on both pieces. If you flip one, the light will hit the fibers differently, and it will look like two different colors even if they came from the same roll. This is a major reason why your new carpet has a visible line through the center. 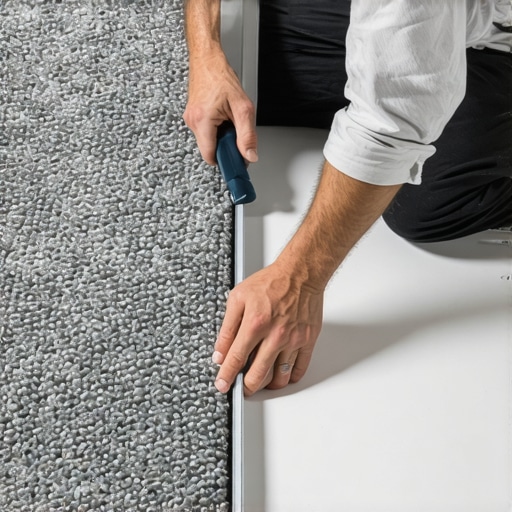
One Blade One Cut and Zero Regrets
Once you have your overlap, use a long metal straight edge as your guide. You aren’t just scratching the surface here; you need to cut through both layers of carpet in a single pass. I learned this the hard way during a job in a tight hallway using one of the best carpet types for high-traffic areas in 2025. I was using a dull blade because I didn’t want to walk back to my truck. The blade snagged, shredded the primary backing, and left me with a jagged seam that refused to stay down. Now, I change my blade every single time I start a new seam. If you feel any resistance, stop and swap the blade immediately. A fresh edge is the only way to ensure the two pieces mate together like they were never separate.
Get the Heat Right or Pay the Price
After the cut, you’ll have two perfectly matching edges. Now comes the seaming tape. Slide the tape under the joint, centered perfectly. You’ll use a seaming iron to melt the adhesive. Here’s the trick: don’t go too fast, but don’t linger. I once got distracted by a phone call and left the iron sitting too long, leading to a frantic search for an iron burn repair for small carpet scars. You want the adhesive to be honey-like—tacky and melted, but not smoking. As you move the iron, press the carpet edges into the melted glue and use a seam roller or even a clean piece of wood to press the fibers together. If the seam feels loose later, you might need to know how to patch a carpet seam that is coming apart, but if you do this right the first time, it creates a permanent, structural bond.
The Final Tension Check
A seam is only as good as the tension around it. If the carpet is loose, the seam will buckle and peak over time, creating a trip hazard and an eyesore. This is where the directional pull rule for power stretching carpet comes into play. You need to stretch the carpet away from the seam once it has cooled completely. Never stretch a warm seam! I’ve seen rookies try to use a power stretcher move to fix loose carpet bubbles while the glue was still soft, and they literally ripped the seam wide open. Wait at least 20 minutes. The bond should be cold to the touch before you apply any mechanical force. By following this sequence, you ensure the carpet stays flat and the seam remains invisible for years to come.
Stop Relying on Caulk to Save Your Joints
You’ve probably heard the old saying that a little caulk and paint make a carpenter what he ain’t. While that might fly for a quick flip, it is a dangerous trap for a homeowner looking for longevity. People often assume that gaps in their woodwork are just part of the house ‘settling,’ but in reality, it’s usually a sign of a poor joint choice. For example, many DIYers use simple miters on inside corners, but the inside corner cope for perfect baseboard installs is the only way to ensure those lines don’t open up when the seasons change. If you rely on caulk to fill a quarter-inch gap, it will eventually shrink, crack, and leave you with a black line of shadow that screams amateur hour. I’ve seen beautiful homes where the baseboard styles that elevate your interior design were completely ruined because the installer didn’t understand wood movement. Have you ever fallen into this trap? Let me know in the comments!
Is Your Subfloor Actually Flatter Than It Looks?
One of the most sophisticated mistakes I see—even among seasoned pros—is confusing ‘level’ with ‘flat.’ Your floor doesn’t necessarily have to be perfectly level (though it helps), but for modern large-format tiles or vinyl planks, it must be dead flat. According to the Tile Council of North America (TCNA) Handbook, the industry standard for tiles larger than 15 inches is a maximum deviation of 1/8 inch in 10 feet. If you ignore this, you’ll end up with lippage—where one tile edge sits higher than the next—creating a trip hazard. This is why you need to master how to level a subfloor dip without removing the old subfloor before a single piece of flooring touches the ground.
The Hidden Danger of Ignoring Your House’s Breath
We often treat our homes like static boxes, but they are living, breathing environments. A common myth is that modern materials like engineered wood or luxury vinyl don’t need to acclimate. That is a recipe for disaster. I once walked onto a job site where the installer had skipped the acclimation test for avoiding hardwood floor gaps because he was in a rush. Within three months, the beautiful wide-plank floor had buckled so badly it looked like a mountain range. The National Wood Flooring Association (NWFA) emphasizes that wood must reach its Equilibrium Moisture Content (EMC) within the specific room’s environment before installation. This nuance is the difference between a floor that lasts fifty years and one that fails in five. This same logic applies to moisture in basements; ignoring the moisture meter requirement for basement flooring jobs is the fastest way to grow mold under your new investment.
Don’t Let Your Shower Curb Kill Your Subfloor
When we move into the bathroom, the ‘oops’ factor usually involves things you can’t see. Everyone focuses on the tile, but the real work is in the slope. I’ve repaired dozens of bathrooms where the owner spent thousands on shower renovation ideas modern designs for a luxury feel, only to have the subfloor rot out because of a flat curb. You must ensure the curb slope requirement for waterproof shower pans is met so water drains back into the tray, not out onto the bathroom floor. It seems like a tiny detail, but it’s the nuance that separates a ‘spa-like experience’ from a structural nightmare. If you are planning a full step-by-step flooring installation that includes wet areas, remember that gravity is either your best friend or your worst enemy. Always double-check your angles with a laser before the thinset dries.I’ve spent thousands of dollars on tools over the years, but if I’m honest, half of them just collect dust. However, there are three things I won’t even unload from the truck unless they are in my hand. First is a high-quality moisture meter. I don’t care if the subfloor looks dry; I need to see the numbers. Skipping the moisture meter requirement for basement flooring jobs is the single biggest gamble you can take with your wallet. Second is a self-leveling laser. I use the laser level hack for straight tile rows every time because our eyes are notoriously bad at judging horizontal lines over long distances. Finally, I’ve switched almost entirely to urethane-based adhesives for wood-to-concrete applications. According to the Bostik Technical Data Sheet for high-performance adhesives, maintaining a low Moisture Vapor Emission Rate (MVER) through a dedicated barrier is critical for glue-down applications on concrete, which is why the urethane glue secret for hardwood on concrete is so vital; it provides a moisture barrier and a flexible bond that won’t get brittle as the house moves.
Will Your New Floors Still Look Great in Ten Years?
Installation is only the first half of the story. If you want to avoid why your hardwood floor finish is clouding over, you have to throw away the string mop. For my own home, I strictly follow the microfiber mist rule for cleaning matte floors. Excess water is the silent killer of joints, especially in modern click-lock systems. If you notice a small mishap, don’t wait. Knowing how to fix a burnt carpet spot without a pro kit or how to repair a chipped ceramic tile in a shower can save you from a full-room replacement later. 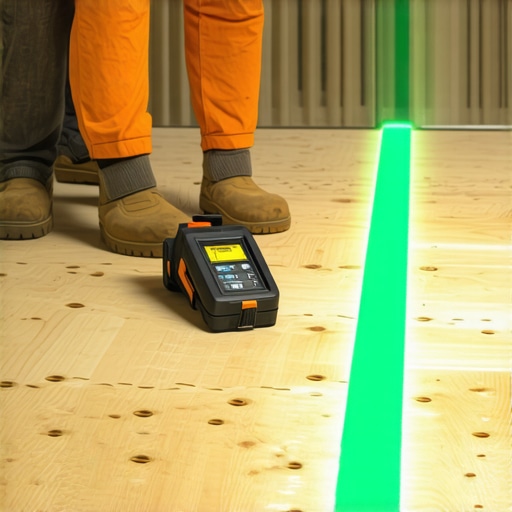 One advanced strategy I recommend for anyone doing wide-plank installs is the glue assist strategy for wide plank hardwood installs. It’s a bit more work up front, but it completely eliminates the ‘hollow’ sound and prevents those annoying seasonal gaps. As for the future, I predict we are going to see a massive shift toward fully waterproof, digitally-printed natural materials. The top trends in installation for 2025 already suggest a push for hybrid cores that combine the beauty of oak with the resilience of stone.
How do I keep my baseboards from pulling away?
It’s a question I get every winter. Wood shrinks when the humidity drops. The fix isn’t more caulk; it’s better fastening. I always use the pre-drill rule for wide baseboard installations to ensure the nails hit the studs deep enough to resist the wood’s natural pull. If you’re working in a bathroom, don’t forget the silicon bead secret for waterproofing baseboards in bathrooms. It prevents the bottom of the MDF or wood from soaking up mop water and swelling. Go ahead, try the pre-drill method on your next room—it’s a small step that ensures those miters stay tight regardless of the weather.
The Hardest Lessons I Learned on the Subfloor
Over the years, I’ve realized that the most expensive mistakes aren’t usually made with the top layer of flooring, but with what lies beneath. I’ve had to rip up entire rooms because I assumed the concrete was dry, when in reality, I had ignored the moisture meter requirement for basement flooring jobs. Here are a few lightbulb moments from my career:
- The 1/8-inch Rule: If your floor isn’t flat, your expensive tile will look cheap. Learn how to level a subfloor dip without removing the old subfloor before you even open a box of materials.
- Factory Edges Lie: Never trust a factory edge for a carpet seam. Overlap, double-cut, and use a fresh blade every time.
- Acclimation is Non-Negotiable: Wood is a living thing. If you don’t let it breathe in its new environment, it will revolt against you in a few months.
#IMAGE_PLACEHOLDER_E#
The Three Tools I Refuse to Work Without
I don’t believe in buying every gadget at the hardware store, but these items are the foundation of every successful project I do. First, a self-leveling laser is non-negotiable; I always use the laser level hack for straight tile rows to ensure my eyes aren’t playing tricks on me. Second, for any hardwood going over concrete, the urethane glue secret for hardwood on concrete has saved me from countless callbacks regarding loose planks. Finally, for maintenance, I always educate my clients on the microfiber mist rule for cleaning matte floors to prevent joint swelling. These aren’t just suggestions; they are the difference between an amateur job and a legacy floor.
Take the Leap and Transform Your Space
There is a unique kind of pride that comes from walking across a floor you installed yourself, knowing that every seam is tight and every tile is level. By avoiding common flooring installation mistakes to avoid and staying updated on transform your home expert flooring installation tips for 2025, you are investing in the long-term value of your home. Don’t let the fear of a visible seam stop you from starting. Grab your tools, follow the sequence, and watch your vision come to life. Have you ever faced a lippage nightmare or a carpet seam that just wouldn’t hide? Let me know about your flooring triumphs and tragedies in the comments below!