

I’ll never forget the sinking feeling in my gut when my brand-new master bedroom carpet started making a crackling noise every time I walked toward the closet. It wasn’t just a sound; I could feel something gritty and brittle beneath the soles of my feet. At first, I beat myself up, thinking I’d completely botched my own carpet install secrets by choosing a subpar cushion. I spent weeks convinced I had some kind of phantom sand leak coming from the slab. I was frustrated, embarrassed, and certain I’d have to rip the whole thing out.
That Annoying Crunching Sound in Your Living Room
Most of the time, that crunch isn’t actually dirt at all. It’s the sound of your flooring’s internal organs failing. I made the classic mistake early on of thinking if the carpet looked good on top, the stuff underneath didn’t matter. Big error. Today, I’m going to walk you through exactly why your floor is talking back to you and, more importantly, how to tell if you need a total tear-out or just a localized fix. We’re going to look at everything from age-related breakdown to the sugar-crystal effect that happens after a spill. Have you ever stepped on a specific spot and felt like you were crushing tiny eggshells? If so, you aren’t alone. It is a common grievance for homeowners, but it usually points to a very specific set of failures.
Is This Really Just a Sign of a Cheap Installation?
You might be worried that your contractor cut corners or that you’re looking at a massive replacement bill. It’s a scary thought. But here’s the reality: even high-end pads have a lifespan. According to the Carpet and Rug Institute, the cushion is essentially the soul of the carpet, and when it breaks down due to oxidation or moisture, it loses its elasticity and starts to crumble into a fine, crunchy powder. This is often one of those flooring installation mistakes to avoid where people try to save fifty cents a yard on padding only to pay for it in comfort later.
The Culprits Behind the Crackle
In my early DIY days, I once installed a beautiful frieze over a budget rebond pad in a sunroom. Within two years, it felt like walking on a beach. The UV rays and heat had literally baked the foam. When polyurethane foam is exposed to high heat or consistent bottoming out—where the pad is too thin for the weight it carries—the chemical bonds break. It goes from being a bouncy sponge to a brittle sheet of plastic. This often happens because the carpet for a cozy living space needs a specific density to survive. If you have pets, the crunching might actually be dried salts and crystals left behind from old accidents that have worked their way deep into the padding. Does your crunch happen in one specific spot where a spill once occurred, or is it everywhere?To truly diagnose the crunch, you have to get hands-on. Start by picking a corner near where the sound is loudest. Use a pair of pliers to gently lift the carpet off the tack strip. If the carpet feels stiff or resistant, you might be dealing with the aftermath of a poor stretch. I remember helping a neighbor who had this exact issue; we pulled back the rug and found the padding had essentially fused to the concrete. It was a classic example of what happens when you skip the concrete moisture test that saves your vinyl floor—or in this case, his carpet. Moisture had wicked up, reacted with the pad’s adhesive, and created a brittle sugar layer. If you see white or yellow powder, your pad has oxidized. If it’s black or gray and slimy, you have a mold problem that requires immediate removal. 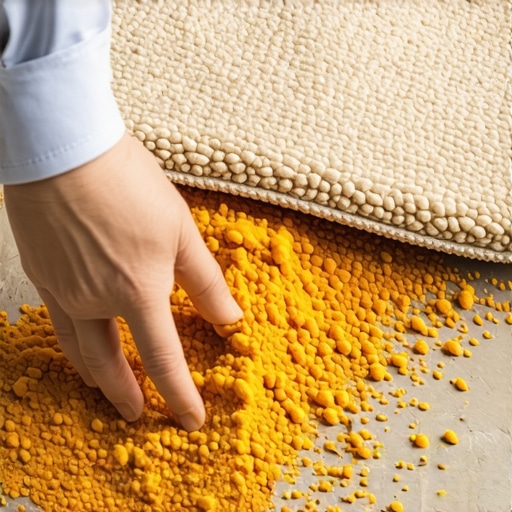
Follow These Steps to Silence the Floor
Once you’ve identified the localized death zone of your padding, you have to decide if it’s worth a patch or a full replacement. For a small area, you can cut out the offending section of pad using a utility knife. Make sure you don’t cut into the subfloor. I once went too deep and nicked a radiant heat line—talk about an expensive afternoon. When you’re ready to put things back, you need to ensure the new pad matches the thickness of the old one perfectly.
Select the Right Replacement Materials
Don’t just grab the cheapest scrap from the hardware store. You need a pad that matches the density of the surrounding floor. If you are working on a basement, choosing the right tack strip for concrete subfloors is just as vital as the pad itself. If the strips are rusted, they won’t hold the tension when you try to kick the carpet back into place.
Avoid the Dreaded Bubbles After the Fix
One of the most common issues after a DIY repair is a floor that looks like a rolling sea. Learning how to fix a bubbling carpet without calling a professional usually starts with proper tension. You’ll need a knee kicker to reset the carpet onto the tack strips. Be careful here; the knee-kicker mistake that ruins carpet tension is over-striking, which can actually tear the carpet backing or pull the strips right out of the floor. You want a firm, even stretch that mimics the perimeter tension trick for wrinkle-free carpets. If the crunching sound is accompanied by a hollow thud, you might actually have subfloor issues. This is why pros look for 4 subfloor prep mistakes that make new vinyl planks sound hollow even when they are installing soft goods. A dip in the plywood or concrete can cause the pad to bridge the gap, creating a pocket of air that snaps and pops when you step on it.
There’s a prevailing wisdom in the flooring world that if a half-inch pad is good, a three-quarter-inch pad must be pure luxury. I used to believe this too, until I saw a high-end frieze literally pull away from the walls because the pad was so soft that the carpet had nowhere to anchor. This is one of those carpet seaming errors that show up in bright daylight—as the carpet flexes too much, the seams are under constant vertical stress they weren’t designed to handle. In fact, according to the IICRC S100 standards for professional carpet maintenance, over-padding can lead to delamination, where the secondary backing of the carpet separates from the primary. It’s not just uncomfortable; it’s destructive to your investment.
The Waterproofing Lie That Ruins Modern Showers
When we move into the bathroom, the mistakes get even more expensive. People spend thousands on shower renovation ideas but ignore the chemistry of the bond. I often see DIYers using the wrong notch size, which is the trowel size mistake that ruins your shower tile bond. They think ‘more thinset equals more security.’ It’s actually the opposite. Too much thinset shrinks as it cures, pulling the tile away from the waterproofing membrane and creating those hollow pockets where mold loves to hide. You want coverage, not depth.
Even the finishing touches like trim are riddled with myths. Most homeowners think you just nail it wherever it hits the wall and the wood is thickest. But the reason why you should never nail baseboards into the bottom plate only comes down to seasonal expansion and the natural ‘settling’ of your home. If you don’t hit the studs, your trim will eventually pull away, leading to that annoying gap where your baseboard caulk starts cracking and peeling.
Why Does My Shower Pan Feel Like It’s Shifting?
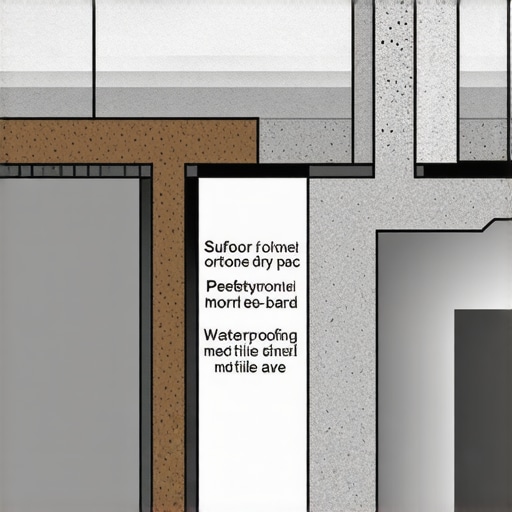
If you feel a slight ‘give’ under your feet in the shower, you’re likely witnessing a failed mortar bed. This often happens when installers skip the dry pack secret for a perfectly sloped shower floor and instead try to use a self-leveling compound that wasn’t rated for constant moisture. Over time, that material softens and compresses. The fix usually involves a complete tear-out, but you can prevent it by ensuring your base is rock-solid before the first tile is even buttered. We always look at baseboard trends in 2025 for aesthetic inspiration, but the true longevity of a room is built in the layers you’ll never see. Have you ever fallen into this trap of prioritizing the ‘look’ over the sub-layer? Let me know in the comments.
People often ask me if they need a truckload of heavy machinery to get a professional finish. Honestly? Most of my favorite ‘hacks’ involve simple hand tools used with a bit of finesse. For instance, I never start a flooring job without my favorite non-marring mallet. Mastering the dead blow hammer secret for flat floor seams completely changed the way I look at vinyl and laminate. It isn’t about brute force; it is about the kinetic energy that seats the locking mechanism perfectly without shattering the delicate tongue. For those tricky wall transitions where nothing is ever truly square, the scribing tool every diyer needs for tight baseboards is my go-to for making sure a wavy wall doesn’t ruin the room’s aesthetics. If you are struggling to find a solid anchor point for your trim, the magnet hack for finding wall studs behind thick baseboards is a total game-changer, especially in older homes where the plaster layers are thicker than a dictionary.
How do I keep my floors and shower looking new for a decade?
The secret isn’t just in the cleaning—it is in the consistent monitoring of your home’s environment. According to the National Wood Flooring Association (NWFA) technical guidelines, maintaining a consistent relative humidity between 30% and 50% is the single most important factor in preventing catastrophic gaps and buckling. This is why I always preach the penny gap rule for installing laminate near drywall. It gives the floor the necessary room to breathe as seasons change. For existing wear and tear, you don’t always need a full sand-and-refinish which can be messy and expensive. I have had incredible luck with the no-sanding fix for scuffed hardwood floor finishes, which can revive a dull room in a single afternoon. In the bathroom, you have to keep an eye on your joints. If you see movement, jump on it immediately. I have often found that your baseboard caulk starts cracking long before you see visible water damage, serving as a vital ‘canary in the coal mine’ for your wet areas.
The Future of Home Surfaces and Smart Sensors
Looking toward the future, we are seeing a massive shift toward ‘smart’ sub-layers and high-performance materials. By transforming your flooring with top trends in installation for 2025, you will likely start seeing integrated moisture sensors that communicate directly with your smartphone. We are moving away from just ‘pretty’ surfaces toward ‘intelligent’ ones. This means more breathable materials and antimicrobial underlayments that prevent the exact crumbling pad issues I mentioned earlier. I predict that within the next five years, the standard for a spa-like shower experience will include built-in leak detection within the dry pack itself. Before you wrap up your next bathroom project, I challenge you to try the blue tape secret for professional shower silicone lines every time. It is the small, disciplined details like this that create the difference between a typical DIY project and a high-end custom finish that stands the test of time.
Looking back at my early days in the trades, I realized that most of my biggest headaches didn’t come from the surface I was looking at, but from the shortcuts I took in the layers I couldn’t see. The crunching sound under your carpet or the slight give in a shower floor are rarely just ‘old house quirks’; they are signals that the underlying chemistry is failing.
The Hard Truth About Those Sub-Floor Shortcuts
Through years of troubleshooting, I have found that the difference between a floor that lasts five years and one that lasts fifty comes down to these fundamental shifts in perspective:
- The Padding is a Support Member, Not Just a Cushion: I used to think the thickest pad was the best, but I learned that density matters more than height. A soft, airy pad allows too much vertical movement, which eventually shreds the carpet’s secondary backing.
- The Invisible Salt Trap: Many homeowners don’t realize that old spills leave behind hygroscopic salts. Even after the liquid is gone, these crystals pull moisture from the air, causing that recurring brittle crunching sound even in dry weather.
- Chemical Bonds vs. Mechanical Gravity: In wet areas, relying on the weight of the tile is a recipe for disaster. If your thinset isn’t properly keyed into the substrate, the bond is purely mechanical and will eventually shear under thermal expansion.
The Gear That Separates Rookies From Pros
If you want to achieve a flawless finish, stop looking at the decorative aisle and start investing in the tools that ensure structural integrity. To avoid future issues, I always recommend following a step-by-step flooring installation from planning to perfect finish. Beyond the basics, these are my non-negotiables:
- The Pinless Moisture Meter: This is the only way to know if your subfloor is actually ready for a pad. Don’t guess; the cost of the tool is a fraction of the cost of a mold remediation.
- A High-Quality Knee Kicker: It’s not just for corners; it’s for ensuring the tension is consistent across the entire plane.
- Contour Gauges and Scribes: For those who need to know how to fix baseboard gaps without replacing the trim, these tools allow you to mirror the wall’s imperfections for a tight, professional fit.
#IMAGE_PLACEHOLDER_E#
The Confidence to Own Your Renovations
It is easy to feel overwhelmed when your home starts making noises or showing cracks, but remember that every failure is just an opportunity to understand your house better. Whether you are tackling a upgrade your bathroom the ultimate shower renovation guide or simply replacing a worn-out bedroom rug, focus on the prep work. When the foundation is solid, the rest of the project naturally falls into place. Your home is an investment in your comfort, so don’t be afraid to pull back the layers and fix the root cause of the problem. A quiet, solid floor is the hallmark of a job well done. Have you ever discovered a surprising ‘secret’ hidden under your old flooring during a tear-out? Let me know in the comments below.