

I stood there, knees aching, staring at a $1,200 pile of Luxury Vinyl Plank (LVP) and a fieldstone fireplace that looked like it had been designed by a chaotic mountain goat. My straight-edge planks looked ridiculous next to those irregular, bulging stones. In my early days, I would have just cut a straight line, filled the two-inch gap with a mountain of caulk, and hoped no one noticed. But deep down, I would have known. You would have known, too. The texture of natural fieldstone is a nightmare for a straight saw blade. Each bump and dip is a unique challenge. In my first attempt at this years ago, I did not even know what a scribe was; I was just trying to trace the stone with a pencil held at a weird angle. It was a mess. That is why I am here—to make sure your living room does not end up looking like a patchwork quilt of mistakes. [image_placeholder]
Don’t Let Your Fireplace Hearth Ruin a Great Floor
Getting LVP to hug a stone hearth is not just about aesthetics; it is about avoiding the most common flooring installation mistakes that turn a weekend project into a long-term eyesore. When I first tried this, I thought a tape measure and a ‘good eye’ would suffice. Spoiler alert: they did not. I ended up with gaps so wide they looked like canyons. Scribing is the only way to get that professional ‘built-in’ look where the floor seems to grow right out of the stone. It is the difference between a job that looks like a DIY disaster and one that has the neighbors asking which pro you hired. I want to save you from that sinking feeling I had when I realized I had ruined three expensive planks in twenty minutes. A clean scribe line is like a magic trick; it makes the stone and the floor look like they were born together, creating a seamless transition that lasts for years.
Is Scribing Really Necessary for a DIY Job?
You might be thinking, ‘Can’t I just use a transition strip?’ or ‘Will anyone actually see that gap?’ The truth is, your hearth is the focal point of the room. A sloppy fit here screams ‘amateur hour.’ Beyond the looks, you have to respect the perimeter expansion gap for vinyl planks. If you cut it too tight, your floor will buckle when the temperature changes. If you cut it too loose, it looks unfinished. According to industry data from the World Floor Covering Association (WFCA), improper installation around fixed objects like fireplaces is a primary driver for floor failure in residential homes. We are going to solve this today by using a simple compass and a bit of patience. By the time we are done, you will be using the rubber mallet rule to click those perfectly shaped planks into place. Have you ever looked at a stone hearth and wondered if you should just stop the floor three inches away and call it ‘modern art’?
Position the Plank Before You Trace
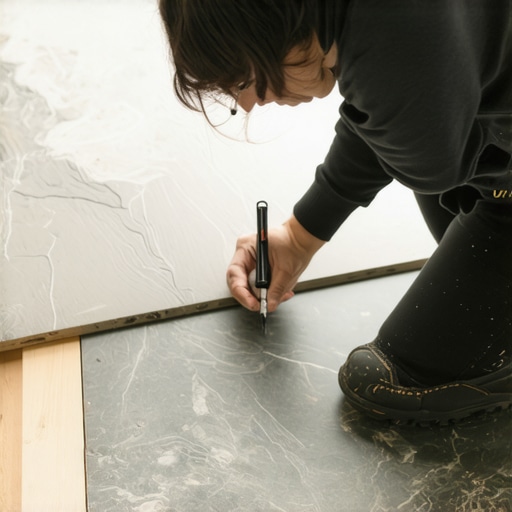
The secret to a perfect scribe starts with positioning your ‘victim’ plank. Do not try to eyeball it from a distance. You need to lay your plank directly over the last installed row, perfectly aligned as if it were the next piece in the sequence. Think of this like a trial run. If you are following a step-by-step flooring installation plan, this is where precision outweighs speed. Once the plank is seated, you’ll notice it overlaps the stone hearth. This overlap is your canvas. I learned this the hard way on a job in 2018 with a granite hearth that had more ‘character’ than I could handle. I didn’t overlap correctly, and my lines were skewed from the start. Secure the plank with a bit of painter’s tape so it doesn’t shift while you are working, or you will find yourself with a gap that no amount of caulk can save.
The Compass Technique That Never Fails
Now, grab a standard carpenter’s compass—the kind that looks like a high school geometry tool but sturdier. Set the metal point against the deepest recession of the stone and the pencil tip on the surface of your LVP plank. This distance is your ‘offset.’ As you drag the metal point along the irregular face of the rock, the pencil will mirror those exact movements onto the vinyl. It is like tracing a mountain range onto a flat map. Ensure you keep the compass perfectly perpendicular to the floor. If you tilt it, your line will be inaccurate. This is essentially a variation of the block scribe secret used for wall trim, adapted for the horizontal plane of your floor. The goal is a 1:1 replica of the stone’s footprint.
#IMAGE_PLACE_HOLDER_B#
Control the Blade for Jagged Edges
Once your line is drawn, it’s time to cut. For LVP, a jigsaw with a fine-tooth blade is your best bet, though some pros prefer a steady hand with a heavy-duty utility knife. If you use a jigsaw, cut on the waste side of the line—you can always shave more off, but you can’t put it back. When I was working on that jagged cabin fireplace, I rushed the cut and the blade ‘chattered’ against the rigid core, leaving a jagged mess. Slow down. Think of the blade as a surgeon’s scalpel. You want a smooth, continuous edge that respects the perimeter expansion gap for vinyl planks. If the stone is severely undercut, you might even need to back-bevel the cut slightly so the top edge of the vinyl sits flush against the stone while the bottom has room to breathe.
Locking the Piece into the Puzzle
With the piece cut, it is time for the moment of truth. Slide the plank toward the hearth. It should hug the stone like a glove. If there is a high spot hitting a rock, use a wood rasp or a sanding block to fine-tune the edge. This isn’t just about the hearth; you also need to ensure you know how to stagger vinyl plank ends so that the short joints aren’t lining up too close to this complex cut, which could weaken the floor’s integrity. Once it fits, use the rubber mallet rule to gently but firmly tap the plank into its locking mechanism. When that final ‘click’ happens and you see the vinyl meeting the stone with zero visible gaps, the satisfaction is better than any cup of coffee. You’ve just turned a focal point eyesore into a masterclass in craftsmanship.
Most DIYers think that once they’ve mastered the physical act of scribing, the battle is won. But here is the contrarian truth: a perfect fit is actually your worst enemy if you don’t account for movement. Everyone says you want that plank to ‘hug’ the stone, but in my experience, a literal hug is a recipe for a buckled floor. Vinyl is a living, breathing material in the sense that it reacts to thermal changes. I have seen countless ‘perfect’ scribe jobs fail because the installer forgot to leave a microscopic buffer for perimeter expansion gap for vinyl planks. If the floor has nowhere to go when the sun hits that living room in July, it will lift right off the subfloor. You need the scribe to be visually tight but physically free.
Stop Sacrificing Expansion for a Tight Fit
The ‘Oops’ factor that catches even seasoned pros is the mistake of ‘pinning’ the floor with baseboards or heavy hearth stones. If you scribe your LVP and then shove a heavy baseboard down on top of it with high-pressure nails, you have effectively locked that floor in a cage. This is especially true when working with baseboard styles that elevate your interior design; you want them to look heavy and substantial, but they shouldn’t act as an anchor. The National Wood Flooring Association (NWFA) states that nearly 60% of flooring failures are directly related to improper expansion allowances or moisture-related dimensional changes. To avoid this, I always use the ‘business card’ rule: the scribe should be close enough to look seamless but have enough clearance to slide a card through before you add a flexible sealant.
Is It Actually Possible to Grout a Scribe Line?
An advanced reader might ask if they can use grout to fill the tiny void between the stone and the LVP. The short answer: absolutely not. Grout is rigid; LVP is flexible. Instead, use a color-matched 100% silicone. Unlike the advice found in the painter caulk vs silicone guide for baseboards, which often favors caulk for wood-to-wall joints, stone-to-floor joints require the high elasticity of silicone to survive the seasons. If you use a rigid filler, you’ll find it cracking and popping out within six months. This is the same principle I apply when teaching the block scribe secret for baseboards on brick walls—you are creating an illusion of a perfect union while maintaining mechanical independence.
Why Your Mitered Corners Gap When Winter Hits
Another nuance people overlook is the ‘seasonal shrink.’ If you are installing your floor or baseboards in the humid summer, your materials are at their maximum size. When winter arrives and the heater kicks on, everything pulls back. This is why your baseboard miters keep gapping in the winter. To combat this, I recommend ‘pre-conditioning’ your materials in the room for at least 72 hours. Also, consider the the butt joint vs scarf joint debate for baseboards; a scarf joint provides much more surface area for glue, which helps the joint stay together even when the wood wants to crawl apart. Precision isn’t just about what it looks like today; it’s about how it holds up three years from now. Have you ever fallen into the ‘too tight’ trap only to see your floor buckle later? Let me know in the comments.
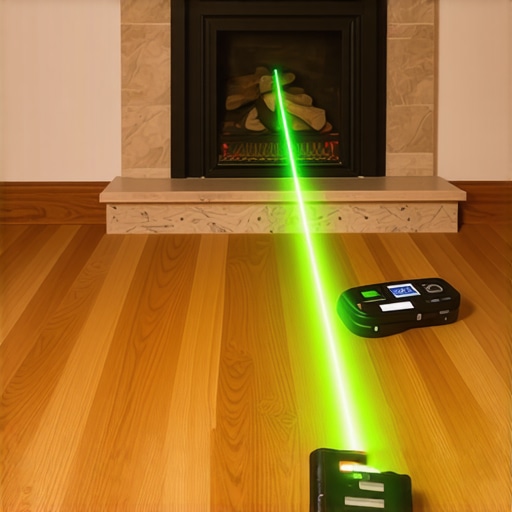
I’ve spent thousands on fancy power saws, but the most important tool in my kit for a perfect finish is actually a high-end laser. If you are still relying on a chalk line for your layout, you are living in the past. I use a green-beam cross-line laser for everything from setting my first row of LVP to ensuring my baseboards are dead level across a wavy subfloor. It’s the core of the laser level hack for straight tile rows, but it works just as well for wood and vinyl. Another ‘must-have’ is a heavy-duty contour gauge. When the scribe compass feels too finicky for complex moldings, a 20-inch contour gauge lets you press pins against the stone and lock in the shape instantly. This level of precision is what separates a ‘good enough’ job from one that looks like a high-end architectural feature designed by a pro.
How do I keep my custom flooring installation from degrading over time?
The work doesn’t stop once the last plank clicks or the last nail is driven. Maintenance is where most DIY enthusiasts fail, leading to premature wear. For LVP and hardwood, moisture is the primary enemy, but friction from grit is a close second. I always tell my clients to ditch the heavy steam mops; they force moisture into the joints, which eventually leads to the very bubbling and warping I want you to avoid. Instead, strictly follow the microfiber mist rule for cleaning matte floors. It’s about using the absolute minimum amount of liquid. If you’ve recently tackled an upgrade your bathroom project, the same logic applies to your grout—seal it once a year without excuses. According to the Tile Council of North America (TCNA) Handbook, maintenance cycles are the single biggest factor in the lifespan of any wet-area installation. Neglect the sealer, and you’ll be researching shower repairs far sooner than you anticipated.
The Digital Shift in DIY Craftsmanship
We are rapidly moving toward a world where your smartphone handles the heavy lifting of layout and material estimation. I’ve started using LIDAR-based apps to create 3D maps of rooms before I even buy my first box of materials. This tech helps me visualize how baseboard trends in 2025 will look in a virtual space, ensuring the scale matches the room’s volume perfectly. In the next few years, I predict we’ll see augmented reality overlays that show you exactly where to place your carpet install seams to minimize waste and visibility. It’s an exciting time to be a builder, but the fundamentals of a step-by-step flooring installation remain the same: prep, precision, and patience. If you’ve been on the fence about investing in a laser level or a high-quality scribe, go buy one today. It will change the way you see your walls and floors forever and give you the confidence to tackle those jagged hearths.
Hard-Won Truths from My Worst Flooring Disasters
Over the years, I’ve learned that the most beautiful flooring installation isn’t the one that looks perfect on day one, but the one that still looks perfect five years later. One lightbulb moment for me was realizing that your scribe line is only as good as your lighting. If you are working in the shadows of a dim living room, you will miss the subtle undercuts of the fieldstone. I always bring in a high-lumen work light to wash the stone in brightness before I even touch my compass. Another lesson? Don’t be afraid to waste one single plank to make a ‘tester’ template. It is much cheaper to sacrifice one board than to realize you’ve botched the final piece of a $1,200 project. I’ve seen too many people fall for flooring installation mistakes by rushing this final, critical step. Remember, the stone isn’t moving, but your floor definitely will, so give it that tiny bit of breathing room we discussed.
#IMAGE_PLACEHOLDER_E#
The Gear That Makes Me Look Like a Pro
If you want to move beyond the ‘weekend warrior’ status, you need to invest in tools that offer repeatable precision. My go-to is a heavy-duty Starrett carpenter’s scribe; it doesn’t flex like the cheap plastic versions you find at big-box stores. I also never start a complex project without consulting the NWFA technical manuals, which are essentially the ‘rulebook’ for high-end craftsmanship. For those looking for a comprehensive roadmap, I always recommend checking out a step-by-step flooring installation guide to keep your workflow organized. And for the final finish, don’t forget the blue tape trick when you’re applying that flexible silicone—it keeps the mess off your beautiful new LVP and creates a crisp, professional bead against the irregular stone.
Your Hearth is Waiting for a Masterpiece
Stepping back and seeing a floor that flows seamlessly into the jagged teeth of a stone fireplace is one of the most rewarding feelings in the trades. It’s no longer just a floor; it’s a custom architectural feature that adds real value to your home. Don’t let the complexity of scribing intimidate you. With the right tools and a patient hand, you can achieve a result that rivals any high-end professional job. As you look toward your next project, remember that flooring installation is a craft that rewards those who pay attention to the details others ignore. You have the knowledge, the techniques, and the vision to make it happen. For more inspiration on how to level up your space, take a look at these expert flooring installation tips for 2025 to stay ahead of the curve. Now, go grab your compass and start tracing!
Have you ever tried to scribe around a fieldstone fireplace and ended up with a gap you could lose your keys in, or did it fit like a glove on the first try? Let me know in the comments below!