

I’ll never forget the sinking feeling in my gut when I pushed that first piece of baseboard against my exposed brick chimney during a weekend remodel. It wasn’t even close. There was a gap big enough to swallow a handful of change, and the board looked like a rigid, straight line trying to hug a rugged mountain range. In my desperation, I tried to ‘fix’ it with a massive bead of caulk—a classic rookie move that ended up looking like I’d smeared white toothpaste all over the room. It was an absolute mess, and it taught me the hard way that no amount of filler can hide a poor fit. I realized then that my baseboards makeover was going to be a total failure unless I learned the art of following the masonry’s unique profile. Today, I’m sharing the exact technique that saved my sanity and my trim work. [image_placeholder_1]
Stop Fighting Your Brick Walls and Start Scribing Them
Most homeowners think they need a fancy, expensive tool or a master’s degree in geometry to get a tight fit against brick. They don’t. The real ‘secret’ is a simple, scrap piece of wood—what I call the block-scribe. Whether you are dealing with a historic fireplace or a new feature wall added during a flooring installation, brick is notoriously uneven and rarely plumb. In fact, professional masonry standards often allow for significant surface variations that make standard carpentry feel impossible. According to the Masonry Institute of America, allowable tolerances for brickwork can still leave a surface looking ‘wavy’ to the naked eye, which is why a straight board always looks hopelessly out of place. I spent years overcomplicating this process. I bought expensive compasses that slipped and plastic profile gauges that never seemed to hold their shape quite right. But once an old-timer showed me the block-scribe method, everything clicked. We are going to solve that ‘gaping hole’ problem today so your trim looks like it naturally grew out of the brick. Have you ever tried to hide a gap with caulk only to have it crack and look terrible just three months later?
Is a homemade block actually reliable enough for your home?
It sounds almost too simple to be true, but that’s the beauty of the block-scribe. While a specialized scribe tool trick for baseboards against stone walls is great, a custom wooden block provides a stable, flat surface that glides over the high points of the brick while your pencil marks the exact ‘valleys’ onto your baseboard. It’s essentially creating a physical map of the wall’s chaos. If you’ve ever wondered why your baseboards look crooked even when you know the floor is flat, it’s almost always because the wall is pushing the trim out in irregular intervals. Learning how to scribe baseboards to a curved wall surface or a jagged brick edge is the difference between a DIY job and a professional finish. I made the mistake of thinking my walls were ‘straight enough’ for far too long, and I have the dusty scrap pile to prove it. Now, let’s get into the nitty-gritty of how to prep your board for the perfect cut.
Master the Block Scribe in Three Simple Steps
You’ve got your board, your pencil, and your scrap wood. Now it’s time to stop guessing and start executing. Think of the brick wall as the ‘difficult’ dancer and your baseboard as the partner that has to mirror every weird move. If you skip the prep, your baseboards makeover will look amateurish before you even fire up the saw. This process is about physical precision, not just visual estimation. You are essentially taking the chaos of the masonry and translating it into a language the wood can understand.
Get Your Board into the Danger Zone
First, place your baseboard flat against the floor and push it as tight as possible against the brick. It’s going to hit a ‘high point’ on the brick and stop, leaving a huge, ugly gap everywhere else. Use a few pieces of blue painter’s tape to hold it vertically against the wall if you do not have a helper to keep it steady. This is the same logic used during a complex flooring installation where you have to account for fixed, unmovable obstacles. You need that board to stay perfectly plumb while you mark it, or the angle of your scribe will be slanted, making the gap even worse once you try to nail it in. I once tried to hold a board with one hand while scribing with the other; the board slipped halfway through and I ended up cutting a line that looked like a heart rate monitor. Use the tape.
Trace the Wall’s DNA with a Wooden Block
Grab a scrap block of wood that is slightly wider than the largest gap between the board and the brick. Hold your pencil firmly against the side of the block, keeping the tip perfectly level. As you slide the block up and down the uneven brick, the pencil tip transfers those exact bumps onto the face of your baseboard. I learned this the hard way on a fireplace hearth in a historic remodel where the brick was so rough it looked like a stack of loose potatoes. I rushed the first scribe and the board ended up 1/4 inch too short because the block slipped on a piece of protruding mortar. When you use the scribe tool trick for baseboards against stone walls, you aren’t just drawing a straight line; you’re drawing a physical map of the wall’s imperfections. 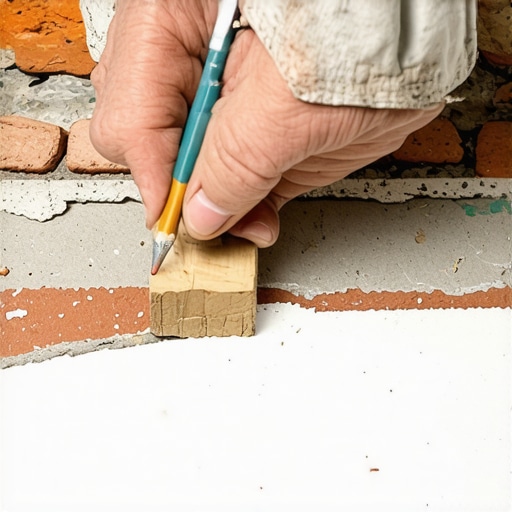
Lean into the Back Bevel for a Flawless Edge
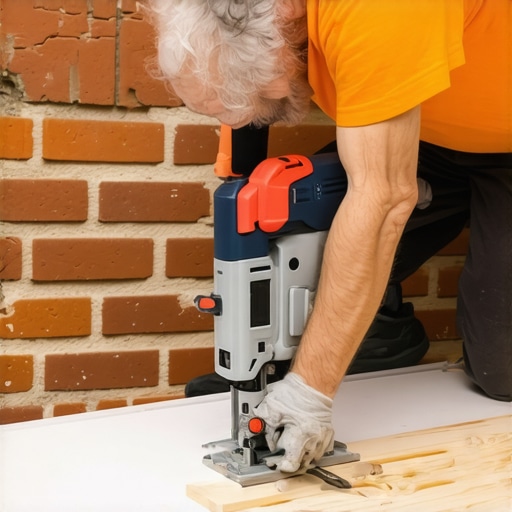
Once your line is drawn, don’t just cut straight down with a jigsaw. This is where most DIY projects fail at the finish line. You need to use the back-bevel move for tight baseboard miters but apply it to your scribed edge. Tilt the base of your jigsaw to a 30 or 45-degree angle so you are cutting ‘under’ the line toward the back of the board. This removes the bulk of the wood from the back while keeping the finished front edge sharp and crisp. It allows the visible edge of the wood to tuck tightly into the mortar joints without the back of the board hitting the wall first. It’s the same level of precision required when learning how to scribe a baseboard to a textured stone wall. If the board feels like it is binding against the brick when you test-fit, it usually means you didn’t bevel it deep enough. I once spent two hours hand-sanding a single board in a cramped hallway because I ignored the angle—save your elbows and get the bevel right on the first pass with the saw.
Everyone tells you that a gap between your trim and the brick is a simple carpentry failure, but I’d argue the real failure happens after you’ve made the perfect cut. In my experience, the biggest mistake is the ‘perfectionist’s trap.’ Most DIYers—and even some seasoned pros—obsess over making a scribe line that matches the brick like a puzzle piece. However, if you make that fit too tight without enough ‘relief’ behind the wood, the natural expansion of your home will turn that beautiful joint into a pressure point. When the house settles or humidity spikes, a hyper-tight scribe has nowhere to go but out, eventually popping your nails or cracking the board itself. It’s a nuanced balance: you want the appearance of a seamless fit, but you need the structural intelligence to leave room for the wood to breathe.
Why your scribe line isn’t the whole story
The contrarian truth about working with irregular surfaces is that the back of the board matters just as much as the front. I’ve seen countless baseboards makeover projects fail because the installer didn’t understand the ‘shadow line’ effect. If you don’t execute a deep enough angle when following the back-bevel move for tight baseboard miters, any tiny pebble or mortar crumb behind the board will prevent the face from sitting flush. It’s like trying to close a door with a rock in the hinge. I once spent an entire afternoon troubleshooting why your baseboards look crooked against a fireplace, only to realize a 1/8-inch mortar burr was pushing the entire six-foot board out of alignment. Always carve out more material from the back than you think you need.
How does masonry pH and dust affect your long-term finish?
This is where we get into the truly advanced stuff that separates the amateurs from the experts. Brick is incredibly porous and often has a high alkaline content that can play havoc with adhesives and caulks. If you are finishing a flooring installation and transitioning to a brick hearth, the brick dust left behind acts as a bond-breaker. According to the Tile Council of North America (TCNA), substrate cleanliness is the single most critical factor in adhesive longevity. If you don’t thoroughly vacuum and wipe down the masonry with a damp cloth before the final fit, your caulk will peel away from the brick within six months, no matter how good your scribe was. This same principle applies to carpet install secrets; if the tack strips or transitions are near masonry, dust is your worst enemy. The ‘Oops’ factor here is assuming that ‘clean enough’ actually is. It never is.
You also need to be wary of the moisture trap. Brick can hold a surprising amount of humidity. If you install kiln-dried baseboards tight against a damp exterior brick wall without a back-seal, the wood will cup. I always recommend back-priming the scribed edge with a quick-drying sealer to prevent the trim from sucking moisture out of the masonry like a sponge. This prevents the edges from curling away from the wall over time, ensuring that the caulk and paint sequence you worked so hard on remains intact for years. Have you ever fallen into this trap and watched your perfect joints open up after the first winter? Let me know in the comments.
If you are still using a top-handle jigsaw for these intricate cuts, you are making life harder than it needs to be. Personally, I swear by a barrel-grip jigsaw because it lowers your center of gravity and gives you significantly more control over those tiny, jagged movements required for a brick profile. When I was finishing a recent baseboard styles that elevate your interior design project, the barrel grip was the only thing that kept my hand steady enough to track the grout lines. It is all about the tactile feedback; you can feel the blade resisting the wood grain, which is crucial when you are performing the zero-clearance cut for flooring around stone fireplaces. Standard jigsaws tend to vibrate too much, which leads to ‘chatter’ marks on your finished edge that require hours of sanding. 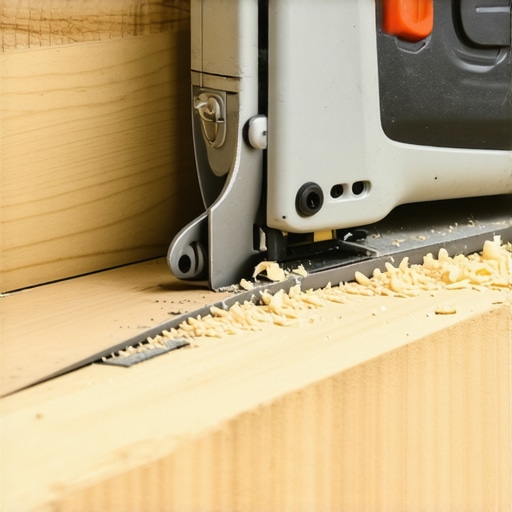
How do I maintain my scribed baseboards over time?
Maintenance starts with the realization that wood is a living material. According to technical standards from the National Wood Flooring Association (NWFA), wood will naturally expand and contract based on the Relative Humidity (RH) of your home, even when it is nailed to a stationary brick wall. To keep your scribe looking tight, you must maintain a consistent indoor environment. If you notice a gap opening up in the dry winter months, do not reach for the caulk immediately. Wait for the humid summer months to see if the wood returns to its original position before making permanent repairs. For those managing transitions between different zones, like moving from a masonry hearth to a plush bedroom, knowing how to choose the right carpet for a cozy living space helps because the carpet pile can effectively hide minor seasonal shifts in the baseboard height. I also recommend a yearly inspection—simply press against the board; if it creaks or shows movement, it might be time to employ the spring miter secret for tight crown and baseboard corners to reinforce the joints. Looking ahead, I predict a massive shift toward digital templating in the next few years. We are already seeing mobile apps utilize LiDAR technology to ‘scan’ uneven walls and generate digital cut-files. While this technology is exciting, it currently lacks the nuance of a human eye. For now, nothing beats the accuracy of a sharp pencil and a steady hand. My challenge to you for your next project is to try the ‘back-bevel’ cut at a much steeper angle than you think you need—aim for a full 45 degrees—and watch how much more forgiving the fit becomes.
Three Brick Walls I Hit Before Mastering This Scribe
Through years of trial and error, I discovered that precision isn’t about being perfect; it’s about being smart. First, never assume the brick is vertical. Even if your flooring looks level, the masonry might lean or bulge in unexpected places. Second, the mortar joints are your biggest hurdle; if you don’t scribe deep enough into those recesses, the board will look like it’s hovering rather than hugging the wall. Third, I learned that relying on caulk to hide a half-inch gap is a recipe for disaster. The caulk will inevitably shrink, pull away, and leave a dark, dusty line within weeks. Real quality comes from that physical wood-to-brick contact that only a true scribe can provide. [image_placeholder_conclusion]
Tools That Make the Jagged Edges Feel Like Butter
You don’t need a truckload of machinery, but a few specific items will change your life and your results. I always recommend a barrel-grip jigsaw because it allows you to steer from the base, giving you better vision and control over your scribe line. A mechanical pencil with 0.5mm lead is non-negotiable; traditional carpenter pencils are too thick and lead to blurry, sloppy cuts. Lastly, keep a flexible sanding sponge nearby to soften the edges of your back-bevel. For more inspiration on how to match your trim to your home’s character, check out different baseboard styles that elevate your interior design before you start your next cutting session.
Make Your Home Look Like It Was Built for You
Scribing is one of those skills that separates a basic renovation from a masterfully crafted home. It shows an attention to detail that visitors might not consciously name, but they will certainly feel the moment they walk into the room. When you take the time to marry a rigid piece of wood to an organic brick surface, you’re creating a permanent piece of craftsmanship. Your baseboards makeover is the final finishing touch that ties the whole aesthetic together. Remember to follow the caulk and paint sequence for that final, seamless look. Once you’ve mastered this technique, moving on to the inside corner cope for perfect baseboard installs will feel like a simple walk in the park. Don’t be afraid of those jagged masonry edges; they are just opportunities for a better fit. Have you ever tried to fill a massive brick gap with caulk only to have it fail miserably after a few months? Let me know your worst ‘gap’ stories below!