

I remember standing in my bathroom with a frayed toothbrush in one hand and a bottle of industrial-strength bleach in the other, feeling absolutely defeated. That dark, fuzzy gunk where my white tile met the edge of the bathtub was back for the third time in six months. It felt like a personal failure. I had spent so much energy creating a spa-like shower experience, yet there I was, knee-deep in a losing battle against biology. My big mistake? I used to think the answer was just a stronger cleaner. I even tried filling that gap with grout early on, which cracked almost immediately because tubs shift when they fill with water. That gap is a living, breathing joint, and treating it like a static wall is why the mold keeps winning. Today, I am going to show you the exact method to seal that transition so tightly that moisture—and the mold that loves it—won’t stand a chance. We are moving past the temporary fixes and onto a permanent solution.
Why Your Current Caulk is a Mold Magnet
Most people reach for the cheapest tube of latex caulk at the hardware store, but that was my biggest rookie mistake. These products often shrink as they dry, creating microscopic fissures where water sits. According to the Environmental Protection Agency (EPA), mold spores can begin to grow in as little as 24 to 48 hours when moisture is present. If your sealant isn’t 100% silicone, you are essentially inviting a colony to move in. You need something that stays flexible enough to handle the weight of a full tub without pulling away from the wall. I finally learned that the blue tape secret for professional shower silicone lines is the only way to get a heavy enough bead to stay waterproof while looking like a pro did it. Have you ever spent an entire Saturday morning scrubbing until your knuckles were raw, only to see the mold return a week later?
Is high-end silicone actually worth the extra five bucks?
Many homeowners worry that professional-grade silicone is too difficult to work with because it is incredibly sticky and unforgiving. I used to be terrified of making a mess that I couldn’t wipe away. However, the difference in longevity is night and day. While cheap caulk dries out and peels, 100% silicone remains rubbery and waterproof for a decade or more. If you are tired of constant shower repairs and want a one-and-done fix, investing in the right materials is the only way to go. We are going to stop the rot before it starts by focusing on proper surface prep and the right application technique.
Prep Work Determines How Long Your Sanity Lasts
If you leave even a microscopic film of old soap scum or oil, your new silicone will never bond. It is like trying to stick a piece of tape to a buttered slice of bread. First, you have to mechanically remove every single trace of the old stuff. I use a plastic razor blade to avoid scratching the tub, followed by the toothbrush trick for cleaning stubborn shower grout residue that hides in the corners. Once it looks clean, it is time for the secret weapon: 99% isopropyl alcohol. This does not just clean; it dehydrates the surface. In my early days, I ignored this step and ended up with a mess that peeled off in three days. Now, I wipe it until the rag comes back pristine and the surface feels squeaky to the touch. This level of prep is just as critical as your step-by-step flooring installation from planning to perfect finish because if the foundation is weak, the whole project fails.
Fill the Tub Before You Pull the Trigger
Here is the part most DIYers miss: gravity. A standard bathtub can hold 40 to 60 gallons of water. That is roughly 300 to 500 pounds of extra weight pulling that tub away from the wall. If you seal the gap while the tub is empty, the first time you take a bath, that weight will stretch the fresh silicone to its breaking point. I learned this the hard way after a client called me back two weeks after a remodel because their seal had split right down the middle. Now, I fill the tub halfway with lukewarm water before I even open the caulk gun. This pre-stresses the joint. If you are dealing with why your baseboard caulk is cracking and the flex-fill fix, you know that movement is the enemy of any sealant. Keeping the water in the tub until the silicone is fully skinned over ensures the joint stays compressed and watertight under normal use.
Master the Blue Tape Barrier
Silicone is notoriously messy; it is like trying to manage liquid spiderwebs. To keep it from smearing all over your beautiful tile, use the blue tape secret for professional shower silicone lines. Place one strip on the tub and one on the wall, leaving about a quarter-inch gap between them. When you pull that tape off at a 45-degree angle while the silicone is still wet, you are left with a line so sharp it looks like it was factory-installed. 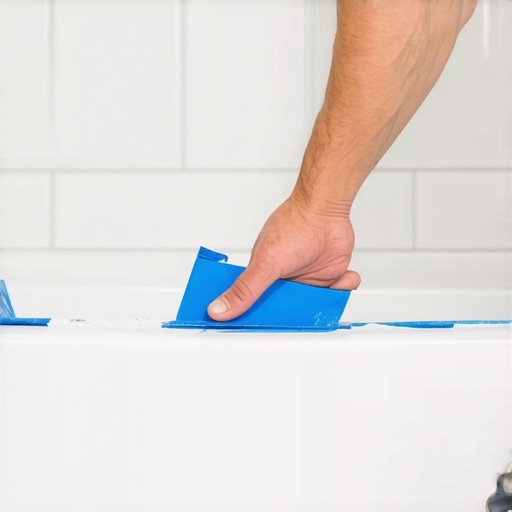 This prevents the jagged, smeared look that ruins an otherwise perfect shower repairs job. I remember the first time I got this right; I actually stood in the doorway and admired the reflection on the silicone bead for a solid five minutes. It is that satisfying.
Tooling the Bead with a Smooth Touch
Once the silicone is down, you have to tool it. Do not use your bare finger; the oils on your skin can actually degrade the bond, and you will end up with silicone stuck under your fingernails for a week. Instead, use a dedicated caulking tool or a gloved finger dipped in a mixture of water and a few drops of dish soap. This allows you to glide over the bead without the silicone sticking to you. It is the same precision required when you are learning carpet install secrets achieving flawless results every time. You want to push the silicone into the joint, not just wipe it over the top. Pressure is what creates the seal, not just the presence of the material.Let’s dig deeper into why so many seemingly professional jobs still fail within the first year. Everyone says that modern high-performance grouts or epoxy-based products are strong enough to bridge the gap between your tub and the wall. In my experience, that is a recipe for disaster. No matter how much polymer additive you pour in, grout remains rigid. A bathtub is a vessel that undergoes massive temperature swings and weight fluctuations. If you use grout at the transition, you are simply ignoring the laws of physics.
Why does even the highest-rated silicone eventually pull away from the wall?
It often comes down to a phenomenon called three-sided adhesion. If your silicone sticks to the back of the joint—the wall framing or the tub flange—as well as the top and bottom, it cannot stretch effectively. When the tub settles or expands, the sealant is pulled in three different directions and eventually tears. To avoid this, I use a backer rod or a bond-breaker tape, ensuring the sealant only bonds to the two surfaces that are moving apart. This level of detail is what separates a weekend warrior from a master, much like how carpet install secrets achieving flawless results every time often hinge on the tension and mechanics you cannot see. Another hidden trap that catches people off guard is the subfloor itself. If your floor isn’t rock solid, the tub will tilt ever so slightly every time you step into it. You can apply the perfect bead, but if the tub is diving because of a weak joist, that seal is doomed. I have seen beautiful bathroom remodels ruined because the installer skipped the moisture meter test every flooring pro uses or failed to address why your new floor is bouncing and the joist fix before setting the heavy cast-iron or acrylic tub. 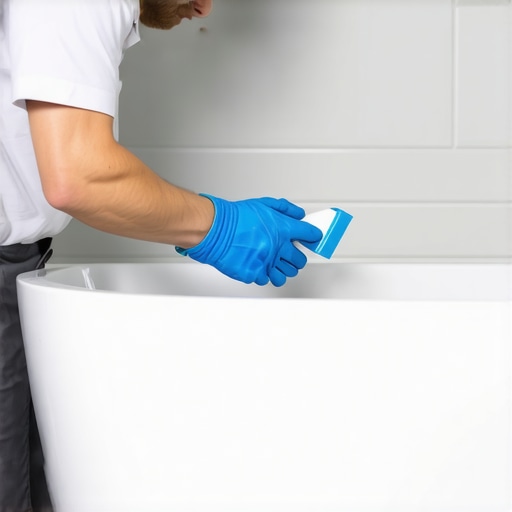 When you are working on the corners, do not just glob the material in and hope for the best. You need the triple point seal for leak proof shower corners to ensure that the vertical wall joint and the horizontal tub joint meet in a way that allows for independent movement. If you aren’t careful, you will end up with a hairline fracture that sucks water behind the wall via capillary action. This is the same reason why your baseboard caulk is cracking and the flex-fill fix is such a common concern; movement is the silent killer of all home finishes. According to the Tile Council of North America (TCNA), any change in plane requires a flexible sealant because buildings are dynamic structures, not static sculptures. Finally, check your drainage before the silicone is even dry. I cannot tell you how many times I have seen homeowners finish a beautiful seal only to realize there is a leak below. Understanding why most diy shower waterproofing fails at the drain is vital; if the drain is leaking, it can rot the subfloor and cause the tub to settle, which breaks your new silicone seal from the bottom up. If you are also updating the room’s trim, ensure you are not committing common flooring installation mistakes to avoid for a seamless look by ignoring the expansion gaps. Have you ever fallen into the trap of thinking a stronger glue or grout would fix a movement problem? Let me know in the comments.
Once you have mastered the application of silicone and the nuances of a waterproof joint, the focus shifts to the long game. I have seen too many people put in the effort for a step-by-step flooring installation from planning to perfect finish only to ignore the project for the next five years. Maintaining a high-moisture environment or a high-traffic floor requires a proactive stance. For instance, in bathrooms, I recommend a quick inspection of every vertical and horizontal joint every six months. If you see even a pin-sized hole, do not wait. Moisture is opportunistic; it will find its way behind the tile and start the slow process of delaminating your thin-set. This is why I always suggest keeping a tube of stop baseboard hairline cracks with this flexible filler or a high-quality silicone on hand for those small touch-ups before they become major structural headaches.
How can I ensure my shower and floors last a lifetime?
Longevity is built on a foundation of regular cleaning and the avoidance of harsh chemicals. I tell my clients to stay away from acidic cleaners on natural stone or porous grout, as they slowly eat away at the seal. Instead, stick to pH-neutral cleaners and keep a squeegee in the shower to reduce standing water. For those with carpet, the secret to a decade of soft steps is regular re-stretching. Over time, heat and humidity can cause fibers to relax, leading to those annoying ripples. If you notice a wave, you might need to revisit the perimeter tension trick for wrinkle-free carpets to pull it back into shape. According to the Tile Council of North America (TCNA) EJ171 standard, flexible sealants are considered maintenance items and should be replaced every 3 to 5 years depending on usage to ensure full protection against water intrusion. This technical standard is the benchmark I use to explain why even a ‘perfect’ job needs an occasional refresh.
The Pro Equipment I Never Start a Project Without
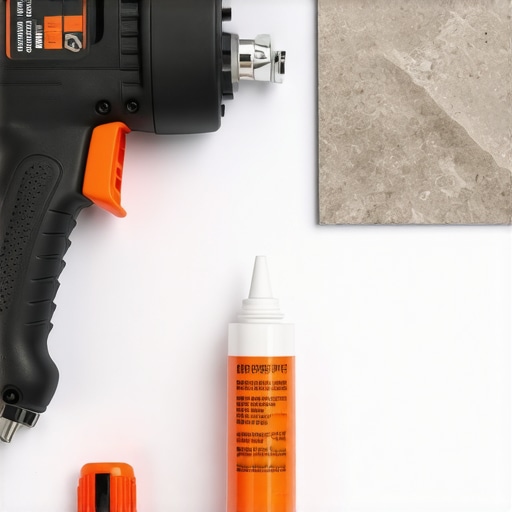
People often ask me if the tool makes the craftsman. My answer? A great tool won’t make you a pro, but a bad tool will definitely make you look like an amateur. I personally refuse to use a standard $5 caulk gun. I use a high-ratio (18:1 or higher) dripless gun because it allows for a smooth, consistent flow of heavy silicone without the hand fatigue that leads to shakes and smears. When it comes to trim, the scribing tool every diyer needs for tight baseboards is my go-to for getting a tight fit against wonky drywall or uneven floors. Using a compass or a dedicated scriber ensures that my baseboard styles that elevate your interior design look like they were custom-molded to the room, rather than just nailed onto it. It is these small mechanical advantages that allow you to scale from a single bathroom to a whole-house renovation without burning out.
Looking ahead, I predict a massive shift toward “smart” subfloors and moisture-sensing underlayments as we move deeper into 2025. We are already seeing the transform-your-flooring top trends in installation for 2025 leaning toward materials that are not just water-resistant, but essentially waterproof from the core out. This doesn’t mean you can skip the caulk, but it does mean your margin for error is getting wider. If you are looking for a project to tackle this weekend, I challenge you to pick up a high-quality scriber and try to fit one piece of baseboard perfectly against an uneven corner; once you see that gap-free fit, you will never go back to filling gaps with giant globs of caulk. For those planning a bigger move, choosing the best carpet types for high traffic areas in 2025 will save you from the cycle of constant replacement.
Hard Truths from a Decade of Damp Bathrooms
Over the years, I have learned that the most expensive sealant in the world cannot fix a lack of patience. One lightbulb moment for me was realizing that humidity is the invisible enemy; even if the tile looks dry, a steamy room from a shower taken an hour prior will compromise the bond. I now strictly follow a twelve-hour ‘dry-out’ rule before even opening my caulk gun. Another epiphany was the ‘hand-path’ check. I used to get halfway through a bead and realize my elbow was hitting the toilet or a towel rack, causing a massive smear. Now, I always perform a dry run with an empty gun to ensure my arm has a clear, unobstructed path for the entire length of the tub.
Lastly, never trust a ‘quick dry’ label if you want the seal to last a decade. While some products skin over in thirty minutes, they don’t reach full structural integrity for twenty-four hours. Rushing to use the shower early is the number one cause of those tiny, invisible fissures where mold eventually takes root. If you are also focusing on your trim work, remember that a baseboards makeover elevate your interior with simple updates is only as good as the prep work beneath it.
The Toolkit That Never Leaves My Side
I do not step onto a job site without a high-ratio (18:1) thrust gun. It provides a level of control that cheap hardware store versions simply cannot match, allowing for a steady, rhythmic flow of silicone. For my corners, I skip the generic plastic spreaders and use a set of specialized silicone profiling tools; they allow for various bead shapes, including the critical concave profile that sheds water most effectively. To get those tight fits where the tub meets the floor, I rely on the back bevel secret for inside baseboard corners to ensure my trim sits flush and looks factory-installed.
I also keep a stash of high-grade 99% isopropyl alcohol in my kit. It is the only cleaner I trust to leave zero residue. If you find yourself staring at a gap that is too wide for standard methods, don’t just fill it with more goop; learning how to fix baseboard gaps without replacing the trim will save you time and money while maintaining a high-end look.
Now Go Build Something That Lasts
The transition between your tub and tile is more than just a decorative line; it is the frontline defense for your home’s subfloor. By applying these professional techniques—from pre-stressing the joint with water to mastering the blue tape barrier—you are moving from a cycle of constant repair to a state of long-term durability. Whether you are doing a simple refresh or a full-scale renovation, the pride comes from knowing the job was done right the first time. Take your time, trust the process, and don’t be afraid to demand perfection from your materials. Have you ever discovered a leak behind your wall because of a failed silicone joint? Let me know in the comments below!