

I’ll never forget the sound of that first crunch. It was six months after I’d finished a guest bathroom renovation, and I was feeling pretty proud of myself. Then, a friend stepped into the stall and *crack*—a single tile snapped right down the middle. My heart sank. I’d used a flimsy pre-sloped plastic tray because I was too intimidated by ‘mud work.’ That shortcut turned into a nightmare of demo and wasted cash. It was the moment I realized that if I wanted a floor that felt like granite underfoot, I had to stop looking for the easy button and start learning the dry-pack secret. The truth is, most homeowners are living with a ticking time bomb under their feet because they don’t realize how much a subbase matters for a spa-like shower experience. Today, I’m going to show you why this old-school method is still the undisputed king of bathroom longevity and how you can avoid the sagging, cracking mess that haunts so many DIY projects.
Why Your Shower Floor Shouldn’t Bounce When You Step on It
The problem with many modern ‘quick-fix’ kits is flex. Plastic and thin-set foam might be lightweight, but they don’t offer the rigid, monolithic strength of a traditional mortar bed. When I first started out, I made the classic rookie mistake of thinking more water in the mix meant a stronger bond. I ended up with a soupy mess that shrunk as it dried, leaving hollow spots everywhere. That’s a fast track to shower curb failure and popped tiles. According to the Tile Council of North America (TCNA), a properly compacted dry-pack bed provides a compressive strength that can easily exceed 2,000 PSI, creating a foundation that simply doesn’t budge. If your base moves even a millimeter, your grout is toast. I’ve seen beautiful installs ruined because someone didn’t understand the trowel size mistake or the importance of a packed subbase. Have you ever felt that unsettling ‘give’ under your feet while you’re lathering up? It’s a sign that the foundation was an afterthought.
Is Hand-Mixing All That Sand Actually Worth Your Weekend?
I get the skepticism. When you see a pile of sand and Portland cement, it looks like a lot of back-breaking labor compared to a pre-fab tray. But here’s the thing: dry-pack allows you to fix a floor that isn’t level—which, let’s be honest, is every floor in existence. It gives you total control over achieving a perfectly sloped shower floor regardless of how wonky your subfloor is. It’s the difference between a shower that drains perfectly and one that leaves a puddle in the corner for a week. When we get into the nitty-gritty of the ‘damp sand’ consistency, you’ll see why it’s actually more forgiving for a perfectionist than any other method.
Master the Damp Sand Mix First
The foundation of a rock-solid shower isn’t actually a liquid; it’s a semi-dry mixture of sand and Portland cement, usually at a 4:1 ratio. Think of it like the perfect sand for building a sandcastle. If you squeeze a handful in your fist, it should hold its shape perfectly without dripping a single drop of water. If it’s crumbly and falls apart, it’s too dry; if it’s shiny or oozes, it’s too wet and will shrink as it cures, leading to the same issues you’d see in a cracking self-leveling compound. Getting this right is the first step in achieving a perfectly sloped shower floor. 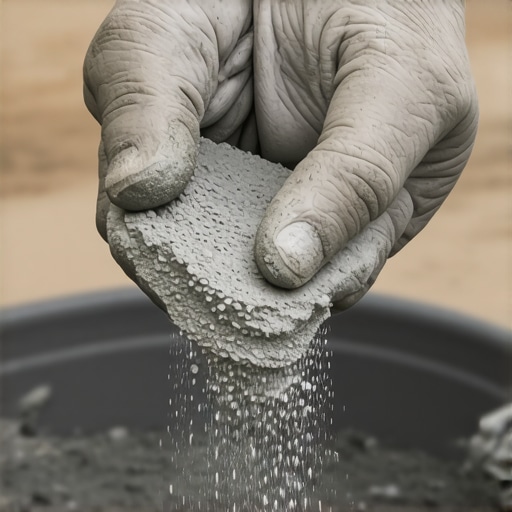 This consistency allows you to stack the material and shape it without it slumping under its own weight, which is the only way to ensure your drain is the lowest point in the room.
Set Your Perimeter for a Flawless Pitch
Before you even dump the bucket, you need a reference point. I always start by marking a level line around the entire perimeter of the shower stall. This is identical to the level line rule for starting your first row of shower tile. From that line, you measure down to establish your high point—usually about 1 to 2 inches above the drain, depending on the distance. You want a 1/4-inch drop for every linear foot of floor. I’ve seen guys try to eyeball this, and they always end up with ‘bird baths’—those annoying puddles that never drain. Once your perimeter ‘curbs’ of mud are packed in at the right height, you have a guide to screed the rest of the floor toward the drain. This level of precision is exactly why we often use pre-sloped pans as a guide for more complex layouts, but nothing beats the custom fit of a hand-screeded bed.
Why Compaction is the Real Secret to Longevity
The biggest mistake DIYers make is just moving the sand around with a trowel and calling it a day. If the mortar isn’t compacted, it remains full of tiny air pockets. Over time, the weight of a person stepping into the shower will compress those pockets, causing the tiles above to shift and pop. I learned this the hard way on a tiny powder room remodel early in my career. I was tired, my back hurt, and I lightly smoothed over the mud bed rather than tamping it down. Three weeks later, the homeowner called because the grout was turning to powder. I had to rip out the floor and found that the ‘solid’ base was as soft as a digestive biscuit inside. Now, I use a wood float and a hammer to beat the mortar until it’s a dense, monolithic slab. This high-density pack is the same principle behind installing a heavy cast iron bathtub; you need a base that cannot be compressed. Once you’ve packed it tight and screeded it flat, you’re ready for the waterproofing layer, such as the liquid membrane move, which ensures that even if water gets past your grout, it never touches your subfloor. Finally, always remember to ensure proper thinset coverage when the tile actually goes down, or all that hard work on the base will be for nothing.
Don’t Let Your Baseboards Reveal Your Floor’s Secrets
Even when your mud bed is a masterpiece, the transition to the rest of the room is where the ‘advanced’ mistakes happen. I’ve seen a hundred ‘perfect’ tile jobs ruined at the six-inch mark because someone thought the baseboards would hide their sins. Common wisdom says you just nail the trim to the wall and move on, but if you want that high-end look, you have to realize that walls and floors are never truly square. If you just force a piece of MDF against a wavy floor, you’re creating tension that will eventually cause baseboard paint to peel as the house settles. Most DIYers think a straight board will eventually ‘bend’ to the floor, but wood has a memory. Instead of forcing it, use the wood shim secret to keep the baseboard level while filling the gap below.
Why do your baseboards look crooked on perfectly level floors?
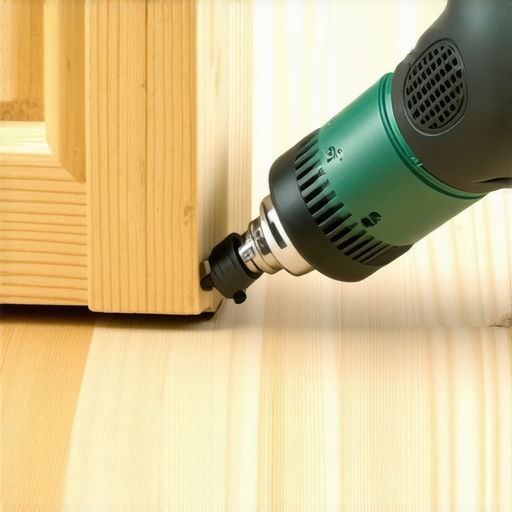
The ‘Oops’ factor here is usually a lack of scribing. When you’re performing a step-by-step flooring installation, the trim acts as the frame. If the floor has a 1/8-inch dip and you push the trim down, the top line of your baseboard won’t be parallel with the ceiling or your tile grout lines. I always use the scribe tool trick to trace the floor’s contour onto the wood. This is the difference between a ‘renovated’ look and a ‘custom-built’ look. 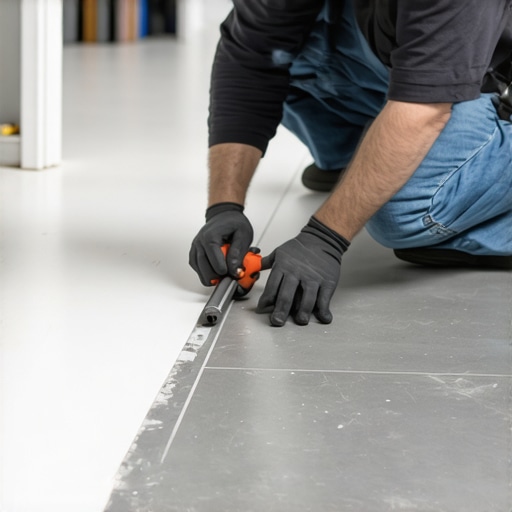 Let’s talk about a contrarian view: the industry is pushing foam shower pans hard right now because they are fast. But in my experience, if you are using large format stone, foam can compress over decades. The Tile Council of North America (TCNA) Handbook specifies that for heavy-duty applications, a thick-bed mortar (dry-pack) remains the gold standard for load distribution. If you go the foam route to save time, you risk telegraphing subfloor bumps through your thin-set. It’s the same logic we apply to carpet install secrets—if the pad or base isn’t right, the top layer won’t last. Another trap is ignoring the curing time. A dry-pack bed needs at least 24 hours before you apply a liquid membrane. Rushing this leads to ‘outgassing’ bubbles in your waterproofing. Have you ever fallen into this trap where a minor shortcut came back to haunt you? Let me know in the comments. By focusing on these hidden nuances, you ensure your spa-like shower experience doesn’t turn into a structural nightmare.To really scale your results from ‘good enough’ to ‘indestructible,’ you need to upgrade your toolkit and your maintenance mindset. I’m a purist when it comes to the magnesium float. While a cheap plastic trowel is fine for spreading thinset, the magnesium float creates a specific suction on the dry-pack that helps bring just enough moisture to the surface to create a tight, closed finish. This prevents the top layer from being sandy and weak, which is the leading cause of tiles detaching later. If you’re moving into the rest of the house, don’t sleep on the oscillating multi-tool. It’s my absolute go-to for the under-cut move for fitting flooring perfectly under door casings. Without it, you’re stuck trying to notch baseboards or floorboards around complicated trim, which always looks like a hack job. I also swear by a high-tension power stretcher for any carpet work. Many think a knee kicker is sufficient, but technical standards like the Carpet and Rug Institute (CRI) 104 emphasize that a power stretcher is mandatory for residential installs to prevent ripples. If you’re performing a step-by-step flooring installation, these tools aren’t luxuries; they are the baseline for professional quality.
  According to the technical standards in the *2024 TCNA Handbook*, specifically the ‘Standard Method B415’ for shower receptors, the mortar bed must be ‘thoroughly compacted’ to ensure structural integrity. They aren’t just being dramatic—it’s the difference between a lifetime floor and a five-year failure.
How do I maintain my shower and floors for the long haul?
Maintenance is where most homeowners drop the ball. Once you’ve achieved that spa-like shower experience, you have to protect the foundation. I recommend applying a high-quality penetrating sealer to any cementitious grout every six to twelve months. If you notice even a hairline crack in a corner, address it immediately to avoid expensive shower repairs later on. For your baseboards, I suggest a semi-annual check of the caulk line where the wood meets the floor. Houses breathe, and that gap will eventually open up as the home settles. Using the masking tape trick for clean silicone joints makes refreshing these lines a breeze without making a mess of your new durable flooring installation. Looking ahead, I see the industry shifting back toward hybrid systems—combining traditional mud beds with modern topical waterproofing membranes. It’s the ultimate ‘best of both worlds’ approach for longevity. If you’re tackling the trim next, definitely check out baseboards makeover ideas to see how a simple change in height can transform a room’s entire profile. Ready to level up your game? I want you to try this: the next time you’re cutting trim or luxury vinyl, follow the stay-sharp blade rule for cutting luxury vinyl. Switch your blade twice as often as you think you need to. You’ll be shocked at how much cleaner your transitions look when the material isn’t being ‘chewed’ by a dull edge. It’s these small, disciplined habits that separate a pro-grade finish from a weekend amateur job.
The Hard Lessons That Saved My Reputation and My Back
Over the years, I’ve realized that the difference between a floor that lasts five years and one that lasts fifty isn’t just the tile you choose; it’s the invisible work beneath it. One of the biggest ‘lightbulb moments’ for me was realizing that moisture doesn’t just come from the showerhead. It creeps up from below too, which is why we never skip the subfloor moisture test on concrete. If you skip this, your dry-pack bed will eventually delaminate. Another hard truth: don’t ignore the subfloor’s physical condition. If you are transitioning from tile to a soft surface, you must learn how to patch a hole in the subfloor before carpeting. Even a small void can cause the padding to fail prematurely. Finally, if you’re fixing an existing install, knowing how to match old grout color when repairing a shower floor can save you from the aesthetic nightmare of a ‘patchwork’ look. These small details are what prevent common flooring installation mistakes to avoid for a seamless look.
Gear That Separates the Masters from the Weekend Warriors
If you want professional results, you have to stop using homeowner-grade ‘all-in-one’ tools. For a proper carpet install, the knee kicker is just for positioning; for the actual tension, you must follow the power stretcher rule for large living room carpets to ensure the fabric never bunches or ripples. When it comes to finishing your room, put down the miter saw for a second and pick up a coping saw. Mastering the coping saw technique for flawless inside baseboard corners is the only way to get a joint that won’t open up during the dry winter months. For the shower itself, I always keep a magnesium float and a high-quality spirit level nearby—these are my ‘eyes’ for ensuring that 1/4-inch pitch is consistent across the entire bed. #IMAGE_PLACEHOLDER_E#
Build a Home That Stands the Test of Decades
Taking the time to do things the ‘old-school’ way—like hand-packing a mortar bed—is an investment in your peace of mind. Whether you are perfecting the slope in your showers or meticulously scribing your baseboards, you are building a structure that resists the inevitable shifts of time and temperature. A truly durable flooring installation isn’t about how fast you finish; it’s about the discipline of the prep. If you ever hit a roadblock, don’t hesitate to contact us for advice on complex layouts. Your home is your sanctuary, and the foundation under your feet should be the strongest part of it. Have you ever had a ‘quick-fix’ shower or floor fail on you years later? Let me know your biggest renovation nightmare in the comments below!