

I still get a little knot in my stomach when I think about a master bathroom I tiled nearly fifteen years ago. I had just picked up these gorgeous, massive 24-inch slate-look porcelains. I felt like a pro, buttering the back of those tiles with five neat little dollops of thinset. It looked clean. It was fast. But two months later, the homeowner called me back because of a hollow sound. When I pulled one tile up, I realized I had basically created a series of air pockets that trapped moisture and offered zero support. That expensive tile had snapped like a cracker under the weight of a footstep. [image_placeholder_1]
Stop Your Tiles from Cracking Before They Even Set
If you are planning an upgrade your bathroom with those trendy, oversized slabs, you cannot afford to wing the mortar application. We are not just talking about more glue here. Large format tiles—anything where one side is longer than 15 inches—behave differently than the 4×4 squares of the past. They are heavy, they are not always perfectly flat, and they demand a continuous foundation. When you skip the full-bed rule, you are inviting flooring installation mistakes that lead to lippage or, worse, total bond failure. I learned the hard way that proper thinset coverage is the only thing standing between a luxury spa feel and a costly demolition. Today, I am breaking down exactly how to achieve that 95% coverage required for wet environments so your shower stays solid for decades.
Is all this extra thinset really worth the effort?
You might be looking at a heavy bag of mortar and wondering if full coverage is just a marketing ploy to sell more product. It is not. According to the Tile Council of North America (TCNA) handbook, tiles in a shower or wet area require a minimum of 95% mortar contact to prevent water from pooling in voids behind the tile. If you leave gaps, you are creating a breeding ground for mold and a structural weak point. I used to think I could save time by using a smaller trowel, but that trowel size mistake is exactly what caused my first big failure. Have you ever stepped on a shower floor and felt a slight give or heard a clicking sound? That is the sound of a tile that is lonely for a full bed of mortar. Tell me, have you run into that hollow-sound nightmare in your own home yet?
Fix Your Substrate Before the Tile Goes Down
If your floor has even a tiny bit of flex, those expensive large-format tiles are going to crack. Large tiles are incredibly unforgiving; they don’t bend with the house, they snap. Before you even mix your first batch of mortar, you must ensure the surface is flat within 1/8 inch over a 10-foot span. You might need to how to reinforce a bouncy subfloor before tiling if you feel any vibration when you walk. I remember a master bath renovation in a drafty old farmhouse where I ignored a slight dip near the drain. I figured the thinset would fill it. Two weeks later, the client sent me a video of the tile ‘clicking’ every time they stepped out of the shower. I had to rip out four 24×24 tiles and start over. It was a messy, expensive lesson in prep work.
Use a Straightedge to Spot the Dips
Don’t trust your eyes. Lay a long level or a straightedge across the floor in multiple directions. If you see light shining under the level, that’s a void that will trap air and cause a failure. In many cases, you’ll need to use the self-leveler move—even though that guide focuses on vinyl, the principle of creating a flat plane is identical for heavy stone or porcelain.
Trowel Your Mortar in Straight Parallel Lines
Most DIYers and even some old-school pros want to make ‘S’ shapes or decorative swirls with the trowel. This is a recipe for disaster. When you swirl the mortar, you create closed loops of air. When you set the tile down, that air gets trapped and compressed, preventing the tile from fully seating. By troweling in straight lines—always perpendicular to the long side of the tile—you create open channels. As you push the tile into place, the air is pushed out the sides, allowing the ridges to collapse and create a solid bed of support. This is the only way to avoid the trowel size mistake that ruins your shower tile bond. 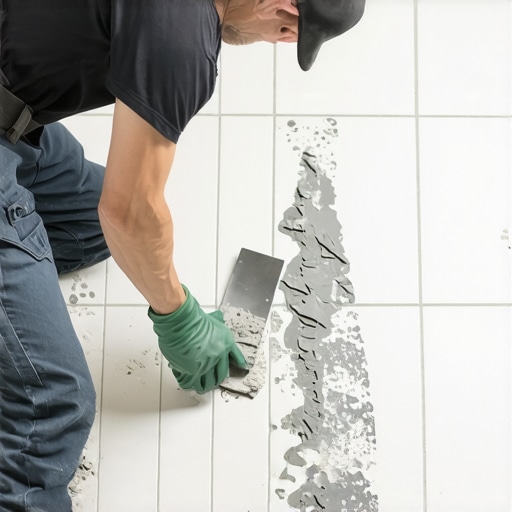
The Back-Buttering Rule for Maximum Grip
Think of back-buttering as the primer for your tile. Even with perfect ridges on the floor, you need to use the flat side of your trowel to ‘key in’ a thin layer of mortar to the back of each tile. This ensures the bond is both chemical and mechanical. If you just drop a dry tile onto wet mortar, you’re gambling on stop shower floor tiles from popping with the proper thinset coverage. You want to see that mortar fully integrated into the tile’s pores. I once skipped this on a small backsplash and the tiles literally peeled off like stickers a month later because the dust on the back of the porcelain prevented a real bond.
Set Your First Row with a Level Line
On a shower wall, gravity is your constant enemy. You cannot rely on the shower pan to be perfectly level. You must use the level line rule for starting your first row of shower tile. Screw a straight 2×4 ledger board to the wall at your starting height to act as a shelf. This keeps the tiles from sagging and sliding while the thinset cures. Once the tiles are up, use a mechanical leveling system. It’s not just about aesthetics; you need to stop tile lippage with this leveling system move to ensure there are no sharp edges that catch toes or trap soapy water. Finally, always perform the finger test for checking thinset moisture in a shower to make sure your environment isn’t drying out the mortar before it has a chance to grab the tile.While a solid tile bed is the heart of a shower, the rest of your home demands the same level of granular attention—especially when we move from wet zones to living spaces. Most people assume that if they buy the most expensive carpet or Luxury Vinyl Plank (LVP), the material will compensate for a mediocre install. This is the biggest myth in the industry. In my experience, a budget-friendly floor installed with precision will outlast a luxury material slapped down over a poorly prepped surface every single time. Let’s dig deeper into the nuances that separate a ‘nice floor’ from a professional-grade masterpiece.
Skip the Knee-Kicker for Long-Term Results
Everyone says a knee-kicker is all you need for a small bedroom carpet, but they are wrong. If you want your carpet to stay tight for a decade, you must insist on a power stretcher. Relying solely on a kicker is the number one reason why your carpet is buckling only three years later. The Carpet and Rug Institute (CRI) 105 Standard explicitly states that power stretching is mandatory for residential installations to prevent ripples and premature wear. I once watched a ‘pro’ finish a room in twenty minutes using only his knees; three years later, the homeowner had two-inch waves in the middle of the floor because the backing was never truly under tension. This is why following the power stretcher rule for large living room carpets is non-negotiable for any serious renovation.
Why is your high-end flooring still telegraphing subfloor bumps?
I see this advanced mistake constantly: installers focus on the product and ignore the ‘memory’ of the subfloor. If you are laying thin LVP and you don’t sweep every grain of sand or fill every minor divot, you will deal with why your vinyl plank floor is telegraphing subfloor bumps. The pressure of footsteps eventually molds the vinyl around the imperfection, creating a permanent pimple or pit in your floor. 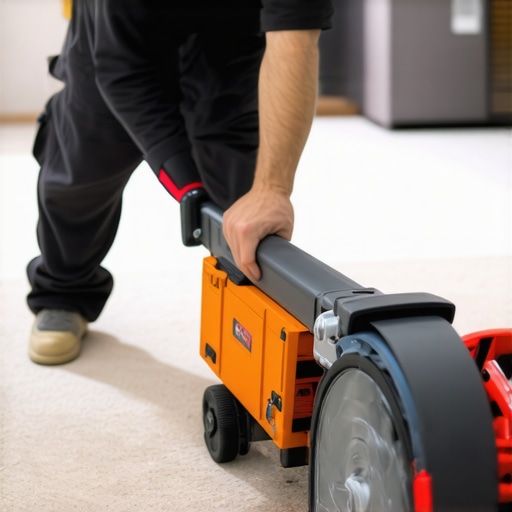
Stop Believing the 24-Hour Acclimation Myth
The biggest ‘trap’ in the world of hard surfaces is the 24-hour acclimation rule. Most installers just leave the boxes in the garage or a drafty hallway and call it a day. Real expertise means why we never skip the subfloor moisture test on concrete before a single plank hits the ground. If your subfloor is holding 12% moisture and your flooring is at 6%, that floor is going to move, regardless of how long it sat in the room. You have to measure the environment, not just wait out a timer.
The Invisible Art of Baseboard Coping
When it comes to the finishing touches, stop trying to miter your inside corners to 45 degrees. Walls are never square, and as the house settles, those miters will open up like a fish’s mouth. Instead, use the coping saw technique for flawless inside baseboard baseboard corners. This allows one piece of trim to nest inside the other, hiding the gap even if the walls expand or contract with the seasons. It’s a nuance that prevents why your baseboards look crooked on perfectly level floors. Have you ever fallen into one of these ‘quick fix’ traps and regretted it later? Let me know in the comments.Once the dust settles and the tools are packed, the real test of a professional installation begins. It’s not about how it looks on day one, but how it holds up on day one thousand. I’ve seen gorgeous walk-in showers turn into mildew-ridden nightmares because the owner used the wrong cleaner. To avoid shower repairs, you have to treat the grout like a living thing. Use pH-neutral cleaners and avoid bleach like the plague; it eats away at the sealant and is the main reason why your shower grout is crumbling far sooner than it should.
Invest in the Tools That Do the Thinking for You
If you’re serious about doing this more than once, throw away your old hand saws. My oscillating multi-tool is the MVP of my kit. It’s the only way to pull off the under-cut move for fitting flooring perfectly under door casings without ruining the trim. Also, if you aren’t using a cross-line laser, you are simply guessing. I personally use a Bosch GLL series laser to ensure my tile patterns align across the floor and wall with sub-millimeter accuracy. A spirit level doesn’t lie, but a laser shows you the truth across the whole room at once.
How can I make my flooring results last a lifetime?
Maintenance isn’t just about cleaning; it’s about environmental control. For hardwood and even high-end LVP, buy a hygrometer. If your home’s humidity swings wildly, you’ll see why your hardwood floors are crowning in the summer. According to the IICRC S100 Standard for Professional Cleaning of Textile Floor Coverings, maintaining a consistent indoor climate and a strict vacuuming schedule is more effective than any deep-clean chemicals. For those with carpet, please, stop using those ‘high-traffic’ foam sprays; they leave a sticky residue that attracts dirt like a magnet. 
The Future is Modular and Waterproof
Looking ahead to 2025 and beyond, we’re seeing a massive shift toward ‘loose-lay’ technologies and fully waterproof cores. The industry is moving toward top trends in installation for 2025 that prioritize ease of repair. Imagine being able to pop out a single damaged plank in the middle of the room without a full teardown. We are already perfecting how to remove a single damaged floor board, but future locking systems will make this even more seamless. If you want to take your skills to the next level today, I challenge you to try the blue tape secret for professional shower silicone lines on your next bathroom project. It’s the difference between a ‘DIY’ look and a factory finish.
The Hard Truths Learned After Decades of Installation Mistakes
If I could go back and talk to my younger self, I would emphasize that the ’90/10 rule’ is the difference between a pro and an amateur. About 90% of the quality in any flooring installation happens during the prep phase—the sanding, the leveling, and the moisture testing—while the actual laying of the material is just the final 10%. I’ve learned that you should never trust a wall to be square; always pull your measurements from a center line to ensure your layout doesn’t ‘walk’ or become crooked as you reach the far side of the room. Another lightbulb moment for me was realizing that ‘good enough’ coverage in a shower is actually a ticking time bomb. If you aren’t seeing mortar squeeze out of the sides during the bedding process, you haven’t used enough. Finally, remember that every material has a ‘memory.’ If you don’t use carpet install secrets like power stretching, the material will eventually try to return to its relaxed state, leading to those ugly ripples we all hate.
My Go-To Kit for Flawless Finishes
I don’t leave my house without a few specific tools that have saved my reputation more times than I can count. First, for any wood or laminate project, the the stair nose tactic for solid hardwood steps requires a high-quality miter saw with a 60-tooth blade to prevent splintering. Second, I always carry a Bosch cross-line laser; it’s the only way to ensure your step-by-step flooring installation stays perfectly aligned across multiple rooms. For those tricky transitions, an oscillating multi-tool is non-negotiable for clean under-cuts. I also highly recommend keeping a digital hygrometer in your toolbox to verify the room’s humidity before you even open a box of planks. These aren’t just gadgets; they are the guardians of your hard work.
Taking the Leap from DIY to Professional Precision
There is a profound sense of pride that comes from walking across a floor you installed yourself, knowing that every ridge of mortar and every carpet tuck was done with intention. Don’t be intimidated by the technical standards of the industry. Instead, view them as a roadmap to a home that feels more solid and looks more refined. By following these expert flooring installation tips for 2025, you aren’t just renovating a room; you are building a legacy of quality that your family will enjoy for years. The transition from ‘fixing up the house’ to ‘mastering a craft’ starts with that very first level line. Have you ever discovered a hidden subfloor nightmare halfway through a project? Let me know how you handled it in the comments below!