

I remember standing in my kitchen last July, barefoot and clutching a cold glass of lemonade, when I felt it. A ridge. Then another. My beautiful, wide-plank oak floors—the ones I’d bragged about to everyone—were arching upward at the edges like a row of tiny, wooden mountain ranges. It’s a heart-sinking moment. You invest your savings into a professional flooring installation, agonizing over the perfect stain and how the grain catches the afternoon sun, only to watch it buckle under the summer heat. I felt like a failure. I thought I’d ruined my home. But as I’ve learned over years of tinkering (and a few expensive mistakes), your floor isn’t necessarily dead; it’s just breathing too much of that thick, humid summer air. Today, we’re going to look at exactly why this happens and how you can bring those planks back down to earth without losing your mind or your budget. [IMAGE_PLACEHOLDER]
Summer Humidity and the Great Floorboard Rebellion
Hardwood is a living, breathing material. Even after it’s cut, sanded, and finished, it remains hygroscopic. This is a fancy way of saying wood is basically a giant sponge. According to the National Wood Flooring Association (NWFA), wood expands as it absorbs moisture from the air and shrinks as it dries out. When the humidity spikes in July and August, the top of your floorboards stay relatively dry while the bottom absorbs moisture from the subfloor, or vice versa. This imbalance causes the edges of the board to sit higher than the center—a classic case of crowning. Early in my DIY journey, I made a massive error by immediately trying to sand down a crowned floor. Please, don’t do that. I ended up with thin, weak boards once the humidity dropped and the floor flattened back out. If you’ve been seeing flooring installation mistakes like this in your own home, you aren’t alone. Often, the culprit is a lack of a proper glue assist method for wide plank hardwood floors, which helps keep those stubborn boards anchored when the air gets heavy.
Can I actually save these planks without ripping them out?
It’s the question that keeps every homeowner awake at night when they hear that first ominous creak. The short answer is yes, but it requires patience and a bit of environmental control. You see, the wood is reacting to its surroundings. If your AC is struggling or you’re keeping the windows open during a heatwave, you’re essentially inviting the floor to swell. I once worked on a house where the owner had beautiful baseboard styles that were being pushed right off the wall because the floor had no room to grow. They’d forgotten the spacer block rule for consistent gaps during the initial setup. Without that tiny expansion gap hidden under the trim, the wood has nowhere to go but up. Have you noticed your floors feeling a bit like a trampoline lately, or seen those edges starting to lift? Let me know in the comments—I’ve likely made the same mistake you’re worried about right now. Before we start ripping things up, we need to talk about stabilization. You can even check around your vents using the box cut method to see if the moisture is concentrated in specific areas of the house.
Dry the Air Before You Do Anything Else
The first rule of wood-floor triage is simple: stop the swelling at the source. Think of your home like a giant cigar humidor; once the internal climate goes haywire, the wood inside will react immediately. You need to pull the moisture out of the air before you even think about power tools. I remember one humid August where I ignored the dehumidifier, thinking my central air was doing all the heavy lifting. It wasn’t. One afternoon, I heard a sound like a gunshot from the hallway—it was a floorboard buckling so hard it snapped a finishing nail and jumped an inch off the subfloor. If you are seeing similar lifting, you might need to look at how to fix baseboard gaps without replacing the trim after the moisture levels drop. Aim for a consistent relative humidity between 35% and 50%. A cheap digital hygrometer is your best friend here; it’s the dashboard for your home’s health, and you shouldn’t trust your skin to tell you when it’s too damp. 
Check the Perimeter for Pressure Points
If your floor is crowning or arching, it’s often because it has run out of room to expand. Wood doesn’t just grow up; it grows outward in every direction. When I was first learning step-by-step flooring installation from planning to perfect finish, my mentor hammered one thing into my head: the expansion gap is not optional. Go to the area where the buckling is worst and remove a piece of baseboard. If the wood is pressed tight against the drywall or the wall studs, that’s your culprit. It’s like wearing shoes two sizes too small—something has to give, and usually, it’s the floor arching toward the ceiling. You might need to use a multi-tool to carefully trim a quarter-inch off the edge of the boards to restore the spacer block rule for consistent gaps in hardwood installation. When you eventually put the trim back, remember why you should never nail baseboards into the bottom plate only, as pinning the floor to the wall prevents it from breathing naturally during the next seasonal shift.
Wait for the Wood to Resign Before Sanding
The most common mistake I see—and one I’ve certainly made in my earlier DIY years—is rushing to sand down those high, annoying edges. In my first fixer-upper, I took a belt sander to a crowned oak floor in mid-July. By late October, when the furnace kicked on and the air dried out, those boards shrank back down, leaving the centers of the planks much higher than the edges. I’d essentially created a permanent “reverse-cup” that looked even worse. Patience is the only way forward. Give the floor at least three to four weeks of controlled humidity to settle. If you have minor surface damage from the boards rubbing together during the swell, you can often use the no-sanding fix for scuffed hardwood floor finishes to restore the luster without removing actual wood. For deeper gouges or pressure marks where the wood was compressed, the iron and towel fix for dents in solid wood floors works wonders by steaming the crushed wood fibers back into place. You’re looking for long-term stability, not a quick fix that ruins your board thickness for the life of the home.People often tell you to just leave your wood in the room for three days and call it acclimated. That is perhaps the most dangerous rule of thumb in the industry. I have seen ten-thousand-dollar installations fail because someone followed the calendar instead of a moisture meter. True acclimation is not about time; it is about reaching the Equilibrium Moisture Content (EMC). According to the USDA Forest Products Laboratory in their Wood Handbook, wood only stops moving when its internal moisture matches the average relative humidity of its environment. If you are rushing a guide to durable flooring installation, you are playing Russian roulette with your planks. The same logic applies to luxury vinyl and even carpet. We often assume these materials are inert, but they react to temperature and subfloor conditions. If you have noticed why your vinyl plank floor is gapping at the short ends, it is often because the temperature fluctuated too wildly during the first twenty-four hours of the floating phase. 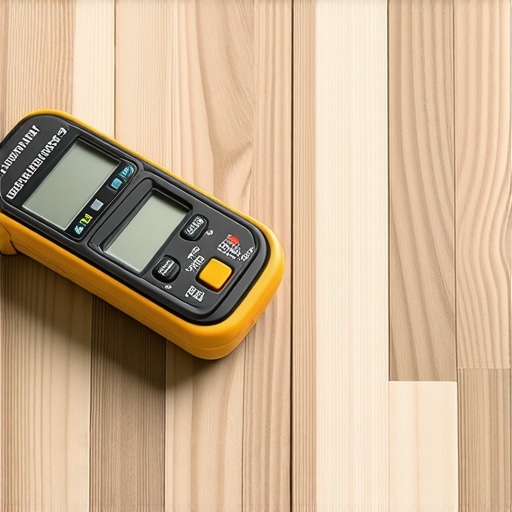
Why does my shower grout still crack even with a perfect mortar bed?
This is a question I get from homeowners who did everything by the book. They followed the mortar bed rule for installing a heavy cast iron bathtub or a shower base, yet the corners are spider-webbing. The oops factor here is usually the transition between two different planes of movement. Most people grout the corners where the wall meets the floor, which is a massive mistake. You must use a flexible sealant in those changes of plane. Even if you use the blue tape secret for professional shower silicone lines, if there is no gap for the house to shift, the rigid grout will fail. And don’t even get me started on baseboards. Everyone wants that seamless look, but if you do not account for the baseboard styles that elevate your interior design fighting against the natural expansion of the floor, you will eventually see why your baseboard caulk is cracking. The trap is nailing the baseboard too low, pinning the flooring down so it cannot slide underneath as it breathes. Have you ever fallen into this trap of trusting a set-it-and-forget-it rule only to have it backfire? Let me know in the comments—I am still learning from my own perfect installs that decided to move anyway.
Don’t Let Your Carpet Turn Into a Wave Pool
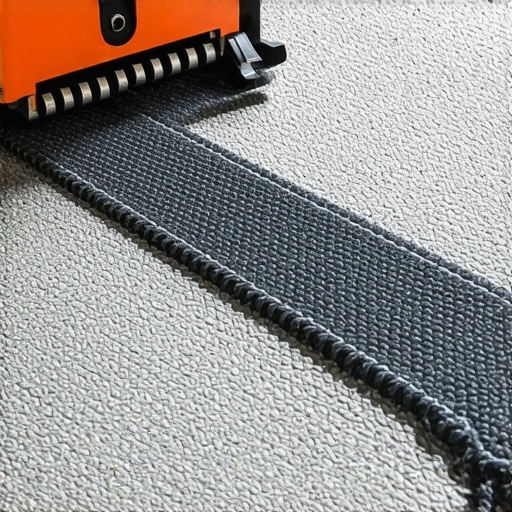
Once you have moved past the initial panic of a buckling floor, the conversation naturally shifts toward longevity. I have learned the hard way that a professional finish is only as good as the tools used to maintain it. For instance, when it comes to a carpet install, most DIYers rely on a knee kicker, but that is a recipe for wrinkles three years down the line. I never step onto a job site without a power stretcher. Why? Because the Carpet and Rug Institute (CRI) 105 Standard specifically mandates that power stretching is required to prevent delamination and ripples. If you skip this, you are basically inviting your carpet to move. If you have already noticed some shifting, you might need to learn the power stretcher rule for large living room carpets to pull that tension back to where it belongs.
How do I keep my new flooring from looking old in two years?
Maintenance is less about deep cleaning and more about preventing mechanical failure. For wood and vinyl, that means keeping grit off the surface—think of dirt like 100-grit sandpaper under your boots. I am a huge proponent of the vacuum seal trick for cleaning dust out of floor grooves because it prevents buildup from acting as an abrasive in the joints. In the shower, the battle is against mineral deposits and movement. If you are dealing with persistent issues, check out my guide on shower repairs: when to fix vs replace for longevity to avoid throwing money at a failing system. We often ignore the small things, like a bit of dried adhesive, but using the scraper blade fix for dried glue on new hardwood early on can prevent permanent finish damage.
The Scribing Tool is Your Secret Weapon
If you want those high-end baseboard styles to actually look like they belong in a luxury home, you have to stop fighting your walls. Walls are never straight; they are wavy, lumpy, and generally uncooperative. This is where the scribing tool every DIYer needs for tight baseboards comes into play. It allows you to trace the floor’s imperfections onto the wood so you can plane it down for a gap-free fit. I predict that in the next few years, we will see a massive shift toward ‘smart underlayment’—systems with built-in sensors that alert your phone when moisture levels under your durable flooring installation cross a dangerous threshold. Until then, we rely on good old-fashioned physics and the right hardware. For your next project, I strongly encourage you to try the magnet hack for finding wall studs behind thick baseboards. It is a game-changer that prevents you from turning your drywall into Swiss cheese while searching for a solid anchor point.
The Expensive Truth About Why My First Three Installs Failed
I used to think that a level subfloor was the only thing that mattered, but nature has a way of humbling even the most meticulous builder. One of the hardest lessons I ever learned was that ‘tight’ is often the enemy of ‘good.’ When you are working on a flooring installation, you are essentially managing a living environment that expands and contracts with the seasons. If you don’t leave room for that movement, the energy has to go somewhere—and it is usually upward. I have seen high-end installs fail simply because the installer did not respect the perimeter. Another ‘lightbulb moment’ for me was realizing that every material in a room affects the others. For example, if you are following a shower renovation guide, you have to account for how that extra humidity will impact the wood floors in the adjacent hallway. Always use the dry-fit rule for no-mistake shower drain alignment to ensure your plumbing does not become a source of hidden leaks that buckle your planks months later.
[IMAGE_PLACEHOLDER_FINAL]
The Gear That Keeps My Floors From Moving
Over the years, my toolkit has shifted from standard tools to problem-solving gear. I never start a project without a professional-grade moisture meter—it is the only way to know if your subfloor is actually ready. For those of you tackling a bedroom or living area, following the carpet install secrets I have shared is vital, specifically using the power stretcher rule for large living room carpets. Without it, you are just waiting for ripples to form. When it comes to finishing the look, I swear by a quality coping saw and the the back-bevel secret for inside baseboard corners. It allows your baseboard styles that elevate your interior design to look seamless even when the house settles and shifts. These tools are not just about speed; they are about insurance against future repairs.
Build a Home That Breathes With You
A house is never truly finished; it is a constant dialogue between the materials you choose and the world outside. When you approach your next flooring installation, do not just think about how it looks today—think about how it will look during the next humid August or the next dry January. By respecting the natural properties of wood, vinyl, and carpet, you are not just renovating; you are creating a stable foundation for your life. Take it one plank at a time, trust your tools, and do not be afraid to wait for the environment to be right. Have you ever heard that ominous ‘pop’ in the middle of the night and realized your floor just buckled? Let me know your flooring horror stories in the comments below—I have likely seen (and fixed) them all!