

I remember standing in my living room last October, watching the afternoon sun pour through the windows and feeling a knot tighten in my stomach. Instead of the warm, honeyed glow I used to love, the light hit a million tiny white scuff marks and dull patches that looked like a roadmap of every heavy furniture move and hyperactive dog sprint from the last five years. I felt defeated. I thought my only option was the dreaded ‘dust-pocalypse’—hiring a crew to sand everything down to the bare wood, living in a plastic-wrapped house for a week, and spending a small fortune. But then I discovered the ‘no-sanding’ screen and recoat method, and honestly, it changed how I look at home maintenance forever.
Why You Don’t Need to Sand Your Life Away
The truth is, most of us are living with finish damage, not wood damage. If your floors are just looking tired, cloudy, or covered in those annoying surface-level scuffs, you probably don’t need a full sand-and-refinish. I used to think that every scratch meant the wood was ruined, similar to how people panic about flooring installation mistakes that seem permanent but are actually fixable. The ‘no-sanding’ fix works by chemically or mechanically etching the existing finish so a fresh, crystal-clear topcoat can bond to it. It saves your floor’s ‘wear layer’ and keeps your sanity intact. According to the National Wood Flooring Association, a typical solid hardwood floor can only be sanded 4 to 6 times in its entire lifespan, so skipping the heavy machinery whenever possible isn’t just easier—it’s smarter for the long-term health of your home. If you have deeper gouges, you might still need the iron and towel fix for dents before you start the recoating process.
Can a Liquid Really Save My Hardwood?
I’ll be the first to admit I was a total skeptic. Years ago, I made the classic rookie mistake of buying a ‘miracle’ shine restorer from a big-box store. It looked great for two weeks, then turned into a sticky, peeling mess that trapped cat hair like a magnet. I learned the hard way that there is a massive difference between a temporary polish and a professional-grade recoat. To do this right, you have to be meticulous about cleaning. I’ve spent hours using a scraper blade fix for dried glue and old residue because any wax or oil left on the surface will cause the new finish to bead up and peel. Today, I’m going to show you how to avoid my early failures and get a result that looks like a step-by-step flooring installation done by a pro. Have you ever tried one of those ‘wipe-on’ floor restorers and regretted it immediately? I want to hear your horror stories in the comments so we can make sure nobody else falls for the quick-fix trap. We are going for a finish that actually lasts.
Deep Cleaning is Your First Line of Defense
Before you even touch a sanding screen, you have to get the floor surgically clean. This isn’t just about a quick sweep; it is about removing every molecule of wax, oil, and floor polish that has built up over the years. I once spent three hours scrubbing my kitchen floor, thinking I was done, only to find a patch of old wax near the baseboards that caused my new finish to bead up like water on a freshly waxed car. It was a nightmare to fix because the finish simply wouldn’t bond. You need a heavy-duty floor prep cleaner or a wax remover. This is a game of chemistry, and any shortcut here leads to the kind of flooring installation mistakes that force you to start the whole project over. If you find old adhesive while you are scrubbing, you can use the scraper blade fix for dried glue to get the surface perfectly level.
The Squeaky Clean Test
You will know you are ready when you can rub a damp white cloth across the floor and it comes up completely spotless. I usually do two rounds of cleaning with a professional-grade degreaser. If your room feels dated while you are at it, consider how baseboards makeovers can complement the fresh sheen of your wood. Once the floor is dry, it should look dull and uniform, ready for the next step.
Give the Surface Some Teeth with Screening
Think of screening like exfoliating your skin before a tan. You aren’t removing the actual wood; you’re just scuffing the existing finish to create ‘teeth’ for the new coat to grab onto. I use a floor buffer (you can rent these at any big-box store) with a 120-grit or 150-grit sanding screen. It’s a giant, gentle vibrating pad that knocks the shine off the old polyurethane. When I first did this in my hallway, I was terrified I was ruining the wood, but you just need to keep the machine moving. If you stay in one spot too long, you will burn through the finish and into the stain, which is why a step-by-step flooring installation mindset is so helpful—precision is everything. 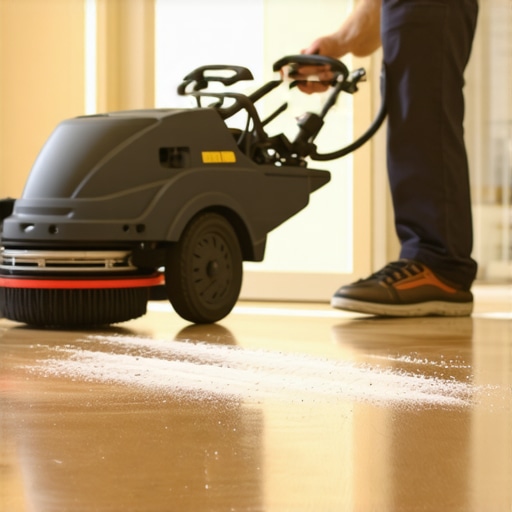
Mastering the Dust Management
The dust from screening is incredibly fine, almost like flour, and it gets everywhere. If you leave even a speck, it will be trapped in your new finish forever, creating a gritty texture that feels like sandpaper under your socks. I vacuum three separate times, then use a microfiber ‘tack’ cloth dampened with water or mineral spirits. Pro tip: turn off your HVAC system before you start. I learned the hard way that a furnace kicking on mid-project will blow dust right back onto your wet finish. Taking these precautions ensures a durable flooring installation that looks professional.
Lay Down the New Protection
Now comes the moment of truth: applying the polyurethane. I prefer a T-bar applicator because it works like a squeegee for your floor, allowing you to pull a thin, even layer of finish across the room. You have to ‘snowplow’ the finish, always keeping a wet edge. If you stop for a coffee break in the middle of the room, you will end up with a visible lap line that is impossible to hide. This process is much more forgiving than a full expert flooring installation, but it still requires a steady hand and a quick pace to avoid bubbles. Always work toward the exit so you don’t paint yourself into a corner—an amateur mistake I only made once!
Now, here is where most DIYers—and even some pros who are in too much of a hurry—really mess up. They think the floor exists in a vacuum. But your floor is only as good as the trim that frames it. I’ve seen beautiful recoats ruined by baseboards that look like they were chewed by a lawnmower. One of the biggest myths is that you can just ‘caulk and forget’ a gap. In reality, if you don’t understand why your baseboard paint is peeling off at the bottom, you’re just putting a band-aid on a moisture or residue problem. Most people assume it’s just old age, but often it’s because the wood wasn’t primed correctly after the floor was cleaned with heavy degreasers or wax strippers.
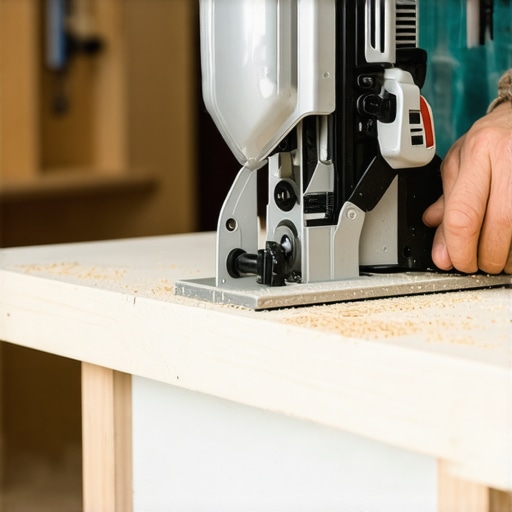
And let’s talk about the ‘Nail Trap.’ Everyone says to just fire a brad nailer into the wall, but learning why you should never nail baseboards into the bottom plate only is a lesson I learned after seeing a whole room’s trim pull away during a dry winter. You have to hit the studs. To get that high-end look, I’ve started using the back bevel secret for inside baseboard corners. It ensures that even if the walls aren’t perfectly square (and let’s be honest, they never are), the joints stay tight forever.
Why does my ‘perfect’ floor still sound hollow?
This is the advanced question I get all the time. You followed the steps, you cleaned, you coated, but there’s a weird ‘click’ or ‘echo.’ Often, this goes back to the subfloor physics. If you were working with a floating floor instead of solid wood, you might have hit one of those subfloor prep mistakes that make new vinyl planks sound hollow. Even with a recoat on solid wood, if the boards have any movement, the new finish will eventually crack at the joints. According to a technical bulletin from the National Wood Flooring Association, subfloor flatness is the single most ignored factor in finish longevity. You have to stabilize the wood before you can expect a finish to stay ‘crystal’ clear.
Have you ever finished a project only to realize the trim or the transitions were the real problem? Let me know in the comments. I once spent a week on a bedroom floor only to realize the carpet install secrets I ignored at the doorway made the whole thing look like an amateur job. If you really want to avoid a disaster, always check our expert flooring installation tips for 2025 before you crack open that first gallon of polyurethane.
I’ve learned that the finish is only the beginning. The real battle is the six-month mark when the house settles and those ‘perfect’ joints start to show their true colors. If you want a result that doesn’t just look good on day one, you have to think like a maintenance pro. For me, that meant finally investing in a tool I used to think was overkill: the scribing tool every DIYer needs for tight baseboards. I used to rely on my eyes and a prayer, but walls are notoriously wavy. A scriber lets you trace the exact profile of your floor onto your wood, so when you cut, it fits like a glove. It’s the difference between a gap filled with caulk and a joint that looks like it grew there naturally. While you are at it, make sure you are checking how to choose the perfect baseboards for your homes style because the wrong height can make even the best installation feel off-balance. 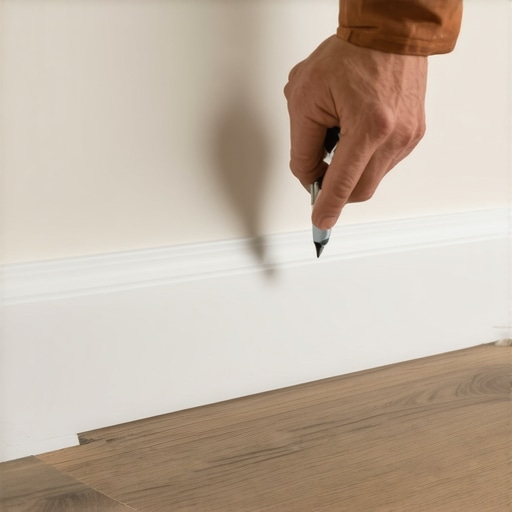
How do I maintain this look without losing my mind?
The secret isn’t just cleaning; it’s preventative medicine. I’ve started using felt pads on everything—and I mean everything. Even the dog’s heavy ceramic water bowl gets a protective base. If you’re dealing with the wet side of things, like a bathroom, longevity depends on the invisible stuff. The Tile Council of North America (TCNA) Handbook specifically requires 95% thinset coverage for tiles in wet areas, which is a standard I follow religiously to prevent water from pooling under the surface and causing the grout to fail. This is why I always tell people to check shower renovation ideas modern designs for a luxury feel while focusing on the waterproofing basics. One of my favorite finishing tricks for these wet zones is the blue tape secret for professional shower silicone lines every time. It sounds simple, but it prevents that messy smear that attracts mold later on. Looking ahead, I see a massive shift toward ‘low-maintenance luxury.’ In the coming year, we’re going to see even more focus on transform your flooring top trends in installation for 2025, particularly involving hybrid materials that mimic the depth of hardwood but have the resilience of stone. The ‘no-sanding’ recoat method is actually a precursor to this; we are moving away from ‘rip it out’ and toward ‘sustain and enhance.’ My challenge to you: don’t just finish the floor—fix that one wonky baseboard joint today using a back-bevel. It will give you the confidence to tackle the whole room.
The One Thing I’ll Never Do Again After My First Recoat
If there is one thing I have learned about the screen and recoat process, it is that patience isn’t just a virtue; it is a structural requirement. I once rushed a second coat on a humid Tuesday and ended up with a ‘milky’ finish that looked like it was underwater. Now, I always wait 24 hours between screening and coating if the humidity is over 50%. Also, never wear shoes in the room once the floor is prepped—not even ‘clean’ ones. I wear fresh cotton socks to avoid leaving any oils that might reject the finish. Finally, remember that the finish is only as good as the surface underneath. If your trim is still looking rough, check out the high build primer secret for smooth baseboard paint to ensure your walls match the quality of your new floors.
My Essential Toolkit for an Effortless Finish
You do not need a truckload of heavy machinery, but you do need specific items that the pros refuse to work without. First, invest in a high-quality T-bar applicator; using a roller creates tiny air bubbles that become permanent bumps. Second, keep a stack of microfiber tack cloths handy to catch the invisible dust that a vacuum misses. Most importantly, I rely on the scribing tool every DIYer needs for tight baseboards. It allows you to trace the exact profile of your floor onto your wood trim, ensuring that when you put your baseboards back, there are zero gaps. It is the secret to a high-end look without the high-end price tag.
#IMAGE_PLACEHOLDER_E#
Don’t Let the Fear of Sanding Stop You from a Beautiful Home
The screen and recoat method is the ultimate ‘low-stakes, high-reward’ project. It is about more than just aesthetics; it is about preserving the history and ‘wear layer’ of your home. By choosing to recoat instead of sanding, you are creating a durable flooring installation that maintains the character of the original wood while adding years of protection. As we look at transform your flooring top trends in installation for 2025, the shift toward sustainable restoration is only going to grow. You have the tools and the method—now it is just time to move the furniture and start. Have you ever attempted a screen and recoat and hit a snag with the dry time or finish bonding? Let me know in the comments below!