

It was a frustrating Saturday morning when I finally looked at my newly installed baseboards and noticed that the corners just didn’t line up properly. The bulky profile of my baseboards made traditional miter cuts seem impossible—every attempt resulted in gaps or awkward overlaps. I remember thinking, “There must be a better way,” and after some trial, error, and a bit of tinkering, I discovered what I now call the “Outside-Corner” Miter Hack. This simple yet effective trick transformed my approach and saved me hours of frustration.
Why Bulky Baseboards Are Tricky at Corners
Bulky or thick-profiled baseboards add a lot of character to a room, but they also pose unique challenges, especially when it comes to mitering corners. Unlike slim profiles, their width and weight make precise cuts more difficult, often revealing gaps or misalignments that can ruin the appearance of your finished project. This is a common pain point among DIYers and even pros, and I want to assure you: there’s a way to get professional-looking results without breaking a sweat.
Have You Faced This Exactly?
If you’ve ever struggled to get your baseboard corners to sit flush, or worse, resorted to filling gaps with caulk or hiding uneven cuts behind furniture, you’re not alone. Early on, I made the mistake of assuming that a perfect mitre was enough—and paid the price with crooked corners and gaps. That experience taught me that the secret isn’t just in the cut but in how you approach the corner joint altogether. That’s where the Outside-Corner Miter Hack shines.
According to recent insights from [Tile & Flooring Magazine](https://tilecraftsmens.com/baseboard-trends-in-2025-fresh-styles-for-every-room), innovative techniques and tricks like this are what separate a homemade job from a professional finish. So, if you’re tired of battling bulky baseboards at corners, stay with me. We’ll walk through the simple steps to master this technique, ensuring your next project looks crisp, seamless, and thoroughly impressive.
Now, let’s dive into the practical steps to implement this hack—because once you get the hang of it, you’ll wonder how you ever did without it.
Apply the Reverse Cut Technique
Start by making a standard 45° miter cut on the inside edge of the baseboard. Then, instead of fitting the pieces together, flip one piece upside down and test the joint. This reverse positioning helps visualize how the bulky profile overlaps at the corner, revealing any gaps early. I once used this approach while installing a thick-profiled baseboard in my living room; the reverse cut made it evident where to trim for a perfect fit. 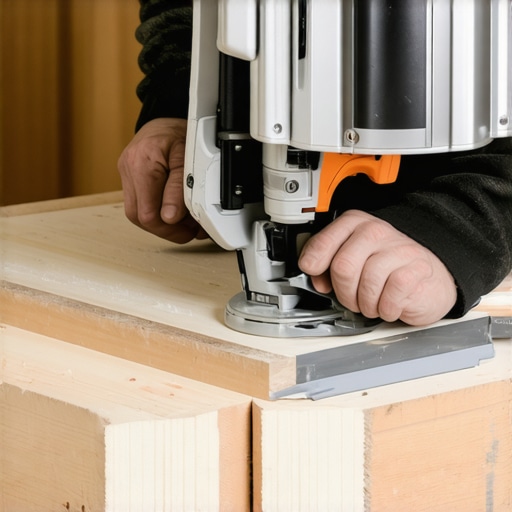
Use the Overlapping Method for Better Fit
Place the mitered pieces on the wall without adhesive or nails, and overlap them slightly at the corner. This step mimics the actual joint and helps identify how much material needs to be trimmed for a seamless connection. I found that overlapping for a few minutes before final cuts prevented the common gap issues, especially with heavy profiles. Think of it like fitting puzzle pieces—trial fitting avoids surprises later.
Trim with the Stacked Saw Technique
After visualizing the overlap, cut your pieces individually at a slight angle, matching the scribe line created during the overlap test. Use a high-quality miter saw, and set it to cut at exactly 45°, but remember to support the heavy profile to prevent sagging. A stable work surface is key—if you’re handling a thick piece, support it properly as I did during my last project, which resulted in a near-perfect corner with minimal gaps.
Scribe and Adjust for Non-Perfect Walls
Walls are rarely perfectly straight, especially in older homes. Use a flexible scribing tool or a contour gauge to follow the wall’s irregularities, marking the baseboard accordingly. This ensures that the cut follows the wall’s shape, preventing gaps on uneven surfaces. When I installed baseboards in my dining room, this step was crucial—hand-scribing made the fit tight against the wall’s undulations.
Seal and Finish for a Professional Look
Once all pieces are cut and fitted, run a thin bead of flexible caulk along the joint to fill tiny gaps. Use paintable caulk for a seamless appearance, and smooth it with a wet finger or a caulk finishing tool. For extra durability, apply a matching wood filler over the caulk once it cures. During my last install, meticulous sealing and touch-up painting transformed what could have been an obvious joint into a clean, professional finish.
Many homeowners and even seasoned DIYers fall into common traps when tackling projects like carpet laying, flooring, or shower remodeling. While the basics are straightforward, the devil is in the details—nuances that can sabotage your results if overlooked. Let’s dig deeper into what most people get wrong and how understanding these subtleties can elevate your craftsmanship.
A frequent misconception revolves around the idea that adhering strictly to standard measurements guarantees perfect outcomes. For example, many assume that cutting flooring planks or baseboards exactly to wall measurements will prevent gaps. However, walls and floors rarely run perfectly true—shifts, warps, and irregularities are the norm, not the exception. Relying solely on measured cuts often results in gaps or overlaps. Instead, tools like scribing and the reverse cut technique, which I detail in my guide on baseboard trends 2025, are essential to adapt to real-world imperfections.
Another widespread myth suggests that the most important aspect of installation is the quality of the materials. While premium products help, many overlook the importance of meticulous technique. For instance, in carpet installation, excessive tension during stretching might seem beneficial, but over-stretching can cause ripples or future buckling. Proper stretching techniques, like the pre-stretch method explained in carpet installation secrets, prevent these issues.
Let’s address a common advanced mistake encountered with showers, which often slips under the radar. Many install shower niches without proper slope or drainage consideration, leading to water pooling, mold, and crumbling grout. This oversight stems from focusing only on aesthetic alignment rather than functional waterproofing. Experts emphasize the importance of a slight *forward tilt* in niches, ensuring water naturally drains out. For deeper insights, check out shower enclosure tips.
A thoughtful question arises: How can understanding the subtleties of installation prevent costly mistakes long-term? The answer lies in the nuances—small adjustments and familiarity with advanced techniques safeguard your investment. For example, knowing how to properly accommodate wall irregularities with scribe tools or when to use specialized sealants can dramatically improve durability and appearance.
Don’t forget that most issues in finishes can be traced back to a lack of attention to these details. When installing anything from baseboards to flooring, pausing to evaluate wall and floor conditions and adjusting your approach accordingly is vital. For an in-depth look at perfecting flooring layout, see my comprehensive guide on flooring installation.
In conclusion, mastering these hidden nuances transforms a good project into a professional finish. Why settle for less when paying attention to the minor details can make all the difference? If you’ve ever fallen into this trap, let me know in the comments—sharing your experience helps everyone learn.
Keep Things Running Smoothly with the Right Tools
Investing in quality tools makes a significant difference in the longevity and appearance of your projects. I swear by my cordless miter saw for precise cuts, especially when trimming heavy-profile baseboards. Its portability and high torque allow me to make clean, accurate miters without re-cutting. Pair this with a high-quality speed squares and a contour gauge to handle uneven walls and irregular surfaces effectively. Supporting tools like a good air compressor and nail gun expedite installations while ensuring nails sit flush, avoiding future splitting or gaps. Using these tools correctly not only improves the initial finish but also reduces the need for repairs down the line.
What About Long-Term Maintenance?
Maintaining your flooring and shower surroundings requires more than just good tools; it involves routine inspections and consistent upkeep. For floors, using proper cleaning products that don’t degrade the finish extends their life. Regularly checking grout and sealant in showers prevents water infiltration that could damage underlying substrates—think of this as a preventative layer that preserves your investment.
Standardize Your Maintenance Routine
Set a calendar reminder to inspect grout lines, caulk joints, and baseboards every six months, especially in high-traffic or moisture-prone areas. Applying a special sealant annually can dramatically reduce mold growth and staining, making cleaning easier. These small, consistent efforts keep your installations looking fresh and functional for years.
Looking Ahead: Future Trends in Maintenance and Tools
Expect advancements like smart sensors that detect moisture leaks or deteriorating grout, alerting homeowners before serious damage occurs. Enhanced power tools with integrated dust collection or self-sharpening blades will further streamline maintenance tasks. Staying ahead involves not just upgrading your toolkit but also adopting these emerging technologies early.
How do I maintain my flooring and showers over time?
The key lies in routine inspections, timely re-sealing, and using the right cleaning agents. Developing a proactive maintenance plan ensures that minor issues don’t escalate into costly repairs, keeping your home safe and beautiful.
For an extra edge, I recommend trying the deep-cleaning routine using a wet rag trick for grout lines, as detailed in this guide. It’s simple yet effective and can restore your tiles’ original shine.
Remember, the foundation of a durable, professional-looking project is not just in the initial install but in diligent maintenance. Staying consistent with your routine will save you time, money, and frustration in the long run. If you’re ready to elevate your maintenance game, start incorporating these expert practices today!
Reflecting on my journey with home renovations, I realize that the most valuable lessons stem from unexpected challenges and those ‘aha’ moments that revolutionize your approach. Here are some personal insights I’ve gained that can help you avoid common pitfalls and achieve professional results in your projects.
Honing in on Hidden Details Made All the Difference
The biggest revelation was understanding that perfect cuts aren’t enough—it’s how you handle irregularities and material weight that truly matters. For instance, supporting heavy-profile baseboards during cuts prevented sagging and misalignment, saving me from redoing entire corners. Small adjustments, like using a contour gauge for uneven walls, turned out to be game-changers, ensuring a snug fit even in less-than-ideal conditions.
Choosing the Right Technique Can Save Hours of Frustration
Before I discovered the reverse cut and overlapping methods, I spent hours filling gaps or contemplating re-cuts. Embracing these techniques transformed my workflow, making corner joints look seamless and professional. These methods, though simple, require patience and practice but yield results that boost confidence and home value alike.
Patience and Preparation Outdo Rushed Work
Jumping into installations without proper planning only led to setbacks. I learned that taking a moment to scribe walls, test overlaps, and visualize the final fit minimizes surprises. This proactive approach not only speeds up the process but also ensures a cleaner, more durable finish—something worth every extra minute spent in preparation.
Tools and Resources Make a Lasting Impact
Investing in quality tools like a reliable miter saw, contour gauges, and high-quality caulks has been invaluable. I trust brands that combine durability with precision because they provide the accuracy needed for tight joints. Additionally, staying updated with trusted guides, such as the latest home renovation articles, keeps techniques fresh and effective, helping me adapt to new challenges confidently.
Continuous Learning Elevates Your Craft
The more I explore related topics—like using sealants correctly or addressing wall irregularities—the more I realize that mastery is an ongoing process. Sharing experiences and tips, like how I approached a crooked wall or a stubborn corner, not only reinforces my skills but also inspires others to tackle projects with renewed enthusiasm.
Resources That Have Shaped My Approach
- Baseboard Trends 2025: Staying ahead with design trends has influenced my material choices and styling. Check it out for inspiring ideas.
- Contact Us: For professional advice tailored to your project, reaching out can provide personalized guidance.
- Expert Shower Tips: While not directly related, the principles of proper preparing and sealing learned here parallel baseboard installation, emphasizing durability and finish quality.
- Flooring Installation Mistakes to Avoid: Understanding common errors in flooring and baseboards helps me prevent those pitfalls in my work, ensuring longevity and aesthetics.
Time to Build With Confidence and Precision
Every project brings its own set of challenges, but with a thoughtful approach, patience, and the right tools, you can achieve results that rival professionals. Remember, the key is not just in the cuts but in respecting the imperfections of your space and adjusting accordingly. Take pride in each step, and soon you’ll see your home transformed with those flawless corners and perfect joins that make all the difference.
Do you have a tricky corner or a flawed wall that’s stumped you? Share your experience below, and let’s learn from each other’s journeys to home perfection!