

I will never forget the sinking feeling in my stomach when I saw that first hairline fracture snaking up the corner of my brand-new master shower. I had spent a week’s worth of late nights tiling that space, choosing the perfect tiles and carefully mixing my materials. I thought I was doing everything by the book. But a few months of seasonal shifts and the house naturally settling proved me wrong. My beautiful grout lines were crumbling and falling out in chunks. That was my big realization: grout and corners are natural enemies. If you have ever dealt with moldy, cracked, or leaking corners, you are in the right place. Today, I am sharing the ‘silicone-only’ rule that changed my entire approach to bathroom projects. Whether you are knee-deep in your own shower renovation or just trying to fix a messy DIY job, this simple switch is going to save your sanity and your subfloor. Have you ever noticed your grout popping out of the corners like it is trying to escape? That is a sign your shower is begging for flexibility.
Grout Just Can’t Handle the Pressure of a Moving House
The problem is physics, plain and simple. Every house moves. Joists expand and contract with humidity, and foundations shift ever so slightly. When you have two walls meeting at a 90-degree angle, they move independently of each other. This is what we call a ‘change of plane.’ Because grout is essentially a rigid form of concrete, it has zero flexibility. When those walls move, the grout has no choice but to crack. I learned this the hard way early in my career, thinking that ensuring your wall stability with extra screws would be enough. It wasn’t. Now, I follow the industry standard set by the Tile Council of North America (TCNA), which explicitly states that all changes of plane require an expansion joint. This usually means a high-quality 100% silicone sealant. If you are struggling with current damage, knowing when to repair versus replace your sealant can prevent massive water damage behind the walls.
Is Silicone Actually Worth the Extra Mess?
Many DIYers avoid silicone because it can be a sticky, frustrating nightmare to apply compared to easy-to-wipe grout. I used to be one of them. However, silicone creates a truly waterproof, flexible bridge that moves with your home. It acts like a gasket rather than a rock. This flexibility is the only thing standing between your shower water and your wall studs. Making the switch isn’t just about aesthetics; it is about building something that lasts a decade instead of a season.
Clear the Way Before You Squeeze the Trigger
Applying a new bead of silicone over old, moldy grout is like putting a fresh coat of paint over a rusted car—it might look okay for an hour, but the failure underneath is already working against you. If you are currently dealing with cracks, you first need to determine if you are facing a simple maintenance issue or a deeper structural failure; checking out shower repairs: when to fix vs replace can help you decide. To start, you must have a clean, dry, and debris-free substrate. Any moisture trapped behind the sealant will eventually cause it to peel, leading to the exact leaks we are trying to prevent.
Scrape Out Every Trace of Old Grout
Use a carbide-tipped grout saw or a sharp utility knife to carefully remove any existing grout from the corner. You need to reveal the actual gap between the two tiled walls. Be incredibly careful not to puncture the waterproofing membrane underneath. I usually suggest using a vacuum with a brush attachment to suck out the dust from the deep recesses of the joint. This is a critical step in any ultimate shower renovation guide because the bond is only as strong as the surface it clings to. If you find that the original builder skipped the overlap trick for waterproofing shower corners, you might need to be extra diligent with your sealant application.
Strip the Surface of Invisible Oils
Once the physical debris is gone, you need to tackle the invisible enemies: soap scum and body oils. A quick wipe with denatured alcohol or a high-percentage isopropyl alcohol will strip the tile edges. This ensures the silicone can bite into the porcelain or stone. Do not use household cleaners that leave a scent or a film, as these act as a bond-breaker.
Push the Bead to Fill the Gap
Most people make the mistake of pulling the caulking gun toward them. This often results in a thin layer of silicone sitting on top of the joint rather than inside it. Instead, you should push the gun. By pushing the nozzle into the corner, you are forcing the material deep into the void, creating a structural gasket. 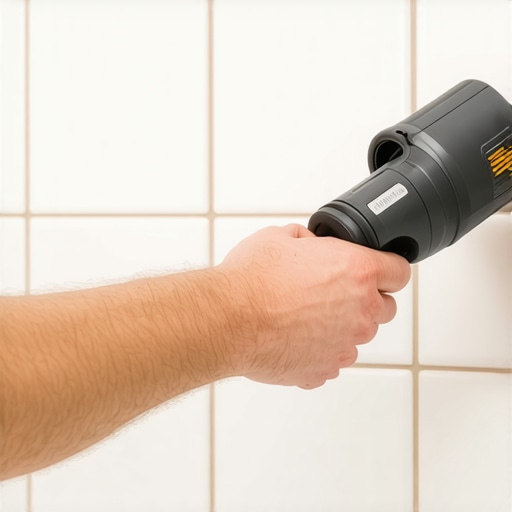
Why 100% Silicone Beats the Cheap Stuff
I cannot stress this enough: do not use ‘siliconized’ acrylic or ‘painter’s caulk’ for this. While those are great for your living room trim, as seen in the painter caulk vs silicone guide for baseboards, they will fail in a wet environment. You need 100% RTV silicone. It remains flexible forever and won’t shrink over time. When I was working on a high-end project aiming for a spa-like shower experience, the client tried to save $20 by buying a bargain-bin sealant. Six months later, the corners had pulled away from the wall, and I had to redo the entire thing.
The Secret to a Smooth Finish
Forget the old ‘wet finger’ trick if you can. While it works for some, the acid in your skin and the moisture on your finger can actually interfere with the curing process of some high-grade silicones. Instead, use a specialized caulking tool or a popsicle stick dipped in a bit of soapy water. I once had a job where I rushed the finishing process on a large-format tile wall. I didn’t take the time to tool the bead properly, and the resulting mess looked like a kindergartner had gone wild with a glue stick. Now, I always use a light mist of soapy water and a smoothing tool to get that factory-perfect concave look.
While the silicone-only rule is a game-changer for showers, the logic of flexibility actually extends much further into your home than you might think. Most people believe that the more rigid and ‘locked-in’ an installation is, the better. In my experience, that is exactly how you end up with buckled floors and split baseboards. I have seen countless DIYers—and even some pros—make the mistake of jamming materials together as tight as possible. But the truth is, a house is a breathing organism. If you do not give your materials room to move, they will make room for themselves, usually by breaking.
Stop Trying to Fight Natural Expansion
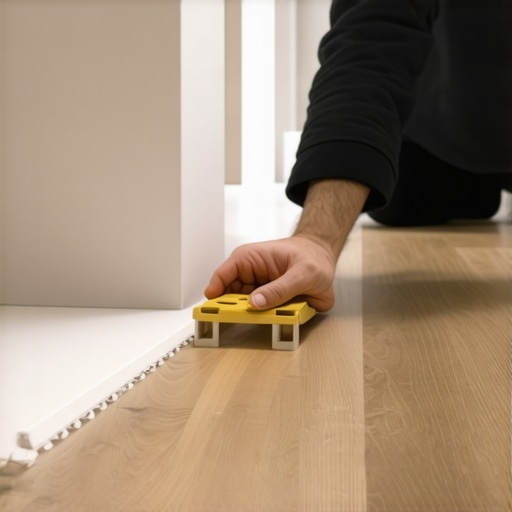
The most common contrarian view I hold is that a ‘tight fit’ is actually a failed fit. Whether you are working on a your guide to durable flooring installation or simply refreshing a room, you must respect the expansion gap. The National Wood Flooring Association (NWFA) explicitly states that wood and laminate products require a specific perimeter gap—usually 1/4 to 1/2 inch—to account for seasonal humidity changes. If you pin your flooring tight against the drywall, the boards will eventually ‘peak’ or ‘tent’ in the middle of the room. I once had a client who insisted on no gaps because they didn’t want to use baseboards. Six months later, the entire floor had lifted three inches off the subfloor like a slow-motion earthquake. Following flooring installation mistakes to avoid like this one will save you a total tear-out later.
Why Does My Rigid Core Floor Still Feel Bouncy?
This is a question I get constantly from homeowners who just finished a luxury vinyl plank project. They often assume a ‘bouncy’ or ‘hollow’ feel means the product is cheap. In reality, it is usually a failure to address subfloor flatness. While many marketing materials claim these floors can go over anything, they actually have a very low tolerance for dips. If your subfloor has a valley deeper than 3/16 of an inch over a 10-foot span, the clicking mechanism will flex every time you step on it. This is specifically why your rigid core floor sounds hollow when you walk; it is essentially a drum head stretched over a void. You cannot fix this with more underlayment; you have to fix the substrate first.
The Trap of Over-Nailing Your Baseboards
Another nuance that gets missed in the rush of a renovation is how baseboards interact with flooring. When you are looking at baseboard trends in 2025, remember that the baseboard’s job is to cover that essential expansion gap we just talked about, not to pin the floor down. If you nail your baseboards through the flooring and into the wall plate, you have effectively ‘locked’ the floor. Now, when the house shifts, either the floor will buckle or the baseboard miters will pop open. I always recommend nailing higher up into the studs and leaving a hair’s breadth of space between the trim and the floor. If you are dealing with a messy transition, the door jamb saw mistake is usually the culprit, leaving gaps that no amount of caulk can truly hide.
Have you ever noticed your flooring shifting or your trim pulling away after a big season change? Have you ever fallen into this trap? Let me know in the comments. If you are feeling overwhelmed by a project that has gone sideways, don’t hesitate to contact us for a professional perspective. Proper prep and respecting the physics of your home are the only ways to ensure your shower renovation ideas and flooring dreams actually stand the test of time.
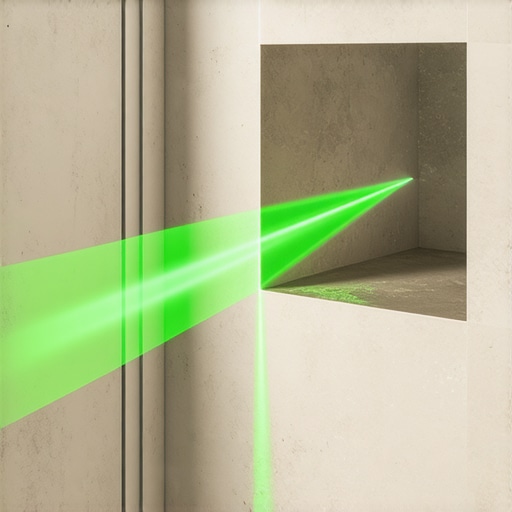
If you want your renovation to last longer than the first humidity spike of summer, you need to stop treating your tools like an afterthought. I’ve spent years refining my kit, and I can tell you that the difference between a ‘DIY look’ and a ‘magazine-ready finish’ is often just the quality of the instrumentation. For instance, I never start a bathroom project without my Bosch GLL3-80 3-way laser level. It creates a 360-degree reference line that ensures every tile is perfectly plumb across all three walls. Without a laser, you are just guessing, and in a tight shower space, a 1/8-inch tilt at the bottom becomes a glaring 1-inch disaster at the ceiling.
Don’t Guess on Moisture Before You Lay the Floor
One tool I never let a neighbor borrow is my pinless moisture meter. Before I even think about a step-by-step flooring installation, I check the subfloor. Most people skip the moisture meter test for concrete subfloors, assuming that because the slab looks dry, it is dry. But moisture is a silent killer for adhesives and wood. I specifically use the Wagner MMC220 because it measures the internal moisture of the wood without leaving puncture marks. If that reading is higher than 12% in my area, the flooring stays in the boxes. This level of precision is exactly how you achieve carpet install secrets: achieving flawless results every time, as even the tack strips need a stable, dry environment to hold tension properly.
The Fein MultiMaster is My Secret Weapon for Trim
When it comes to baseboards and door casings, the oscillating multi-tool is the undisputed king. I personally swear by the Fein MultiMaster. It has a vibration-dampening system that allows me to make surgical cuts into existing door jambs without shaking the teeth out of my head. If you are trying to avoid flooring installation mistakes to avoid for a seamless look, you need to undercut your jambs so the floor can slide underneath. A hand saw will take you twenty minutes and leave a jagged edge; the Fein does it in thirty seconds with a clean, factory-straight finish. This tool is also essential when you’re looking at baseboard styles that elevate your interior design, allowing you to notch out space for complex transitions without removing the whole piece of trim.
How do I maintain my shower and floors over the long haul?
Maintenance is a game of vigilance. For showers, I recommend a ‘deep-seal’ every twelve months, even if the grout claims to be ‘stain-proof.’ For flooring, especially if you have selected one of the best carpet types for high traffic areas in 2025, regular professional cleaning is non-negotiable. According to the IICRC S210 Standard for Residential Textile Floor Maintenance, hot water extraction is the only way to remove the abrasive grit that actually saws through carpet fibers from the bottom up. For your hard surfaces, check those silicone beads we talked about earlier. If you see even a tiny black speck of mold that won’t wipe off, it means the silicone has detached from the substrate, and water is getting behind it. Strip it and replace it immediately.
Looking Ahead to the Future of Home Surfaces
The industry is moving toward ‘intelligent’ materials. We are already seeing the rise of hydrophobic grout and antimicrobial silicones that use silver-ion technology to kill mold on contact. In the next few years, I expect to see shower renovation ideas that incorporate built-in sensors to detect leaks behind the tile before you ever see a water spot. Until then, your best defense is a high-quality application. I challenge you to try this: the next time you are finishing a bead of silicone, skip the finger and use a dedicated smoothing tool with a light mist of denatured alcohol. The results will look so professional your neighbors will think you hired a crew. If you run into a snag or need a second pair of eyes on your layout, feel free to contact us to ensure your project hits that high-end mark.
Lessons from the Fractures: What My Early Mistakes Taught Me
Over the years, I have realized that the biggest failures in home renovation aren’t usually caused by a lack of effort, but by a lack of respect for physics. First, grout in a corner is a ticking time bomb; if it hasn’t cracked yet, it eventually will. Second, moisture is often an invisible enemy until the mold appears, which is why I have become obsessed with the prep work most people skip. Third, your house is never truly still—it is a living, breathing structure that needs ‘joints’ just like your own body does to stay healthy and intact.
The Heavy-Hitters in My Jobsite Trailer
To get the job done right, you need more than just grit; you need the right gear. I never step onto a job site without my Bosch laser level for perfect tiling lines. I also swear by the Wagner moisture meter—I have seen too many beautiful projects ruined because someone skipped the moisture meter test for concrete subfloors before laying planks. For surgical trim work, the Fein MultiMaster is non-negotiable, and I always keep a copy of the TCNA Handbook close by to stay aligned with industry standards for expert flooring installation tips for 2025. #IMAGE_PLACEHOLDER_E#
Building Something That Outlasts the Trends
Renovating your home can be intimidating, but when you focus on these hidden details—the expansion gaps, the silicone beads, and the subfloor prep—you are building more than just a room; you are building peace of mind. Whether you are currently browsing for shower renovation ideas or trying to master carpet install secrets, remember that the most beautiful finish is the one that stays beautiful for twenty years. You have the tools and the knowledge now—go create something incredible. Have you ever discovered a hidden leak or a cracked corner that surprised you during a DIY project? Let me know your story in the comments below!