

It was 3:14 AM when the house betrayed me. I was tiptoeing toward the kitchen, desperate for a glass of water, when a single floorboard under the hallway rug let out a piercing groan that sounded like a rusty gate in a horror movie. I froze. The baby didn’t wake up, but my sanity certainly took a hit. I’d spent weeks on a carpet install that looked flawless, yet this phantom noise was mocking my hard work from beneath the surface. For months, I tried the ‘guess and check’ method—basically stomping around like an angry toddler hoping to pin down the culprit—but the sound always seemed to shift just a few inches away every time I thought I found it. Today, I’m going to show you how a simple dish soap bottle can end that frustration forever by pinpointing exactly where your subfloor is rubbing. We are going to stop those noises without ripping up your beautiful work or losing your mind.
Why That One Screeching Floorboard Is Testing Your Sanity
Every home has its quirks, but a persistent subfloor squeak is a different kind of torture. It usually happens because a nail has loosened over time, allowing the plywood to rub against a joist or another sheet of wood. I used to think I could just drive a screw anywhere near the noise and be done with it. That was a huge mistake. Early in my DIY journey, I actually ended up hitting a pipe because I was ‘blindly’ fixing a noise near a bathroom renovation area. Trust me, learning the hidden screw fix for squeaky floors is a lifesaver, but only if you know the exact square inch to target. According to structural experts at the National Association of Home Builders, floor squeaks are often caused by seasonal humidity changes that cause wood to shrink and expand, loosening the grip of original fasteners. If you don’t find the ‘heart’ of the friction, your repairs are just expensive guesswork that can lead to further flooring installation mistakes to avoid.
Is this weird soap bottle method actually worth the hype?
You might be skeptical that a kitchen staple can do what expensive electronic sensors often struggle with. I get it; I thought my neighbor was pulling my leg when he first suggested it while I was busy with a flooring installation project. But the physics is sound. By using a liquid medium to create a visible ‘bubble’ or movement indicator on the floor surface, we can see the microscopic subfloor deflection that the human eye usually misses. It’s the difference between guessing where a leak is and seeing the water drip. Have you ever spent hours trying to fix a noise only for it to pop up again two days later? Tell me about your most annoying ‘phantom’ floor noise in the comments! Before you think about fixing a squeaky carpeted floor by just throwing more weight on it, let’s look at how to actually see the problem.
Turn Your Dish Soap Bottle Into a Precision Squeak-Finder
To start this process, you aren’t actually looking for the noise with your ears anymore; you are looking for movement with your eyes. Most people make the mistake of thinking a squeak is just ‘somewhere over there,’ but in reality, it’s a specific point of friction where the subfloor has about a 1/16th-inch gap from the joist. To get a clear view of the subfloor, you need to peel back the carpet edge. It’s essentially a carpet install in reverse. Use a pair of pliers to gently pull the carpet off the tack strips in the corner nearest the noise. If the noise is closer to the wall, you might need to use the pry bar secret for removing baseboards without damaging the drywall so you can access the very edge of the floorboards. Once the wood is exposed, wipe away any dust or debris. Any grit left on the surface will just soak up your ‘sensor’ liquid and ruin the trick.
Why a Tiny Soap Bubble is the Ultimate Truth-Teller
Now comes the physics. Take a standard bottle of liquid dish soap—the cheap blue stuff works best because of its high visibility. Squeeze a thin, continuous ring of soap (about the size of a silver dollar) over the spot where you suspect the loose nail is hiding. Think of the soap like a gasket. When you step near the ring, if there is even a microscopic amount of vertical movement in the plywood, the air trapped beneath the board will be forced upward, creating a tiny, tell-tale bubble in the soap. 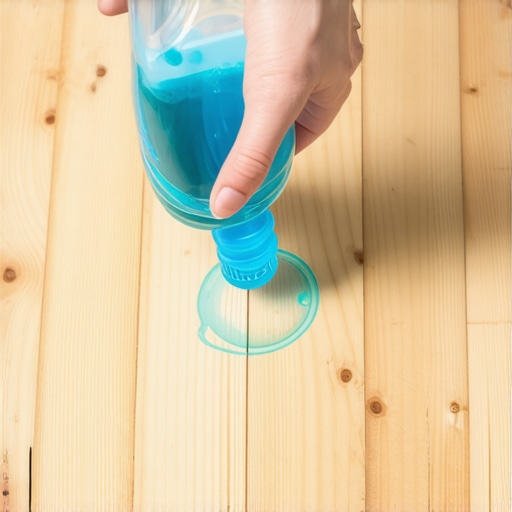 I remember using this technique in a hallway right after I finished a grueling shower renovation. I was exhausted and ready to just give up and live with the noise. I put a dab of soap down, stepped on the board, and watched a single bubble grow and pop right over a nail head that looked perfectly flush to the naked eye. It was a ‘eureka’ moment that saved me from drilling twenty unnecessary holes in my floor. This level of precision is how you avoid the most common flooring installation mistakes to avoid, such as weakening your subfloor with a ‘Swiss cheese’ pattern of random screws.
Drive Your Screws with Sniper Accuracy
Once the soap bubble identifies the exact ‘heart’ of the friction, wipe the area clean with a damp rag immediately. You don’t want the soap to soak into the wood grain and cause swelling, which could lead to popping sounds later on. With the spot marked, you can now apply the hidden screw fix for squeaky floors. Use a 2.5-inch wood screw and drive it directly into the joist. You’ll know you hit the joist if the drill provides significant resistance; if it spins freely, you’ve missed the target and need to try an inch to the left or right. If you are working on a surface where the carpet cannot be pulled back easily, you can still use this method by applying the soap to a small, inconspicuous area where the carpet meets the wall or by using a specialized breakaway screw kit. By focusing on the movement indicated by the soap rather than just the sound, you ensure that fixing a squeaky carpeted floor is a one-and-done job rather than a recurring nightmare.While the soap bottle trick is a game-changer for finding the ‘where,’ most DIYers fail at the ‘why.’ A common myth is that simply adding more fasteners will fix any bounce or noise. In reality, over-fastening creates what I call the ‘Swiss cheese effect,’ which can actually weaken the plywood’s structural integrity. According to the National Wood Flooring Association (NWFA), subfloor panels must be properly spaced—usually 1/8-inch—to allow for natural expansion and contraction. If you ignore this and just drive screws everywhere, you’re setting yourself up for flooring installation mistakes to avoid that no amount of carpet can hide. One of the biggest traps in a shower renovation or a hallway project is ignoring the ‘hidden’ moisture trapped in the materials. You might fix the squeak today, but if you didn’t run the concrete moisture test that saves your vinyl floor, that wood is going to warp again in six months. I’ve seen homeowners spend thousands on a premium carpet install only to have the tack strips rot out because they didn’t check the subfloor’s pH and moisture levels before starting.
Does your subfloor meet the L/360 deflection standard?
This is where we move from DIY to pro-level analysis. Most people think a floor is ‘solid’ if it doesn’t move when they jump on it. But for tile or high-end laminates, the industry standard is L/360—meaning the floor shouldn’t bend more than the length of the span divided by 360. If you have too much flex, you’ll eventually hear subfloor prep mistakes that make new vinyl planks sound hollow or, worse, find cracked grout in your bathroom. Another nuance often missed is the transition to walls. People often think they are being thorough by nailing trim tightly, but understanding why you should never nail baseboards into the bottom plate only is a lesson usually learned the hard way when the boards start to cup or pull away from the drywall. You need to hit the wall studs for a true, lasting hold that withstands the house settling. 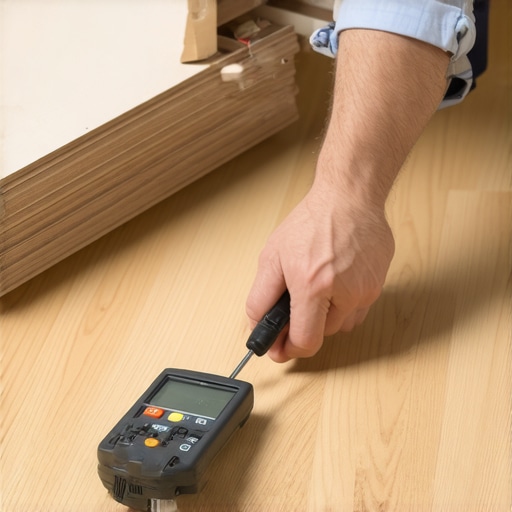 Have you ever fallen into this trap where a ‘quick fix’ turned into a weekend-long reconstruction? Let me know in the comments! Before you decide on shower repairs: when to fix vs. replace for longevity, ensure your foundation is actually worth saving.
The One Tool That Actually Saved My Sanity
While the soap bottle trick is great for emergencies, my long-term survival in the DIY world is thanks to a high-quality cross-line laser level. I used to rely on a traditional four-foot bubble level, but when you are tackling a bathroom renovation, gravity is your biggest critic. I use a laser because it projects a perfectly straight reference line across all four walls simultaneously. This is critical for ensuring your baseboards align perfectly at the corners and that your shower drain alignment is centered exactly where it needs to be. If you’ve ever seen baseboards that look like a staircase at the corner, it’s because the installer followed the floor’s slope rather than a level line. I always recommend using a green beam laser; it is far more visible in daylight, especially when you are doing a flooring installation in a room with large windows.
How do I keep my home looking brand new over time?
The secret isn’t in more cleaning; it’s in managing movement. Your house is a living thing that breathes. If you don’t use flexible materials in the right places, your hard work will literally pull itself apart. This is especially true where different materials meet, like where a tiled shower floor meets the bathroom wall. I’ve learned the hard way that using standard grout in these change-of-plane joints is a recipe for disaster. Instead, you need to master professional shower silicone lines. Silicone has the elasticity to expand and contract without cracking, which is the only way to prevent water from sneaking behind your walls.  For the rest of the house, pay close attention to your trim. If you notice gaps appearing as the seasons change, it’s usually why your baseboard caulk is cracking. To fix this for good, I use a high-stretch elastomeric sealant that can handle up to 25% joint movement. According to the Tile Council of North America (TCNA) Handbook, specifically Method F113, maintaining the integrity of these expansion joints is the single most important factor in preventing long-term structural failure in tile assemblies.
The Future of Home Maintenance is Smarter Than You Think
Looking ahead, I predict we are going to see a massive shift toward ‘smart’ subfloors. We are already seeing moisture-sensing underlayments that can send an alert to your phone if a leak starts under your carpet install. Until those become standard, your best defense is a $20 moisture meter. I use it every time I’m worried about a loose carpet transition or a suspicious soft spot near the tub. If you want to elevate your craftsmanship today, stop guessing with your cuts and start using the scribing tool every DIYer needs to match your baseboards to wavy walls. Don’t just settle for ‘close enough’—take the extra five minutes to scribe your trim and watch your home’s value (and your own pride) skyrocket.It was 3:14 AM when the house betrayed me. I was tiptoeing toward the kitchen, desperate for a glass of water, when a single floorboard under the hallway rug let out a piercing groan that sounded like a rusty gate in a horror movie. I froze. The baby didn’t wake up, but my sanity certainly took a hit. I’d spent weeks on a carpet install that looked flawless, yet this phantom noise was mocking my hard work from beneath the surface. For months, I tried the ‘guess and check’ method—basically stomping around like an angry toddler hoping to pin down the culprit—but the sound always seemed to shift just a few inches away every time I thought I found it. Today, I’m going to show you how a simple dish soap bottle can end that frustration forever by pinpointing exactly where your subfloor is rubbing. We are going to stop those noises without ripping up your beautiful work or losing your mind.
Why That One Screeching Floorboard Is Testing Your Sanity
Every home has its quirks, but a persistent subfloor squeak is a different kind of torture. It usually happens because a nail has loosened over time, allowing the plywood to rub against a joist or another sheet of wood. I used to think I could just drive a screw anywhere near the noise and be done with it. That was a huge mistake. Early in my DIY journey, I actually ended up hitting a pipe because I was ‘blindly’ fixing a noise near a bathroom renovation area. Trust me, learning the hidden screw fix for squeaky floors is a lifesaver, but only if you know the exact square inch to target. According to structural experts at the National Association of Home Builders, floor squeaks are often caused by seasonal humidity changes that cause wood to shrink and expand, loosening the grip of original fasteners. If you don’t find the ‘heart’ of the friction, your repairs are just expensive guesswork that can lead to further flooring installation mistakes to avoid.
Is this weird soap bottle method actually worth the hype?
You might be skeptical that a kitchen staple can do what expensive electronic sensors often struggle with. I get it; I thought my neighbor was pulling my leg when he first suggested it while I was busy with a flooring installation project. But the physics is sound. By using a liquid medium to create a visible ‘bubble’ or movement indicator on the floor surface, we can see the microscopic subfloor deflection that the human eye usually misses. It’s the difference between guessing where a leak is and seeing the water drip. Have you ever spent hours trying to fix a noise only for it to pop up again two days later? Tell me about your most annoying ‘phantom’ floor noise in the comments! Before you think about fixing a squeaky carpeted floor by just throwing more weight on it, let’s look at how to actually see the problem.
Turn Your Dish Soap Bottle Into a Precision Squeak-Finder
To start this process, you aren’t actually looking for the noise with your ears anymore; you are looking for movement with your eyes. Most people make the mistake of thinking a squeak is just ‘somewhere over there,’ but in reality, it’s a specific point of friction where the subfloor has about a 1/16th-inch gap from the joist. To get a clear view of the subfloor, you need to peel back the carpet edge. It’s essentially a carpet install in reverse. Use a pair of pliers to gently pull the carpet off the tack strips in the corner nearest the noise. If the noise is closer to the wall, you might need to use the pry bar secret for removing baseboards without damaging the drywall so you can access the very edge of the floorboards. Once the wood is exposed, wipe away any dust or debris. Any grit left on the surface will just soak up your ‘sensor’ liquid and ruin the trick.
Why a Tiny Soap Bubble is the Ultimate Truth-Teller
Now comes the physics. Take a standard bottle of liquid dish soap—the cheap blue stuff works best because of its high visibility. Squeeze a thin, continuous ring of soap (about the size of a silver dollar) over the spot where you suspect the loose nail is hiding. Think of the soap like a gasket. When you step near the ring, if there is even a microscopic amount of vertical movement in the plywood, the air trapped beneath the board will be forced upward, creating a tiny, tell-tale bubble in the soap. I remember using this technique in a hallway right after I finished a grueling shower renovation. I was exhausted and ready to just give up and live with the noise. I put a dab of soap down, stepped on the board, and watched a single bubble grow and pop right over a nail head that looked perfectly flush to the naked eye. It was a ‘eureka’ moment that saved me from drilling twenty unnecessary holes in my floor. This level of precision is how you avoid the most common flooring installation mistakes to avoid, such as weakening your subfloor with a ‘Swiss cheese’ pattern of random screws.
Drive Your Screws with Sniper Accuracy
Once the soap bubble identifies the exact ‘heart’ of the friction, wipe the area clean with a damp rag immediately. You don’t want the soap to soak into the wood grain and cause swelling, which could lead to popping sounds later on. With the spot marked, you can now apply the hidden screw fix for squeaky floors. Use a 2.5-inch wood screw and drive it directly into the joist. You’ll know you hit the joist if the drill provides significant resistance; if it spins freely, you’ve missed the target and need to try an inch to the left or right. If you are working on a surface where the carpet cannot be pulled back easily, you can still use this method by applying the soap to a small, inconspicuous area where the carpet meets the wall or by using a specialized breakaway screw kit. By focusing on the movement indicated by the soap rather than just the sound, you ensure that fixing a squeaky carpeted floor is a one-and-done job rather than a recurring nightmare.While the soap bottle trick is a game-changer for finding the ‘where,’ most DIYers fail at the ‘why.’ A common myth is that simply adding more fasteners will fix any bounce or noise. In reality, over-fastening creates what I call the ‘Swiss cheese effect,’ which can actually weaken the plywood’s structural integrity. According to the National Wood Flooring Association (NWFA), subfloor panels must be properly spaced—usually 1/8-inch—to allow for natural expansion and contraction. If you ignore this and just drive screws everywhere, you’re setting yourself up for flooring installation mistakes to avoid that no amount of carpet can hide. One of the biggest traps in a shower renovation or a hallway project is ignoring the ‘hidden’ moisture trapped in the materials. You might fix the squeak today, but if you didn’t run the concrete moisture test that saves your vinyl floor, that wood is going to warp again in six months. I’ve seen homeowners spend thousands on a premium carpet install only to have the tack strips rot out because they didn’t check the subfloor’s pH and moisture levels before starting.
Does your subfloor meet the L/360 deflection standard?
This is where we move from DIY to pro-level analysis. Most people think a floor is ‘solid’ if it doesn’t move when they jump on it. But for tile or high-end laminates, the industry standard is L/360—meaning the floor shouldn’t bend more than the length of the span divided by 360. If you have too much flex, you’ll eventually hear subfloor prep mistakes that make new vinyl planks sound hollow or, worse, find cracked grout in your bathroom. Another nuance often missed is the transition to walls. People often think they are being thorough by nailing trim tightly, but understanding why you should never nail baseboards into the bottom plate only is a lesson usually learned the hard way when the boards start to cup or pull away from the drywall. You need to hit the wall studs for a true, lasting hold that withstands the house settling. Have you ever fallen into this trap where a ‘quick fix’ turned into a weekend-long reconstruction? Let me know in the comments! Before you decide on shower repairs: when to fix vs. replace for longevity, ensure your foundation is actually worth saving.
The One Tool That Actually Saved My Sanity
While the soap bottle trick is great for emergencies, my long-term survival in the DIY world is thanks to a high-quality cross-line laser level. I used to rely on a traditional four-foot bubble level, but when you are tackling a bathroom renovation, gravity is your biggest critic. I use a laser because it projects a perfectly straight reference line across all four walls simultaneously. This is critical for ensuring your baseboards align perfectly at the corners and that your shower drain alignment is centered exactly where it needs to be. If you’ve ever seen baseboards that look like a staircase at the corner, it’s because the installer followed the floor’s slope rather than a level line. I always recommend using a green beam laser; it is far more visible in daylight, especially when you are doing a flooring installation in a room with large windows.
How do I keep my home looking brand new over time?
The secret isn’t in more cleaning; it’s in managing movement. Your house is a living thing that breathes. If you don’t use flexible materials in the right places, your hard work will literally pull itself apart. This is especially true where different materials meet, like where a tiled shower floor meets the bathroom wall. I’ve learned the hard way that using standard grout in these change-of-plane joints is a recipe for disaster. Instead, you need to master professional shower silicone lines. Silicone has the elasticity to expand and contract without cracking, which is the only way to prevent water from sneaking behind your walls. For the rest of the house, pay close attention to your trim. If you notice gaps appearing as the seasons change, it’s usually why your baseboard caulk is cracking. To fix this for good, I use a high-stretch elastomeric sealant that can handle up to 25% joint movement. According to the Tile Council of North America (TCNA) Handbook, specifically Method F113, maintaining the integrity of these expansion joints is the single most important factor in preventing long-term structural failure in tile assemblies.
The Future of Home Maintenance is Smarter Than You Think
Looking ahead, I predict we are going to see a massive shift toward ‘smart’ subfloors. We are already seeing moisture-sensing underlayments that can send an alert to your phone if a leak starts under your carpet install. Until those become standard, your best defense is a $20 moisture meter. I use it every time I’m worried about a loose carpet transition or a suspicious soft spot near the tub. If you want to elevate your craftsmanship today, stop guessing with your cuts and start using the scribing tool every DIYer needs to match your baseboards to wavy walls. Don’t just settle for ‘close enough’—take the extra five minutes to scribe your trim and watch your home’s value (and your own pride) skyrocket.
Why Subfloor Silence is a Marathon and Not a Sprint
After years of chasing squeaks across three different houses, I’ve realized that wood is almost always talking to you. The hardest lesson I ever learned was that rushing a step-by-step flooring installation is the fastest way to invite noise back into the room within six months. If you don’t allow your plywood to acclimate to the home’s humidity, it will move, and those screws you just drove in will eventually become the new friction points. I also learned to trust the vibration in my drill more than my eyes; if you feel that sudden ‘sink’ without resistance, you’ve missed the joist, and no amount of soap bubbles will save you until you find solid wood.
The Maintenance Kit I Never Leave Home Without
To get professional results, you have to stop guessing and start measuring. I never start a repair without my digital moisture meter; it’s the only way to know if a floor is actually ready for a fresh carpet install or if you’re trapping dampness that will cause warping later. I also highly recommend keeping a set of breakaway screw kits handy; they are the secret to how to fix a bubbling carpet without calling a professional by allowing you to anchor the subfloor right through the rug pile. Finally, always have a tube of elastomeric sealant ready for the caulk and dab method for perfect baseboard joints, ensuring that as your house breathes, your trim stays looking flawless.
Turning Your House Into a Sanctuary One Screw at a Time
There is a unique kind of satisfaction that comes from walking across a hallway at midnight and hearing nothing but silence. By mastering these small, precise techniques, you aren’t just fixing a board; you’re taking control of your living space and building something that lasts. Don’t be intimidated by the tools or the technical standards—every expert was once a DIYer with a squeaky floor and a bottle of soap. Take the time to do it right, and your home will reward you with decades of quiet comfort. Which room in your house has the most stubborn ‘phantom’ squeak that you’re ready to fix? Let me know in the comments below!”,”image”:{“imagePrompt”:”A close-up, high-detail photo of a hand squeezing a blue liquid dish soap bottle to form a small ring on a wooden subfloor panel, with a single tiny air bubble rising through the liquid as someone steps nearby.”,”imageTitle”:”Finding Subfloor Friction with the Dish Soap Method”,”imageAlt”:”Using dish soap to find the exact location of a squeaky floorboard nail”},”categoryId”:0,”postTime”:””}